Category: Recipes

Pumpkin Lasagne

Pumpkin Lasagne

Did you know that 18,000 tonnes of pumpkin is wasted in the UK every year from pumpkin carving?! That’s a lot of delicious soups, lasagnes, and roast pumpkin salads in the bin. One of my first food memories is having pumpkin soup round one of my friend’s houses when I was at pre-school, and so I have a bit of a nostalgic fondness for pumpkin and it’s definitely not a veg to throw away. It’s a bit of a bitch to cut up and prepare as they’re so flipping massive when they’re whole, but roasting them before scooping out the filling can make it bearable! On the other hand, if you’re carving out the filling for lanterns anyway problem solved. These are a great vegetarian variation of the classic lasagne and is so much easier to make than the classic as the cheese sauce is just a ricotta mixture. So don’t throw your pumpkin away this year, use it!

Recipe

Serves 4

Time: 1 hour, plus roasting time for the pumpkin

Ingredients

  • 1kg Pumpkin pieces (about 1 medium sized pumpkin)
  • 1 tbsp Olive oil
  • ¼ tsp Ground nutmeg
  • 1 tsp Dried sage leaves
  • 350g Ricotta
  • 1 Egg
  • 100g Cheddar cheese, grated, plus extra for topping
  • 8 Lasagne sheets
  • 80g Butter
  • 2 tbsp Chopped walnuts
  • 12 Fresh sage leaves

Method

  1. Pre-heat the oven to 180˚C.
  2. Cut the pumpkin into quarters and then place it on a baking tray. Drizzle with the oil and the salt and pepper. Cover with foil and then roast for 20-25 minutes until tender.
  3. Put the pumpkin into a food processor and puree. Add the sage, nutmeg, and a lot of seasoning, and pulse until the mixture is smooth. Spoon the  mixture into a bowl and set aside for later.
  4. Now make the cheesy layer. Wash out your food processor and put the ricotta, egg and cheddar cheese into a food processor with some seasoning. Whizz together until smooth.
  5. Cover the base of a 24cm oven-proof dish with a layer of lasagne sheets. Spread over half the pumpkin mix. Then top with another layer of lasagne sheets. Spread over half the ricotta mix and then repeat the same layers again. Sprinkle the top layer with some more cheddar and then bake for 20-30 minutes until golden and the edges are starting to crisp.
  6. Heat the butter, walnuts and sage leaves in a pan and heat until the butter starts to bubble.
  7. Remove the pan from the heat, spoon the walnuts and sage over the lasagne and then serve with a side salad!

Thanks for reading!

Emma x

Apple Puddle Pudding

Apple Puddle Pudding

We all get those moments where nothing can make you feel better…apart from a particular kind of food. It might be dairy milk chocolate for a break-up, mac and cheese for an essay deadline, or a whole tray of brownies for that night in when you just didn’t want to see another human being for the rest of your life – good comfort food is a really important thing in my books. So, whilst you probably shouldn’t live purely on comfort food (unfortunately) it’s always handy to have a few go-to pick-me-up recipes in your back pocket just in case you need them.

I came across the idea of apple puddle pudding in a food magazine the other day, and I thought it sounded so warming and cuddly that I thought I’d make my own version. Another way cooking de-stresses me when I’m, well, stressed, is if it’s hands on. There’s something about really getting stuck into what your making that can zone you out from all the worry and make you focus on the task in hand. And this is exactly what you do when making these dumplings. Roll your sleeves up, get stuck in, and get messy. This can turn out pretty sweet, so make sure you serve it with lots of clotted cream or vanilla ice-cream to balance it out!

(For more comforting recipes have a look at the ‘comforting’ section under ‘something that’s…’ in the top bar!)

Recipe

Serves 6

Time: 45 minutes

Ingredients

  • 75g Unsalted butter
  • 200g Light brown sugar
  • 60g Golden syrup
  • 2 tbsp Lemon juice
  • 3 Large Bramley apples (or 4 dessert apples)
  • Clotted cream to serve

For the Dumplings

  • 200g Self raising flour
  • 1 tsp Baking powder
  • Pinch of Ground cinnamon
  • 100g Cold Butter
  • 4 1/2 tbsp Milk

Method

  1. Pre-heat the oven to 180˚C.
  2. Put the butter, sugar, syrup, lemon juice, and 125ml water into a pan and bring to a simmer.
  3. Peel, core, and thinly slice the apples and then add them to the pan. Leave to cook for 10-15 minutes, stirring occasionally until they soften. Then pour the apples and the juice into an oven-proof baking dish about 20x30cm.
  4. Next make the dumplings. Put the flour, baking powder, sugar, cinnamon and salt into a large bowl and mix together.
  5. Add the butter to the mixture and rub it into the flour until the mixture resembles bread crumbs. Slowly add the milk, stirring with a round-bladed knife until the mixture starts to clump together.
  6. Use your hands to bring the dough together and then divide the dough into 12 balls. Arrange the dumplings over the apples, leaving little gaps between the balls, and then sprinkle with a little extra brown sugar.
  7. Bake the dumplings in the oven for around 25 minutes, until puffed up and golden brown. Leave to cool a little before serving with lots of cream or ice cream!

Thanks for reading!

Emma x

Blood Orange Chocolate Meringue Pie

Blood Orange Chocolate Meringue Pie

Having just moved to a new place I’m meeting loads of new people and I’m going through that classic process of making friends. The classic what’s your name? Where are you from? What subject do you do? And so on.  Then once your past the go-to questions things get a little more creative, and sooner or later things seem to move onto ‘hobbies and interests’ at which point I inevitably get asked ‘what is your favourite thing to cook?’ It’s taken a while to work out what actually is my favourite thing to cook, and, whilst I don’t have a firm fave, the best answer I have at the moment is fruity meringue pies. This is somewhat ironic as I don’t really like them, but they’re fun to make for two reasons i) they’re my Grandad’s favourite so every time we see him I make a lemon meringue pie, and ii) they involve three really fun elements to make: pastry, curd and meringue.

I normally make traditional lemon meringue pies, but as I’m not a big fan of lemons I thought I’d try making a chocolate orange variation instead. However, the general concept of a meringue pie is that the curd is really sharp and that balances the super sweet meringue, so I’ve added some lemon juice in the curd of this one, not so much for the lemon flavour but more to give the filling a sharp kick. Since I made that almond and blood orange cake a little while ago I’ve been obsessed by blood oranges, and they work so well in this! They’re a little more floral and fruity than normal oranges, so you can think of this as orange-pie-plus!

(If you’ve never made pastry before and the thought of doing so makes you tremble, check out my last post on everything you need to know about making a pastry base!)

Recipe

Serves 12

Time: 2 hours

Ingredients

For the Pastry

  • 285g Plain flour
  • 30g Cocoa powder
  • 90g Icing sugar
  • Pinch of salt
  • 225g Unsalted butter
  • 1 Large egg
  • 1 tbsp Cold water

For the Blood orange curd

  • 3 Blood oranges
  • 3 tbsp Lemon juice
  • 65g Cornflour
  • 300ml Water
  • 110g Caster sugar
  • 85g Unsalted butter
  • 4 Egg yolks

For the meringue

  • 50g Dark chocolate
  • 5 Egg whites
  • 250g Caster sugar
  • 2 tsp Cocoa powder

Method

  1. Pre-heat the oven to 180˚C. Then grease a 9 or 10 inch fluted tart tin.
  2. Put the flour, cocoa, sugar and salt into a large bowl and mix together. Add the butter and cut it up into chunks with a round bladed knife.
  3. Then go in with your fingers and rub the butter into the flour to make a bread-crumb texture.
  4. Add the egg yolk and the vanilla to the mixture and then mix everything together with a round bladed knife until a ball forms. (You might need to go in with your hands again and squish the dough into a ball).
  5. Wrap the dough in cling film and then leave it to chill in the fridge for at least an hour.
  6. Lightly flour a surface and turn the dough out onto it. Roll the pastry into a circle at least 12inch in diameter. Flip the pastry into the tart case and then gently ease it into the flutes of the tin. Then use a rolling pin to trim off the excess by rolling it over the edge. Chill in the fridge for another 30 minutes.
  7. Line the pastry case with baking paper and baking beans. The easiest way to do this is to scrunch up a square of baking paper and then un-crumple it – this will make it super easy to line the tin with!
  8. Put the base in the oven and bake for roughly 15 minutes, until the base is cooked through but not necessarily crisp. Then take the case out of the oven, remove the beans and bake for another 5-10 minutes, until crisp.
  9. Next make the curd. Put the zest and the juice of the blood oranges into a heatproof bowl. Add the lemon juice, cornflour and mix together to form a paste.
  10. Put the water into a pan and bring to the boil. Then pour the hot water over the orange mixture, stirring constantly. When combined pour the mixture back into the pan and place over a medium heat. Stir constantly until the mixture starts to thicken. Then leave to boil for a minute.
  11. Take the mixture off the heat and stir in the sugar, butter and the egg yolks. Set aside until needed.
  12. When the pastry case is ready, pour the curd into the case and smooth over with a spatula . Lower the oven temperature to 140˚C.
  13. Now make the meringue. Put the chocolate into a heatproof bowl over a pan over simmering water (make sure the bottom of the bowl doesn’t touch the water!). Melt gently and then take the bowl off the heat and leave to cool a little.
  14. Next clean a metal or glass bowl and some electric beakers with hot soapy water. (You need them to be really clean so that the meringue will hold its shape).
  15. Put the egg whites into the clean, dry bowl and whisk until soft peaks form.
  16. Slowly add the sugar, one tbsp at a time, whisking constantly until stiff peaks form.
  17. Stir together the cocoa powder and the melted chocolate and fold it into the meringue to get a swirl effect.
  18. Spoon the mixture into a piping bag with a star shaped nozzle and then pipe swirls over the curd (or just dollop the meringue on top if you don’t want to pipe).
  19. Put the whole thing back in the oven for 10-15 minutes until it’s crisp but not brown. Then leave to cool slightly in the oven before serving!

Thanks for reading!

Emma x


Making a Pastry Case

Making a Pastry Case

Lots of people have been telling me that they love m’ blog but that everything looks too hard to actually make. Whist I’m perfectly happy to keep generating eye candy I thought I’d start some step-by-step posts on how to do relatively complicated but really useful things, like making a pastry case.

For years I couldn’t make these and I’d just buy the ready made ones from Sainsbury’s to avoid the disappointment of another soggy bottom or another crust that has shrunk, but alas years of practice has finally paid off and now these are one of my favourite things to make.

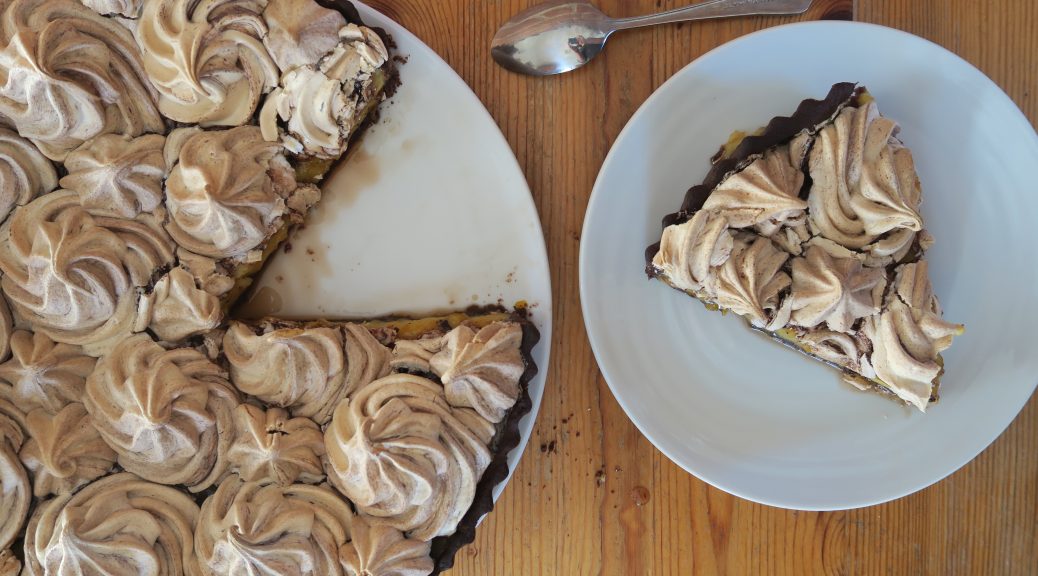
So here’s a step-by-step guide of how to make a pastry case, from making the pastry and lining the tin to baking blind and using your new found skill in actual recipes. Here I’m using a chocolate pastry as the recipe I’m posting next uses a chocolate crust, but feel free to use whatever flavour pastry you want.

How to make a pastry case

1. Make the pastry

This is a seemingly simple step but it is a very important one. How you make the pastry will vary between specific recipes but here’s a few top tips:

  • If the recipe says to rub the butter into the flour, begin this process by taking a table knife and cutting the butter up into the flour until it’s too small to keep cutting up. Then go in with your fingers. The warmer the pastry gets the softer it gets and the harder it is to work with, so you want to keep the pastry as cool as possible.
  • On a similar note, add your liquid to the dough gradually. If you add too much your dough will be super soft and hard to work with so you could end up over working the dough which would make the pastry undesirably chewy.
  • Finally make sure you chill the dough. Personally I’d chill it for at least 90 minutes, maybe more. This will help prevent the dough from shrinking and will also harden up any butter than may have melted during the making of the pastry, making it easier to work with.

2. Shape the dough

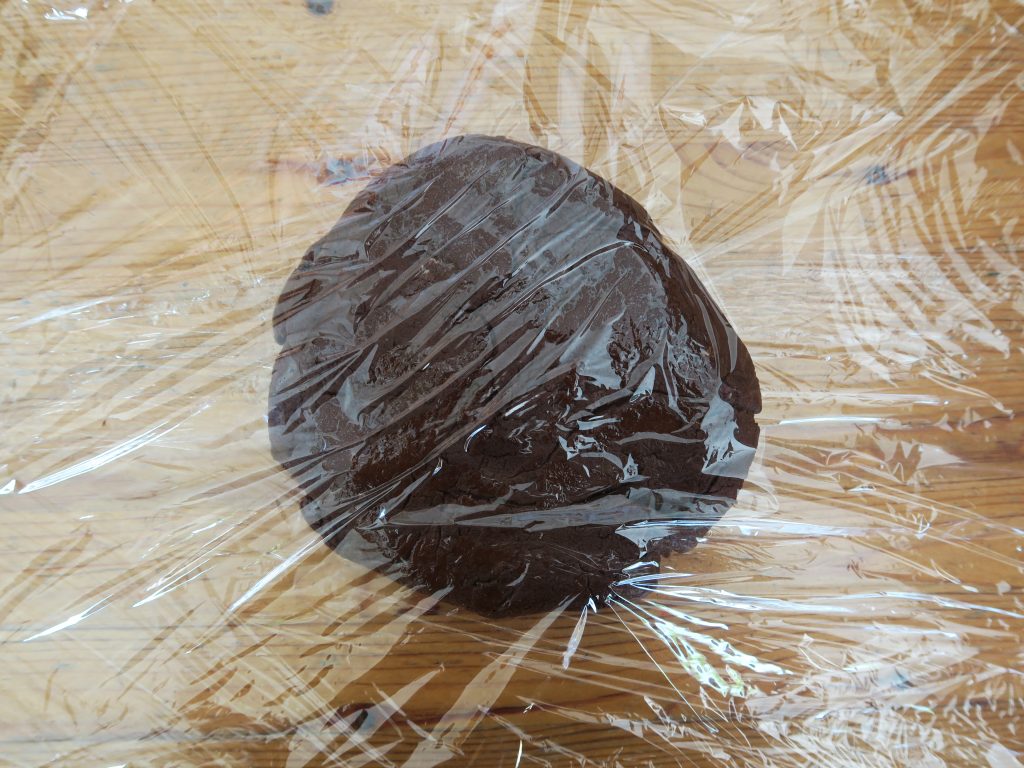
Take the dough out of the fridge and form into a ball. Sandwich the ball between two sheets of cling film and then squash slightly to make a flattened circle. Most people roll their pastry out onto a floured worktop but I find using cling film quicker, less messy and it saves on flour so why not?

3. Rolling out the pastry

Roll the pastry out between the cling film with large rolling pin into a large circle. Use the tin to see how much wider you need the dough to be and in what direction. The pastry should be about 2 cm wider all the way around (to be able to fit up the sides of the tin with some overhang), and be about the thickness of a 10p piece.

4. Putting the pastry into the tin

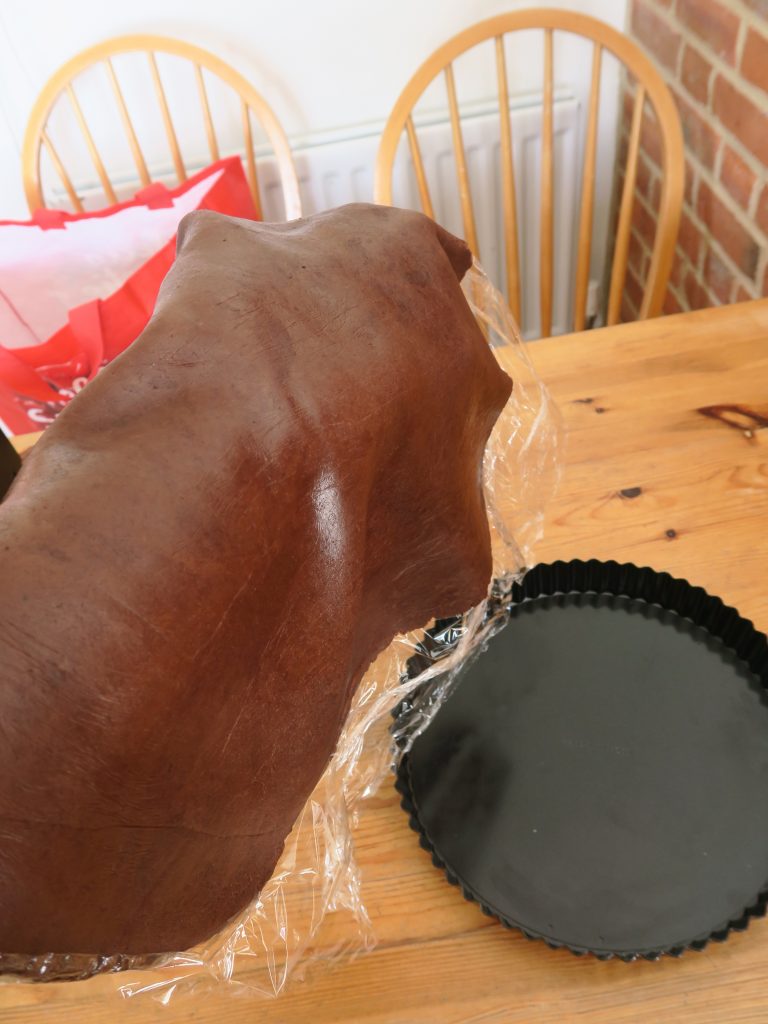
Now you’re going to have to get physical. Take the top layer of cling film off the pastry and discard it. Then ease the forearm of your less dominant hand under the pastry sheet and lift it up as shown above. (You could also do this with a rolling pin if you’d prefer). Then place the tin underneath where your arm is and roll the pastry off you arm and into the tin, making sure that the cling film is on top of the pastry. It’s a good idea to work from one side of the tin to the other, making sure there’s some good overhang.

5. Fit the pastry into the tin

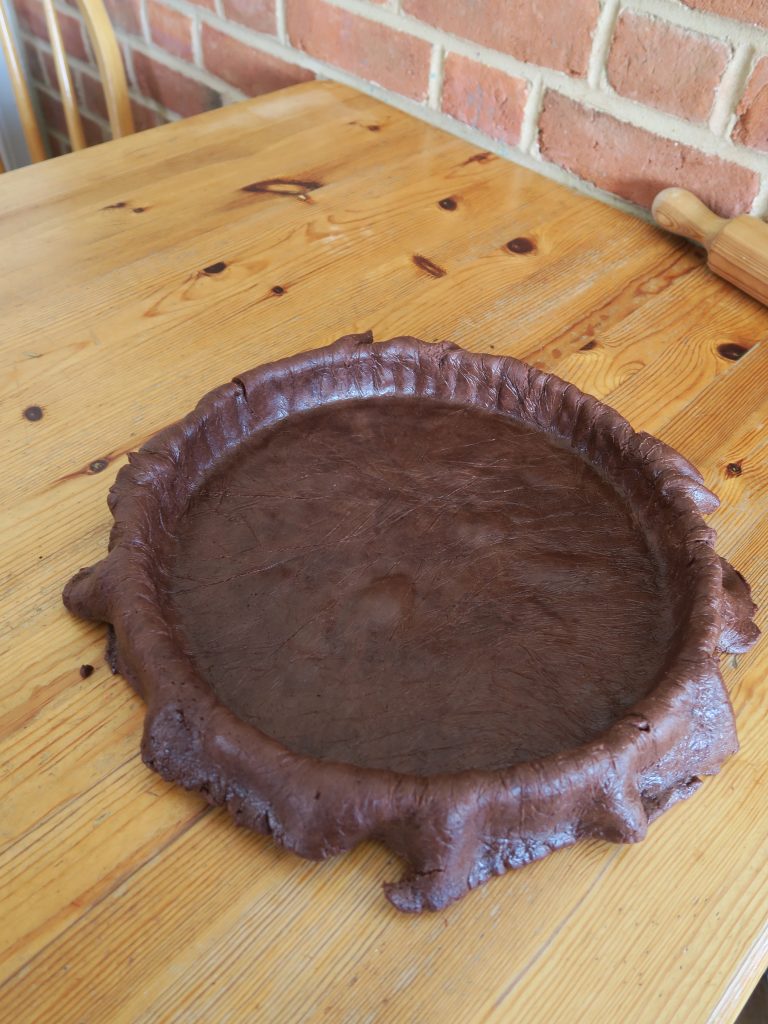
Gently ease the pastry into the shape of the tin so that is has contact with the whole of the tin. This will help it to bake evenly. Then take the layer of cling film off the pastry.

6. Trim off the excess

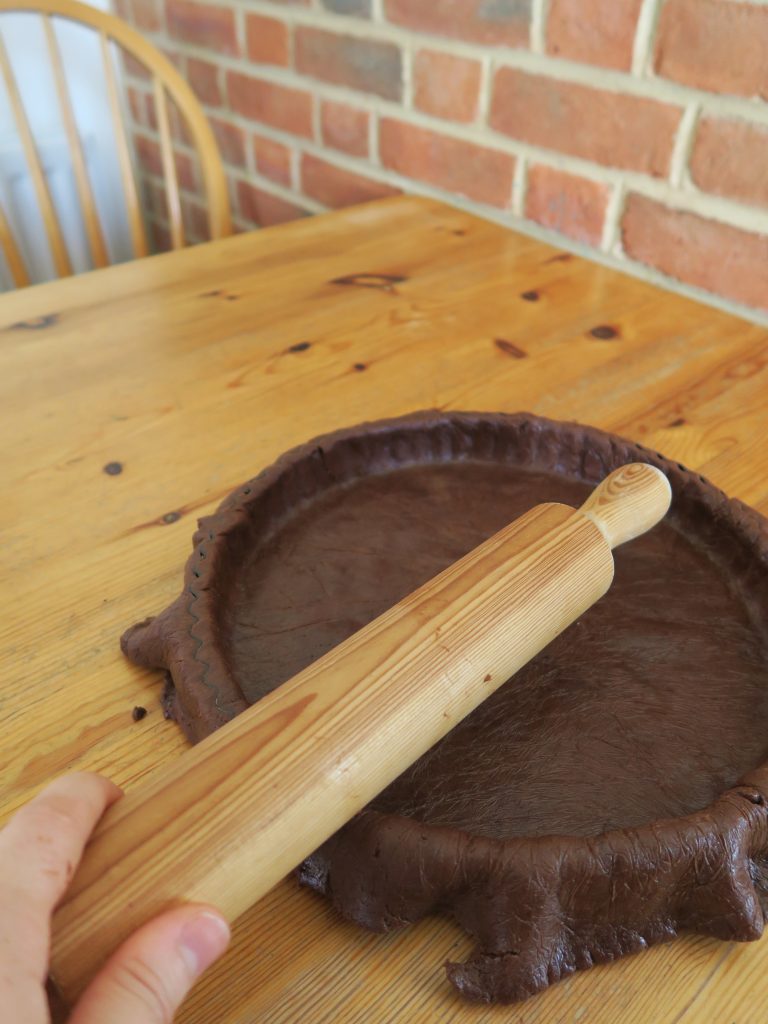
Some people prefer to do this once the case has baked as it helps stop the pastry from shrinking away from the edges too much, but for tarts I think the best way to do it is like this. Make sure all your pastry is fitting snugly into the tin. Then take your rolling pin and roll it around the top of the tin so that the excess pastry is rolled off.

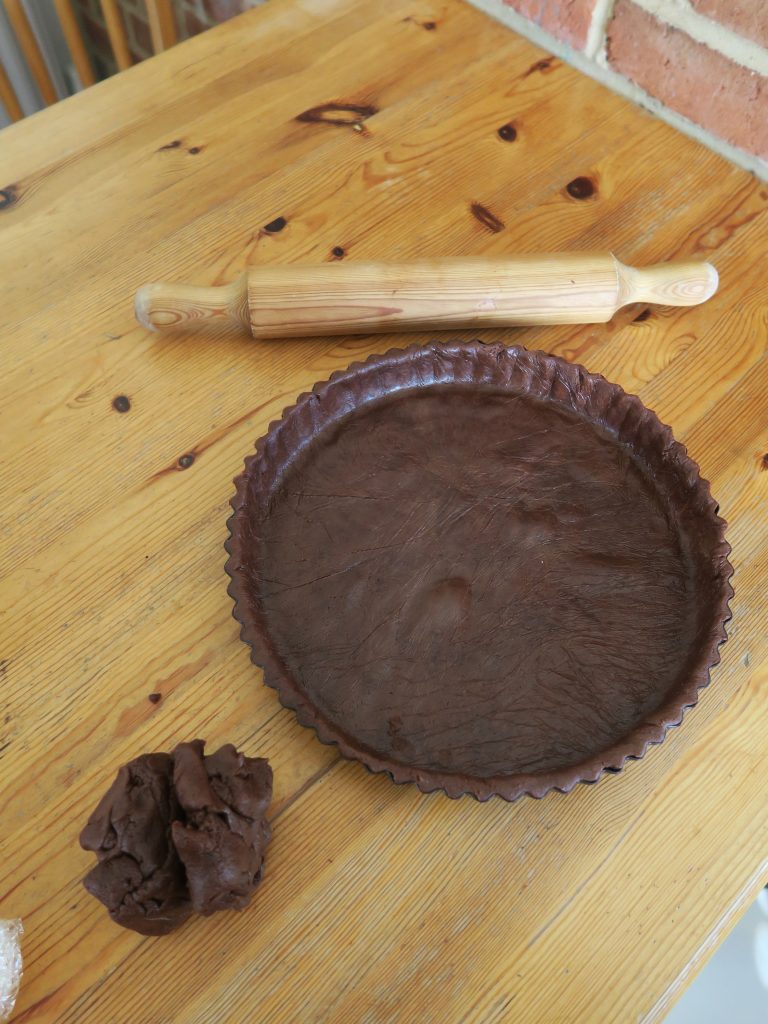
7. Using the excess pastry

Bundle up your excess pastry. You can use this to fill in any gaps in your base at this stage, or if any cracks appear after the first bake, so don’t throw it away! You could also use it to make pastry decorations, or even make cute little biscuits!

8. Blind baking

Blind baking is where you pre-bake the pastry case before adding the filling. This helps to make sure the base is cooked all the way through and stops you getting a soggy bottom! Some pies and tarts don’t need to be blind baked (pies with tops and bakewell tarts are two that come to mind) but it’s a useful skill to learn anyway.

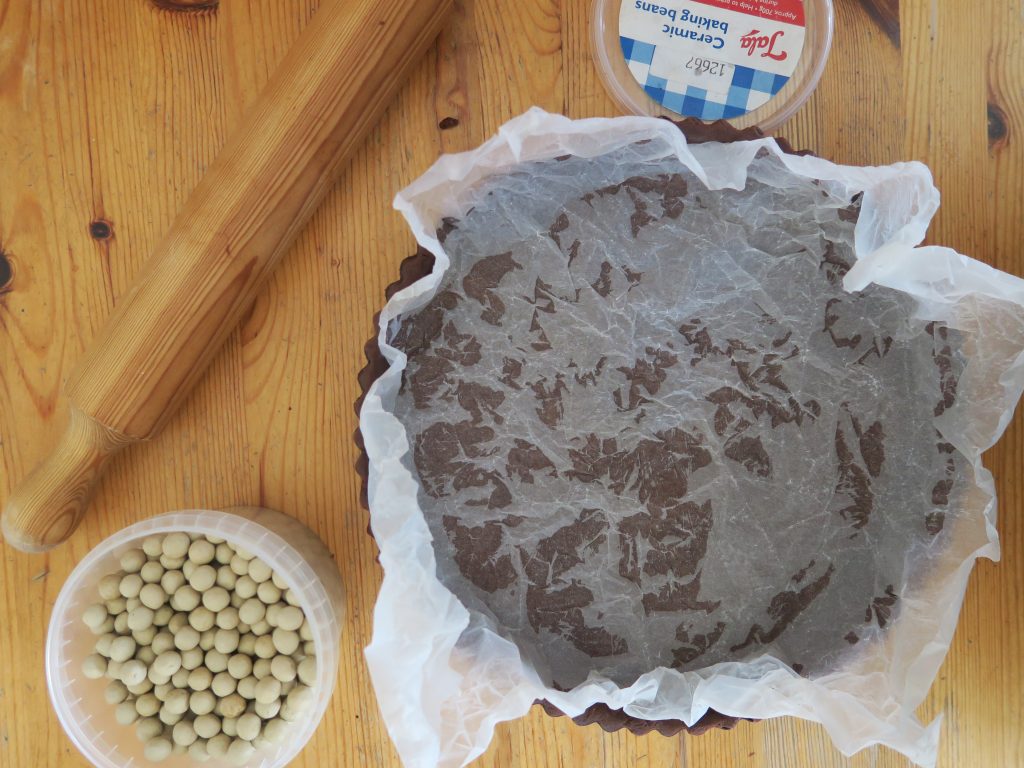
Take a piece of baking paper wider than your tin and scrunch it into a ball like you were going to throw it away. Then un-crumple the paper and line the inside of the pastry case with it. Scrunching it up first should make it easier to make the pastry fit the shape, but still be careful when doing this as you could pull the pastry down from the sides of the tin.
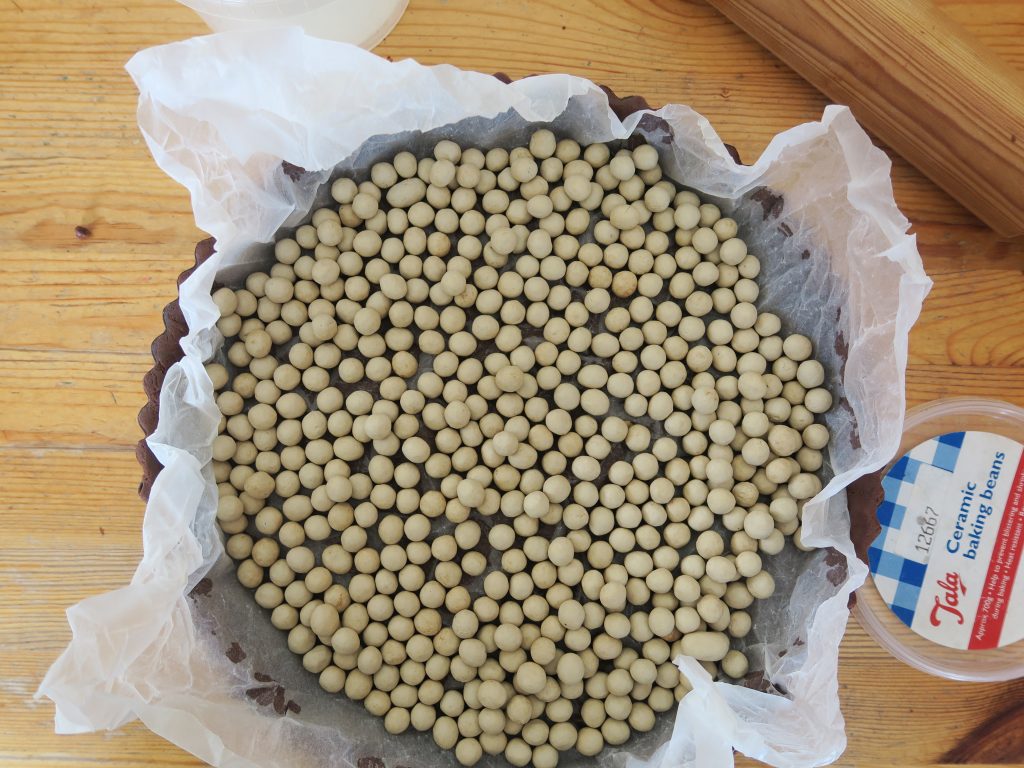
9. Adding the beans

If you bake the pastry case without any filling or weight on it then the base will rise up and leave no room for any fillings. To stop this you can use ceramic beans like these which are re-usable and weigh the pastry down. Alternatively you could use rice, lentils or any other dried pulse to weigh the pastry down, but I prefer using beans as then I don’t feel like I’m wasting food.

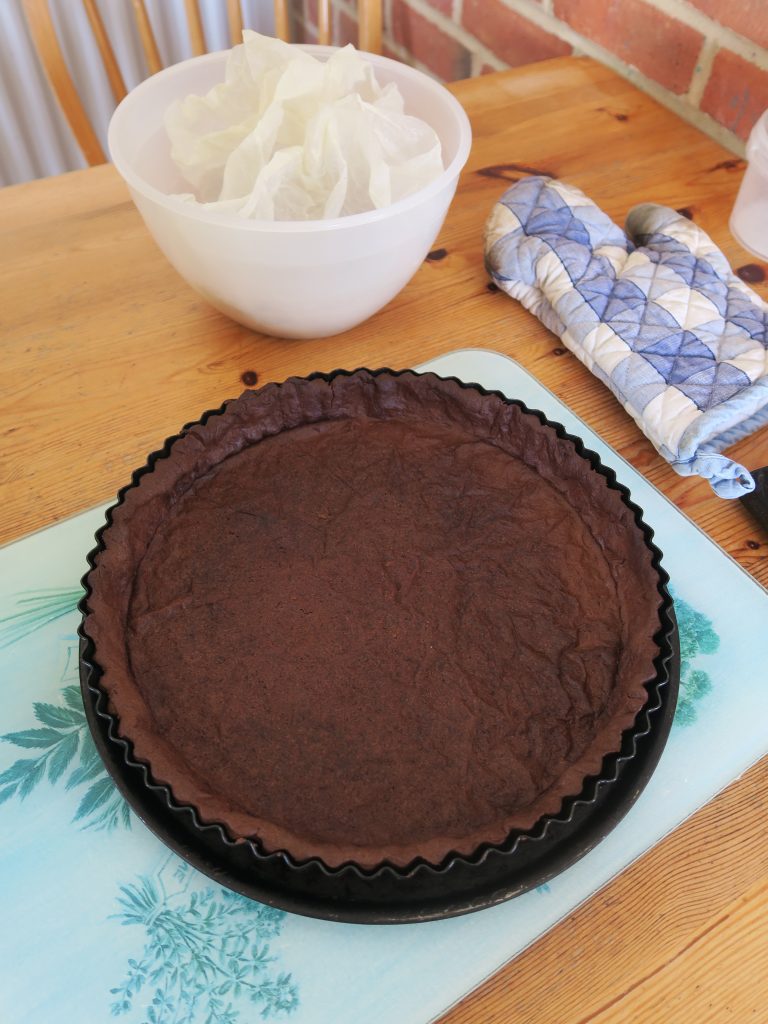
Bake the pastry in the oven for 15-20 minutes. This will vary depending on the size and type of tart you’re making but you generally want the pastry to look cooked all the way through (see photo below), even if it’s not crispy yet.
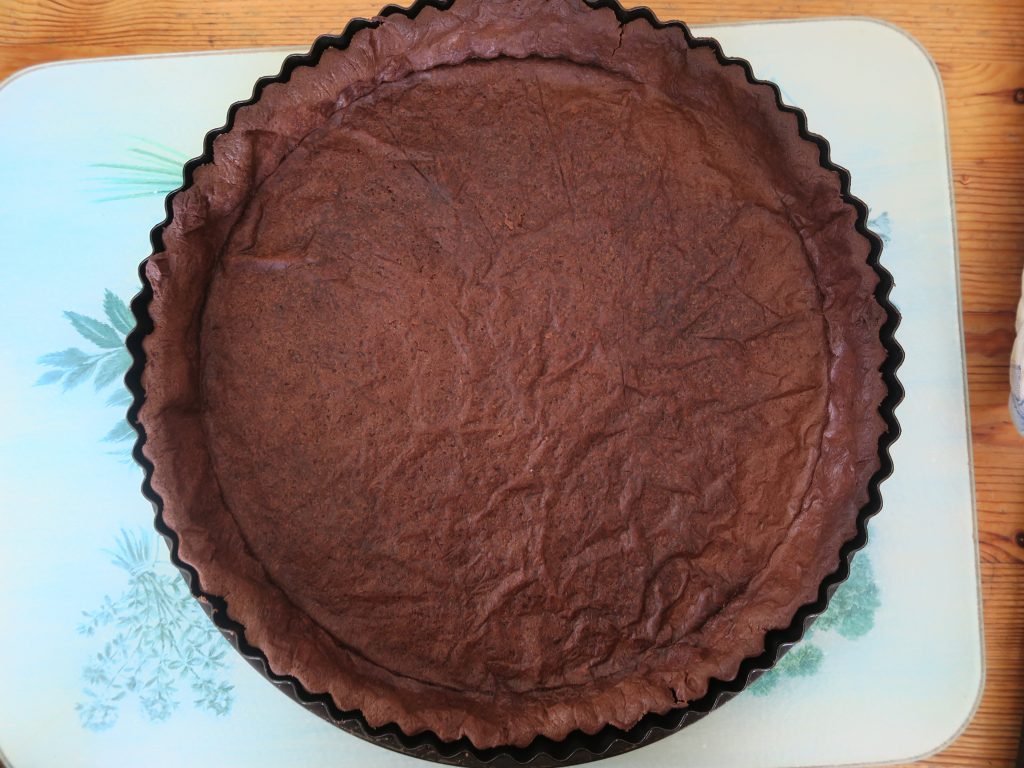
10. Second bake

Once the pastry has cooked all the way through, take it out of the oven and take the beans or whatever’s weighing the pastry down out. Also take out and discard the baking paper. Then bake the pastry for a further 5-10 minutes until crispy but not burnt.

11. Be creative!

Hopefully you should have a perfect crisp pastry case to work with now. You can either stop the baking here and fill the case with things that need to be chilled to set, or you could fill it with mixtures and fillings that need to be baked. Here’s a few of my faves to try…


Baked fillings

Frangipane – This is a cake-type mixture made with almonds. It’s traditionally used for bakewell tarts but it’s also a great base for other types of baked tarts!

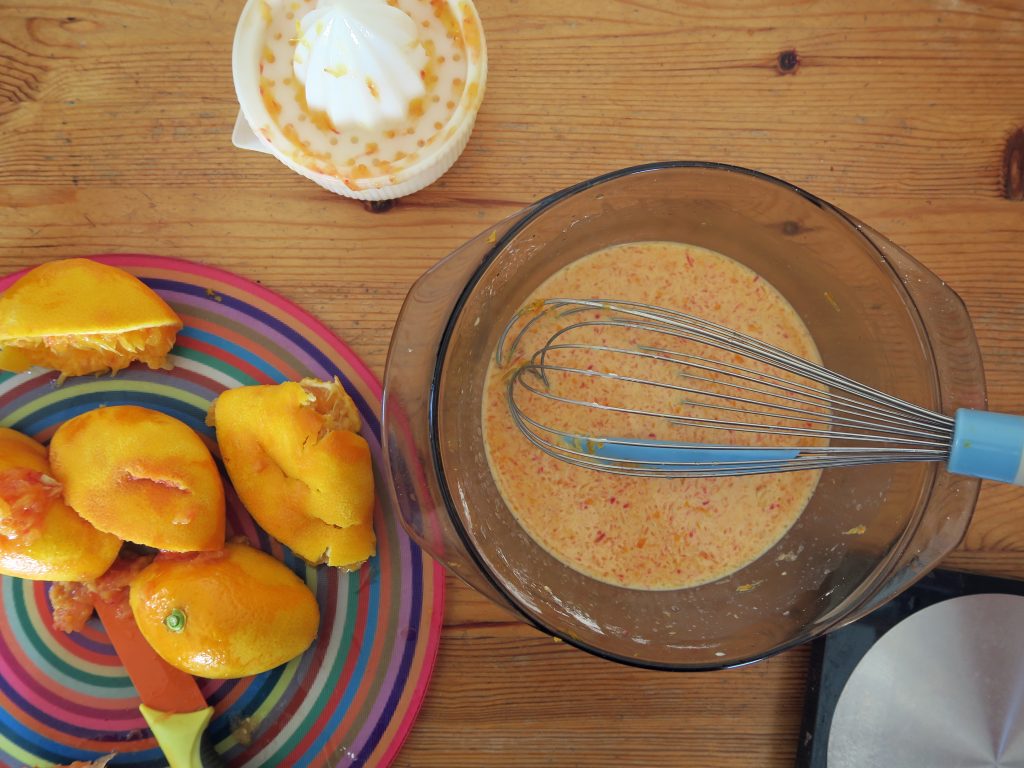
Custard – Whilst some custard fillings will just set naturally, some need to be baked, like Portuguese custard tarts. You can really experiment with this type of filling as the custard can be flavoured and customised a lot.

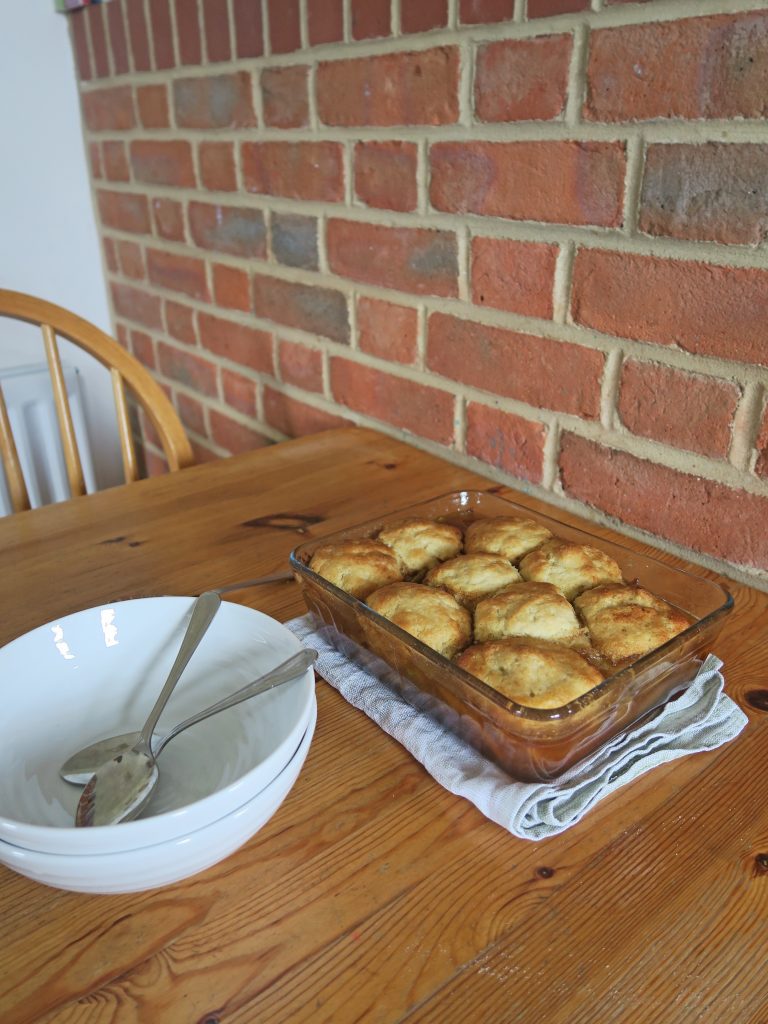
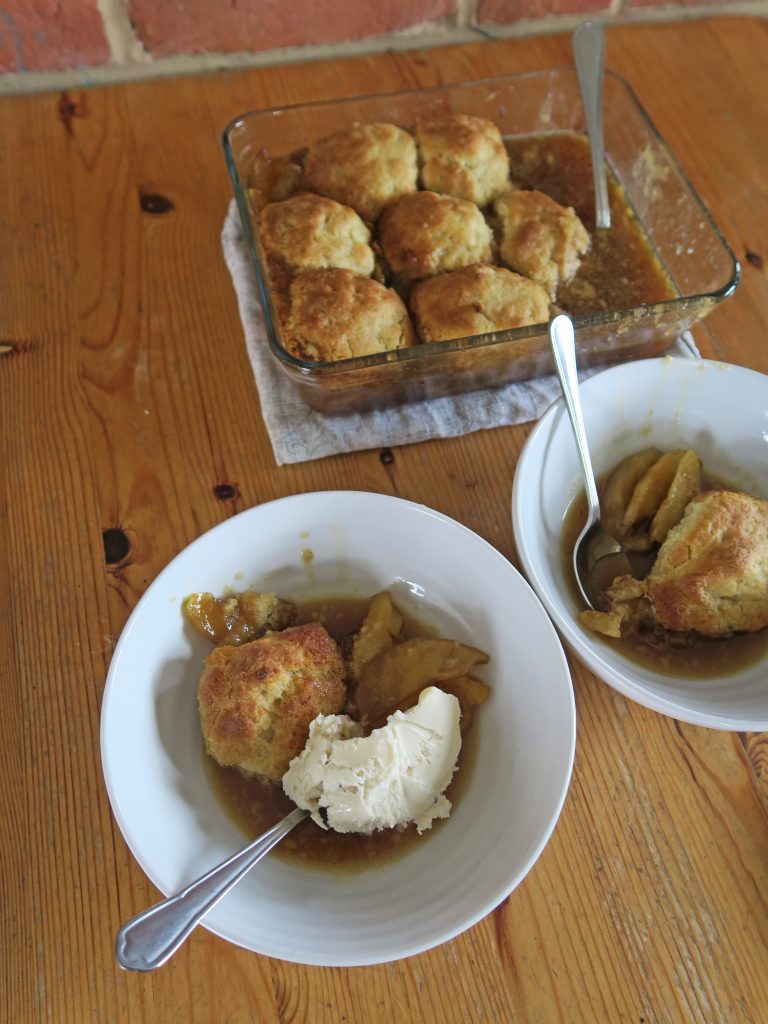
Fruit – Mainly for pies, but also for tarts. Peel and de-stone whatever fruit you like and then either stew it first or pop it into a pastry case raw.

Cold fillings

Jams – This works really well in the bottom of a tart with a baked frangipane or a light mousse over the top as it packs great flavour!

Ganache – The first tarts I made were just chocolate tarts made by pouring warm cream over an equal amount of chopped dark chocolate and leaving it to set. You can also add liqueurs to your ganache if you want to make a boozy tart.

Mousse – It’s slightly untraditional to put mousse in a tart,  but I think a soft fruit mousse can work really well in a pastry case, especially if layered with a jam or jelly.

Creme pattisserie – On the other side of our baked custard tarts are the tarts filled with creme patisserie – a custard that doesn’t need to be baked. This is really good when topped with fresh fruit and berries! (See recipe below).

Recipe suggestions…

Vegan Woodland Pie

Devils Fruit Pie

Bakewell Tartlets

Butterscotch Pear Tart with Blackberry Sauce

Fruit Tartlets

Thanks for reading! If you have any other pastry queries I haven’t talked about here please let me know by leaving a comment below.

Emma x

Amaretti Stuffed Peaches with Lemon Cream

Amaretti Stuffed Peaches with Lemon Cream

As it’s world mental health awareness day today I wanted to make a recipe that’s perfect for all states of mind. For me cooking is that relaxing, creative outlet for all my anxiety, anger and so on and I think lots of people similarly find that it’s a great de-stress activity. There’s also something very communal about making something you can share with others, and most of all making something that is tasty to eat. However there are times when the thought of going into the kitchen is not appealing and whilst I know it’d help me feel better, everything I can think of to cook feels too complicated. Bring on the stuffed fruit!

I’ve never been much of a fan of stuffing fruit for desserts; I generally prefer to stuff desserts with fruit. But if you want a quick, delicious dessert that is super easy to throw together and very hard to get wrong then I seriously recommend these! By crushing up some amaretti biscuits you can make a really flavoursome stuffing for these peaches in seconds, and it also works really well in plums, nectarines and apples so you can work with whatever fruit is in season. I realise that amaretti biscuits may be a little pricey and niche for the average student/household, so if you don’t have any amaretti biscuits around you could use a selection of nuts instead.

Recipe

Serves 3

Time: 20 minutes

Ingredients

For the peaches

  • 3 Peaches
  • 30g Ground almonds
  • 20g Chopped almonds or hazelnuts
  • 20g Crushed amaretti biscuits
  • Zest of ½ a Lemon
  • 1 tbsp Caster sugar
  • 1 Small egg
  • A few drops of rosewater
  • A few drops of Vanilla extract
  • 1 tsp Amaretto (optional)
  • 250ml Apple juice

For the cream

  • 250ml Double cream
  • Zest of ½ an Lemon
  • 2 tbsp Icing sugar
  • 1 tsp Orange blossom water

Method

  1. Pre-heat the oven to 180˚C. Slice the peaches in half and then take out the stones. Put the peach halves into a deep gratin dish or roasting tin in a single layer.
  2. In a bowl mix together the ground almonds, chopped almonds, crushed amaretti biscuits, lemon zest, sugar, egg, rosewater and vanilla until combined.
  3. Spoon this mixture into the space in the peaches where the stones were, making a little mound.
  4. Mix the apple juice and the amaretto in a bowl and then pour this around the peaches.
  5. Then bake the peaches in the oven for 30-40 minutes until soft and slightly caramelised (the time will vary depending on the peaches ripeness).
  6. Now make the cream. Gently whip the cream with a hand whisk until soft peaks form. Then add the lemon zest, sugar and orange blossom water and fold in gently to combine.
  7. Serve the warm peaches with the cream and little of the poaching juices!

Thanks for reading!

Emma x