Category: Baking

Mince Pie Bread Snowflake

Mince Pie Bread Snowflake

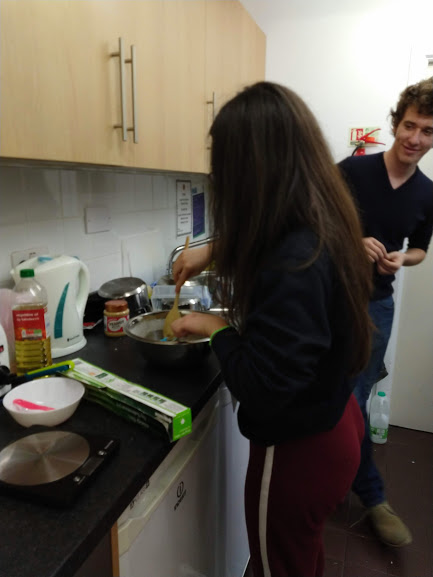
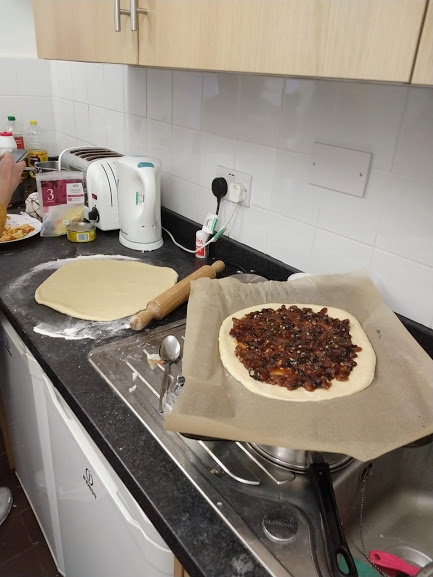
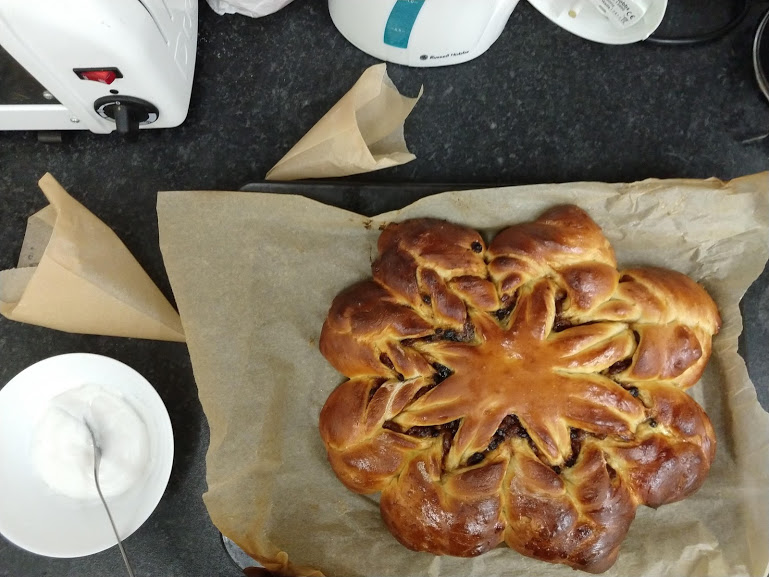
As you can see from the photo below, baking in a little student kitchen is more problematic than my little naive brain could have ever thought of. Before I got to uni I went on a full out shop, buying everything (within reason) I thought I would need to be ready to cook at uni. Oh boy was I wrong. Lacking in scales, space, ingredients and an oven big enough to actually fit the loaf of bread I made it was a wonder it came out looking like this and not a blob on a plate. I even resorted to using a golden syrup bottle to roll out my dough before realising I had a rolling pin after all (fyi, a bottle that has a curvy shape may be pretty but does not function as an effective rolling pin!).
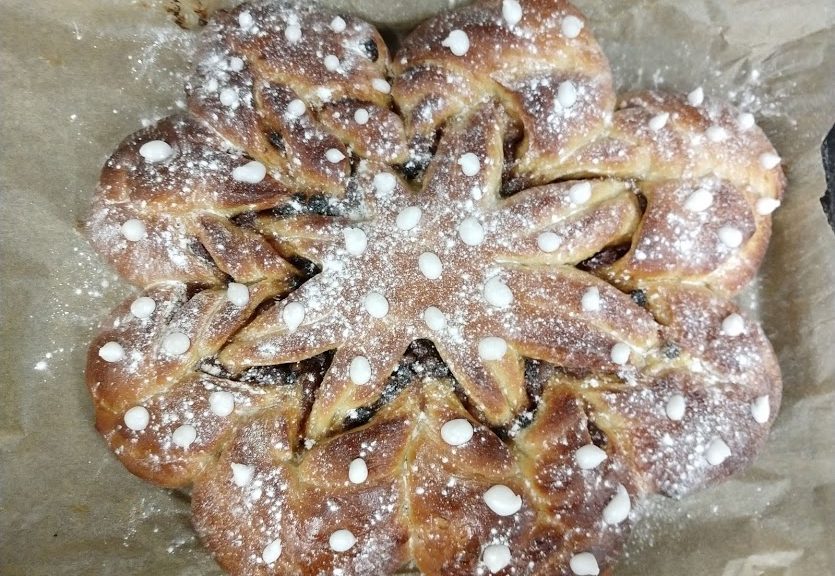
Anyway, a bit of guessing with the measurements, some careful squishing onto the baking tray and 4 hours of time I probably should have spent studying later, this beauty appeared from the oven… and was then eaten in about 5 minutes. The two things I love most about baking is sharing the outcomes with others and, of course, the hands on process of making whatever it is. In particular there’s something very therapeutic about making bread and it’s a great way to calm yourself and get out your anger at the same time. I actually made this in the midst of the ‘I have no idea what the hell I’m doing, should I switch to an art degree or will I regret that in three years when I’m living in a cardboard box?!?’ crossroad in my life, and just getting the head space to actually think by doing something hands on was just what I needed at the time. I’m also 98% sure that mincemeat is a mood booster. Shove a jar of that under my nose and you’ll fool me into thinking it’s Christmas so I’ll perk up a lot!
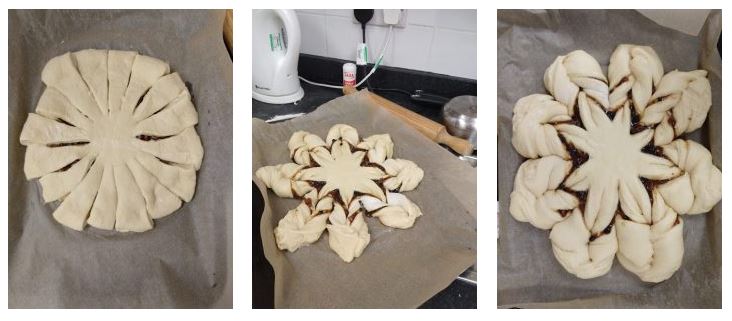
One of the other fun things about making bread is the cool shapes you can twist the dough into! I first came across this way of shaping a loaf whilst watching Bake Off a few years ago. It’s so simple to do and yet messes with everyone’s head so they go ‘ooo, how’d you do that?’. It also makes the loaf really easy to share as each person can  rip off one of the snowflake branches!
Recipe

Serves about 8 hungry students

Time: 1 hour (plus proving and baking time)

Ingredients

For the Dough                   

  • 500g Strong white bread flour
  • 10g Salt
  • 25g Caster sugar
  • 10g Fast action dried yeast
  • 30g Butter
  • 2 Large eggs
  • 50ml Milk
  • Olive oil for greasing

For the Filling/Topping 

  • 350g Mince meat
  • 1 Egg to glaze
  • 150g Icing sugar

Method

  1. Begin by making the dough. Put the flour, salt, sugar and yeast into a bowl and mix everything together. Make sure you don’t put the salt directly on top of the yeast or you could end up deactivating the yeast.
  2. Add the butter, eggs, milk and 100ml water to the mixture. Stir until combined, adding a little more water if needed to bring the dough together.
  3. Turn the dough out onto a lightly floured surface and knead until smooth and elastic (about 10 minutes).
  4. Form the dough into a bowl and then put it into a large clean bowl. Cover with clingfilm and then set aside to prove for around an hour, until doubled in size.
  5. Turn the dough out onto a worktop and knead for 10-15 seconds to knock the air out. Then cut the dough in two, wrap one of the halves in clingfilm and set aside for later.
  6. Lightly flour a work top and roll the first half of the dough out into a circle, about 30cm in diameter. The dough will resist being stretched but keep going and you’ll get there. Transfer this sheet of dough to a lined baking tray.
  7. Spread the mincemeat over the circle of dough, leaving a 1 cm boarder around the edge.
  8. Roll out the remaining dough into another 30cm circle. Brush the edge of the base with a little water and then lift the top sheet of dough on to the base.
  9. Take a knife and carefully trim the circle so it’s neat (using a large bowl or plate as a guide can help). Then cut 16, 10cm long, equally spaced slices into the centre of the bread, but not cutting all the way into the middle. Using a 10cm wide template in the middle so you know where to cut to can help.
  10. Twist each strip over twice, the first one to the right, the second one to the left and so on, until you have 16 alternating twisted strips.
  11. Take two strips and gently squeeze together the tops of the strips to join them together. Repeat with the rest of your strips so you have 8 snowflake branches.
  12. Wrap the loaf loosely in cling film and then leave to prove for about 30 minutes.
  13. Pre-heat the oven to 180˚C. Break an egg for glazing in a small bowl and beat with a fork to break it up.
  14. Brush the egg over the risen loaf to glaze and then bake for 20-25 minutes in the oven until golden-brown and risen. Set aside to cool.
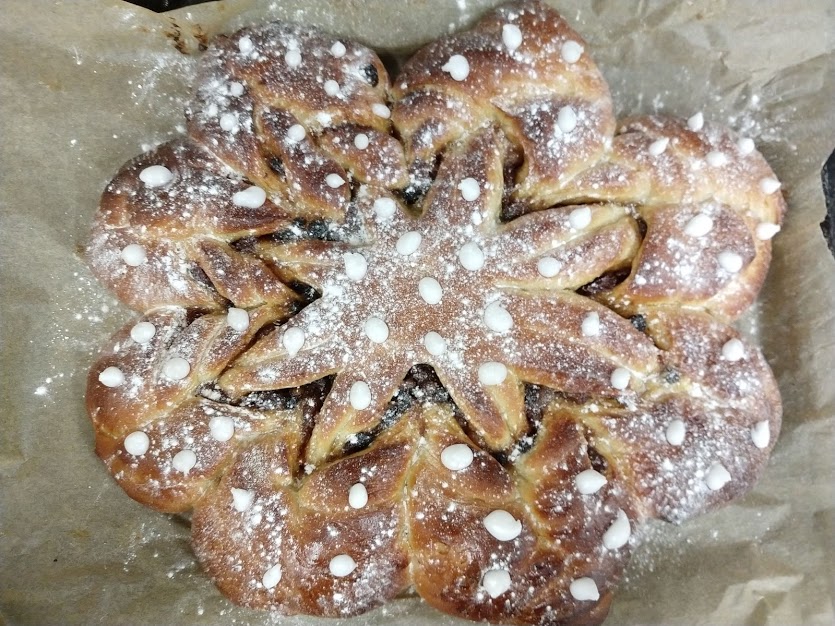
  15. Mix together the icing sugar and just enough water to make a pourable but not runny icing. Transfer the icing to a piping bag with a small round nozzle and then pipe decoration over the cooled loaf. Serve!
Thanks for reading!

Emma x
Tiramisu Cake

Tiramisu Cake

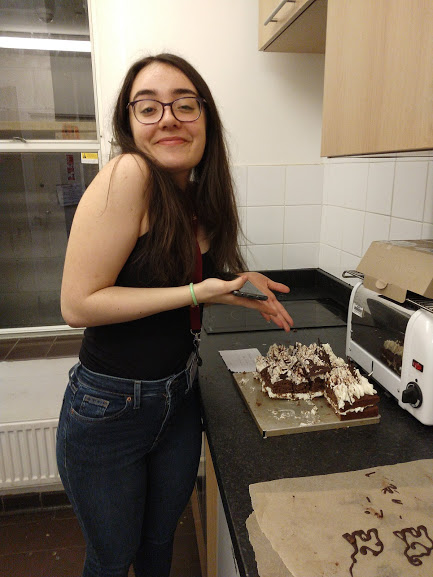
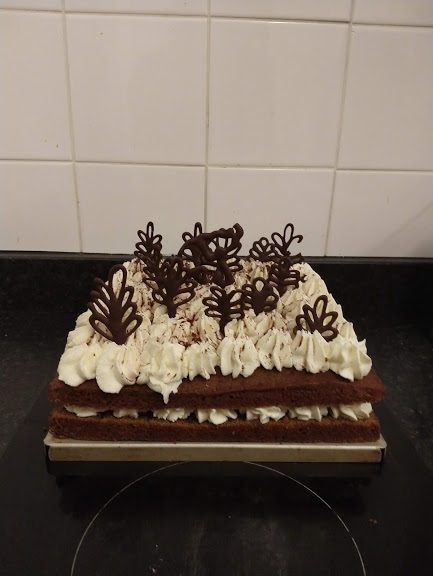
So my first term at Oxford has come to an end and oh boy has it been a term. I’ve switched degrees, become a vegetarian and have made some incredible friends (miss you already btw!). Just before we left we had a big birthday celebration dinner thing for my friend Kat and so I made this tiramisu cake for dessert!

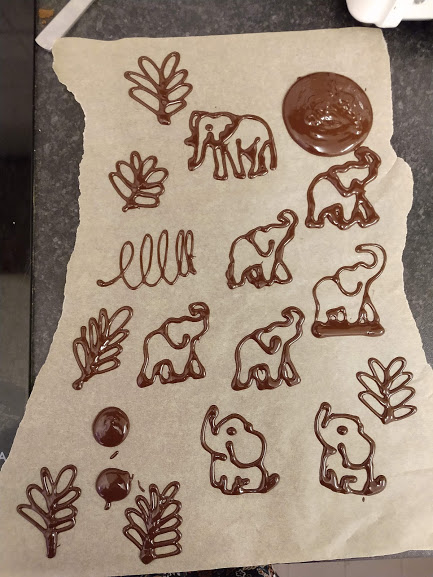
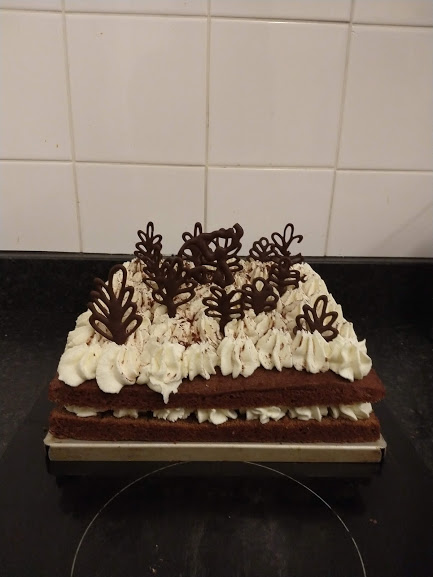
I love baking things for people’s birthdays as it always puts the best look on their face and you can personalise what you make to fit the person! I’ve topped this one with chocolate decorations of an elephant in a little woodland as Kat loves elephants, but you can pipe your decorations to look like anything. To make these ones I got a picture of an elephant up on my phone and then placed a sheet of baking paper over my phone so that I could see the outline underneath. Then I just piped over the top following the lines. A top tip with this is make sure that the piping is thick enough so that you can peel the shapes off the paper without it breaking (RIP too many thin elephants!).

Recipe

Serves 16

Time: 2 hours

Ingredients

For the cake

  • 240g Caster sugar
  • 240g Butter
  • 4 Eggs
  • 250g Self raising flour
  • 2 tbsp Coffee powder
  • 2 tbsp Milk
  • 1 tbsp Cocoa powder

For the filling

  • 750g Mascarpone cheese
  • 300ml Double cream
  • 3 tbsp Icing sugar

To Decorate

  • 100g Dark chocolate
  • 1 tbsp Instant coffee powder
  • 1 tbsp Milk
  • Cocoa powder to dust

Method

  1. Pre-heat the oven to 180˚C. Grease and line a square tin with butter and baking paper.
  2. Put the butter and sugar into a bowl and beat with a wooden spoon until pale and creamy.
  3. Add the eggs one by one to the mixture, whisking in between each addition until combined. Add the flour and whisk again to make a smooth batter.
  4. Put the coffee and milk into a small bowl and stir until the coffee dissolves. Add the coffee to the cake mixture and mix until combined.
  5. Pour the mixture into your lined tin and then bake the cake in the oven for 15-20 minutes until risen and golden brown – a skewer inserted into the middle should come out clean.
  6. Transfer the cake to a wire rack and leave to cool before taking it out of the tin.
  7. Now make the chocolate decorations. Put the chocolate in a bowl over a pan of gently simmering water. Leave to melt and then pour into a piping bag with a very small, round nozzle.
  8. Take a sheet of baking paper and either draw your design onto the paper with a pencil and then turn it over so you can see the design on the back, or use your phone as a light box to shine a design through the paper from underneath.
  9. Carefully pipe the chocolate over your designs and then leave to set completely (not in the fridge as it’ll go white and horrible!).
  10. To make the cream filling put the mascarpone, cream and icing sugar into a large bowl and whisk together until smooth and creamy. Spoon the mixture into a piping bag fitted with a star shaped nozzle.
  11. When the cake has cooled take a sharp knife and cut the cake in half horizontally. Dissolve 1 tbsp coffee in the milk and then brush the coffee evenly over the two sponges.
  12. Place the bottom half on the board or plate you’ll present it on. Pipe blobs of the cream over the cake. Then top  with the other cake half and pipe the rest of the cream over the top.
  13. Carefully peel your chocolate decorations off your baking paper and arrange them over the top of the cake. Finish with a dusting of cocoa powder and serve!

Thanks for reading!

Emma x
 

Peanut Butter and Chocolate Pinwheel Cookies (Vegan)

Peanut Butter and Chocolate Pinwheel Cookies (Vegan)

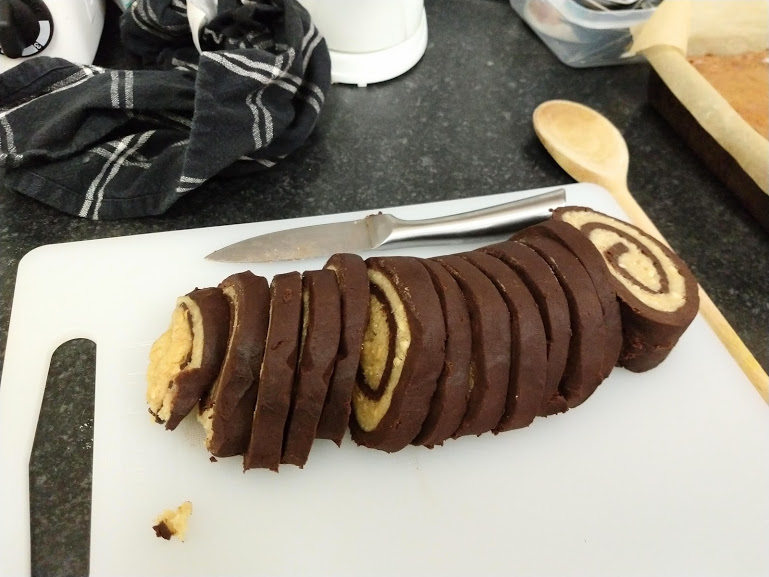
With term almost over it’s time to head back to the land of stocked fridge and rolling fields. Whilst I’m looking forward to having a (bit) of a break, this has been the most amazing 8 weeks. From the people I’ve met to the things I’ve learnt, it’s been a total blast and I can’t wait to come back and so it all over again (after a long rest that is!). Some of the best times I’ve had this term have been our group baking sessions in our college kitchen. Trying to fit more people than can physically fit into a lil’ kitchen, jumping over people to get from the sink to the oven and then everyone eating whatever’s made in minutes.

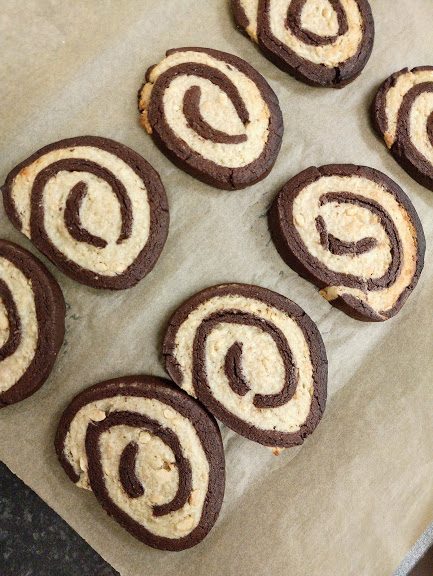
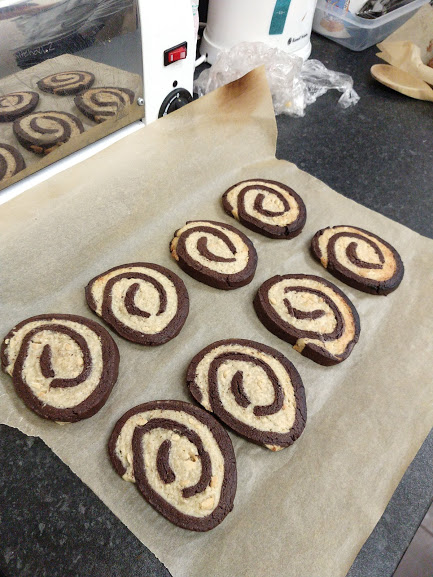
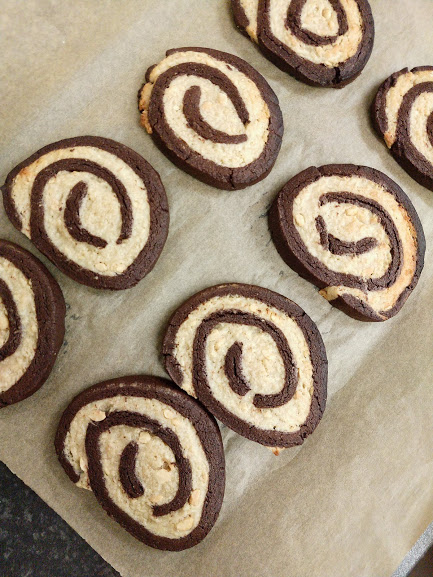
Of course the down side of cooking at uni is the lack of equipment, ingredients and space. For example these were made with only half the ingredients we probably needed and when freezing the pinwheel log before cutting it into slices I had to wedge it into the jam-packed freezer, hence the slightly squashed shape. However, even with the set backs these turned out super tasty and were so fun to make, so I guess the main thing I’ve learnt from student cooking so far is just to make use of what you’ve got to hand and it’ll most likely turn out fine!

You can also play around with the two flavours in these as much as you like which is fun. I went for chocolate and peanut butter as they’re relatively cheap and taste hella good together. But you could try other combos like chocolate and vanilla, lemon and strawberry, or orange and almond. The key to get these looking good is to make sure that the two doughs have different enough colours to stand out against each other and to make sure you get a tight roll when you roll the wheels up. After that all you’ve got to worry about is getting them to the tin before everyone eats them.

Ingredients

For peanut butter dough

  • 125g Caster sugar
  • 113g Smooth peanut butter
  • A large pinch of Salt
  • 1 tbsp Water
  • 215g Plain flour

For the chocolate dough

  • 125g Caster sugar
  • 113g Smooth peanut butter
  • A large pinch of salt
  • 1 tbsp Water
  • 170g Plain flour
  • 45g Cocoa powder

Method

  1. First make the peanut dough. Put the peanut butter and sugar into a large bowl with the vanilla and a pinch of salt and beat with a wooden spoon until smooth and creamy.
  2. Add the water to the mixture and beat in to loosen the mixture a little. Then add the flour and mix everything together until a smooth dough forms.
  3. Use your hands to make the dough into a ball and then wrap it in cling film and leave it in the fridge until needed.
  4. Now make the chocolate dough. Repeat step 1 with the butter, sugar and so on.
  5. Add the water to the mix and beat to loosen the mixture as you did before. Then add the flour and the cocoa powder to the bowl and mix everything together until a smooth dough forms.
  6. Again, form the dough into a ball and wrap in clingfilm. Leave the two doughs in the fridge for 1-2 hours to harden up slightly.
  7. When ready take the peanut dough out of the fridge. Lay down a sheet of cling film on the work top and then place the dough on top. Lay out another sheet of cling film over the dough. Then take a rolling pin and roll the dough out into a oblong about 20cm x 40cm.
  8. Repeat with the chocolate dough so you have two rectangles of a similar shape.
  9. Take the top layer of the clingfilm off the two doughs. Then turn the chocolate dough over onto the peanut dough and take off the clingfilm sheet which will now be on the top.
  10. Carefully roll the sheet up into a pinwheel, working from short edge to short edge. It can help here to roll over a 1cm bit at the start to begin your spiral and then work from there.
  11. Wrap the log in clingfilm and then freeze for 1-2 hours to make it easier to cut later.
  12. Pre-heat the oven to 180˚C. Line two baking trays with baking paper.
  13. Take the pinwheel log out of the freezer and place it on a chopping board. Take a sharp knife and cut the log into 1cm discs. Place each cookie on the lined baking trays.
  14. Bake the biscuits for 15-20 minutes until slightly golden brown and crispy. Leave to cool before eating!

Thanks for reading!

Emma x

Welsh Cakes

Welsh Cakes

I think we’ve got to that point in the year where it’s dark more than it is light, the words ‘I can’t believe it’s getting dark this early’ ring in the air, and you can no longer convince yourself that you don’t need a coat when you go out. I’m up north for the weekend and about 70% of the time I can’t feel my fingers. Oh yes… we’re in… winter.  (Add dramatic music as you will). But it’s not all bad. The Christmas lights are out, the jumpers are in and comfort food is better than it ever was.

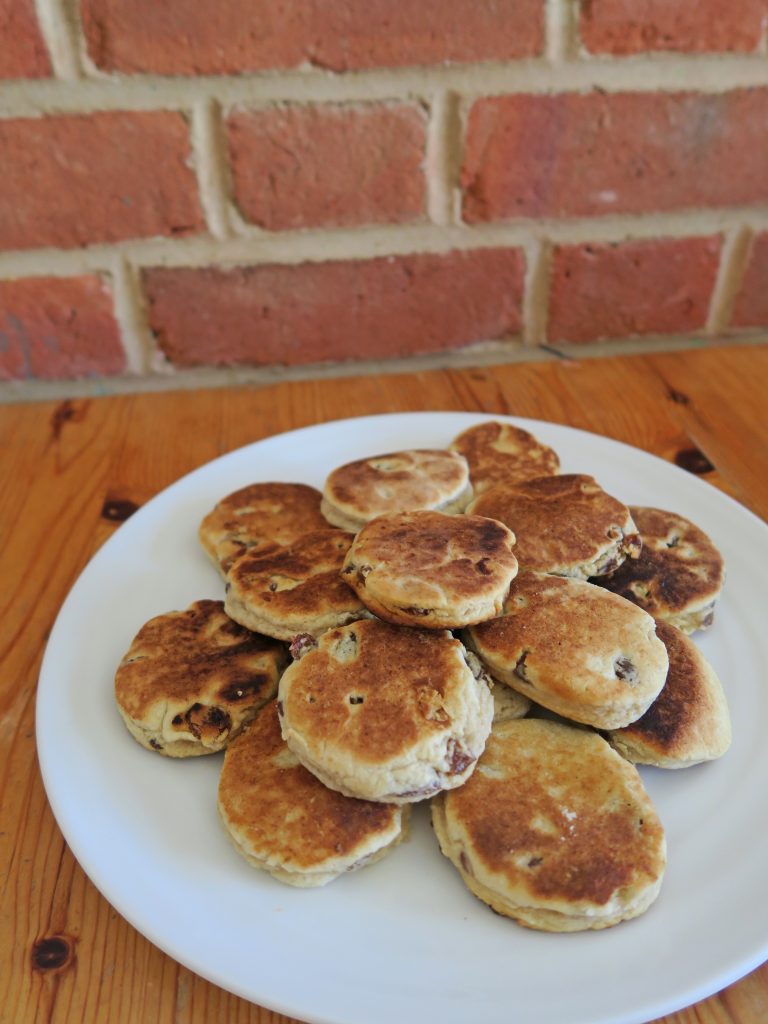
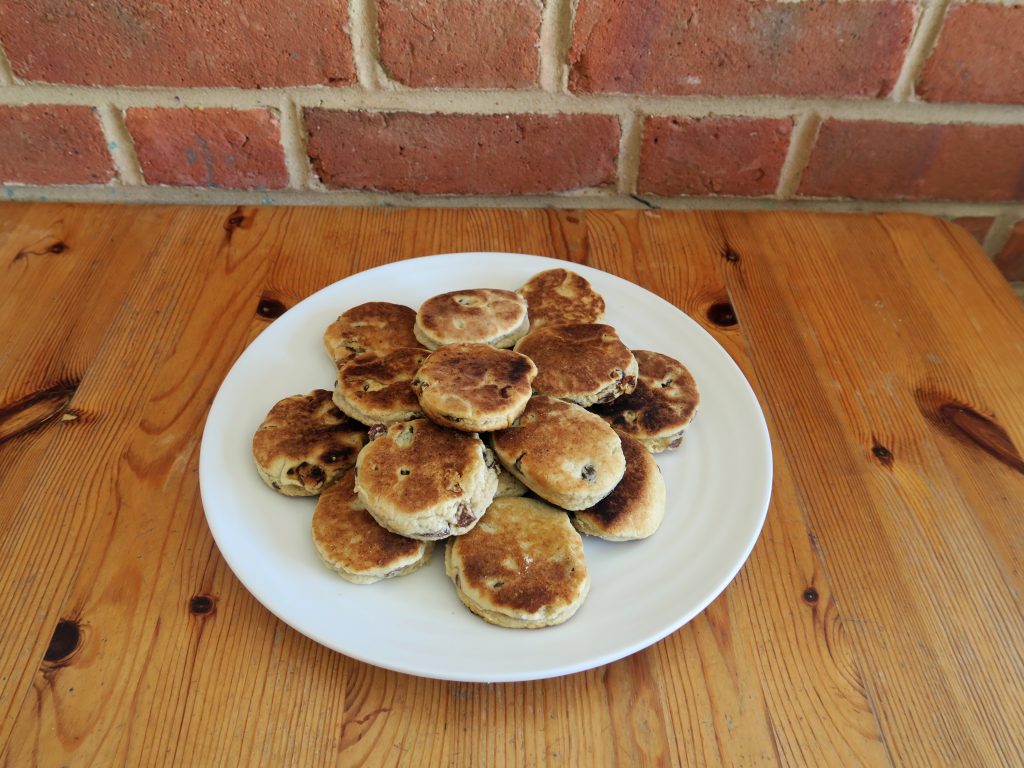
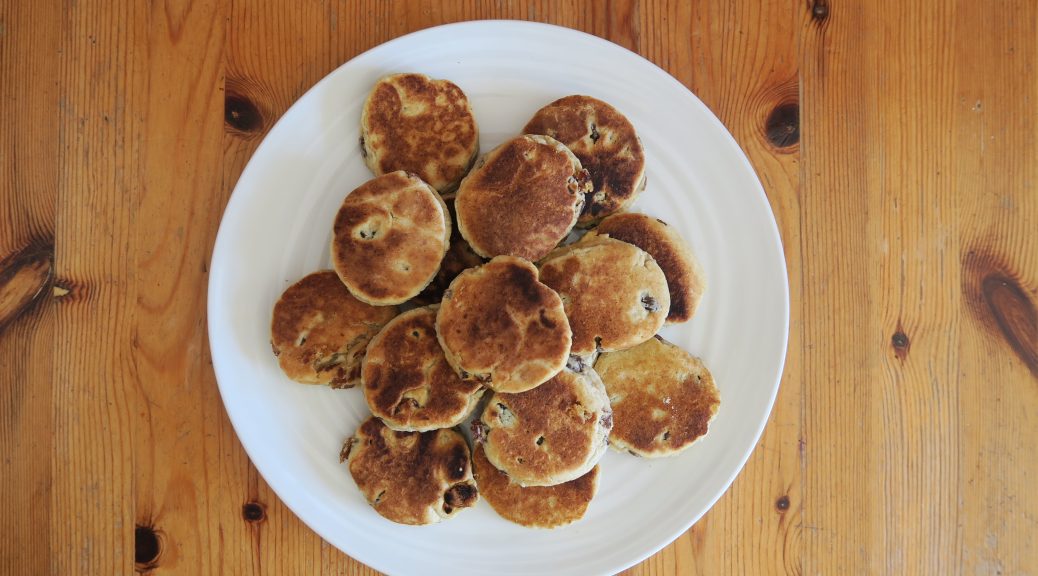
I think this little treats are massively underrated. I find loads of supermarkets sell them, however as they’re small and look a little meh they don’t really get picked up. If you’ve never had one before think of them as a sweeter, slightly shorter scone that you cook in a pan. They’re so easy and quick to rustle up that they’re perfect to make before Strictly on a Sunday evening.

Recipe

Makes 20

Time: 20 minutes

Ingredients

  • 230g Plain flour
  • 90g Caster sugar
  • ¼ tsp Ground ginger
  • ¼ tsp Ground cinnamon
  • ½ tsp Baking powder
  • 50g Unsalted butter
  • 50g Lard, plus extra for frying
  • 70g Raisins or currants
  • 1 Large egg
  • 25ml Milk

Method

  1. Put the flour, sugar, ginger, cinnamon and baking powder into a big bowl and mix together until combined.
  2. Add the butter and the lard and then rub the fats into the dry ingredients with your fingers until the mixture resembles breadcrumbs. Shake the bowl from side to side every so often to get the lumps to the top so you can work them into the mix.
  3. Add the raisins or currants and mix them into the dough.
  4. In another bowl mix together the egg and milk. Then slowly trickle in the milk, mixing with a round bladed knife (like a table knife) until a dough forms.
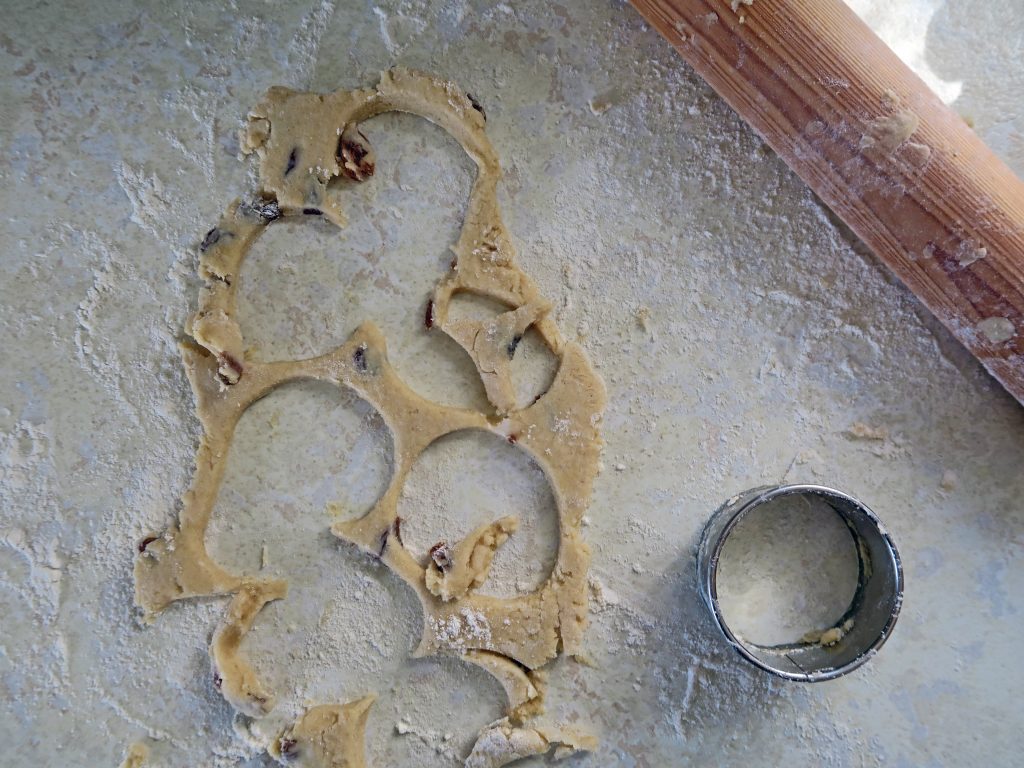
  5. Lightly flour a worktop and roll the dough out into a thin sheet around the thickness of a £1 coin. Take a 6cm round cookie cutter and cut out as many circles as you can, re-rolling the leftovers until you’ve used all the dough.
  6. Put a large skillet or frying pan over a medium heat. Add a knob of lard and leave it to melt. Then place 4-5 welsh cakes on the pan and fry for 3-4 minutes on either side until golden brown and cooked all the way through (they shouldn’t feel squidgy when prodded gently).
  7. Repeat with the rest of your welsh cakes until you have a stack of delicious treats. Serve with jam, butter or just as they are!

Thanks for reading!
Emma x
Tahini Chocolate Cake

Tahini Chocolate Cake

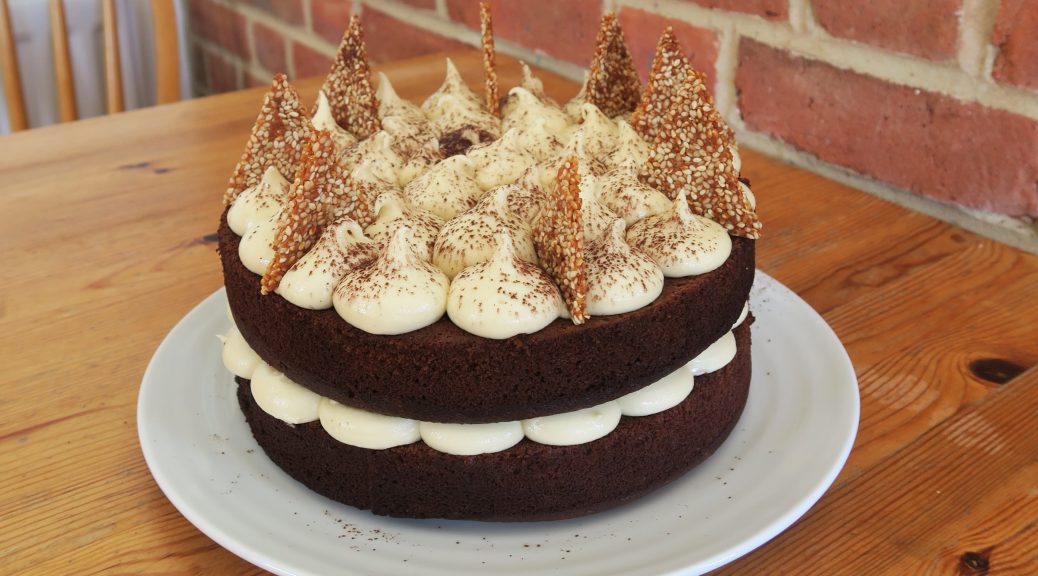
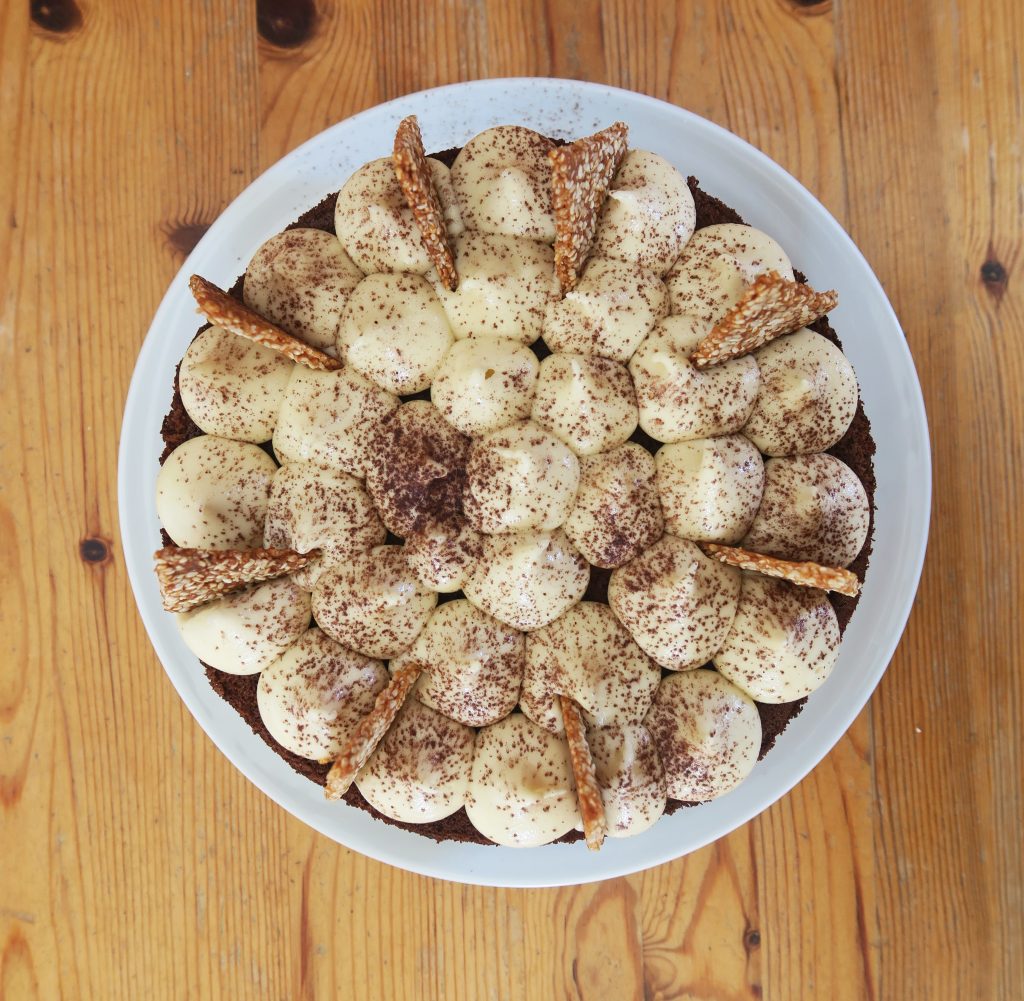
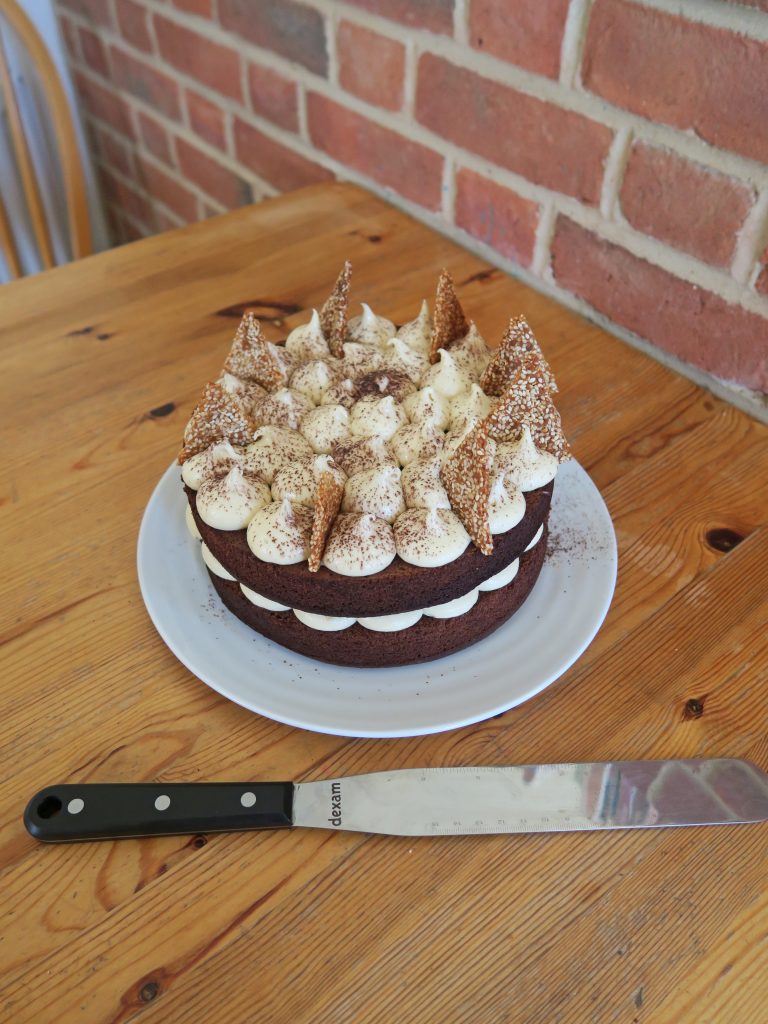
What the hell is tahini I hear you ask? To be honest, the first time I heard about it I thought it could be an exotic grass skirt dance from the Caribbean. But alas… no.  It’s actually a sesame seed paste that is used a lot in Middle Eastern cooking and is a key component of hummus. So if you like hummus you’ll definitely like this, but fear not, this is not hummus cake! The tahini goes in the icing to make a salty, sweet, nutty filling for these super moist chocolate cakes that just works so so well.

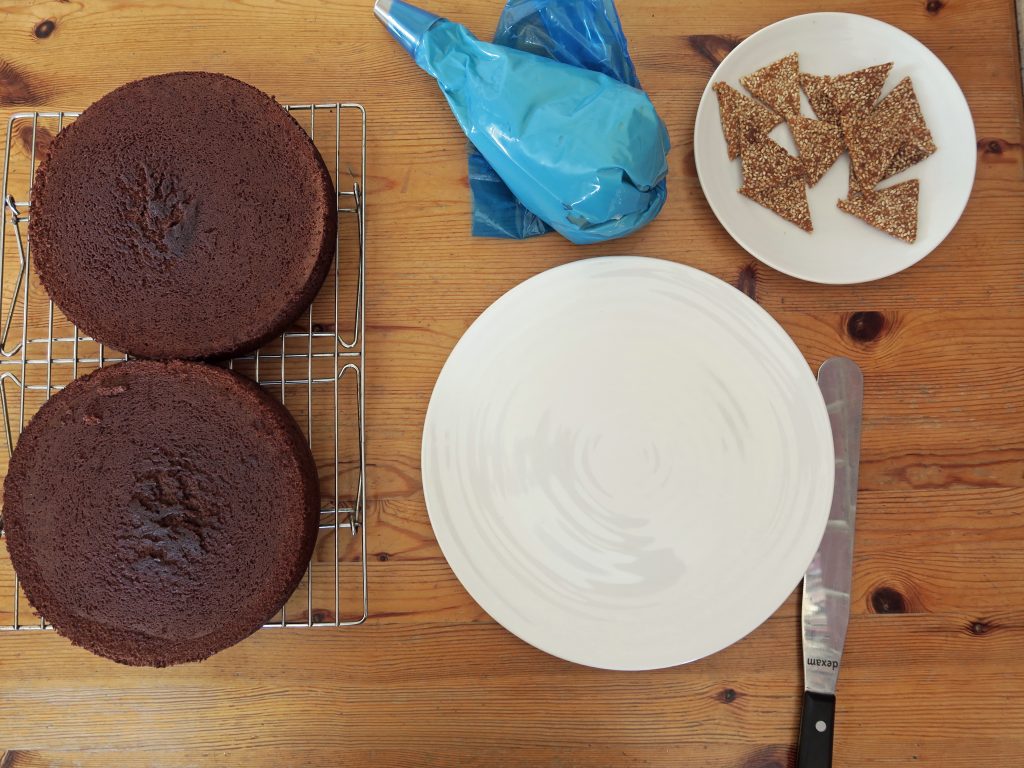
This is one of those things that will only make sense when you try it, so if you’re looking at this a little doubtingly then I’d recommend just giving it a go! I made my own sesame snaps for this as I couldn’t for the life of me find any anywhere in the shops, but in the recipe I’ve said use sesame snaps as they taste better and make your life so much easier.

Recipe

Serves 12

Time: 90 minutes

Ingredients

For the chocolate cake

  • 180g Unsalted butter
  • 100g Dark chocolate
  • 240g Plain flour
  • 280g Caster sugar
  • 1 tsp Bicarbonate of soda
  • 3 tbsp Cocoa powder, plus extra for dusting
  • 2 Large eggs
  • 142ml Milk
  • 142ml Greek yoghurt
  • 2 tbsp Tahini

To Decorate

  • 230g Unsalted butter
  • 3 tbsp Tahini
  • 320g Icing sugar
  • 2 Packets of sesame snaps

Method

  1. Preheat the oven to 180˚C. Grease and line two 7.5 inch cake tins.
  2. First make the chocolate cake. Melt the butter and chocolate together in a heat-proof bowl over a pan of simmering water.
  3. In a bowl mix the flour, sugar, bicarb and cocoa together.
  4. In another bowl whisk together the egg, milk, and yoghurt. Add this mixture and the chocolate mixture to the flour mixture, along with the tahini and 100ml boiling water. Whisk quickly until combined and then pour this into the two lined tins.
  5. Bake in the oven for 25-30 minutes, or until a skewer comes out clean once inserted. Leave the cakes to cool for 15 minutes before turning them out onto wire racks and leaving to cool completely.
  6. Now make the icing. Put the butter and tahini into a bowl and mix with a wooden spoon until smooth and creamy. Add the icing sugar and beat it into the mixture until smooth. Spoon the icing into a piping bag fitted with a round nozzle and leave in the fridge until needed.
  7. When the cakes have cooled completely put one onto a plate. Pipe blobs of the icing over the base layer and then place the other cake on top.
  8. Pipe the rest of the icing over the top of the cake in blobs.  Dust the cake with a little cocoa powder. Then break the sesame snaps into shards and place them around the top of the cake. Serve!

Thanks for reading!

Emma x