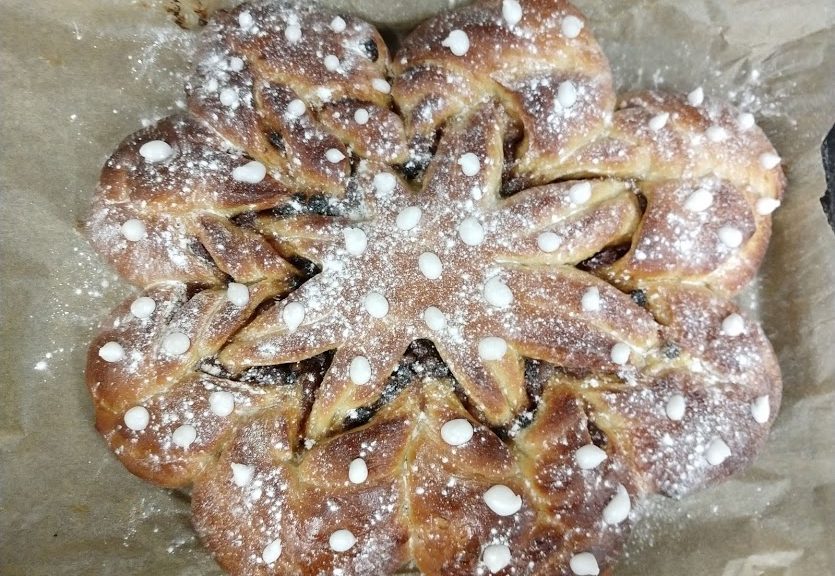
Mince Pie Bread Snowflake
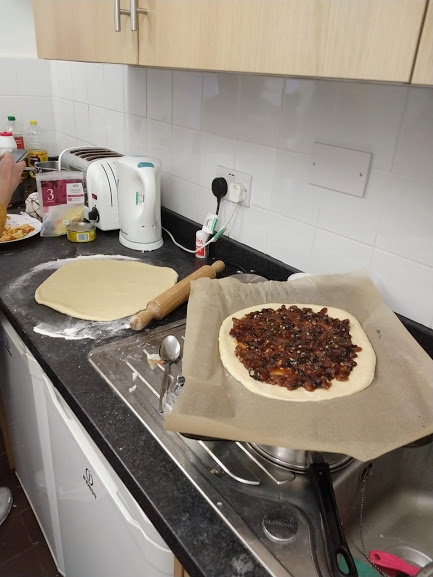
As you can see from the photo below, baking in a little student kitchen is more problematic than my little naive brain could have ever thought of. Before I got to uni I went on a full out shop, buying everything (within reason) I thought I would need to be ready to cook at uni. Oh boy was I wrong. Lacking in scales, space, ingredients and an oven big enough to actually fit the loaf of bread I made it was a wonder it came out looking like this and not a blob on a plate. I even resorted to using a golden syrup bottle to roll out my dough before realising I had a rolling pin after all (fyi, a bottle that has a curvy shape may be pretty but does not function as an effective rolling pin!).
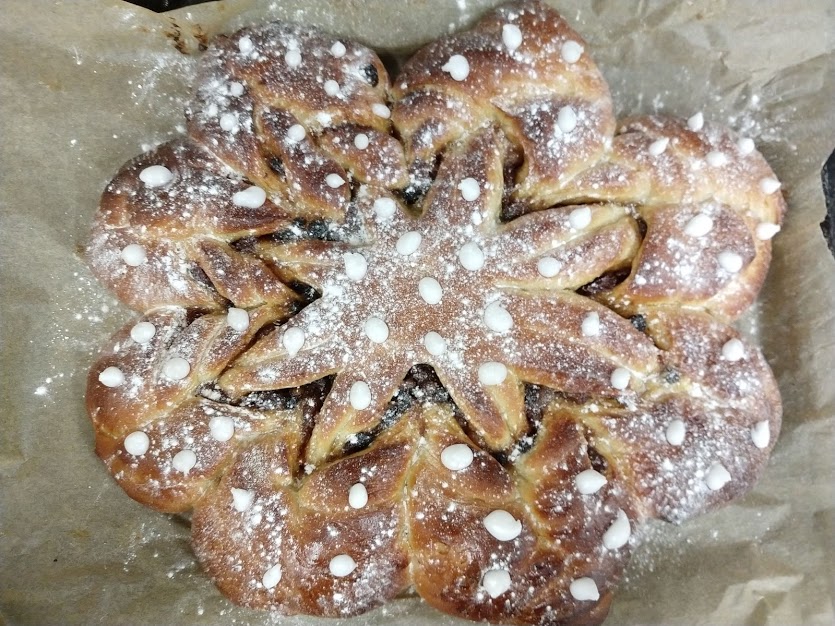
Anyway, a bit of guessing with the measurements, some careful squishing onto the baking tray and 4 hours of time I probably should have spent studying later, this beauty appeared from the oven… and was then eaten in about 5 minutes. The two things I love most about baking is sharing the outcomes with others and, of course, the hands on process of making whatever it is. In particular there’s something very therapeutic about making bread and it’s a great way to calm yourself and get out your anger at the same time. I actually made this in the midst of the ‘I have no idea what the hell I’m doing, should I switch to an art degree or will I regret that in three years when I’m living in a cardboard box?!?’ crossroad in my life, and just getting the head space to actually think by doing something hands on was just what I needed at the time. I’m also 98% sure that mincemeat is a mood booster. Shove a jar of that under my nose and you’ll fool me into thinking it’s Christmas so I’ll perk up a lot!
 One of the other fun things about making bread is the cool shapes you can twist the dough into! I first came across this way of shaping a loaf whilst watching Bake Off a few years ago. It’s so simple to do and yet messes with everyone’s head so they go ‘ooo, how’d you do that?’. It also makes the loaf really easy to share as each person can rip off one of the snowflake branches!
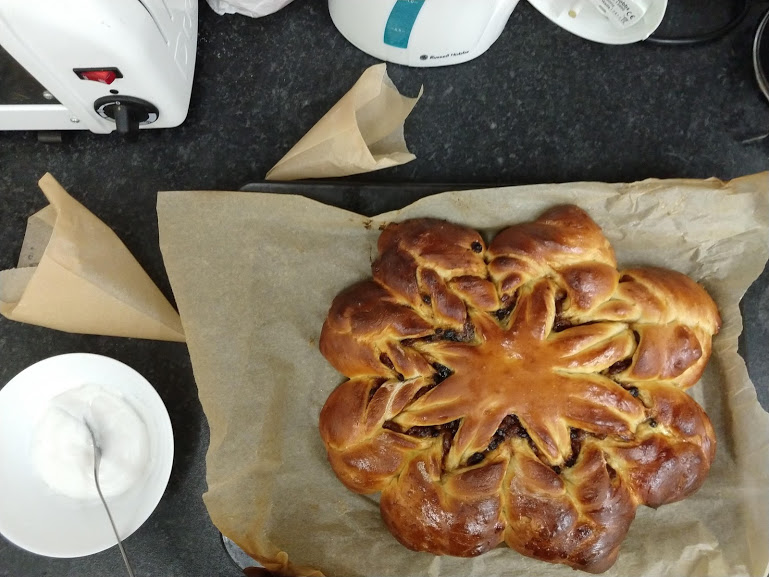
Recipe
Serves about 8 hungry students
Time: 1 hour (plus proving and baking time)
Ingredients
For the Dough
- 500g Strong white bread flour
- 10g Salt
- 25g Caster sugar
- 10g Fast action dried yeast
- 30g Butter
- 2 Large eggs
- 50ml Milk
- Olive oil for greasing
For the Filling/Topping
- 350g Mince meat
- 1 Egg to glaze
- 150g Icing sugar
Method
- Begin by making the dough. Put the flour, salt, sugar and yeast into a bowl and mix everything together. Make sure you don’t put the salt directly on top of the yeast or you could end up deactivating the yeast.
- Add the butter, eggs, milk and 100ml water to the mixture. Stir until combined, adding a little more water if needed to bring the dough together.
- Turn the dough out onto a lightly floured surface and knead until smooth and elastic (about 10 minutes).
- Form the dough into a bowl and then put it into a large clean bowl. Cover with clingfilm and then set aside to prove for around an hour, until doubled in size.
- Turn the dough out onto a worktop and knead for 10-15 seconds to knock the air out. Then cut the dough in two, wrap one of the halves in clingfilm and set aside for later.
- Lightly flour a work top and roll the first half of the dough out into a circle, about 30cm in diameter. The dough will resist being stretched but keep going and you’ll get there. Transfer this sheet of dough to a lined baking tray.
- Spread the mincemeat over the circle of dough, leaving a 1 cm boarder around the edge.
- Roll out the remaining dough into another 30cm circle. Brush the edge of the base with a little water and then lift the top sheet of dough on to the base.
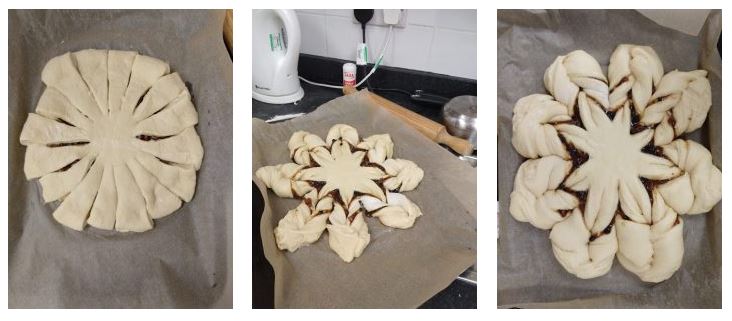
- Take a knife and carefully trim the circle so it’s neat (using a large bowl or plate as a guide can help). Then cut 16, 10cm long, equally spaced slices into the centre of the bread, but not cutting all the way into the middle. Using a 10cm wide template in the middle so you know where to cut to can help.
- Twist each strip over twice, the first one to the right, the second one to the left and so on, until you have 16 alternating twisted strips.
- Take two strips and gently squeeze together the tops of the strips to join them together. Repeat with the rest of your strips so you have 8 snowflake branches.
- Wrap the loaf loosely in cling film and then leave to prove for about 30 minutes.
- Pre-heat the oven to 180˚C. Break an egg for glazing in a small bowl and beat with a fork to break it up.
- Brush the egg over the risen loaf to glaze and then bake for 20-25 minutes in the oven until golden-brown and risen. Set aside to cool.
- Mix together the icing sugar and just enough water to make a pourable but not runny icing. Transfer the icing to a piping bag with a small round nozzle and then pipe decoration over the cooled loaf. Serve!
Thanks for reading!
Emma x