Tiramisu Cake
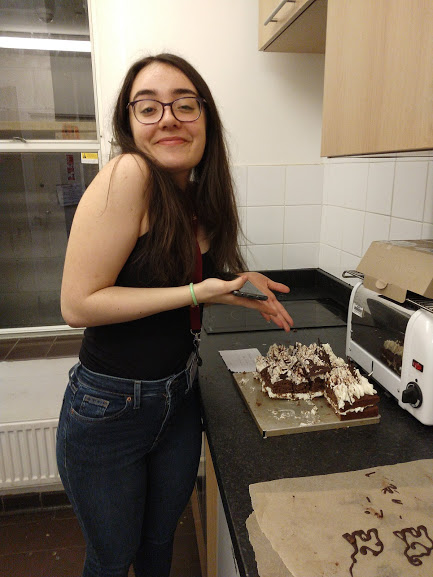
So my first term at Oxford has come to an end and oh boy has it been a term. I’ve switched degrees, become a vegetarian and have made some incredible friends (miss you already btw!). Just before we left we had a big birthday celebration dinner thing for my friend Kat and so I made this tiramisu cake for dessert!
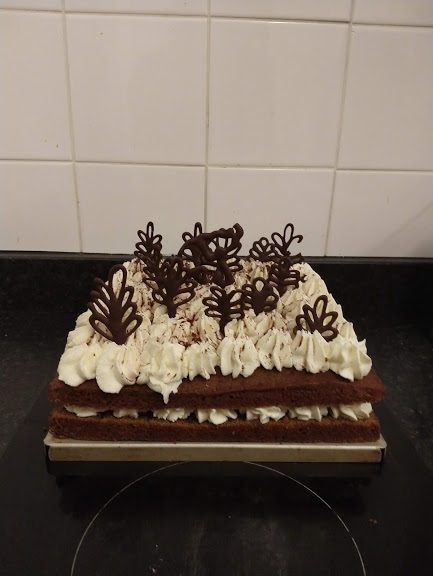
I love baking things for people’s birthdays as it always puts the best look on their face and you can personalise what you make to fit the person! I’ve topped this one with chocolate decorations of an elephant in a little woodland as Kat loves elephants, but you can pipe your decorations to look like anything. To make these ones I got a picture of an elephant up on my phone and then placed a sheet of baking paper over my phone so that I could see the outline underneath. Then I just piped over the top following the lines. A top tip with this is make sure that the piping is thick enough so that you can peel the shapes off the paper without it breaking (RIP too many thin elephants!).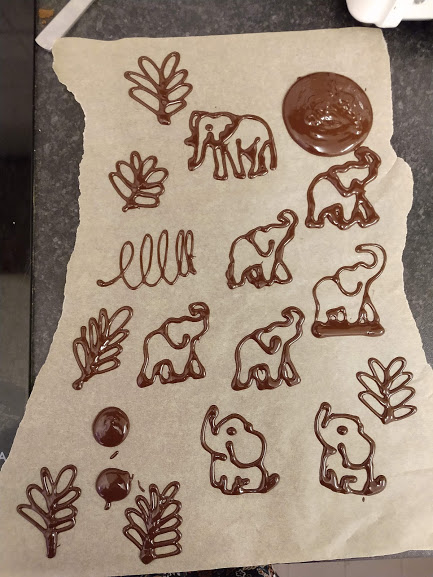
Recipe
Serves 16
Time: 2 hours
Ingredients
For the cake
- 240g Caster sugar
- 240g Butter
- 4 Eggs
- 250g Self raising flour
- 2 tbsp Coffee powder
- 2 tbsp Milk
- 1 tbsp Cocoa powder
For the filling
- 750g Mascarpone cheese
- 300ml Double cream
- 3 tbsp Icing sugar
To Decorate
- 100g Dark chocolate
- 1 tbsp Instant coffee powder
- 1 tbsp Milk
- Cocoa powder to dust
Method
- Pre-heat the oven to 180˚C. Grease and line a square tin with butter and baking paper.
- Put the butter and sugar into a bowl and beat with a wooden spoon until pale and creamy.
- Add the eggs one by one to the mixture, whisking in between each addition until combined. Add the flour and whisk again to make a smooth batter.
- Put the coffee and milk into a small bowl and stir until the coffee dissolves. Add the coffee to the cake mixture and mix until combined.
- Pour the mixture into your lined tin and then bake the cake in the oven for 15-20 minutes until risen and golden brown – a skewer inserted into the middle should come out clean.
- Transfer the cake to a wire rack and leave to cool before taking it out of the tin.
- Now make the chocolate decorations. Put the chocolate in a bowl over a pan of gently simmering water. Leave to melt and then pour into a piping bag with a very small, round nozzle.
- Take a sheet of baking paper and either draw your design onto the paper with a pencil and then turn it over so you can see the design on the back, or use your phone as a light box to shine a design through the paper from underneath.
- Carefully pipe the chocolate over your designs and then leave to set completely (not in the fridge as it’ll go white and horrible!).
- To make the cream filling put the mascarpone, cream and icing sugar into a large bowl and whisk together until smooth and creamy. Spoon the mixture into a piping bag fitted with a star shaped nozzle.
- When the cake has cooled take a sharp knife and cut the cake in half horizontally. Dissolve 1 tbsp coffee in the milk and then brush the coffee evenly over the two sponges.
- Place the bottom half on the board or plate you’ll present it on. Pipe blobs of the cream over the cake. Then top with the other cake half and pipe the rest of the cream over the top.
- Carefully peel your chocolate decorations off your baking paper and arrange them over the top of the cake. Finish with a dusting of cocoa powder and serve!

Thanks for reading!
Emma x