Category: Cakes

Vegan Peanut Butter Blondies

Vegan Peanut Butter Blondies

In the last 3 days I’ve moved back to college, have had 36 hours of drama rehearsals and now I have a tonne of coursework to do before term starts, so this is gonna be a fairly short post. Essentially, I made some of these last April and then I found myself craving another batch. However, unable to use eggs and milk at the moment I had to make a vegan version of my fave PB blondies instead. Dare I say it, I actually prefer these to the originals because they’re so much easier to make and they taste so damn good!

Recipe

Makes 16 squares

Time: 15 minutes, plus baking

Ingredients

  • 150g Light brown sugar
  • 200g Peanut butter
  • 45ml Sunflower oil (or other oil like vegetable or coconut)
  • 130g Plain flour
  • ½ tsp Baking powder
  • 100ml Soy milk
  • 100g Vegan white chocolate chips

Method

  1. Pre-heat the oven to 180˚C. Then grease and line a 25x25cm cake tin with a little oil and baking paper.
  2. Put the sugar, peanut butter and oil into a large bowl and beat together with a wooden spoon until smooth.
  3. Add the flour, baking powder, milk and chocolate chips to the batter and mix again to make a smooth batter (it may be fairly thick).
  4. Pour the mixture into the tin and smooth out to make an even layer.
  5. Bake in the oven for 15-20 minutes until golden brown and baked all the way through. Leave to cool a little before serving!

Thanks for reading!

Emma x

Vegan Chocolate Cake

Vegan Chocolate Cake

It’s 2019. Everything’s squeaky fresh and everything’s vegan! (For this month at least). I have 9 delish vegan recipes coming your way and then depending on how I like the whole vegan thing I might carry on with it or go back to being a chill veggie. That said, it’s only been 1.5 days and I’ve been hungry and staring at every non vegan thing in my kitchen for most of that time. But it’s gonna be great. I’ve got hummus, I’ve got aubergines, and I’ve got some sweet wonders like this chocolate cake to keep me going!

I actually first came across this way of making a cake a couple of years ago before I even considered going vegan, and it was so good that I didn’t realise it had no milk, eggs etc in it. It also doesn’t require lots of random hard-to-find ingredients like lots of vegan foods do, all you need is just a couple of avocados and you’re good to go! I also cannot stress enough that this is a hella good cake in it’s own right – this has actually become my go-to chocolate cake because it tastes so insanely good. So if the first thing you think of when someone says vegan is a bowl full of bland vegetables try whipping up one of these!

Recipe

Serves 10-12

Time: 2 hours

Ingredients

For the cake

  • Dairy free spread for greasing
  • 2 Small avocados (about 150g)
  • 300g Caster sugar
  • 350g Plain flour
  • 60g Cocoa powder
  • 1 tsp Bicarbonate of soda
  • 2 tsp Baking powder
  • 400ml Soya milk
  • 150ml Vegetable oil
  • 2 tsp Vanilla extract

For the icing

  • 70g Ripe avocado
  • 100g Dairy free spread
  • 200g Dark chocolate (dairy free)
  • 125ml Soya milk
  • 25g Cocoa powder
  • 200g Icing sugar
  • 1 tsp Vanilla extract

Method

  1. Pre-heat the oven to 170˚C. Line two 20cm sandwich tins with dairy free spread and baking paper.
  2. Put the avocado flesh into a bowl and puree it with a hand blender. Then put the avocado through a sieve into another big bowl.
  3. Add the sugar, flour, cocoa powder, bicarb, baking powder, milk, oil, vanilla and a pinch of salt to the avocado and whisk together until smooth and velvety.
  4. Pour the mixture into the two tins and bake for 20-25 minutes until risen and springy. (A skewer inserted into the middle should come out clean). Leave to cool for a few minutes and then turn the cakes out onto a wire rack.
  5. Now make the icing. Put the avocado and sunflower spread into a large bowl and beat until smooth. Pass the mixture through a sieve and then set aside for now.
  6. Melt the chocolate in a bowl over a pan of simmering water and then leave to cool for a couple of minutes.
  7. Put the dairy-free milk into a pan and bring to a simmer. Put the cocoa powder into a bowl and pour over the milk, whisking until a smooth mixture forms.
  8. Add the avocado, icing sugar, melted chocolate and vanilla and beat again until the mixture is thick, smooth and shiny.
  9. Put one of the cooled cakes onto a plate. Spread over half the icing, then top with the other sponge and the rest of the icing. Serve!

Thanks for reading!

Emma x

Christmas Mug Cake

Christmas Mug Cake

I’m a little late in posting this one – I got to that point in the holidays where I forgot what day it was! That sounds a bit like bliss: getting so lost in time off that you forget where you are, but for control-freak me it’s more of a sign that I’m spiralling downwards. I’ve been really lucky that since going to Uni I’ve been feeling fairly stable and happier than I have in a long time, however since coming back home things have been roller-coasting like crazy. It feels a little weird writing about it here as I know this content gets out to friends and family more than anyone else, and this isn’t something I’d normally discuss with them, but when I changed the angle of this blog I said I’d be more open about my mental health and so I guess that’s what I’m doing.

I know I’ll be ok, and I know this is just a phase, but anyone who’s been in this position themselves knows that it doesn’t make living it any easier. At the moment I have very little motivation to do anything, but I’m lucky that I used my normal crazy energeticness before to make some recipes I could use for times like these. So I made this a while ago, and I also wrote a long post on our Christmas cake tradition in my family, however it feels like a bit too much of a jump between what I wrote then and what I feel is appropriate now to write. But here we go…

Does anyone else have that thing where the Christmas cake is made in October, fed till December, and then eaten slowly until August? Every year we have the panic in our family of hitting December 23rd, realising we don’t have a cake, having a debate over if we do make a cake whether anyone would it eat it anyway, concluding no one probably would, then making one. And alas, it gets picked at over the following months, just to get finished off late August so we can have a few Christmas cake free months before the cycle repeats.

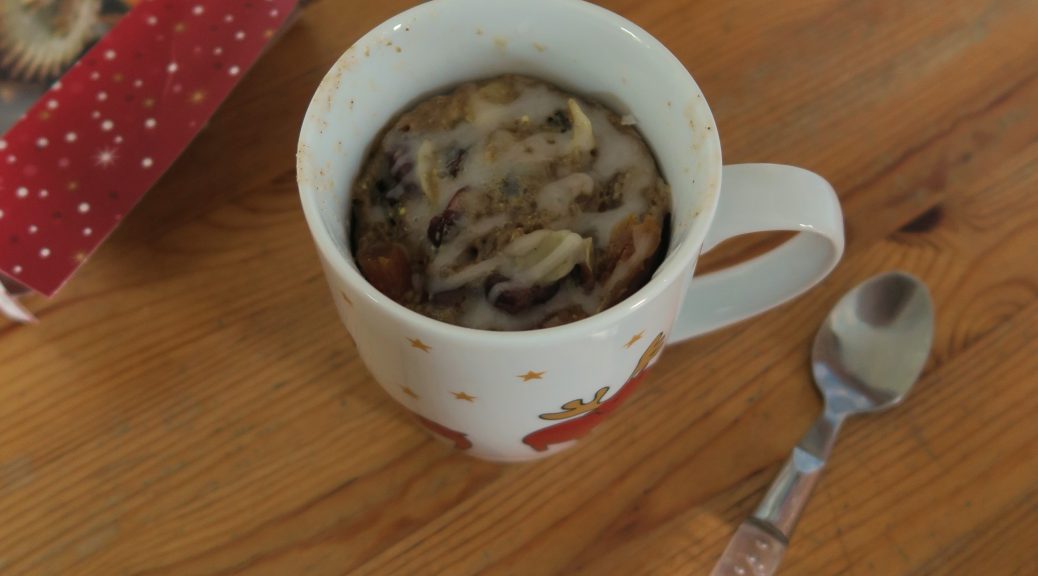
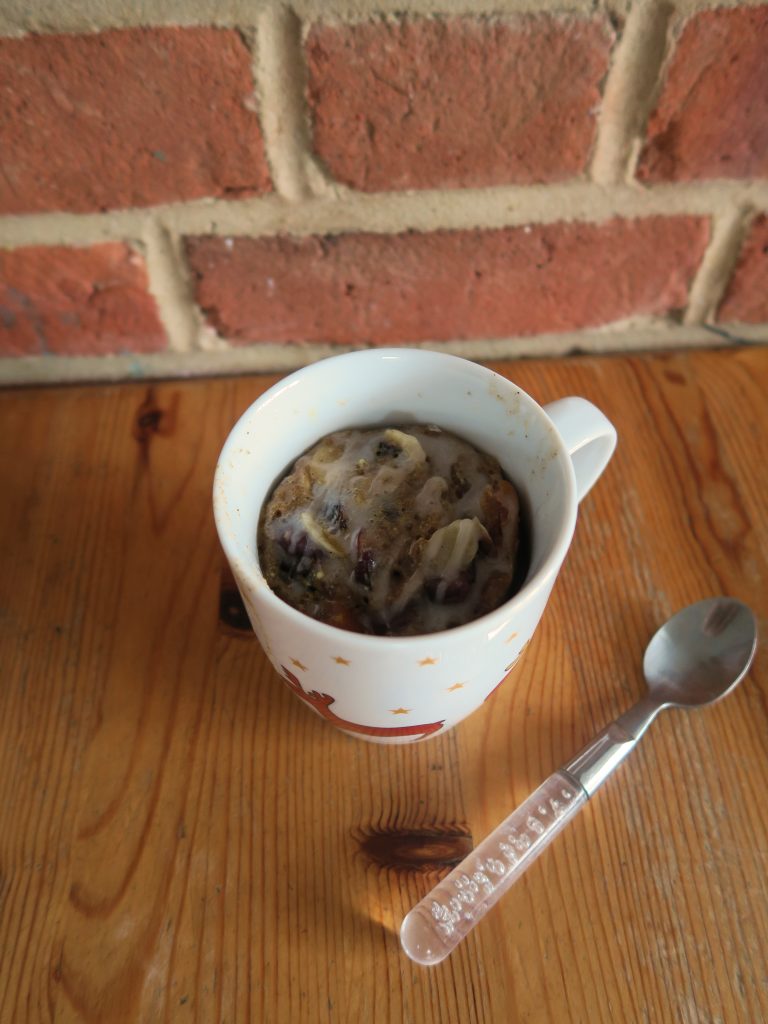
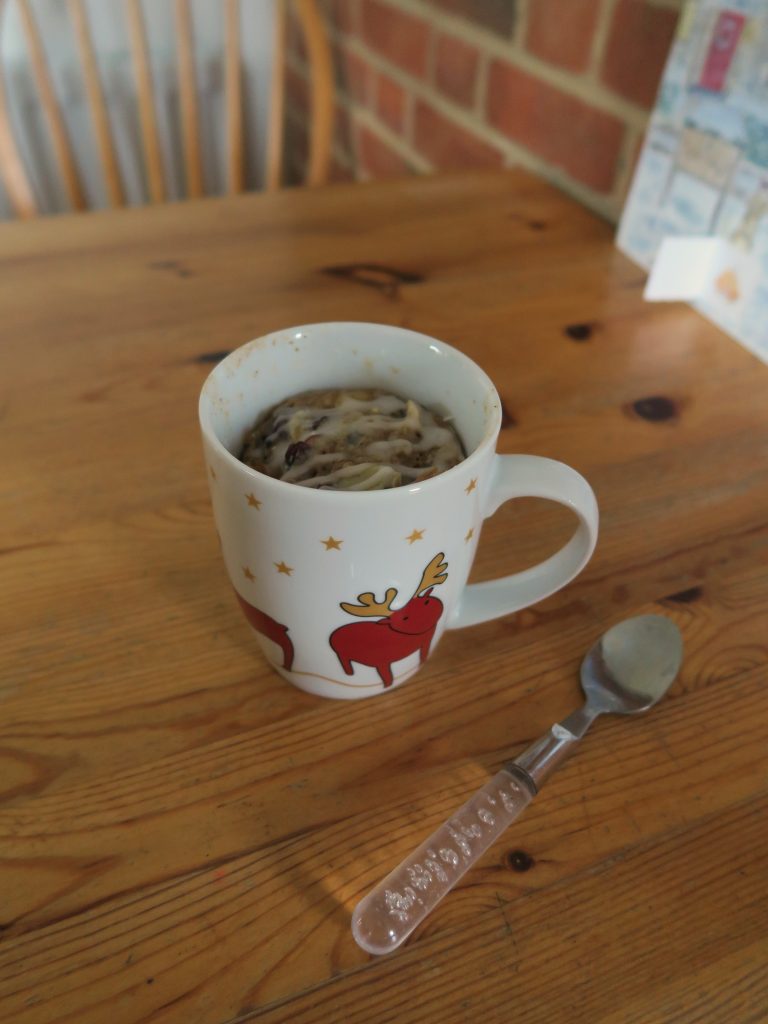
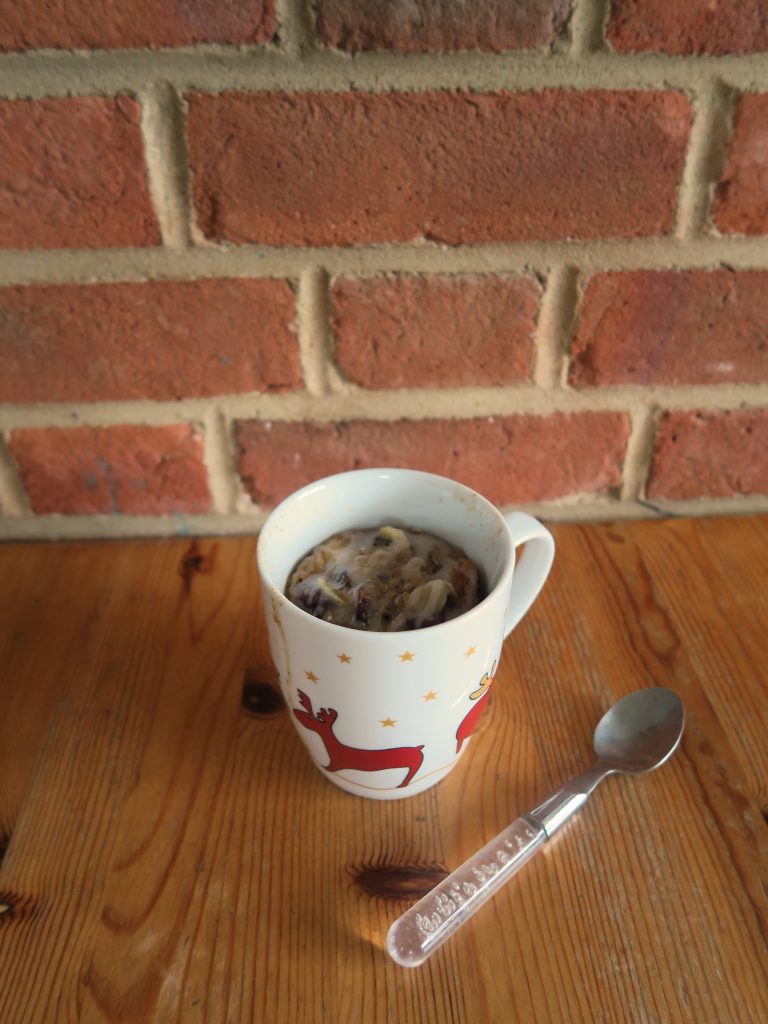
Now I love Christmas cake, I really do, but at Christmas. The spices, fruit and marzipan in a cake just seem out of place when eaten un-surrounded by Christmas trees and mistletoe. So I decided to bring the essence of the Christmas cake into a mug cake so it’s super easy to make, doesn’t require too much forethought and serves a single person! All the spices, all the fruit, all the booze and even a chunk of marzipan in the middle, but none of the paph and palava.

Recipe

Serves 1

Time: 10 minutes

Ingredients

  • 1 tbsp Butter
  • 1 tbsp Brandy
  • 1 tsp Dried cranberries
  • 4 tbsp Raisins
  • 4-5 Dried Apricots
  • 1 Egg
  • 3 tbsp Brown sugar
  • ½ tsp Mixed spice
  • ½ tsp Ground cinnamon
  • 1 tsp Vanilla extract
  • 1 tbsp Self raising flour
  • Pinch of salt
  • 1 tbsp Glace cherries (about 5-6)
  • 2 tbsp Almond, roughly chopped
  • 25g Marzipan

To decorate

  • 1 tbsp Icing sugar, mixed with ½ tsp water
  • 1 tbsp Apricot jam (optional)

Method

  1. Grease a 350ml mug with butter.
  2. Put the butter, brandy and fruit into a mug and microwave for 10-20 seconds until melted.
  3. Add the egg, sugar, spices, and vanilla and beat together with a fork.
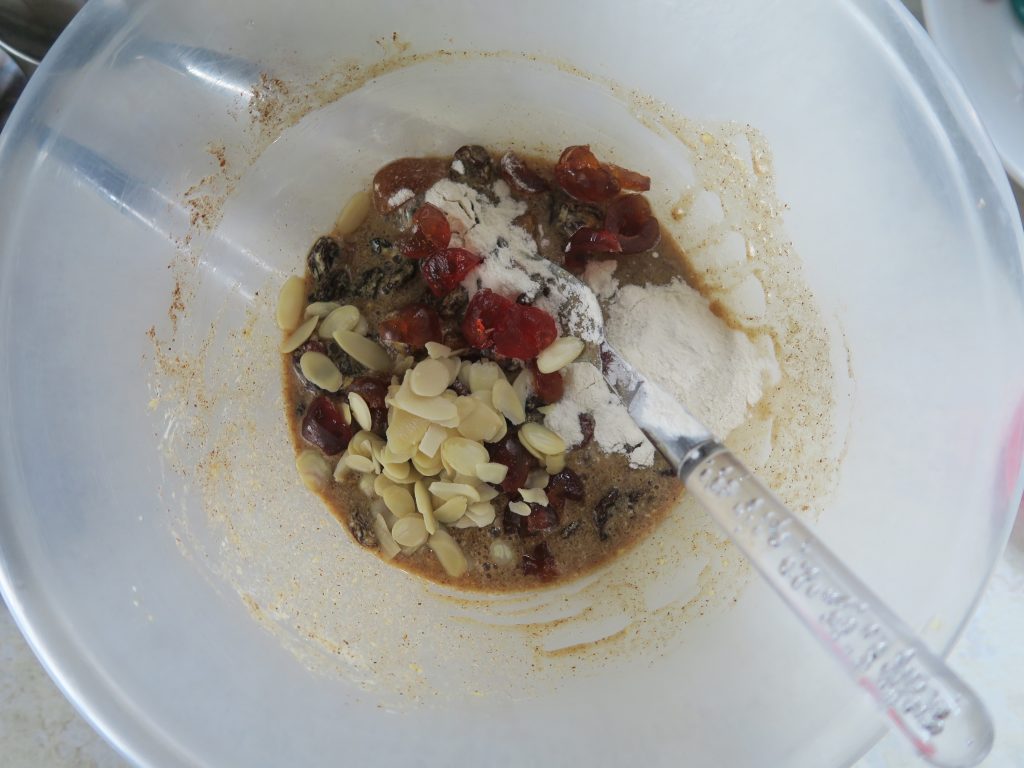
  4. Add the flour, salt, cherries, and almonds to the mixture and mix until combined.
  5. Roll the marzipan into a ball and push it into the centre of the cake.
  6. Cook the mug cake for 3 minutes until it comes away from the sides of the mug slightly and is cooked through.
  7. Brush the cake with the apricot jam and then decorate with the icing and water mixture. Enjoy!

Thanks for reading!

Emma x

Gingerbread Cake with Lemon Curd and Cream Cheese Icing

Gingerbread Cake with Lemon Curd and Cream Cheese Icing

This might just be the most Christmasy thing I have ever made. Ginger is without a doubt the poster spice for the festive season and so ginger cake topped with a ginger bread house, little trees and a good dusting of icing sugar is pretty much an edible version of Lapland. This was really fun to make but it wasn’t without it’s faults. For example, I learnt things like:

  1. Sometimes gingerbread can be too thick.
  2. Don’t pipe icing that’s too runny onto a sloped surface. As much as you tell yourself it will succumb to the laws of gravity and drip sadly off the sides of your house, forming a pool of sugar tears next to it.
  3. Even if your cakes are completely cool make sure your kitchen isn’t too hot when icing your cake. Those of you following my Instagram may have seen the effects of heat + cream cheese frosting with the image of my cake ‘rustically deconstructed’ across my kitchen table, where it slid whilst I was washing up.

So yeah, this didn’t go entirely to plan, but it still tasted amazing and I managed to get a few decent photos before it self deconstructed! As with all big cakes this can feed an army so it’s perfect for any Christmas parties or celebrations coming up.

Recipe

Serves 12

Time: 2 1/2 hours

Ingredients

For the cake

  • 150g Butter
  • 300g Self raising flour
  • 1 tsp Bicarbonate of soda
  • 4 tsp Ground ginger
  • 2 tsp Ground mixed spice
  • 1 tsp Ground cinnamon
  • 150g Muscovado sugar
  • 280g Golden syrup
  • 300ml Whole milk
  • 1 Large egg

For the gingerbread house

  • 175g Dark muscovado sugar
  • 85g Golden syrup
  • 100g Butter
  • 350g Plain flour
  • 1 tsp Bicarbonate of soda
  • 1 tbsp Ground ginger
  • 1 tsp Ground cinnamon
  • 1 Egg, beaten
  • 200g Icing sugar

For the icing

  • 150g Cream cheese
  • 300ml Double cream
  • 3 tbsp Icing sugar
  • 1 tbsp Stem ginger syrup (optional)

For the decoration

  • 4 tbsp Lemon curd
  • 2 tbsp Caramel
  • A large pinch of Sea salt
  • Icing sugar for dusting

Method

  1. Heat the oven to 180˚C. Grease and line 3, 20cm round tins with butter and baking paper.
  2. Put the flour, bicarb, ginger and mixed spice into a large bowl. Add the butter and rub it into the flour with your fingers until there are no lumps.
  3. Put the sugar, golden syrup and milk into a pan and heat gently until the sugar dissolves, stirring occasionally. Bring the mixture just up to the boil.
  4. Pour the warm mixture into the dry mixture and whisk together. Add the egg and then mix in. The mixture should resemble a thick pancake batter.
  5. Pour the mixture into the three lined tins (about 400g into each tin) and then bake in the oven for 50 minutes – 1 hour until baked all the way through. A skewer inserted into the middle should come out clean. Leave to cool until needed.
  6. Now make the ginger bread house. Put the sugar, syrup and butter into a pan. Bring to a gentle simmer whilst stirring until the sugar has dissolved. Leave to bubble for 1-2 minutes and then leave to cool for 5-10 minutes.
  7. Put the flour, bicarb and spices into a bowl. Add the egg, syrup mixture and stir together to form a soft dough.
  8. Wrap the dough in cling film and leave in the fridge for 30 minutes to firm up.
  9. Take the dough out of the fridge and roll out between two sheets of clingfilm. You want it to be about half the thickness of a £1 coin. Using the templates (below) cut out the pieces of the house you need.
  10. Place the pieces onto a lined baking tray and bake in the oven for 10-15 minutes until starting to slightly brown at the edges. Leave to cool before icing.
  11. Mix the icing sugar and 2 tbsp water in a small bowl and then transfer it into a piping bag with a small round nozzle.
  12. Pipe icing around the edge of your gingerbread pieces. Then join the four sides of the house together. Add the roof to the house and then decorate each panel how you want. Leave the house at room temperature for a couple of hours so that the icing has time to set.
  13. Now make the filling. Put the cream cheese, cream, icing sugar, and ginger syrup (if using) into a big bowl and whisk together until it starts to hold its shape and is smooth. Then spoon the mixture into a piping with a large round nozzle. Keep chilled until needed.
  14. When the cakes have cooled completely and your house is ready you can start assembling. Place one of the cakes on a plate or board. Spread over ½ the lemon curd and then pipe blobs of the icing over the sponge. Then drizzle 1/3 of the caramel over the icing.
  15. Place another sponge on top and repeat with the icing and caramel. Then finish by putting the last sponge on top.
  16. Pipe the rest of the icing in blobs over the top of the cake. Spoon the rest of the caramel over the icing, letting it drip over the edge.
  17. Top with the mini ginger bread house, any Christmas decorations you like and a sprinkling of icing sugar!

Thanks for reading!

Emma x

Gingerbread House Template:


Tiramisu Cake

Tiramisu Cake

So my first term at Oxford has come to an end and oh boy has it been a term. I’ve switched degrees, become a vegetarian and have made some incredible friends (miss you already btw!). Just before we left we had a big birthday celebration dinner thing for my friend Kat and so I made this tiramisu cake for dessert!

I love baking things for people’s birthdays as it always puts the best look on their face and you can personalise what you make to fit the person! I’ve topped this one with chocolate decorations of an elephant in a little woodland as Kat loves elephants, but you can pipe your decorations to look like anything. To make these ones I got a picture of an elephant up on my phone and then placed a sheet of baking paper over my phone so that I could see the outline underneath. Then I just piped over the top following the lines. A top tip with this is make sure that the piping is thick enough so that you can peel the shapes off the paper without it breaking (RIP too many thin elephants!).

Recipe

Serves 16

Time: 2 hours

Ingredients

For the cake

  • 240g Caster sugar
  • 240g Butter
  • 4 Eggs
  • 250g Self raising flour
  • 2 tbsp Coffee powder
  • 2 tbsp Milk
  • 1 tbsp Cocoa powder

For the filling

  • 750g Mascarpone cheese
  • 300ml Double cream
  • 3 tbsp Icing sugar

To Decorate

  • 100g Dark chocolate
  • 1 tbsp Instant coffee powder
  • 1 tbsp Milk
  • Cocoa powder to dust

Method

  1. Pre-heat the oven to 180˚C. Grease and line a square tin with butter and baking paper.
  2. Put the butter and sugar into a bowl and beat with a wooden spoon until pale and creamy.
  3. Add the eggs one by one to the mixture, whisking in between each addition until combined. Add the flour and whisk again to make a smooth batter.
  4. Put the coffee and milk into a small bowl and stir until the coffee dissolves. Add the coffee to the cake mixture and mix until combined.
  5. Pour the mixture into your lined tin and then bake the cake in the oven for 15-20 minutes until risen and golden brown – a skewer inserted into the middle should come out clean.
  6. Transfer the cake to a wire rack and leave to cool before taking it out of the tin.
  7. Now make the chocolate decorations. Put the chocolate in a bowl over a pan of gently simmering water. Leave to melt and then pour into a piping bag with a very small, round nozzle.
  8. Take a sheet of baking paper and either draw your design onto the paper with a pencil and then turn it over so you can see the design on the back, or use your phone as a light box to shine a design through the paper from underneath.
  9. Carefully pipe the chocolate over your designs and then leave to set completely (not in the fridge as it’ll go white and horrible!).
  10. To make the cream filling put the mascarpone, cream and icing sugar into a large bowl and whisk together until smooth and creamy. Spoon the mixture into a piping bag fitted with a star shaped nozzle.
  11. When the cake has cooled take a sharp knife and cut the cake in half horizontally. Dissolve 1 tbsp coffee in the milk and then brush the coffee evenly over the two sponges.
  12. Place the bottom half on the board or plate you’ll present it on. Pipe blobs of the cream over the cake. Then top  with the other cake half and pipe the rest of the cream over the top.
  13. Carefully peel your chocolate decorations off your baking paper and arrange them over the top of the cake. Finish with a dusting of cocoa powder and serve!

Thanks for reading!

Emma x