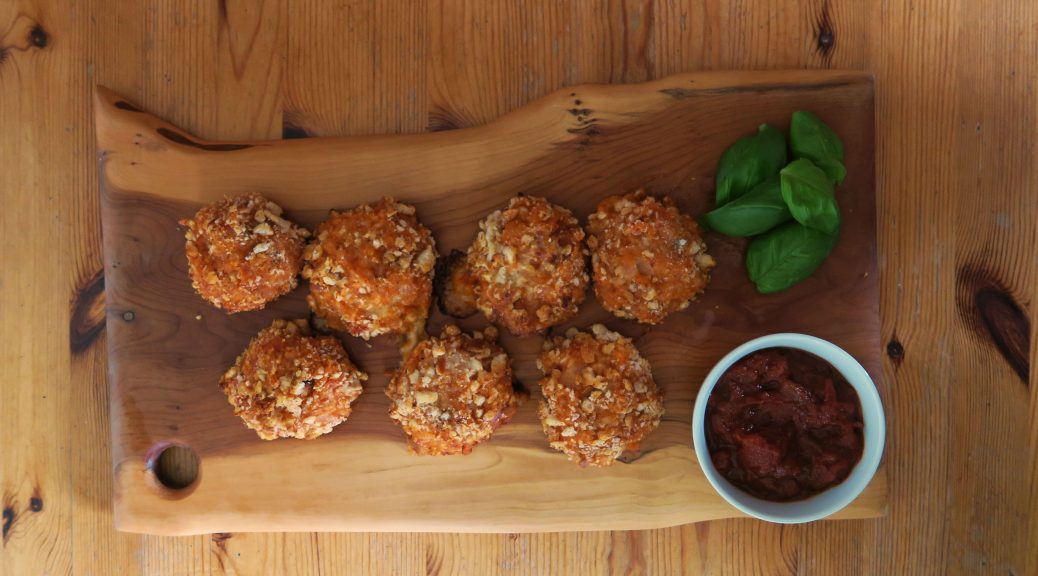
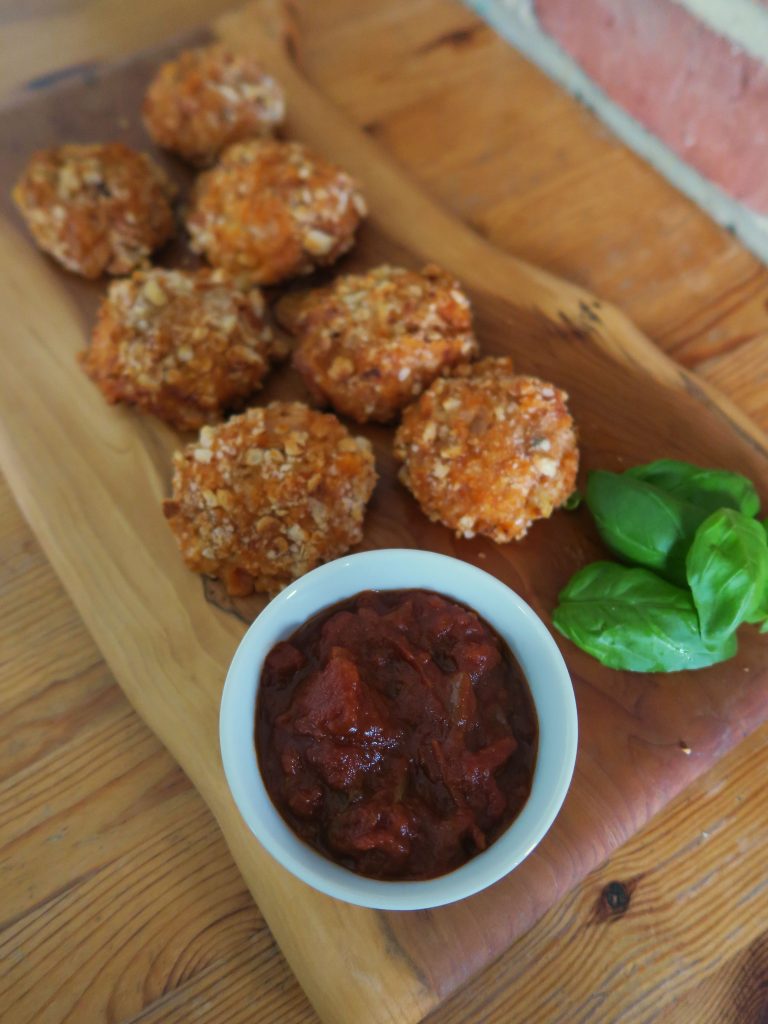
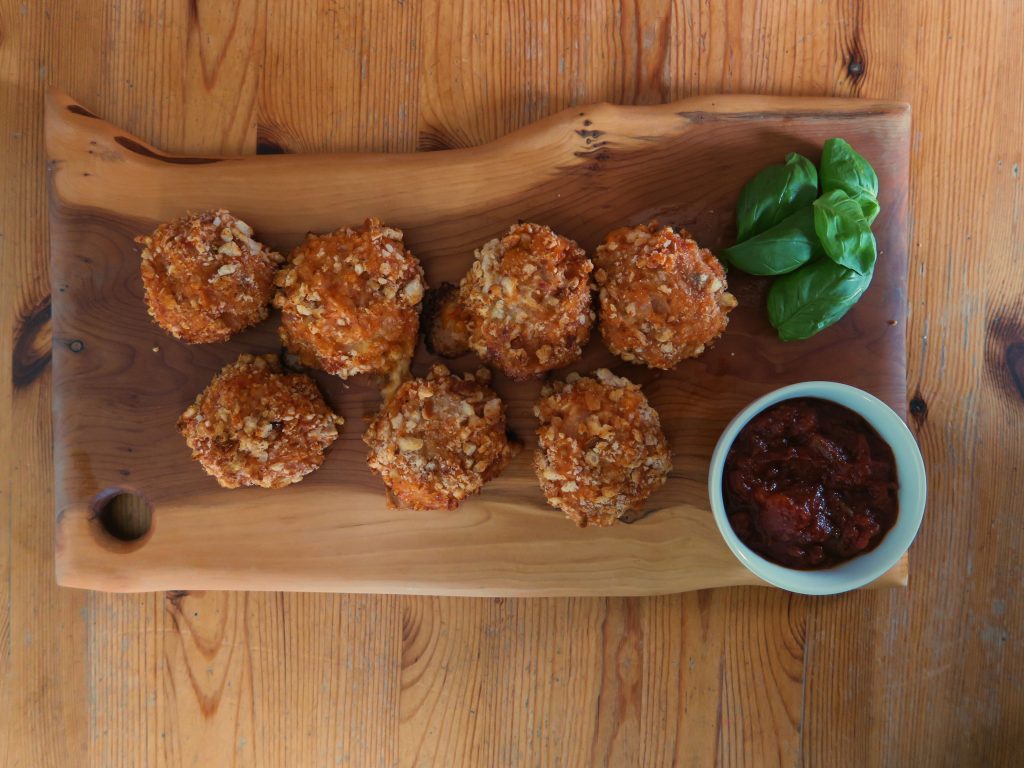
Oven Baked Arancini with a Spicy Tomato Sauce
I kid you not when I say that this is the most delicious savoury thing I’ve ever made. I’m a sucker for Italian food in general so maybe I’m biased but these Italian crispy risotto balls are out of this world – try them yourself and you will not be disappointed! Combine a rich, tomato-y squidgy rice ball, coated in crispy bread crumbs and stuffed with oozying mozerella, with a side of a sweet, sour, spicy tomato sauce and bam, you’ve got one hell of a starter/maincourse/snack thing. Arancini are traditionally deep fried, but as I don’t have a deep fat fryer I decided to try oven-baking them and I think it worked out really well. You still get the crispy, crunchy outside to the arancini but without the added calories and grease of deep-fat frying.
On another exciting note I’m officially going to Italy this summer on an inter-railing trip with some friends. We’ll be starting in Rome and will wind our way north, soaking up the beauty and of course trying all the food we can on the way! Needless to say I’m more than a little excited at the prospect of pizza, pasta, risotto, tiramisu, and mountains of gelato so I’ll come back with lots of Mediterranean inspiration for future recipes. If you have any recommendations for foods to try/places to stop off please ping them my way!
Recipe
Serves 4
Time: 90 minutes
Ingredients
- 600ml Vegetable stock (or 1 vegetable stock cube in 600ml water)
- 50g Unsalted butter
- ½ Large white onion, diced
- 1 Bay leaf
- 200g Arborio rice
- 260ml Bolognese sauce
- ½ tbsp Garlic puree
- 50g Parmesan, grated
- 80g Mozzarella, torn in chunks
- 2 Egg whites
- 100g Bread crumbs
For the sauce
- ½ Large white onion
- 1 tsp Olive oil
- 1 tsp Cayenne pepper
- 1 tsp Smoked paprika
- 75ml Balsamic vinegar
- 20g Caster sugar
- 1.2kg Chopped tomatoes
- 1 Bay leaf
- ½ tsp Thyme
- ½ tbsp Garlic puree
Method
- In a large pan bring the vegetable stock to the boil and leave to simmer until needed.
- Melt the butter in a large pan over a medium heat and then add the bay leaves and diced onions. Fry the onions until they just begin to caramelise, then season with a little salt and pepper.
- Add the rice to this pan and cook whilst stirring for around 2 minutes.
- Slowly add the stock to the rice, one ladle full at a time, constantly stirring as you do. Keep doing this until the rice is sticky and just overcooked.
- Then add the Bolognese sauce to the rice and mix it in. Remove the pan from the heat and set to one side until needed.
- Stir the garlic, parmesan and mozzarella into the risotto and then take the bay leaves out of the mixture. Taste to check the seasoning and then pour the mixture into a large tray and leave to cool.
- Break the egg whites into a bowl and beat a little with a fork to make it runny. Then pour the breadcrumbs into a separate bowl. Shape the rissotto mixture into small balls – about 1 heaped tbsp for each one. Dip each ball into the egg whites and then the breadcrumbs, making sure they are coated fully and then put them on a tray in the fridge until needed.
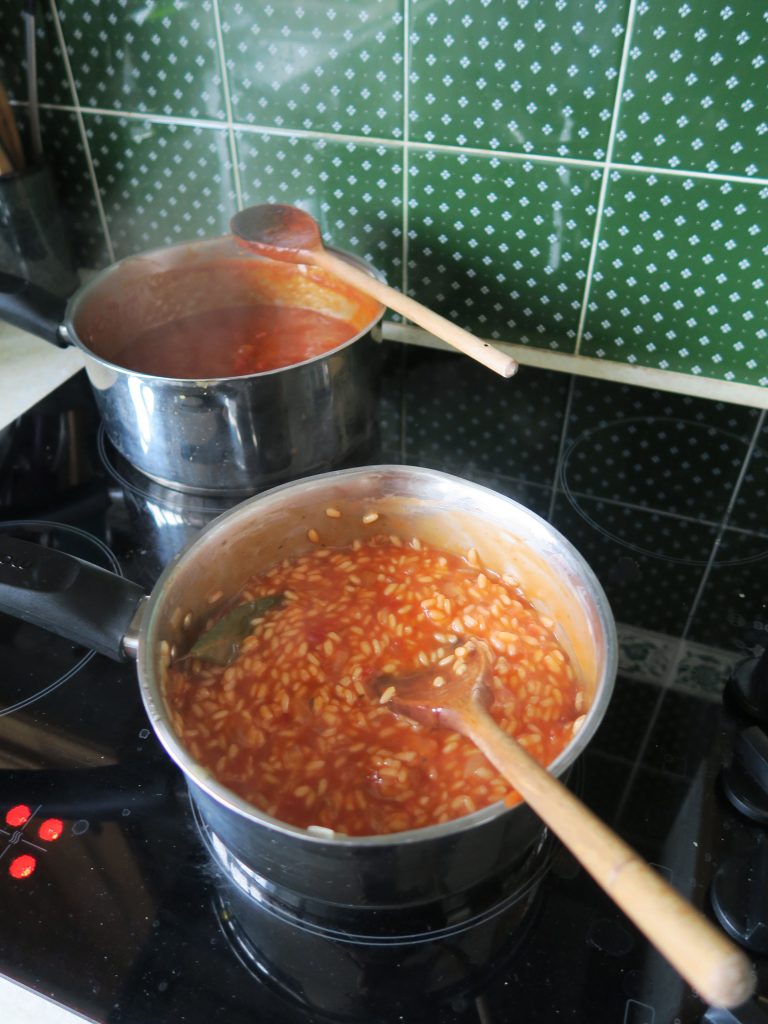
- Now make the tomato sauce. Peel and then dice the onions. Add them to a pan with the olive oil and fry until caramelised.
- Add the pepper and paprika to the mixture and stir. Add the balsamic and sugar and stir them in. Then leave to reduce for a couple of minutes.
- Add the chopped tomatoes, bay leaves, thyme, and garlic puree to the mixture and stir. Then leave to simmer for a couple of hours until reduced and thick. (You could boil it for less time but you get the best flavour if you leave it to properly reduce).
- Once the sauce is almost ready pre-heat the oven to 180C. Place the arancini on a lined baking tray and bake them in the oven for around 20 minutes until crisp, golden brown and so that the cheese is bubbling.
- Taste the sauce again and season to taste before serving with the arancini balls.
Thanks for reading!
Emma x