Tag: Baking

Kanellangd – Cinnamon Buns

Kanellangd – Cinnamon Buns

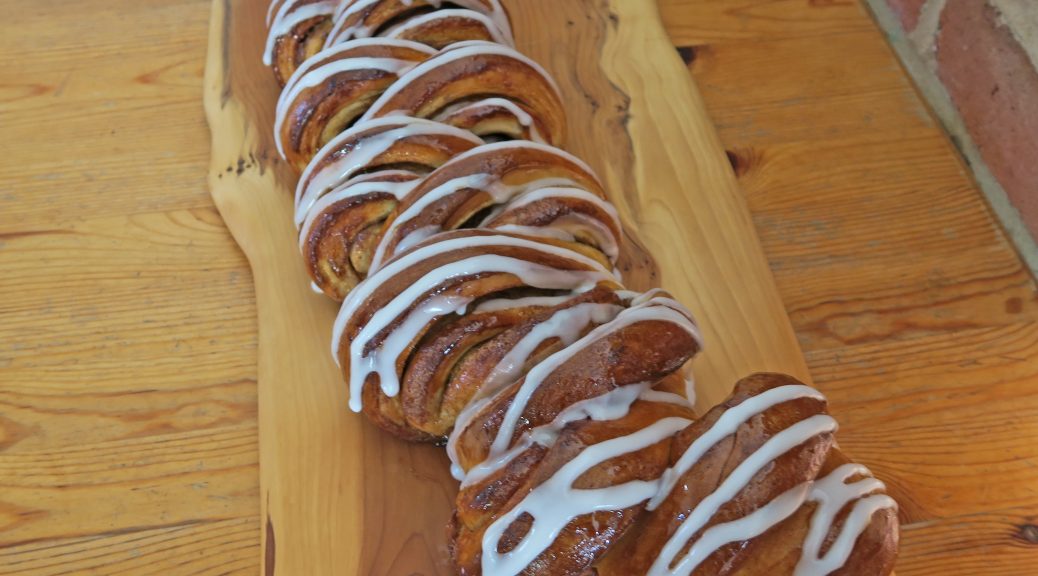
It’s December and so Christmas bakes are officially allowed! This means we have a month of sugar, spice and all things nice coming up. I’m carrying on with the theme of foreign baking, from last week’s kaiserschmarrn to kanellangd this week. Now you might be asking am I becoming obsessed with weirdly named dishes no one’s ever heard of before? Well yes, but bare with me. This one is a Swedish version of cinnamon buns, where it’s pretty much the same except for the beautiful shaping. All the buns are baked attached together as a loaf, rather than as a batch bake in a tin, and so you end up with this really cool shaped bake. Essentially though you still get the sweet cinnamony fluffy buns smothered in icing which we all love.
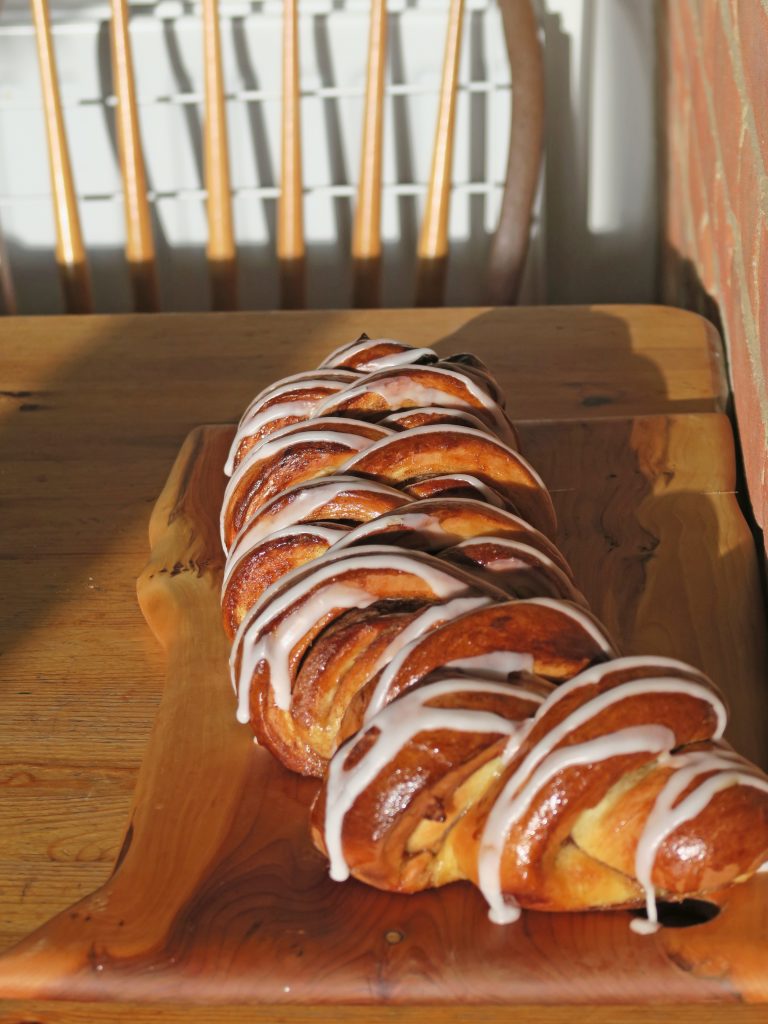
This takes a bit of time to make, but as with lots of my recipes recently, it’s not time you have to spend working on it, you just need to leave it a lot to rise and bake so that you get the perfectly light texture. On the one hand this can be really annoying as you just want to tuck into this delish loaf, but then again, if you have little pockets of time in a day this can be the bake for you. When making anything remotely bready I tend to do a step and then when leaving it to prove I’ll do some work before coming back to it later on, so don’t let the long resting times put you off as you can get stuff done in those times.

Recipe

Makes 1 loaf

Time 1 hour, plus time for proving

Ingredients

For the dough

  • 80g Unsalted butter
  • 260ml Full fat milk
  • 480g Strong plain bread flour, extra for dusting
  • ½ tsp Mixed spice
  • 6g Salt
  • 7g Instant yeast
  • 40g Caster sugar
  • 1 Egg (10g for dough and the rest for glazing)

For the filling

  • 75g Unsalted butter
  • 1 tsp Vanilla bean paste
  • 1 tbsp Ground cinnamon
  • 80g Caster sugar

For the glaze

  • 50g Caster sugar
  • 50ml Water

For the icing

  • 125g Icing sugar
  • 1 tbsp Water

Method

  1. Firstly make the dough by putting the butter and milk into a saucepan and melt gently.
  2. Put the flour and mixed spice into a bowl. Then add the salt and yeast on separate sides of the bowl (putting them in direct contact of each other will kill the yeast). Then add the butter, milk, sugar and 10g of the egg (keep the rest for glazing).
  3. Using a spatula at first, mix everything together. When it starts to come together go in with your fingers until a dough forms.
  4. Lightly flour a work surface, tip out the dough and then knead for around 10 minutes until smooth, elastic, and soft. Form the dough into a ball and put into a lightly oiled bowl. Cover with clingfilm and then leave to rise for about an hour, until doubled in size.
  5. Meanwhile make the filling. Put the butter and vanilla into a bowl and beat until smooth and spreadable.
  6. Put the sugar and cinnamon into another bowl and mix until fully combined.
  7. Pre-heat the oven to 200˚C and line a long baking tray with baking paper.
  8. Tip the dough out onto a lightly floured surface and knead a little to knock back.
  9. Roll the dough out to a 25x35cm rectangle, making sure the long edge is facing you. The dough will resist being rolled and will spring back into shape but persevere. Tack the far edge down onto the work surface by pushing the dough into the worktop.
  10. Spread the butter mix over the dough and then sprinkle the cinnamon sugar evenly over the top. Roll the dough up like a swiss roll from the edge nearest to you to the tacked down edge. Transfer to the lined tray.
  11. Take a pair of sharp scissors and cut 15 slices into the roll, making sure you don’t cut all the way through. Pull the slices to alternative sides to make the cool shape. Loosely clingfilm the dough and leave to prove again for 20-25 minutes, until the dough springs back when pressed lightly.
  12. Meanwhile make the sugar syrup. Put the sugar and water into a small pan and bring to the boil. Leave to reduce by half and then set to one side (it’ll thicken up even more once cooled down).
  13. Brush the loaf with the rest of the beaten egg and bake for 20-25 minutes until golden brown and soft. If it starts to brown too much cover with foil to stop it burning.
  14. Now make the icing. Put the icing sugar and 1 tbsp water into a bowl and mix to make a semi-thick icing. If it’s too thick add more water a little dribble at a time until you have a pourable mixture which still holds its shape.
  15. Take the loaf out of the oven and leave on a wire rack to cool. Brush with sugar syrup whilst it’s still warm, and then, once completely cool, drizzle with the icing. Serve and enjoy!
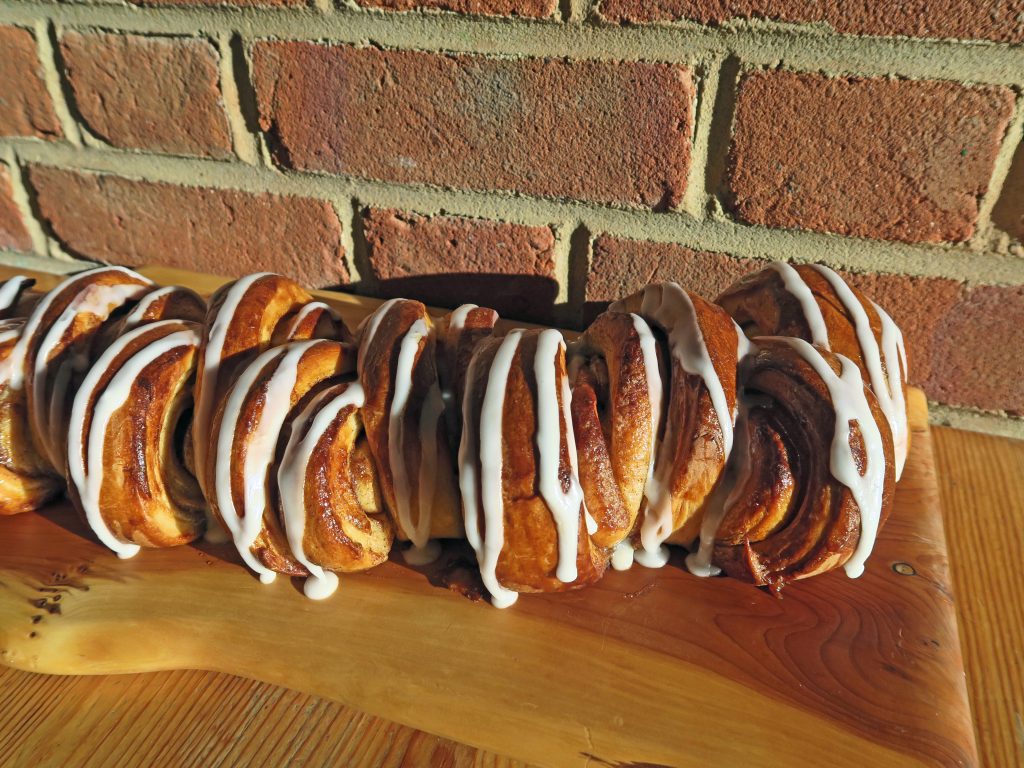
Thanks for reading! More Christmas bakes coming very soon…

Emma x
Kaiserschmarrn with Spiced plums

Kaiserschmarrn with Spiced plums

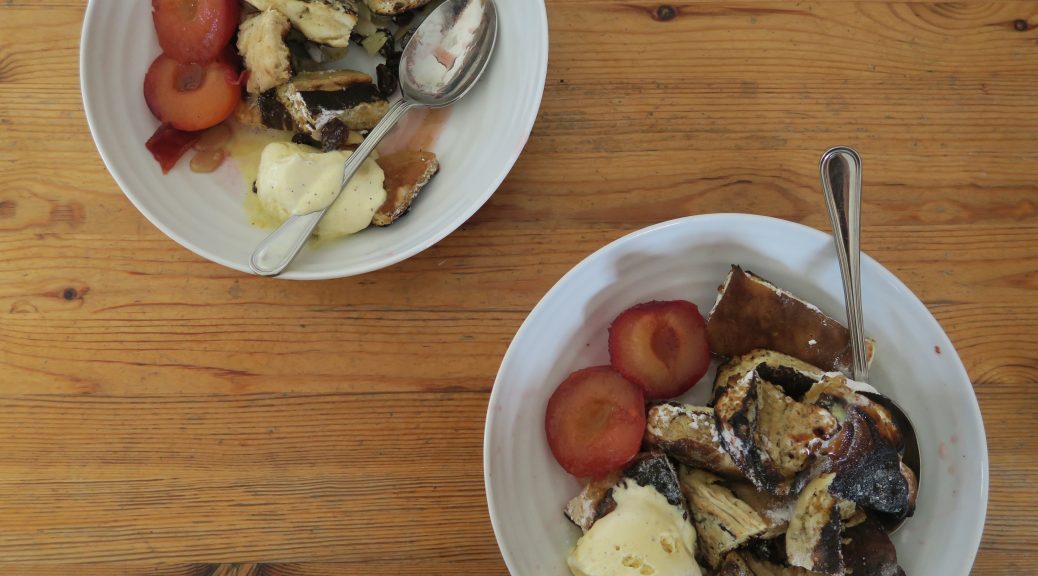
We’re almost into the excitement of Christmas, but here’s one last autumn recipe before the winter warmers come in. I first came across Kaiserschmarrn when I was browsing in the cook book section in a massive book shop. I’ve always loved foreign dishes that I haven’t heard of before, and so I made a note to look it up when I got home. It’s not the prettiest or most refined of dishes, but it tastes really good which is just as important. If you’re not Austrian, Kaiserschmarrn essentially means cut up pancakes with rum and dried fruits. It’s then sprinkled with sugar and put under the grill to caramelise. All in all this elevates the classic pancake to a perfectly delicious dessert.

I’ve paired this with spiced plums, as the first time I made it it came out pretty dry. The plums and the juices from them hydrate the dish and bring some warming fruity flavours which work really well with the soft pancakes and rum. I think traditionally this is made with thin pancakes, more similar to a french crepe, but I’m using thick Scotch pancakes for this as I think the light, fluffy texture works really well. They also soak up the juices and rum a lot better, but you can go for crepes if you prefer.

Recipe

Serves 8

Time 45 minutes

Ingredients

For the pancakes

  • 300g Self-raising flour
  • 1 ½ tbsp Baking powder
  • 60g Caster sugar
  • 2 Large eggs
  • 200ml Milk
  • Vegetable oil for greasing
  • 4 tbsp Rum
  • 190g Raisins
  • 80g Butter
  • 100g Flaked almonds
  • 2 tbsp Icing sugar
  • 1 tsp Ground cinnamon

For the plum sauce

  • 8 Plums, halved and stoned
  • 125g Caster sugar
  • 65ml Orange juice
  • 65ml Water
  • 1 Cinnamon stick
  • 1 Vanilla pod

Method

  1. Begin by making the pancakes. Put the flour, baking powder and caster sugar into a bowl. Mix to combine and then make a well in the centre. Add the egg and milk in the well and then whisk until combined and smooth.
  2. Put a large frying pan with 1 tbsp of vegetable over a medium heat. Using a ladle pour a neat circle of batter into the middle of the pan. Leave to cook for 1-2 minutes, until bubbles start to form on top, and then turn over and cook on the other side.
  3. Once cooked on both sides transfer onto a large plate. Repeat with the rest of the mixture to create a large stack of pancakes.
  4. Cut the stack of pancakes into 5 strips and then cut these strips into 5 to get squares.
  5. Now make the spiced plums. Put the all the ingredients for the sauce in a pan over a high heat. Bring to the boil, cover with a lid and then leave on a low heat to gently simmer until the plums soften – about 20 minutes.
  6. Take the sticks and vanilla pod out of the pan and then set aside for later.
  7. Now finish the kaiserchmacchan. Heat the rum in a small saucepan. Add the raisins and then leave off the heat to soak.
  8. Pre-heat the grill on high heat. Melt the butter in a large frying pan. Add the pancake squares, the raisins and rum mix, and the almonds. Cook for 3-4 minutes whilst stirring until warmed through and starting to brown.
  9. Sift the cinnamon and icing sugar over the top and then put under the grill. Once the sugar starts to caramelise, take out from under the grill and serve immediately with the plums and vanilla ice cream.

Thanks for reading!

Emma x

Pear Tart Tatin

Pear Tart Tatin

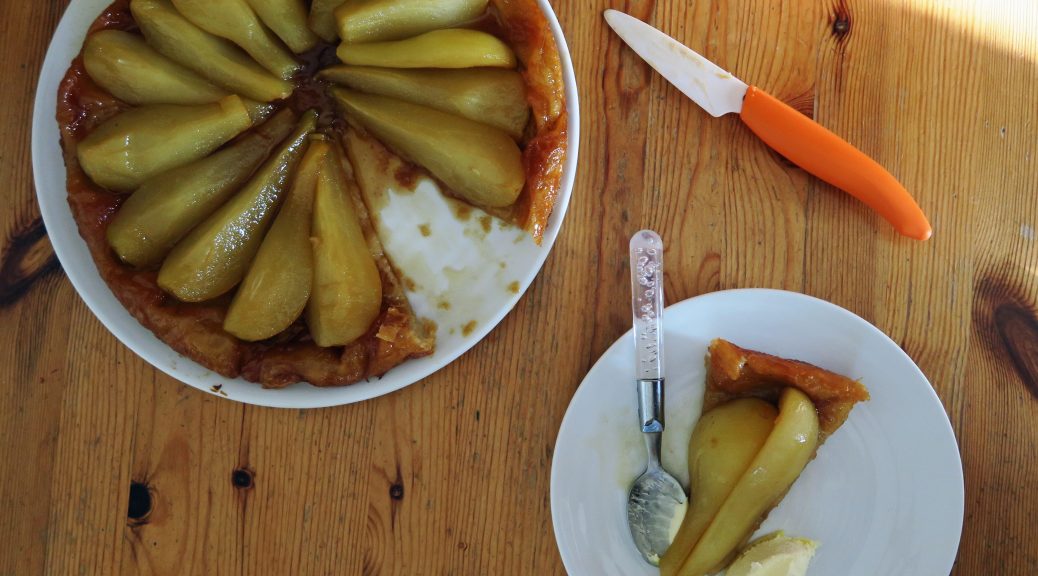
Here’s another french classic – pear tart tatin. Soft, juicy pears, sticky caramel and crisp, caramelised pastry – it’s a classic for a reason. Unlike most tarts, this one’s unusual as it’s baked upside down. The caramel is made in the pan, then the pears go on top, the pastry on top of that, and then it’s all whopped in the oven. Then when it comes out it’s turned over to show the deliciously caramelised pears. As well as giving the pastry a beautiful flavour, this way of cooking it all also helps to keep the pastry crisp, as the juice from the pears doesn’t have the chance to rest on the pastry when it’s in the oven, and make it soggy.

The first time I ever made this I used shop bought puff pastry and roughly chopped apples. These are two great alterations to make if you want to save time or if you’re just starting to learn how to bake. On the other hand, if you haven’t made your own puff pastry before I’d recommend giving it a go. It takes a bit of time, but it’s not so much time that you have to work on it, more just that you have to leave it a lot to chill in between turns. This recipe is for rough-puff which is a slightly easier and quicker variation on full-puff pastry, but it still gives a beautiful light and crispy pastry.

Recipe

Serves 8

Time: 2 hours (plus time for chilling) – much shorter if using shop bought puff pastry

Ingredients

For the rough-puff pastry

  • 225g Plain flour
  • ½ tsp Salt
  • 250g Unsalted butter, cut into small cubes
  • 150ml Cold water

For the Filling

  • 3 tbsp Water
  • 100g Caster sugar
  • 60g Unsalted butter, diced
  • 4 Conference pears, peeled, cored and quartered

Method

  1. Put the flour and salt into a large bowl. Add the cubed butter and stir until each piece is coated in flour, trying not to break the butter up too much.
  2. Pour in the water and then stir with a round-bladed knife to bring the dough together.
  3. Turn the dough out onto a floured surface and shape into a rough rectangle. Wrap in clingfilm and then chill in the fridge for 15-20 minutes.
  4. Roll the pastry out onto a floured surface into a long rectangle until about 1cm thick. Fold the bottom third up onto the middle third of the pastry. Then fold the top third down onto the other two thirds to make a block one third of the original long rectangle.
  5. Turn the pastry 90˚ so that the folded edge faces you, not the smooth edge. Press the ends down with a rolling pin to seal. Chill in the fridge for another 15 minutes.
  6. Repeat steps 4-5 another 4 times.
  7. Chill the pastry in the fridge for at least an hour, ideally overnight.
  8. When the pastry is ready you can begin to assemble. In a large frying pan (which can go in the oven) put the water and caster sugar. Leave for 5 minutes so that the sugar absorbs the water.
  9. Put over a medium heat and gently bring to the boil. Leave until a golden caramel forms – be careful not to stir during this process and the sugar will crystalize. Add the butter and stir to melt and combine. Leave to cool slightly.
  10. Meanwhile roll out the pastry on a floured surface until about the thickness of a pound coin. Cut out a circle 2cm wider than the diameter of the pan.
  11. Add the peeled and cored pears to the caramel in a spiral, all facing the same way. Then add the pastry on top, pressing the excess around the side of the pears so that the pastry snuggles everything in.
  12. Put into the oven and bake for 20-25 minutes until golden brown and crisp.
  13. Once ready take it out of the oven and get ready to turn it out. Take a toasting tin or large bowl and a large plate. Put the plate over the pan so that when turned over the tart will be on the plate. Hold the pan and plate together, and turn 90˚ over the roasting tin to let the juices drain – this will prevent the pastry from going soggy when turned out. Once the juices have stopped dripping, turn over completely, tap a bit to release and then take the pan away.
  14. Serve immediately with double cream or ice cream.

 Thanks for reading!

Emma x


Mississippi Mud Pie

Mississippi Mud Pie

It’s thanksgiving tomorrow, and how better to celebrate it than with a huge Mississippi mud pie. Being a Brit I don’t normally celebrate, or even know when thanksgiving is. Yet luckily last Sunday I was at one of my drama rehearsals, and when we were trying to work out who was free for a rehearsal this Thursday a fellow cast memeber, who’s American, replied ‘yes, even though it’s Thanksgiving’. The convo then spiralled off into talks of pumpkin pie and pastry crusts, but this got me thinking.  Why not look into classic American dishes and make one to celebrate? I know Mississippi Mud Pie isn’t strictly traditional for thanksgiving, and the Americans out there will be gritting their teeth that I haven’t made a pumpkin or pecan pie. But personally I find the later overly sweet and not suited to my British palette, whereas this chocolate binge of a pie is heaven on a plate to me.

I’m not sure why it’s called Mississippi mud pie – the name unfortunately doesn’t do the dish justice. I’ve been skipping past it in cook books for years, not even looking to see what it is, and stupidly I think it’s probably because of the name. There have been many variations from the original, but it’s essentially a chocolate biscuit base, a gooey chocolate brownie on top, then a smooth chocolatey creamy mousse thing, and finally topped off with freshly whipped cream. I’m a huge chocoholic, and as I was making this I was getting way too excited with each layer I was putting on. You might be looking at it and thinking that’s way too much chocolate, but it’s actually not overpowering. Think of it as an ombre cake where each layer is slightly more subtle than the last. The Oreo and Bourbon base is really rich, then the brownie is slightly sweeter and less rich, then the next layer is chocolatey and creamy, and the top layer of cream is a great break from the chocolate.

With the days getting darker at the moment I’m constantly struggling to make my dishes before the light dims and so I was a little rushed making this. As I wanted to photograph this before the natural light started to go, to avoid the yellow wash that comes from my kitchen lights, I took it out of the mould after only two hours of resting. When you read the recipe you’ll see that I recommend at least 4 hours, or even better overnight, which is why in some of the pictures the chocolate filling is pouring out everywhere. Trust me though, if you leave it for long enough it will set and look beautiful when cut. I left mine in the fridge over night and this morning the chocolate filling had set and gone all beautiful, so be patient. That said, it still tasted amazing after 2 hours, so if you can’t wait, and you don’t need it to look neat and elegant when cut into, an hour is long enough for chilling.

Recipe

Serves at least 8

Time 1 hour 15 minutes, plus lots of time for chilling

Ingredients

For the Chocolate crust

  • 160g Oreos
  • 200g Bourbon biscuits
  • 100g Unsalted butter, melted, plus extra for greasing

For the Chocolate brownie

  • 150g Butter
  • 210g Dark chocolate
  • 3 Medium eggs
  • 210g Caster sugar
  • 40g Plain flour
  • 100g White chocolate, roughly chopped

For the Chocolate filling

  • 100g Dark chocolate
  • 290ml Whole milk
  • 3 Egg yolks
  • 60g Caster sugar
  • 15g Plain flour
  • 1 tbsp Cocoa powder
  • 20g Cornflour
  • 150ml Double cream

For the Topping

  • 350ml Double cream
  • 1 tsp Vanilla bean paste
  • Cocoa powder for dusting

Method

  1. Pre-heat the oven to 180˚C. Grease and line a 24cm loose bottomed cake tin with butter and baking paper.
  2. Put the biscuits into a large bowl and crush with the end of a rolling pin to make into a fine crumb. Pour over the butter and mix to combine.
  3. Tip the mixture out into the tin and smooth out into an even thickness with a spoon. Put into the oven and bake for 5 minutes to firm it up.
  4. Now make the brownie mix. Put the butter and chocolate into a bowl over a pan of simmering water and leave to melt.
  5. Take another bowl and whisk the eggs until pale and fluffy with an electric whisk. Add the sugar and continue to whisk until it leaves a trail when the whisk is taken out.
  6. Fold the chocolate into the eggs, sieve in the flour and add the chopped white chocolate. Fold everything again until combined.
  7. Pour the mixture into the biscuit case and bake again for about 15-20 minutes until a crust has formed on top and it feel slightly firm. Set aside to cool.
  8. Now make the chocolate filling. Put the chocolate into a heat-proof bowl and melt over a pan of simmering water. Put the milk into a pan and heat until just boiling.
  9. In another bowl whisk the egg yolks, sugar, plain flour, cocoa powder and cornflour until smooth. Pour in the milk whilst whisking until smooth.
  10. Pour the mixture back into the pan and cook gently until just starting to thicken. Take off the heat, stir in the melted chocolate and leave in the fridge to cool completely.
  11. Take the filling out of the fridge and whisk to break up. In another bowl whisk the double cream to soft peaks. Fold the cream into the chocolate mix and then pour this over the cool brownie. Put this into the fridge to chill for 2 hours.
  12. Finally whip up the double cream and vanilla into soft peaks. Spoon this into a pipping bag with a round nozzle and pipe in blobs over the chilled chocolate filling. Put all this back into the fridge to chill for at least another 2 hours, or even better overnight.
  13. When ready to eat, take it out of the mould and dust with cocoa powder before serving.

Thanks for reading and happy Thanksgiving for tomorrow!

Emma


Chocolate Chip Cookies

Chocolate Chip Cookies

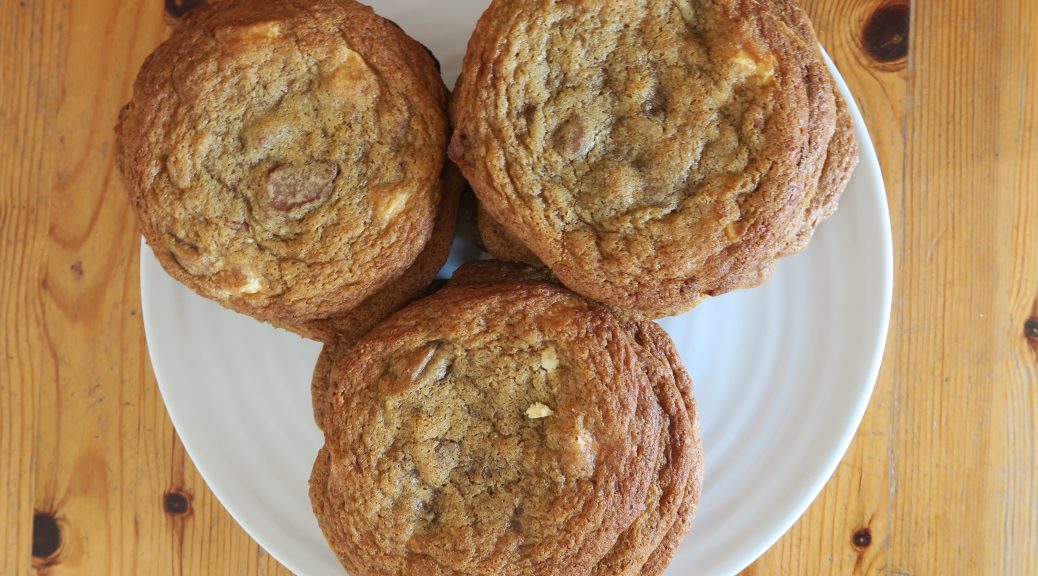
Can anything truly top a good chocolate chip cookie? Especially when they’re warm from the oven and the chocolate is just melted when you bite into them. It’s always hard with classics like these to  know which recipes will work and which won’t. The expanse of the internet means that there’s thousands of variations out there, and unfortunately too many of them result in burnt, tasteless disappointments. After some research, though, I think I’ve found the perfect combination which’ll, fingers crossed, work without fail.

I do have a couple of top tips though to make sure that they end up the best they can be. Firstly, it’s important to make sure the dough is as cold as possible before going into the oven. Why I hear you ask? Well this means that they’ll keep their shape more in the oven, which will stop them from spreading too thinly. This makes it easier to get a soft, chewy bake, rather than a crisp, burnt one. It’s also kinda obvious, but when buying your ingredients make sure you buy chocolate you like the taste of. Sometimes it can be tempting to buy super cheap chocolate to bake with, but when you have chunks of chocolate, like in this, you can really taste it. My general rule is go for a chocolate you’d be happy to eat on it’s own, that way your cookies will be super delicious.

Recipe

Makes 20

Time 25 minutes, plus time for chilling

Ingredients

  • 220g Unsalted butter, softened
  • 170g Light brown sugar
  • 150g Caster sugar
  • 1 tsp Vanilla extract
  • 2 Large eggs
  • 330g Plain flour
  • 3/4 tsp Baking powder
  • Pinch of Salt
  • 100g White chocolate, roughly chopped into chunks
  • 100g Milk chocolate, roughly chopped into chunks
  • 1 tsp Sea salt to top (it’s really worth it)


Method

  1. In a bowl put the butter, sugars and vanilla, and beat together until pale and fluffy. Using an electric mixer can help with this.
  2. Add the eggs, one at a time, to the mix and whisk together after each addition to combine.
  3. Sift the flour, baking powder and salt into the main bowl and stir to combine.
  4. Stir the chocolate chunks into the mix so that they’re evenly distributed.
  5. Turn the dough out onto some clingfilm, wrap it up and then put it into the fridge to chill for at least 2 hours. (If you’re short on time or just can’t wait put it into the freezer for 30 minutes).
  6. 20 minutes before the dough finishes chilling, pre-heat the oven to 170˚C.
  7. Line 4 baking trays with baking paper.
  8. Roll the dough out between two sheets of clingfilm (I find this easier than using a floured surface). You want the dough to be the thickness of about 2 pound coins.
  9. Using a round cookie cutter, cut out circles of the dough. Put the circles onto the baking sheets, making sure they’re well spaced out as they will spread. I put about 5-6 on each of mine. Put them back into the fridge for 30 minutes to re-chill.
  10. Take the baking trays out of the fridge and sprinkle the dough circles with the sea salt. You only want a little on each cookie, but it works wonders in bringing out the flavour.
  11. Bake in the oven for 15-20 minutes until just starting to brown at the edges and puffed up. They will feel fairly soft, but they’ll firm up some more once they’ve cooled down. Eat as soon as you can!

Thanks for reading!

Emma x