Pear Tart Tatin
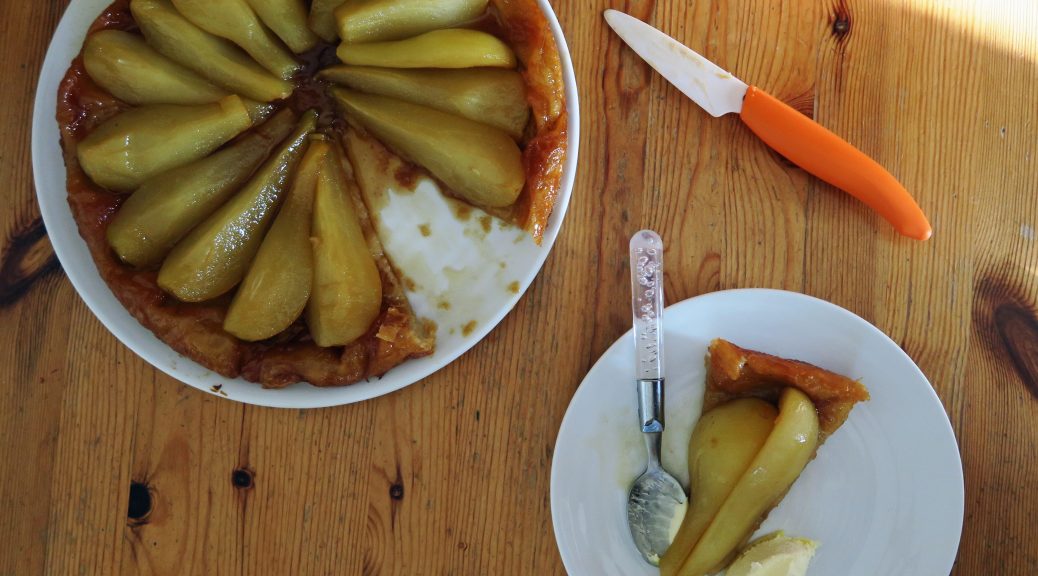
Here’s another french classic – pear tart tatin. Soft, juicy pears, sticky caramel and crisp, caramelised pastry – it’s a classic for a reason. Unlike most tarts, this one’s unusual as it’s baked upside down. The caramel is made in the pan, then the pears go on top, the pastry on top of that, and then it’s all whopped in the oven. Then when it comes out it’s turned over to show the deliciously caramelised pears. As well as giving the pastry a beautiful flavour, this way of cooking it all also helps to keep the pastry crisp, as the juice from the pears doesn’t have the chance to rest on the pastry when it’s in the oven, and make it soggy.
 The first time I ever made this I used shop bought puff pastry and roughly chopped apples. These are two great alterations to make if you want to save time or if you’re just starting to learn how to bake. On the other hand, if you haven’t made your own puff pastry before I’d recommend giving it a go. It takes a bit of time, but it’s not so much time that you have to work on it, more just that you have to leave it a lot to chill in between turns. This recipe is for rough-puff which is a slightly easier and quicker variation on full-puff pastry, but it still gives a beautiful light and crispy pastry.

Recipe
Serves 8
Time: 2 hours (plus time for chilling) – much shorter if using shop bought puff pastry
Ingredients
For the rough-puff pastry
- 225g Plain flour
- ½ tsp Salt
- 250g Unsalted butter, cut into small cubes
- 150ml Cold water
For the Filling
- 3 tbsp Water
- 100g Caster sugar
- 60g Unsalted butter, diced
- 4 Conference pears, peeled, cored and quartered
Method
- Put the flour and salt into a large bowl. Add the cubed butter and stir until each piece is coated in flour, trying not to break the butter up too much.
- Pour in the water and then stir with a round-bladed knife to bring the dough together.
- Turn the dough out onto a floured surface and shape into a rough rectangle. Wrap in clingfilm and then chill in the fridge for 15-20 minutes.
- Roll the pastry out onto a floured surface into a long rectangle until about 1cm thick. Fold the bottom third up onto the middle third of the pastry. Then fold the top third down onto the other two thirds to make a block one third of the original long rectangle.
- Turn the pastry 90˚ so that the folded edge faces you, not the smooth edge. Press the ends down with a rolling pin to seal. Chill in the fridge for another 15 minutes.
- Repeat steps 4-5 another 4 times.
- Chill the pastry in the fridge for at least an hour, ideally overnight.
- When the pastry is ready you can begin to assemble. In a large frying pan (which can go in the oven) put the water and caster sugar. Leave for 5 minutes so that the sugar absorbs the water.
- Put over a medium heat and gently bring to the boil. Leave until a golden caramel forms – be careful not to stir during this process and the sugar will crystalize. Add the butter and stir to melt and combine. Leave to cool slightly.
- Meanwhile roll out the pastry on a floured surface until about the thickness of a pound coin. Cut out a circle 2cm wider than the diameter of the pan.
- Add the peeled and cored pears to the caramel in a spiral, all facing the same way. Then add the pastry on top, pressing the excess around the side of the pears so that the pastry snuggles everything in.
- Put into the oven and bake for 20-25 minutes until golden brown and crisp.
- Once ready take it out of the oven and get ready to turn it out. Take a toasting tin or large bowl and a large plate. Put the plate over the pan so that when turned over the tart will be on the plate. Hold the pan and plate together, and turn 90˚ over the roasting tin to let the juices drain – this will prevent the pastry from going soggy when turned out. Once the juices have stopped dripping, turn over completely, tap a bit to release and then take the pan away.
- Serve immediately with double cream or ice cream.

Thanks for reading!
Emma x