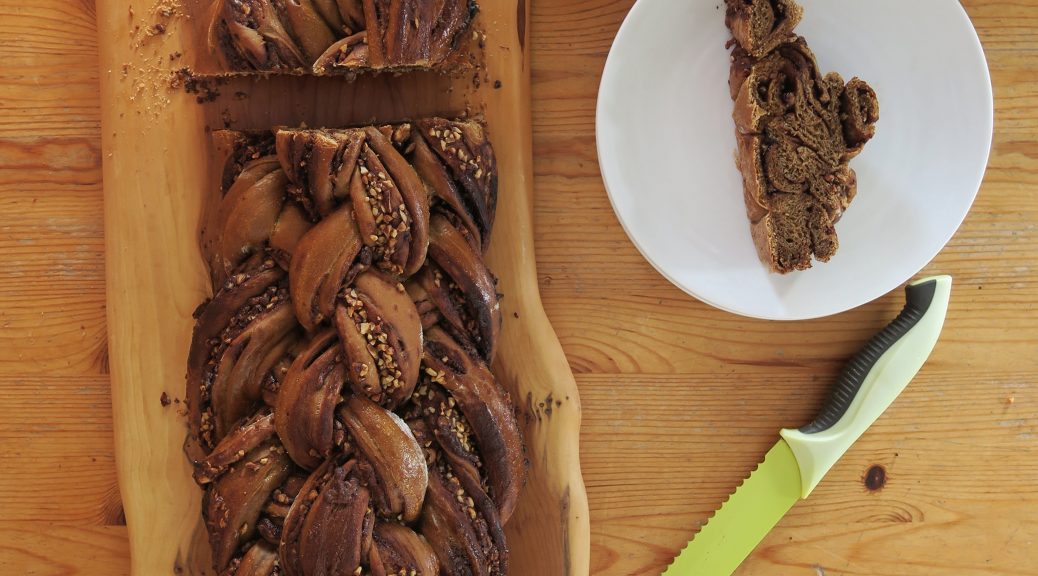
Hazelnut Mocha Bread
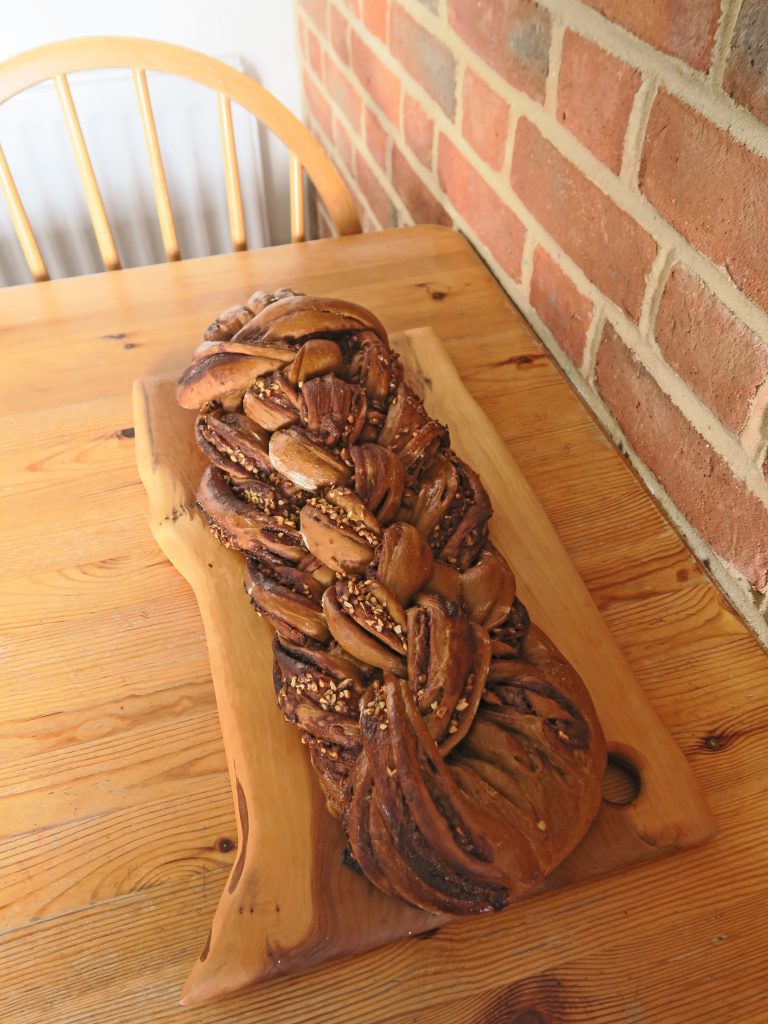
I’m just going to pause for a moment and soak up the beauty that is this eight-strand plaited hazelnut mocha bread (yes it’s a mouthful of a name but it’s worth it!)….. OK…. onto where we are this week. In the words of The Beatles ‘when I find myself in times of trouble’ bread is there to comfort me. Everything’s a little crazy at the moment, I’m not entirely sure which way is up and I’m just diving head first into I don’t quite know what. But hey. Get some bread dough in between your fingers, smell it baking in the oven, taste the freshness on your tongue and it’s just about bearable.
One thing great about bread is that it’s a very forgiving medium. Unlike pastry it’s hard to over work bread dough and so as long as the bake is right it’s (relatively) easy to get a warm fresh loaf on the table with ease. The first few times I made bread it was generally more effective as a garden rock than as an edible delicacy, but once I got the hang of kneading and proving everything fell into place. Not to mention how satisfying it is when the loaf comes out of the oven warm, a gorgeous shade of brown and 100% homemade. Call me dramatic but there’s a level of love and comfort poured into a homemade loaf of bread that you just don’t get from shop bought ones.
So if you’re ever bored, angry, frustrated or restless bread is the thing you need to be making. Pummel all your feelings onto the dough, stuff it with luscious flavours and it’ll rise into a beautiful cradle of comfort!
Recipe
Makes 1 loaf
Time: 2 hours, plus proving and baking time
Ingredients
For the dough
- 650g Strong white bread flour
- 12g Salt
- 14g Dried yeast
- 35g Unsalted butter
- 400ml Water
- 3 tbsp Coffee granules
- 1 Small egg
For the filling
- 4 tbsp Nutella
- A Few handfuls of chopped hazelnuts
Method
- Put the flour, salt, yeast and butter into a large bowl. Make sure to put the yeast and salt on different sides of the bowl as the salt could de-activate the yeast.
- Bring 1/4 of the water to the boil in a pan or kettle and then add and leave the coffee to dissolve in it. Top the coffee solution with the rest of the cold water, then add 2/3 of it to the dry ingredients and stir to make a loose dough. Add the rest of the coffee mix and then bring together with your hands into a ball.
- Turn the dough out onto a table and knead for 5-10 minutes until smooth and stretchy. Put the dough back into a clean bowl, cover with cling film and leave to rise for 1-2 hours until doubled in size.
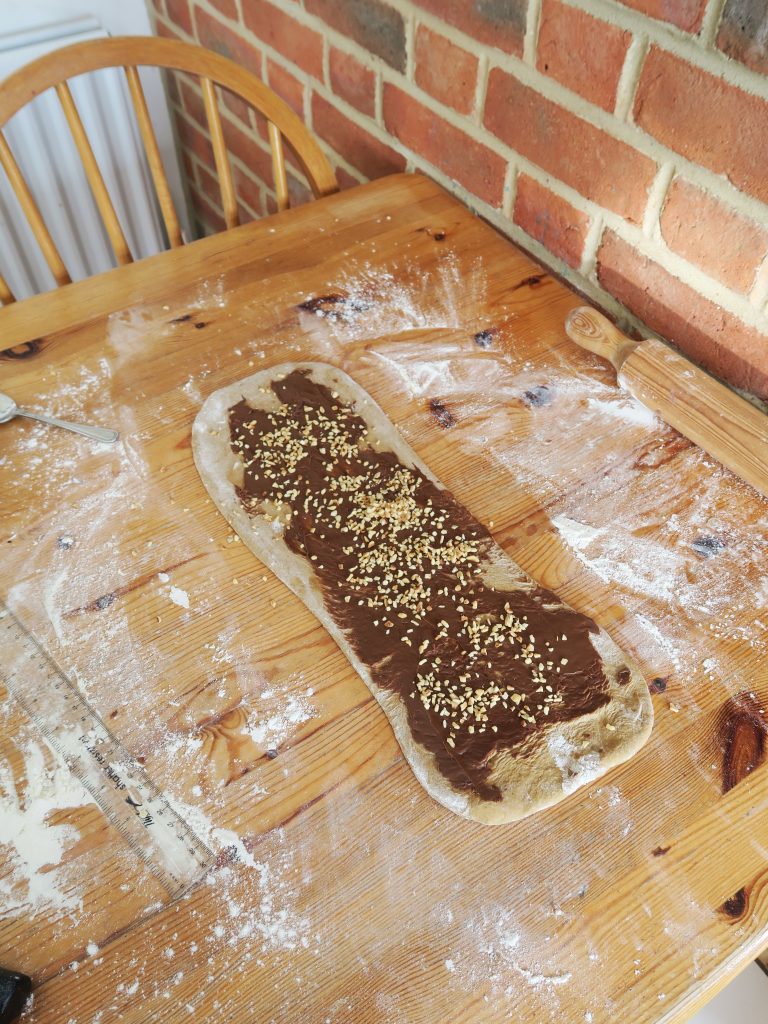
- Once risen take the dough out of the bowl and knead for a couple of seconds to knock the air out. Then split the dough into 4. Roll each piece of dough out into a rectangle 40cm x 30cm.
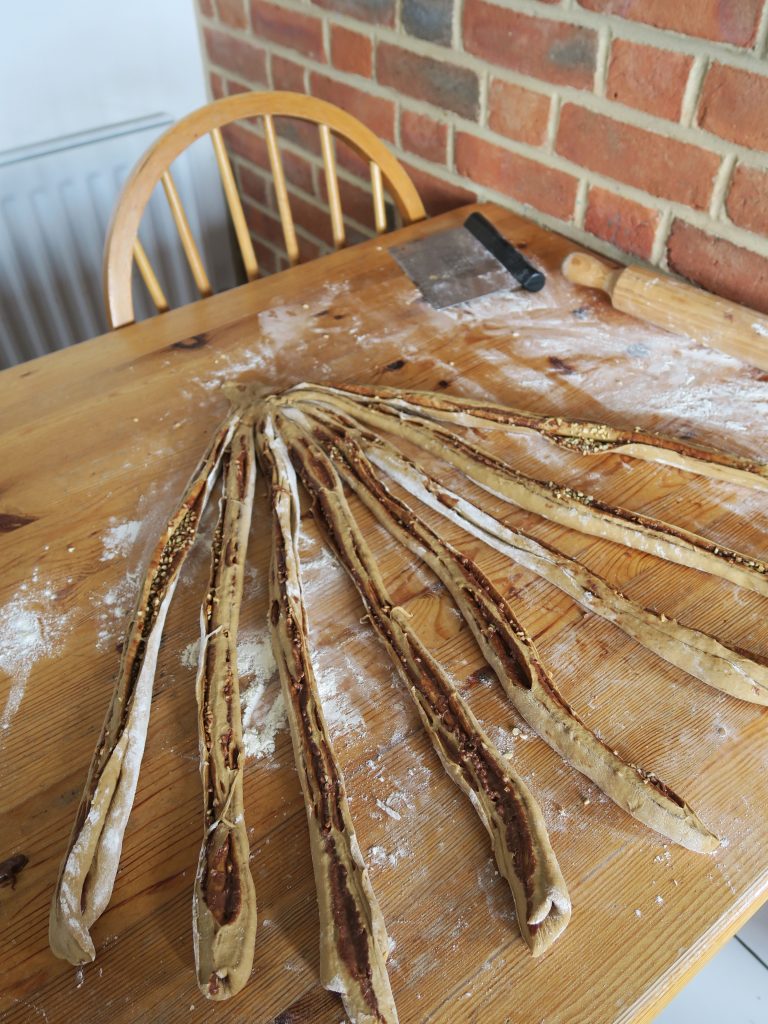
- Spread the ¼ of the Nutella over each bread sheet. Then sprinkle over the chopped hazelnuts. Roll up each bit of dough long edge to long edge to make tight rolls. Then halve each roll to make 8 strands.
- Now comes the plaiting. Lay the strands out on a large surface and group the ends together at the side furthest away from you on the table. Now number the strands in your head 1-8, working left to right. Every time you plait the numbers will re-jig so that it’s still 1-8 left to right.
- Now start plaiting through the sequence. First take 8 under 7 and then over 1. Then repeat the following steps until the plait is finished:
- Take 8 over 5.
- Take 2 under 3 and over 8
- Take 1 over 4
- Take 7 under 6 and over 1.
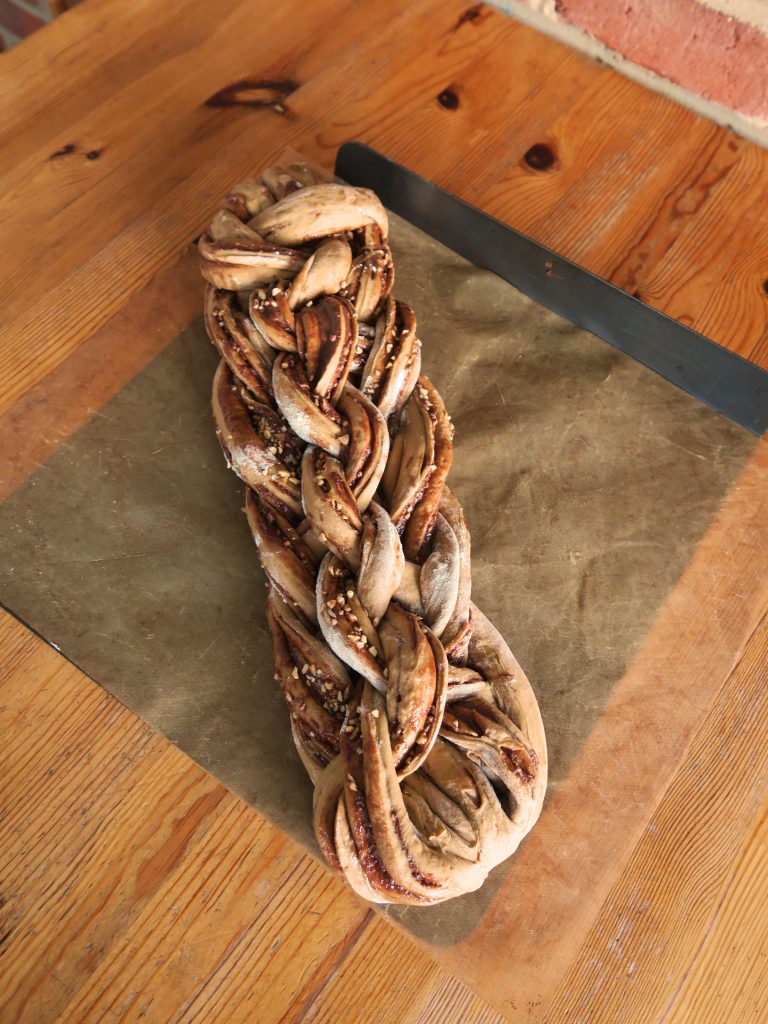
- It’s going to be a little complicated, but keep going and it’ll be fine! Once finished tuck the end of the plait under itself to fuse it. Then transfer it to a line baking tray. Cover loosely with cling film and prove for another hour or so to double in size.
- Pre-heat the oven to 180˚C. Beat the egg in a small bowl with a fork and then brush over the loaf to glaze. Bake in the oven for 50 minutes – 1 hour until golden brown and cooked through. If it starts to burn on top cover with tin foil and keep it in the oven. Leave to cool a little before serving!
Thanks for reading!
Emma x