Category: Comforting

For the times when you need the edible equivalent of a hug.

Stuffed Potato Skins

Stuffed Potato Skins

For those of you who don’t know I’ve spent the last year on an art foundation course and somehow I now find myself in the run up to my final exhibition. Installing everything is an equal balance of fun and stress, but essentially it’s also taking up all of my time. So, as a result, my food for the next two weeks is going to be orientated towards the purely quick and tasty. The other day I made some gnocci and had some potato skins leftover, so I started thinking about quick and easy stuffed potato skins recipes. These ones are made with whole, normal potatoes, but you could also make them with sweet potatoes and/or without the potato flesh if you’re using leftovers from gnocchi.

These are the perfect pick-up comfort food and I’ve found that when it comes to comfort food it’s best to go all out. You can try to make these healthy if you want, but in my opinion just stuff them full of cheese, bacon and anything else tasty you can think of and they’ll be great.

Recipe

Serves 2

Time 30 minutes

Ingredients

  • 2 Large baking potatoes
  • 3 Rashers streaky Bacon
  • 50g Frozen peas
  • 25g Butter
  • Salt and pepper to season
  • 75g Cheddar cheese, grated
  • A handful of Parsley or Basil to garnish (optional)

Method

  1. Pre-heat the oven to 180˚C. Put the potatoes onto a plate and microwave for 10 minutes to soften them. Then put them on a baking tray and leave in the oven until cooked all the way through (about 45 minutes).
  2. Meanwhile prep the other elements. Put the bacon onto a grill pan and cook under the grill until crispy, turning over half way through cooking so they cook evenly.
  3. Now boil a pan of water on a high heat. Add the peas and leave to boil for 5 minutes until just cooked. Then drain and leave to one side.
  4. When the potatoes are ready take them out of the oven and halve them. Scoop out the insides and mash it with the back of the fork. Add the butter and continue to mash until smooth. Cut the bacon into pieces and mix it into the mash with the peas.
  5. Season the mix to taste and then spoon it back into the potato skins. Sprinkle with the grated cheese and then put back into the oven to bake until the cheese just melts.
  6. Sprinkle with parsley and serve!

Thanks for reading!

Emma x
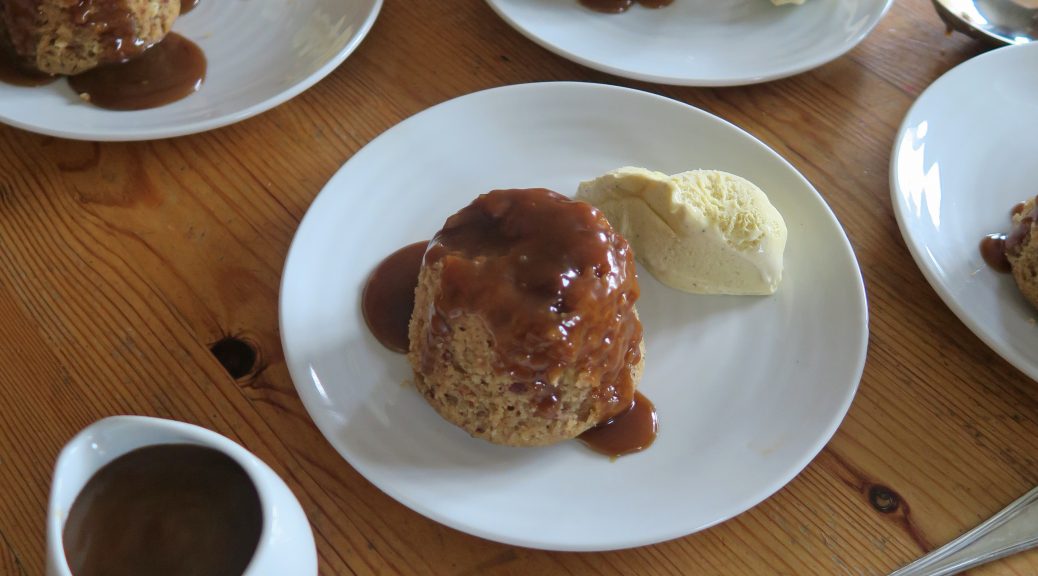
Sticky Toffee Puddings

Sticky Toffee Puddings

Generally speaking I love complicated, fancy food. I love how weird and wacky it can sound on paper, or look on the plate, and yet how incredibly tasty it can be. But I have to admit that nothing beats the classics – I mean they’re classics for a reason. In this case I don’t think I’ve ever had a sticky toffee pudding I haven’t liked. Whatever the texture, whatever the ingredients, as long as it’s true to the name and is sweet and sticky you’re on to a winner!

These ones are particularly light a fluffy as they’re made with a classic sponge mix and are then steamed, but the date puree in the mix also makes them really squidgy and sweet. The toffee sauce put on the top then adds even more sticky moistness, with a bit of a bitter flavour to really complement the sponge! They’re also really good with ball of fresh vanilla ice cream and  this will cut through the sweetness and also provides a great temperature balance to the warm sponge!

Recipe

Serves 8

Time: 1 hour

Ingredients

  • 130g Chopped dried dates
  • 130ml Water
  • 130g Unsalted butter, plus extra for greasing
  • 125g Caster sugar
  • 3 Large eggs
  • 180g Self raising flour
  • 1 tsp Baking powder

For the toffee sauce

  • 300ml Double cream
  • 125g Light brown sugar
  • 50g Unsalted butter

Method

  1. Pre-heat the oven to 180˚C. Then grease 8 small pudding basins with butter.
  2. Put the dates and water into a small saucepan and leave to gently simmer over a medium heat until soft (about 5 minutes). Blend the mix to a puree and set to one side.
  3. Put the butter and sugar into a bowl and beat until smooth. Add the eggs and whisk together. Then add the flour, baking powder, and date puree until smooth.
  4. Distribute the mixture between the basins and put them into a deep roasting tin. Fill the tin with boiling water so it comes half way up the side of the basins. Cover the tin with foil and then put in the oven to bake/steam for 40 minutes.
  5. Meanwhile make the toffee sauce. Put half the cream, the sugar and the butter into a small saucepan and bring to the boil whilst stirring. Once the sugar is dissolved and the butter has melted, leave the mixture to boil gently until it becomes a deep amber colour.
  6. Then take the caramel off the heat and add the rest of the cream. Stir together and then keep warm until needed.
  7. When the puddings are ready (a skewer will come out clean when inserted into the middle), turn them out of their moulds onto plates. Serve with the toffee sauce and ice cream!

Thanks for reading!

Emma x

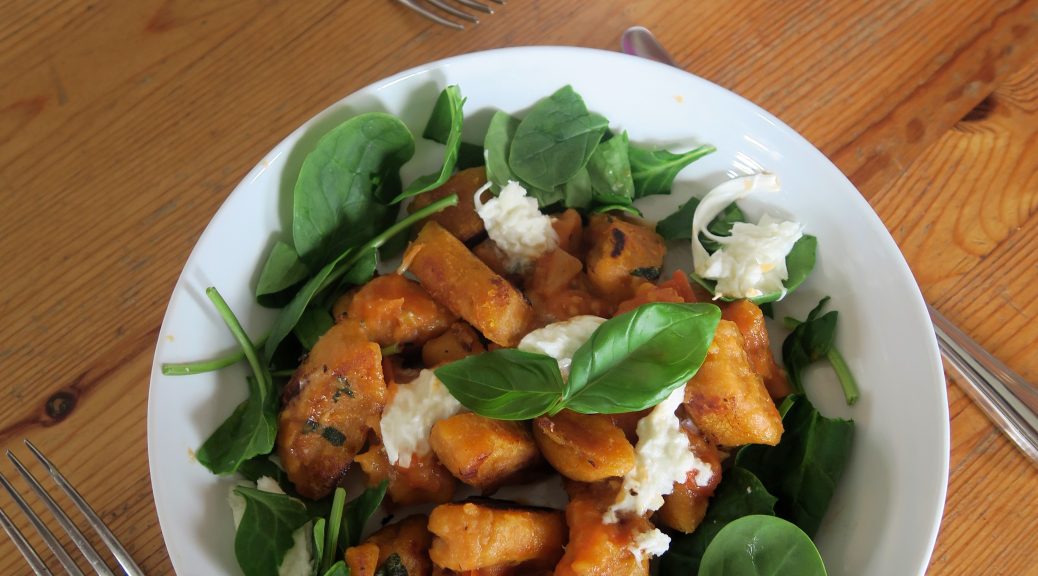
Sweet Potato Gnocchi with Homemade Passata

Sweet Potato Gnocchi with Homemade Passata

The first time I had gnocchi was in Sorrento in Italy and it was one of the most delicious things I’ve ever eaten. We were in a very Italian restaurant in the middle of the town, with red chequered table cloths and plastic tables, and as the Italians eat a lot later than we do we were the only ones in there at the time. I remember being served this very simple-looking bowl of potato dumplings with a basic tomato sauce and a little sprinkle of parmesan, so it didn’t look like much, but the taste of it was just perfection in a bowl.

Every time I go back to Italy now I always order gnocchi, and it never fails to impress. Not to mention the incredible passata (aka tomato sauce) they can make over there to go with it. If you’ve been following my other posts you’ll know by now I’m obsessed with Italian tomatoes. Apparently the volcanic soil makes them super good, and it’s really true! Whilst we don’t have tomatoes like that here, I find that a way of making the most of what we do have is to make your own homemade tomato passata, which will always taste so much better than the ones you buy in shops.

It’s a bit weird that it’s taken me this long to get round to making my own gnocchi, especially as it’s a lot easier than you’d think to make and it’s really tasty. These are slightly different to the traditional as they’re made with sweet potato, which makes them slightly heavier than the normal potato gnocchi, but it also gives them a really rich, sweet flavour, which works really well with the sauce! This recipe makes quite a lot of gnocchi, so if you can’t get through it all in one sitting you can blanch it (as in step 6) and then put it in an airtight pot in the fridge for up to 48 hours before carrying on and frying it.

Recipe

Serves 6

Time: 1 hour

Ingredients

  • 2 Medium sized Sweet potatoes (about 500g)
  • A sprinkle of Salt
  • 300g Pasta flour (plus extra for dusting)
  • 50g Unsalted butter

For the Passata:

  • 1 Small white onion
  • 2 Garlic cloves
  • 1 tbsp Olive oil
  • 8 Beef tomatoes
  • 3 tbsp Sundried tomato paste
  • 2 tsp Mixed herbs

To serve:

  • 2 Balls of Mozerella
  • 4 Handfuls of Baby spinach
  • A few leaves of Basil

Method

  1. Pre-heat the oven to 180˚C.
  2. Put the potatoes onto a baking tray and sprinkle over the salt. Leave to roast in the oven for about an hour until soft. Cut in half and then leave to cool.
  3. Once cool enough to handle, scoop the flesh out of the potatoes with a spoon. (The skins aren’t used in this recipe, but keep them as they’re great for making crispy, stuffed potato skins!)
  4. Mash the potato flesh with a fork so it becomes smooth. Season with a little salt and pepper and then slowly add the flour, squeezing he dough with your hands to make a pliable dough.
  5. Divide the dough in half and roll each half into a thin sausage, about 60cm long. Cut the lengths into little pillow shapes about 2cm wide.
  6. Bring a pan of water to the boil. Drop the gnocci into the water and boil for a couple of minutes to blanch them. Normal potato gnocchi will rise to the surface when ready, but these are a little heavier so they might not. Scoop the gnocchi out of the water and place on a plate to cool.
  7. Now make the passata. Peel and finely chop the onion and garlic. Put the oil into a pan and heat gently. Add the chopped onion and garlic and fry, stirring occasionally, for a few minutes until the mixture starts to caramelise.
  8. Then chop the beef tomatoes into chunks and add them to the onions. Stir in the sundried tomato paste, mixed herbs and a little salt and pepper to season. Then leave to simmer on a medium heat for about 15 minutes, until the tomatoes have gone mushy and the mixture has begun to reduce down.
  9. You can leave your passata like this, but if you’d prefer it to be smooth take a hand-blender and puree the passata to make a smooth sauce. Taste again and season the sauce if needed. Then keep warm until the gnocchi is ready.
  10. Put the butter into a large frying pan and leave to melt. Then add the gnocchi and fry for 2-3 minutes. When one side is golden brown flip them over and cook on the other side. Once all the gnocchi have become crispy and golden-brown all over, transfer them to a plate and then serve with the passata, mozerella, baby spinach and a handful of fresh basil.

Thanks for reading!

Emma x

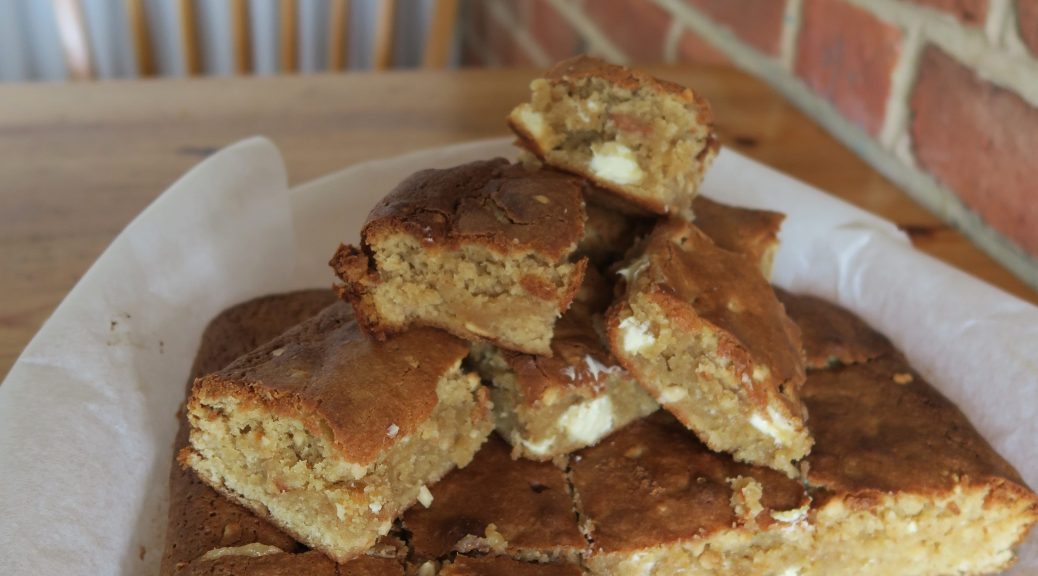
Peanut Butter Blondies

Peanut Butter Blondies

Blooondieeeeeees! Here comes the insanely underrated cousin of the brownie. These have the crisp top and chewy texture of the best brownie imaginable, but instead are flavoured with peanuts and little chunks of sweet white chocolate. I made these a while ago, and then realised I forgot to write down the recipe. So when it came round to doing a blog post on them I was like ‘ah man, how the hell did I make these before??’ Luckily though I think I’ve worked out what I did to get this amazing texture, and they’re now better than ever – but I guess the only way to know for yourself is to make a batch!

Recipe

Makes 16 squares

Time: 45 minutes

Ingredients

  • 50g Butter, plus extra for greasing
  • 175g Peanut Butter
  • 200g White chocolate, chopped roughly
  • 190g Plain flour
  • ½ tsp Baking powder
  • A pinch of Salt
  • 200g Light brown sugar
  • 100g Golden caster sugar
  • 3 Large eggs
  • 1 tbsp Vanilla bean paste

Method

  1. Preheat the oven to 180˚C.
  2. Take a 21 x 21cm tin and line with butter and baking paper.
  3. Put the butter, peanut butter and ½ the white chocolate into a heatproof bowl over a pan of simmering water and leave to melt. Take off the heat and leave to cool until needed.
  4. Then put the flour, baking powder and a pinch of salt into a bowl and stir to combine.
  5. Take another bowl and put in the sugars and the eggs. Whisk with an electric hand whisk until the mixture is thick and pale, about 2-3 minutes.
  6. Pour the chocolate mixture and vanilla into the egg mix and fold together. Sieve in the flour and then add the chunks of white chocolate. Fold everything together again until fully combined.
  7. Pour the mixture into your lined tin and smooth it over with a spatula so it’s an even thickness.
  8. Bake in the oven for 30-35 minutes until a skewer inserted into the centre of the blondies comes out clean.
  9. Leave to cool in the tin and then cut into 16 squares. Enjoy!

Thanks for reading!

Emma x

Banana, Peanut Butter and Chocolate Loaf Cake

Banana, Peanut Butter and Chocolate Loaf Cake

In every family there’s always a scale of culinary abilities. There’s the Delia Smith – the one who does the majority of the cooking, the ‘I cook to survive’ one who could make pasta and boil an egg if needed, and the one who could burn water and would die trying to find their way to the kitchen. Whilst in my family we have a kinda scale like this, everyone of us has, admittedly, a pretty good knack in the kitchen, and we all have our signature dishes. For me it’s my chocolate fondants, for my Mum it’s her chicken and leek pie, my Dad’s is his ultimate apricot tiffin, and my sister makes a mean chocolate banana cake.

However, since my sister left home we haven’t had many of her incredible banana cakes around, so I thought I’d make one of my own. This one’s just like hers – packed with banana and chocolate chips which melt into delicious puddles when served warm! I’ve also added some peanut butter though as I love a good PB and chocolate combo. This one is also really easy and fun to make, but when served fresh from the oven it’s everything you could want from a cake.

Recipe

Makes 1 loaf

Time: 45 minutes

Ingredients

  • 50g Unsalted butter
  • 75g Peanut butter
  • 250g Caster sugar
  • 2 Medium eggs
  • 250g Plain flour
  • 2 tsp Baking powder
  • 2 Ripe bananas
  • 200g Dark chocolate

Method

  1. Pre-heat the oven to 180˚C.
  2. Put the butter, peanut butter and sugar into a bowl and beat with a wooden spoon until smooth.
  3. Add the eggs and then whisk until combined. Then sift the flour and baking powder into the mixture and fold in to make a smooth batter.
  4. Mash the bananas in another bowl with a fork until they’re a pulp. Then roughly chop the chocolate. Add the bananas and 150g of the chocolate to the batter and stir until fully combined.
  5. Line a 1L loaf tin with butter and baking paper. Pour in the mixture and then bake in the oven for about 1 hour until a skewer comes out clean when inserted into the middle. If the top starts to brown too much cover it loosely with kitchen foil to protect it.
  6. When ready take the cake out of the oven and leave to cool for a few minutes before turning it out of the tin. Leave to cool on a wire wrack.
  7. Meanwhile put the rest of the chopped chocolate into a heatproof bowl and melt over a pan of gently simmering water. Pour this chocolate into a pipping bag with a small round nozzle and drizzle over the cake. Then serve!

Thanks for reading!

Emma x