Author: Emma Hawkins

Chocolate, Orange, and Chilli Bread

Chocolate, Orange, and Chilli Bread

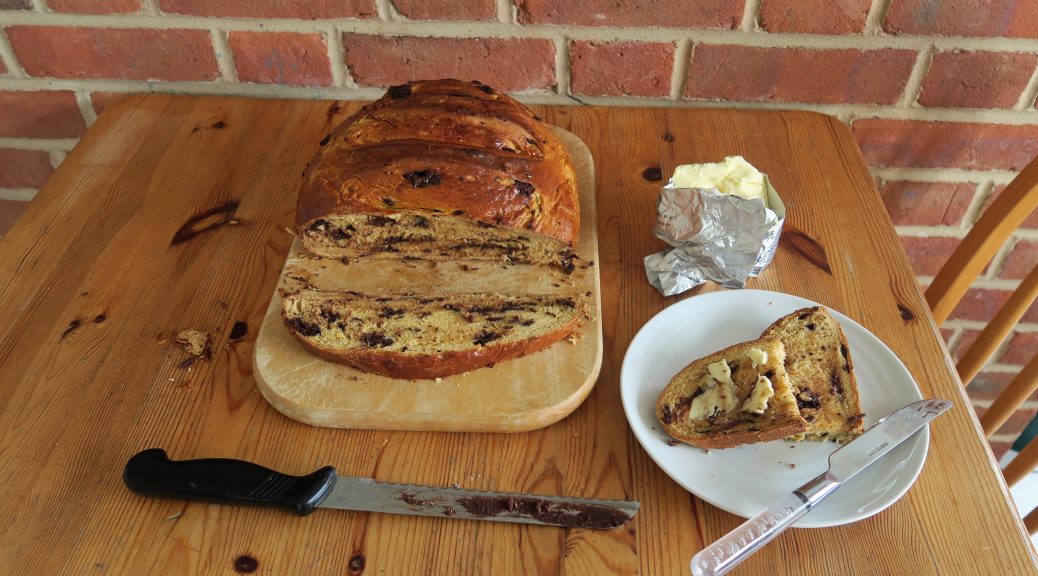
 I haven’t made bread in waaay too long so I thought that it was time I entered back into that world again – and since it’s chocolate month, it’s chocolate bread! Though rather than a ‘chocolate, orange and chilli bread’,  as I’ve called it, it’s probably better to think of this as an orange bread with chocolate chips and a gentle wave of chilli heat after it’s eaten. I love a bit of heat in the background of any bake, but I’m not a fan of blow-your-head-off heat, so the amount of paprika in this is just enough to prickle the tongue. But of course if you like your food really hot you can increase the quantity of paprika going in, put in 3 tsp for a moderate warmth, and 4 1/2 tsp for a strong heat!

By using really rich, dark chocolate it also means that the loaf, whilst sweet and enriched, feels as though it borders the line between sweet and savoury. This makes the whole thing really moreish, and with a bit of butter it goes down really well with a good cup of coffee.

Recipe

Makes 1

Time: 45 minutes, plus proving and baking time

Ingredients

  • 350ml Milk
  • 80g Sugar
  • 16g Yeast
  • 12g Salt
  • 700g Strong white bread flour
  • 1 ½ tsp Paprika
  • 2 Large eggs
  • 100g Butter
  • 3 Oranges, zest only
  • 200g Dark chocolate, chopped

Method

  1. Put the milk into a saucepan and bring to the boil.
  2. Meanwhile put the sugar, yeast, salt, flour, and paprika into a large bowl and mix together.
  3. Add one of the eggs, butter, zest and ¾ of milk to the dry ingredients. Mix everything together and then slowly add the rest of the milk until you get a sticky dough.
  4. Turn the dough out onto a lightly floured surface. Knead for about 10 minutes until smooth and elastic. Add the chopped chocolate knead for another few minutes to incorporate it.
  5. Lightly oil a bowl and tip the dough into it. Cover with clingfilm and leave to rise for about 2 hours, until doubled in size.
  6. Turn the dough out onto a lightly floured surface. Knead for a few seconds to get rid of the air bubbles. Then tuck the dough under itself to make a loaf-shape with a tight surface. Place onto a lined baking tray, cover loosely with clingfilm and leave to rise for another hour.
  7. Pre-heat the oven to 180˚C. Take a sharp knife and score the top of the loaf with three confident slices. This will help shape the bread as it rises.
  8. Take the other egg, crack it into a bowl and beat it with a fork. Then take this beaten egg and brush the top of the loaf with it to glaze. Then put the bread into the oven to bake for about 40 minutes, until it sounds hollow when lightly tapped on the bottom. Serve!

Thanks for reading!

Emma x

Anzac Biscuits

Anzac Biscuits

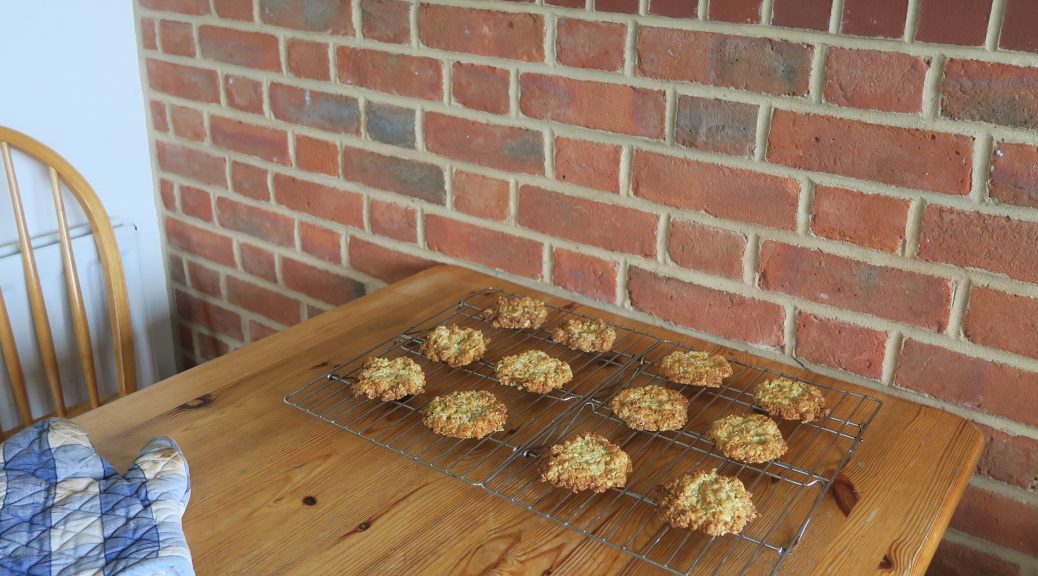
Back in the time when I was small, cute, and at primary school I came across this incredible recipe for Anzac biscuits. There was this lovely Australian teacher there who taught me in year three, and at a school fete one year she sold bags of them which were so delicious I had to ask for the recipe. A couple of days later she gave me an A4 hand-typed recipe which I still have to this day in a recipe folder on the shelf. I loved making them when I was little as they were so simple and quick to put together, and of course tasted delicious!

That said, for some reason I  haven’t made these in a  really long while. So, as it’s Anzac day today, I thought it’d be a good time to re-discover the recipe. Sure enough, they’re just as delicious as I remember them – sweet, chewy and with a slight nutty, caramelised flavour.

Recipe

Makes 16

Time: 30 minutes

Ingredients

  • 135g Plain flour
  • 200g Sugar
  • 100g Rolled oats
  • 100g Desiccated coconut
  • 150g Butter
  • 40g Golden syrup
  • 2 tbsp Boiling water
  • 1 tsp Bicarbonate of soda

Method

  1. Pre-heat the oven to 180˚C. Then line two baking trays with greaseproof paper.
  2. Put the flour, sugar, oats and coconut into a bowl and mix together.
  3. Next take a pan and melt together the butter and syrup. When fully melted add the water and bicarb and mix together.
  4. Mix the wet into the dry ingredients until completely combined.
  5. Take a table spoon and drop blobs of the mixture onto your lined tray. Make sure to leave space between the biscuits as they will spread a little.
  6. Bake in the oven for 10-15 minutes until golden brown and just starting to colour.
  7. Take the biscuits out of the oven and leave to cool for a few minutes so they harden, before transferring them to a cooling rack to cool completely.

Thanks for reading!

Emma x

Peanut Butter Blondies

Peanut Butter Blondies

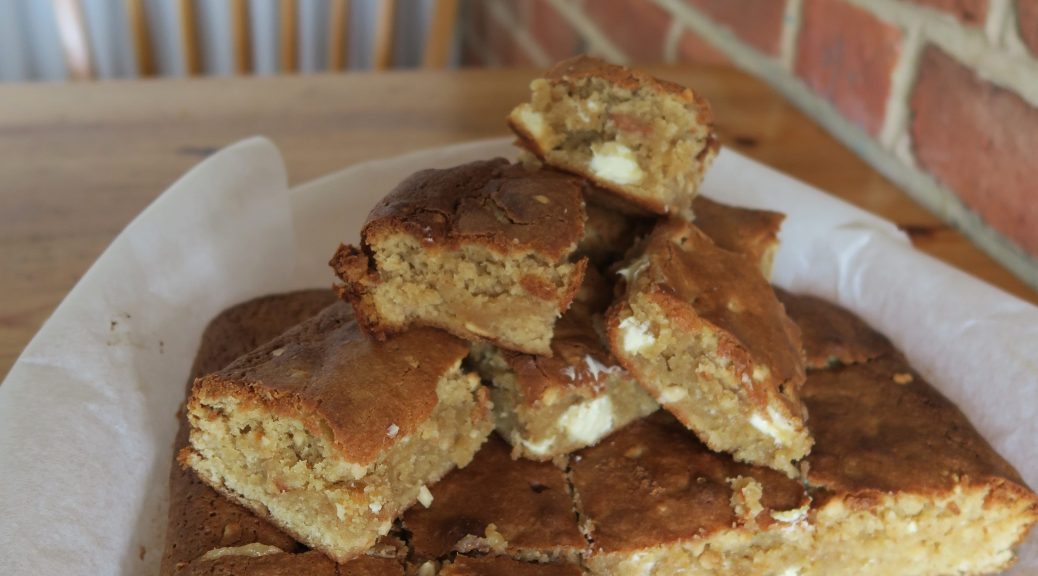
Blooondieeeeeees! Here comes the insanely underrated cousin of the brownie. These have the crisp top and chewy texture of the best brownie imaginable, but instead are flavoured with peanuts and little chunks of sweet white chocolate. I made these a while ago, and then realised I forgot to write down the recipe. So when it came round to doing a blog post on them I was like ‘ah man, how the hell did I make these before??’ Luckily though I think I’ve worked out what I did to get this amazing texture, and they’re now better than ever – but I guess the only way to know for yourself is to make a batch!

Recipe

Makes 16 squares

Time: 45 minutes

Ingredients

  • 50g Butter, plus extra for greasing
  • 175g Peanut Butter
  • 200g White chocolate, chopped roughly
  • 190g Plain flour
  • ½ tsp Baking powder
  • A pinch of Salt
  • 200g Light brown sugar
  • 100g Golden caster sugar
  • 3 Large eggs
  • 1 tbsp Vanilla bean paste

Method

  1. Preheat the oven to 180˚C.
  2. Take a 21 x 21cm tin and line with butter and baking paper.
  3. Put the butter, peanut butter and ½ the white chocolate into a heatproof bowl over a pan of simmering water and leave to melt. Take off the heat and leave to cool until needed.
  4. Then put the flour, baking powder and a pinch of salt into a bowl and stir to combine.
  5. Take another bowl and put in the sugars and the eggs. Whisk with an electric hand whisk until the mixture is thick and pale, about 2-3 minutes.
  6. Pour the chocolate mixture and vanilla into the egg mix and fold together. Sieve in the flour and then add the chunks of white chocolate. Fold everything together again until fully combined.
  7. Pour the mixture into your lined tin and smooth it over with a spatula so it’s an even thickness.
  8. Bake in the oven for 30-35 minutes until a skewer inserted into the centre of the blondies comes out clean.
  9. Leave to cool in the tin and then cut into 16 squares. Enjoy!

Thanks for reading!

Emma x

Deconstructed Mississippi Dessert

Deconstructed Mississippi Dessert

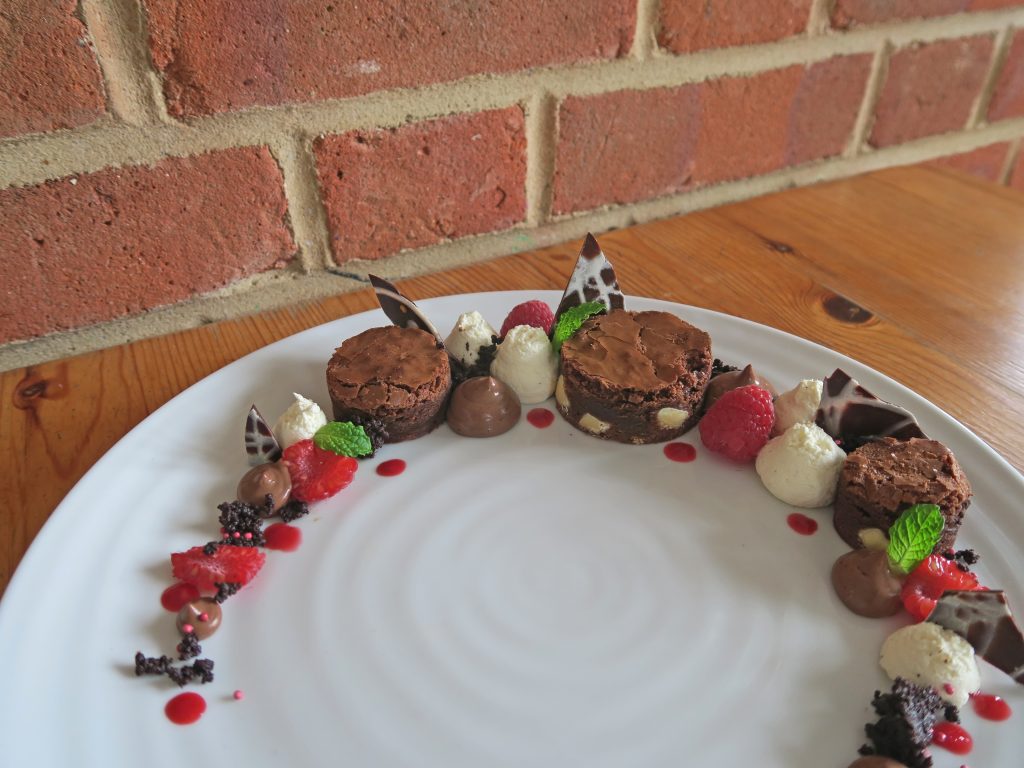
Back in November I made a Mississippi mud pie for thanksgiving, which if I say so myself was pretty darn good. So for a while now, being the massive chocoholic I am, I’ve been thinking how I could re-interpret it, and with a little refinement make it into an awesome dessert. With Masterchef just finished I’ve been going through a bit of withdrawal, but I’ve been super inspired by all the incredible cooking on the show, and so I decided now would be the time to make a more delicate dish, like this delish deconstructed mud pie.
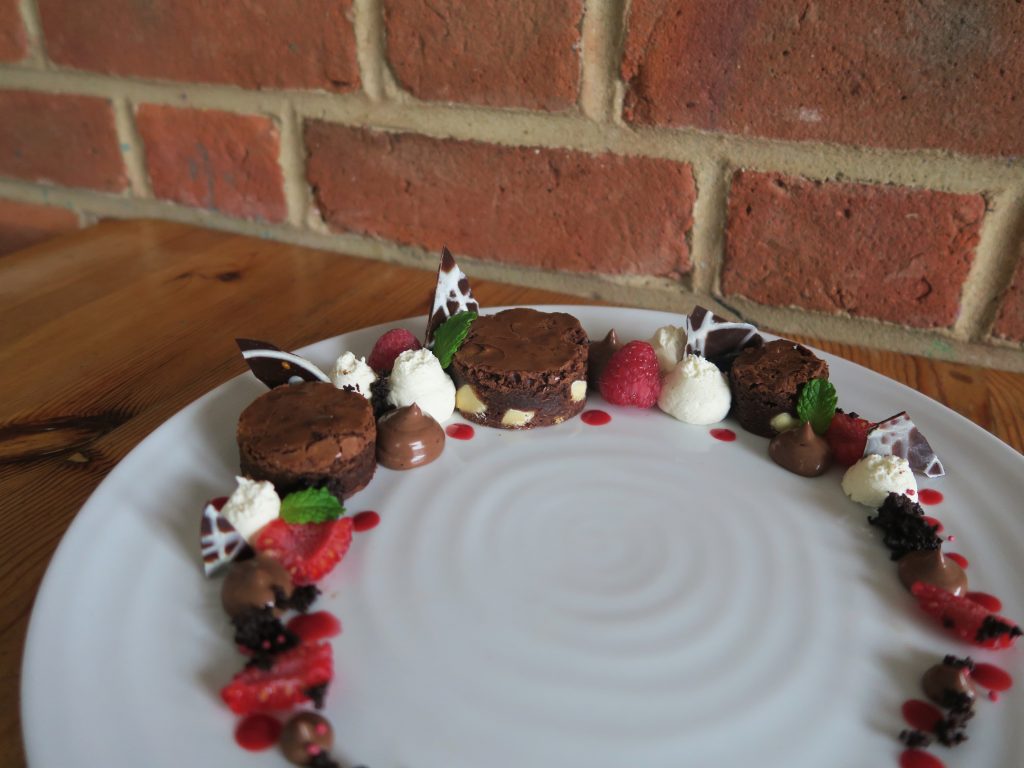
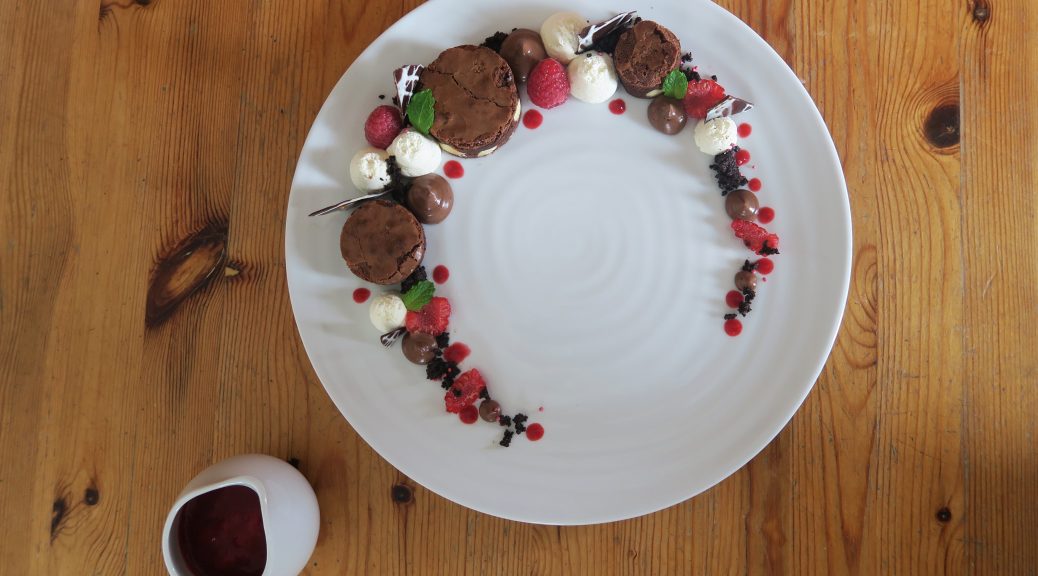
Whilst being predominantly chocolate based, each element here contributes a unique texture and flavour to the dish so it doesn’t come across too rich. Almost like an ombre there’s a crumbly, very rich chocolate crumb, a lighter but fudgy brownie, a creamy sweet chocolate custard, and then a light whipped cream, all served with chocolate shards and a sharp raspberry coulis to cleanse the palette. (As you can probably tell from how pretentious that sounds, I’m pretty proud of how this one has turned out). Unlike my other fancier dishes this one is also fairly easy. There are a lot of elements but each one doesn’t require too much knowhow to make, so it’s worth giving a go!

Recipe

Serves 5

Time 2 hours, plus cooling time

Ingredients

For the Chocolate brownie

  • 110g Butter
  • 140g Dark chocolate
  • 2 Medium eggs
  • 140g Caster sugar
  • 30g Plain flour
  • 100g White chocolate, roughly chopped

For the Chocolate custard

  • 100g Dark chocolate
  • 290ml Whole milk
  • 3 Egg yolks
  • 60g Caster sugar
  • 15g Plain flour
  • 1 tbsp Cocoa powder
  • 20g Cornflour
  • 160ml Double cream

For the Chocolate crumble

  • 100g Plain flour, plus extra for dusting
  • 150g Unsalted butter
  • 55g Cocoa powder
  • 40g Caster sugar
  • 5g Sea salt

For the Cream

  • 300ml Double cream
  • 1 tsp Vanilla bean paste

For the Coulis

  • 150g Raspberries
  • 100g Caster sugar

To Decorate

  • 50g White chocolate
  • 100g Dark chocolate
  • 5 Fresh raspberries
  • A few sprigs of fresh mint

Method

  1. Pre-heat the oven to 180˚C. Grease and line a 15×15 cm loose tin with butter and baking paper.
  2. To make the brownies put the butter and chocolate into a bowl over a pan of simmering water and leave to melt.
  3. Take another bowl and whisk the eggs until pale and fluffy with an electric whisk. Add the sugar and continue to whisk until it leaves a trail when the whisk is taken out.
  4. Fold the chocolate into the eggs, sieve in the flour and add the white chocolate. Fold everything again until combined.
  5. Pour the mixture into the lined tin and bake for around 20 minutes until a crust has formed on top and it feel slightly firm. Set aside to cool.
  6. Now make the chocolate filling. Put the chocolate into a heat-proof bowl and melt over a pan of simmering water. Then put the milk into a pan and heat until just boiling.
  7. In another bowl whisk the egg yolks, sugar, plain flour, cocoa powder and cornflour until smooth. Pour in the milk whilst whisking until smooth. Pour the mixture back into the pan and cook gently, whilst whisking, until just starting to thicken. Take off the heat, stir in the melted chocolate and then leave in the fridge to cool completely.
  8. Take the filling out of the fridge and whisk to break up. In another bowl whisk the double cream to soft peaks. Fold the cream into the chocolate mix and then pour this into a pipping bag. Put this into the fridge to chill for 2 hours.
  9. Now make the chocolate crumble. Put all the ingredients into a bowl and mix until a smooth dough forms. Roll this out on a lightly floured surface to make a thin sheet. Put this onto a baking tray lined with greaseproof paper and bake in the oven for 10 minutes. Take out of the oven and crumble with your fingers to make a crumble/crumb-like texture. Then put it back into the oven to bake for another 10 minutes until crisp. Set to one side to cool.
  10. Next whip up the double cream and vanilla into soft peaks (when it just holds its shape). Spoon this into a pipping bag with a round nozzle and leave in the fridge to chill until needed.
  11. Then make the chocolate shards. Put the white and dark chocolates into separate heatproof bowls over pans of gently simmering water. When melted transfer the white chocolate to a piping bag with a small, round nozzle. Take a sheet of baking paper or acetate and drizzle the white chocolate in a squiggle pattern over it. Leave to set completely at room temperature.
  12. When set, take the dark chocolate and spread over the white chocolate in a thin layer, making it smooth with a palette knife. Leave to set.
  13. Finally make the raspberry coulis. Put the raspberries and sugar into a pan and heat gently until the raspberries mush and gently simmer.
  14. Pour the mixture into a sieve and press through with the back of a spoon to get the juice and pulp but to remove the seeds. Pour this into a pipping bottle with a small, round nozzle and leave in the fridge until needed.
  15. When ready to plate up begin by cutting 3 small circles out of the brownie. Place these in a semi-circle around the edge of the plate. Take the chocolate custard and pipe blobs of it around the brownies. Then take the fresh raspberries and arrange them in a crescent around the other elements. Then take the cream and fill in the gaps. Then sprinkle the crumble in the gaps to make a crescent shape and then break the chocolate sheet into shards and place them around the plate. Take the coulis and pipe spots of it around the plate, and then put the rest into a jug to serve with the dessert. Garnish with the fresh mint and serve!
 Thanks for reading!

Emma x
Banana, Peanut Butter and Chocolate Loaf Cake

Banana, Peanut Butter and Chocolate Loaf Cake

In every family there’s always a scale of culinary abilities. There’s the Delia Smith – the one who does the majority of the cooking, the ‘I cook to survive’ one who could make pasta and boil an egg if needed, and the one who could burn water and would die trying to find their way to the kitchen. Whilst in my family we have a kinda scale like this, everyone of us has, admittedly, a pretty good knack in the kitchen, and we all have our signature dishes. For me it’s my chocolate fondants, for my Mum it’s her chicken and leek pie, my Dad’s is his ultimate apricot tiffin, and my sister makes a mean chocolate banana cake.

However, since my sister left home we haven’t had many of her incredible banana cakes around, so I thought I’d make one of my own. This one’s just like hers – packed with banana and chocolate chips which melt into delicious puddles when served warm! I’ve also added some peanut butter though as I love a good PB and chocolate combo. This one is also really easy and fun to make, but when served fresh from the oven it’s everything you could want from a cake.

Recipe

Makes 1 loaf

Time: 45 minutes

Ingredients

  • 50g Unsalted butter
  • 75g Peanut butter
  • 250g Caster sugar
  • 2 Medium eggs
  • 250g Plain flour
  • 2 tsp Baking powder
  • 2 Ripe bananas
  • 200g Dark chocolate

Method

  1. Pre-heat the oven to 180˚C.
  2. Put the butter, peanut butter and sugar into a bowl and beat with a wooden spoon until smooth.
  3. Add the eggs and then whisk until combined. Then sift the flour and baking powder into the mixture and fold in to make a smooth batter.
  4. Mash the bananas in another bowl with a fork until they’re a pulp. Then roughly chop the chocolate. Add the bananas and 150g of the chocolate to the batter and stir until fully combined.
  5. Line a 1L loaf tin with butter and baking paper. Pour in the mixture and then bake in the oven for about 1 hour until a skewer comes out clean when inserted into the middle. If the top starts to brown too much cover it loosely with kitchen foil to protect it.
  6. When ready take the cake out of the oven and leave to cool for a few minutes before turning it out of the tin. Leave to cool on a wire wrack.
  7. Meanwhile put the rest of the chopped chocolate into a heatproof bowl and melt over a pan of gently simmering water. Pour this chocolate into a pipping bag with a small round nozzle and drizzle over the cake. Then serve!

Thanks for reading!

Emma x