Author: Emma Hawkins

Chicken Noodle Soup

Chicken Noodle Soup

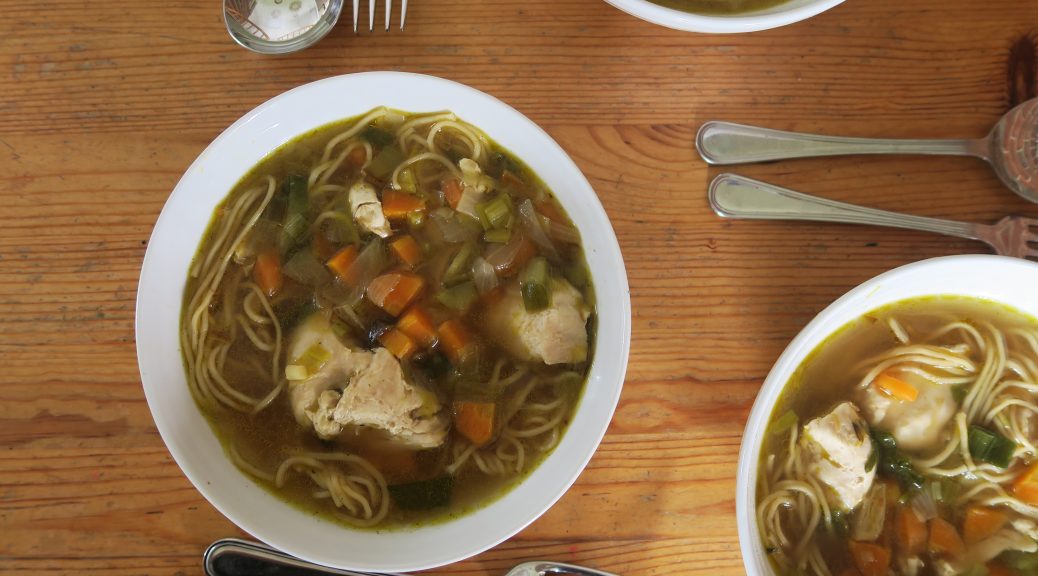
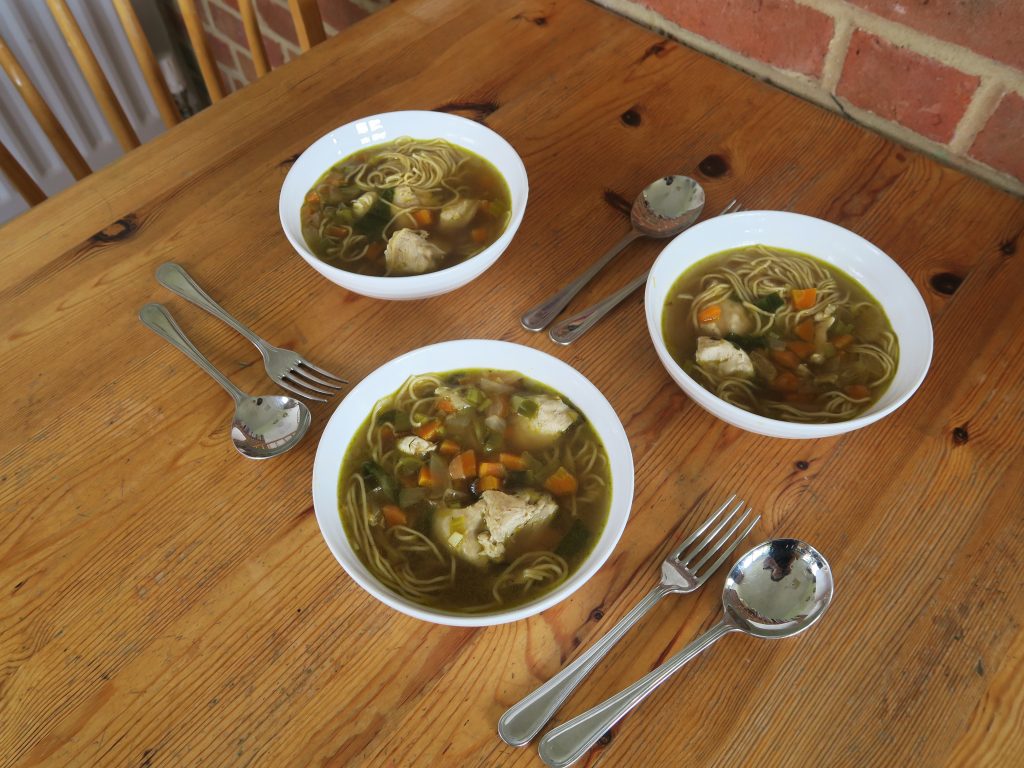
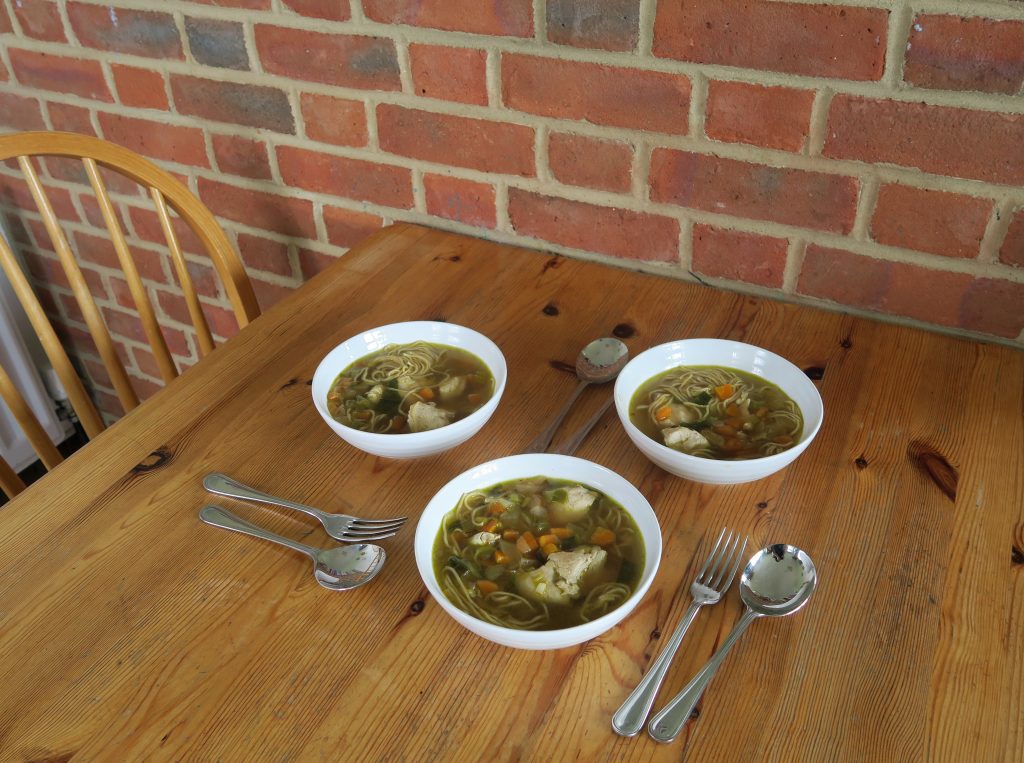
Here’s a nice quick one for soup Sunday! Every Sunday in my house we don’t have the traditional British roast, instead we have soup. It’s kind of a ritual where every leftover vegetable left in the fridge from the week is boiled up and blitzed into a bowl of vegetable soup surprise. This one is a bit more conventional than the ones we have on a normal Sunday lunch, but it’s just as warming and comforting. 

Although I said earlier that we don’t have roasts every Sunday, when we do we have roast it’s normally chicken, and it always results in a box of shredded chicken meat sitting in the fridge. This soup is great for leftover roast chicken, and pretty much any left over meat. Just finely slice or shred it and then add it to the soup. By adding some noodles to this relatively light, protein studded soup the whole thing is made into a full, hearty meal, and brings a nice oriental element to the whole thing.

Recipe

Serves 4

Time: 30 minutes

Ingredients

  • 2 Chicken breasts (or chopped chicken thigh)
  • 1 White onion
  • 2 Medium sized carrots
  • 2 Spring onions
  • 1 tbsp Root ginger
  • 1/2 Small red chilli, deseeded
  • 1 Small leek
  • 50g Unsalted butter
  • 1 tbsp Olive oil
  • 1L Chicken stock (or 1L boiling water with 2 chicken stock cubes)
  • 2 balls of Uncooked egg noodles
  • Salt and pepper to season

Method

  1. Pre-heat the oven to 180˚C. Wrap the chicken in foil and then leave to cook in the oven for 10-15 minutes until just cooked through. Leave to one side for later.
  2. Next prep the veg. Peel and then finely slice the onion and carrots. Then top and tail the spring onions and the leek and finely chop. Take the chilli and chop it finely. Then peel the ginger and then finely grate it.
  3. Put the butter and oil into a pan and leave to melt. Then add the prepped vegetables and fry gently until they begin to brown and soften. Then add the stock and leave to simmer for 5 minutes.
  4. Slice the chicken into strips and then add it to the soup. Leave it all to boil for another 5 minutes and then add the noodles. Leave to boil for a further 8-10 minutes until the noodles are just cooked before seasoning to taste and serving!

Thanks for reading!

Emma x


Monkey Bread

Monkey Bread

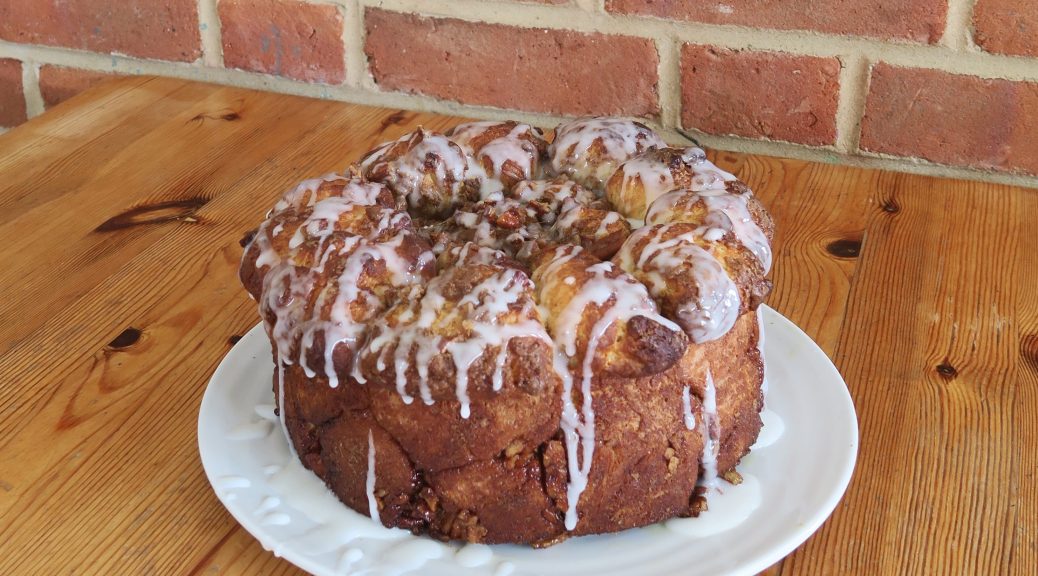
I think that bread is one of those things people rarely bake at home for two main reasons. 1) It takes ages to make and 2) the end result is often really disappointing, and so on the whole it normally would have been a lot quicker to just buy a loaf from the local shop. This bread will take a bit of time, as with most other breads it does need to prove and (obviously) bake. However, in my opinion this one’s way more fun to make than other breads as the dough is really nice to work with, it’s assembled as little tear-and-share style balls, and it’s all lathered in cinnamon and butter so it tastes insane!

The identifiable feature of monkey bread is the mosaic-like pattern of the finished loaf, made by rolling the dough into balls which are individually dipped in butter and then cinnamon sugar to make each piece of bread sumptuous and sticky. Then the whole thing is scattered with pecans to give a delicious crunchy nuttiness to the whole thing. The shaping also makes it a great loaf for sharing as you can pull bits off without the need for a knife! This is traditionally made in a Bundt tin (one with a hole in the middle – not sure why but meh), but as I didn’t have one I just popped them all into a 9 inch cake tin which seemed to do the job just as well.

Recipe

Serves 8-10

Time: 1 hour, plus proving and baking time

Ingredients

For the dough

  • 220ml Milk
  • 90g Unsalted butter
  • 550g Strong white bread flour, plus extra for dusting
  • 10g Fast-action dried yeast
  • 5g Salt
  • 50g Caster sugar
  • 2 Large Eggs

To decorate

  • 125g Unsalted butter
  • 1 tbsp Ground cinnamon
  • 2 tsp Ground ginger
  • 230g Light brown sugar
  • 160g Pecans, chopped roughly
  • 1 Large egg, beaten

For the icing

  • 1 tbsp Milk
  • 100g Icing sugar

Method

  1. To start making the dough put the milk and butter into a saucepan and leave to simmer on a medium heat until the butter has melted.
  2. Next put the dry ingredients into a large bowl and mix together. Add the egg and the milk mix and stir to make a sticky dough.
  3. Turn the dough out onto a lightly floured surface and knead for about 10 minutes until smooth and elastic.
  4. Tip the dough into a clean bowl and cover with clingfilm. Leave to rise in a warm space for 90 minutes, until doubled in size.
  5. Next melt the butter for the topping in a small pan and set to one side.
  6. In another bowl mix the spices, sugar and a little salt. Then add the chopped pecans and mix together.
  7. Take a Bundt or 9 inch cake tin and brush the inside with a little of the melted butter to grease. Then spoon a little of the pecan mix into the base of the tin.
  8. Tip the dough out onto a lightly floured surface and knead for 5-10 seconds to knock out the air. Then split and roll the dough into 50 small balls. Dip one of the balls in the butter and then roll in the spiced sugar. Chuck it into the tin and then repeat with the other dough balls until the base of the tin is filled. Scatter with the rest of the pecans and then continue with the rest of the dough. If you have any butter or sugar left over at the end pour it over the loaf.
  9. Cover the whole thing with cling film again and leave to rise at room temperature for 1 hour.
  10. Pre-heat the oven to 180˚C. Take the beaten egg and brush it over the top of the loaf to glaze. Then bake the loaf in the oven for 35-40 minutes until risen and golden brown. Leave to cool in the tin.
  11. To make the icing put the icing sugar and milk into a small bowl and mix together to make a smooth paste.
  12. Turn the monkey bread out of the tin and drizzle with the icing. Serve!

Thanks for reading!

Emma x

Rugelach

Rugelach

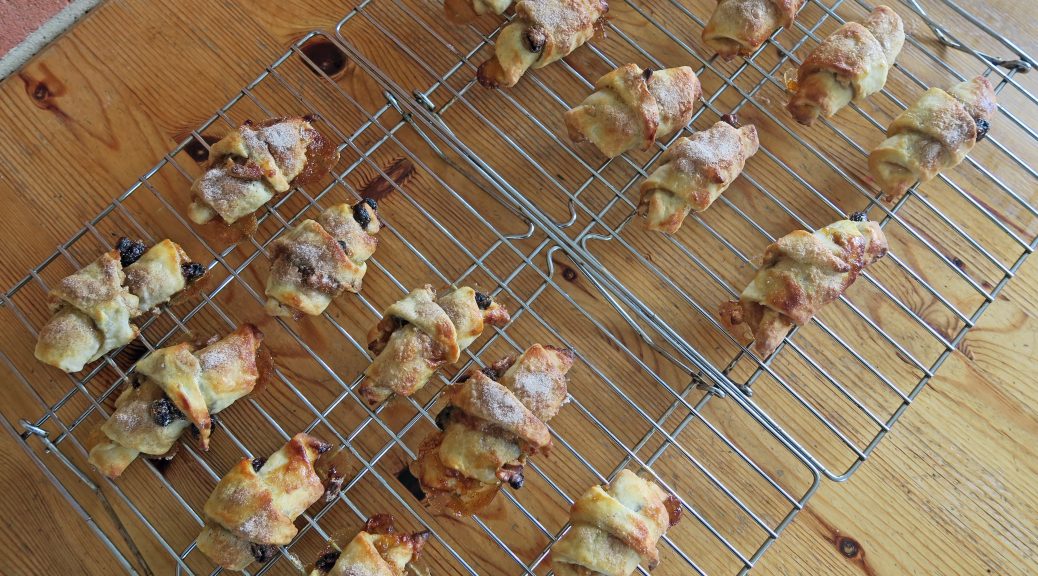
What is this? Another unusual bake that no one’s ever heard of before? Well you’d be right there. As you can probably tell I’m pretty obsessed with foreign baking, and over the course of the year I’ve been really pushing that side of my cooking. In my town there’s this really old bookshop that has a massive cookbook section, full of every style, theme, and cuisine of cookbook you could imagine. I love flicking through the books there, making mental notes of any unusual flavours, techniques, and ideas to give a go.

I first came across these in a Nordic recipe book and I immediately knew they’d be something I’d want to work on myself. Despite finding them in a Nordic cookbook though, these are actually a Jewish pastry, mainly found in the middle east. The dough is made with cream cheese which creates a really interesting, soft texture. These are then stuffed with apricot jam, nuts, raisins and cinnamon which makes them super moreish.

I quite like these as small, one-mouthful bites, but if you want to make them chunkier you can easily do this by cutting your circle into 6 or 8 triangles, rather than 12 like I have. I also haven’t tried this, but I wouldn’t be surprised if this filling works really well with shortcrust, puff, or even filo pastry, so you can really play around with these to suit your personal taste.

Recipe

Makes 24

Time: 45 minutes plus chilling and baking

Ingredients

  • 230g Cream cheese
  • 250g Unsalted butter
  • 155g Caster sugar, plus 3 tbsp for dusting
  • ½ tsp Salt
  • 1 tsp Vanilla extract
  • 300g Plain flour
  • 40g Light brown sugar
  • 1 ½ tsp Ground cinnamon
  • 140g Raisins
  • 140g Walnuts, finely chopped
  • ½ cup Apricot jam
  • 1 Large egg, beaten

Method

  1. Put the cream cheese and butter into a bowl and whisk until light and pale. Add 55g of the caster sugar, salt and vanilla and mix again to combine. Slowly add the flour and mix slowly until a dough forms.
  2. Roll the dough into a ball. Then cut the ball into quarters, roll each quarter into a ball and wrap in cling film. Leave in the fridge for an hour.
  3. Meanwhile make the filling. Put the 100g of the caster sugar, the brown sugar, ½ tsp cinnamon, raisins and chopped walnuts into a bowl and mix together.
  4. Lightly flour a surface and roll each dough ball out into a 9 inch circle. Spread the apricot jam over the circles and sprinkle with some of the filling mix, pressing it into the dough slightly.
  5. Cut the dough circle into 12 wedges. Then, starting at the wide end of the wedge roll the dough up like a croissant.
  6. Line a baking tray with baking paper and put the rolled up cookies on the tray, making sure the point where the folded bit of pastry ends is underneath. Chill for 30 minutes.
  7. Pre-heat the oven to 180˚C. Lightly brush each biscuit with the beaten egg. Then combine the rest of the caster sugar and cinnamon in a bowl and sprinkle over the biscuits.
  8. Bake the rugelach in the oven for 15-20 minutes until golden brown and crisp.
  9. Leave to cool on a wire rack and then serve!

Thanks for reading!

Emma x

Stuffed Potato Skins

Stuffed Potato Skins

For those of you who don’t know I’ve spent the last year on an art foundation course and somehow I now find myself in the run up to my final exhibition. Installing everything is an equal balance of fun and stress, but essentially it’s also taking up all of my time. So, as a result, my food for the next two weeks is going to be orientated towards the purely quick and tasty. The other day I made some gnocci and had some potato skins leftover, so I started thinking about quick and easy stuffed potato skins recipes. These ones are made with whole, normal potatoes, but you could also make them with sweet potatoes and/or without the potato flesh if you’re using leftovers from gnocchi.

These are the perfect pick-up comfort food and I’ve found that when it comes to comfort food it’s best to go all out. You can try to make these healthy if you want, but in my opinion just stuff them full of cheese, bacon and anything else tasty you can think of and they’ll be great.

Recipe

Serves 2

Time 30 minutes

Ingredients

  • 2 Large baking potatoes
  • 3 Rashers streaky Bacon
  • 50g Frozen peas
  • 25g Butter
  • Salt and pepper to season
  • 75g Cheddar cheese, grated
  • A handful of Parsley or Basil to garnish (optional)

Method

  1. Pre-heat the oven to 180˚C. Put the potatoes onto a plate and microwave for 10 minutes to soften them. Then put them on a baking tray and leave in the oven until cooked all the way through (about 45 minutes).
  2. Meanwhile prep the other elements. Put the bacon onto a grill pan and cook under the grill until crispy, turning over half way through cooking so they cook evenly.
  3. Now boil a pan of water on a high heat. Add the peas and leave to boil for 5 minutes until just cooked. Then drain and leave to one side.
  4. When the potatoes are ready take them out of the oven and halve them. Scoop out the insides and mash it with the back of the fork. Add the butter and continue to mash until smooth. Cut the bacon into pieces and mix it into the mash with the peas.
  5. Season the mix to taste and then spoon it back into the potato skins. Sprinkle with the grated cheese and then put back into the oven to bake until the cheese just melts.
  6. Sprinkle with parsley and serve!

Thanks for reading!

Emma x

Chocolate Ginger Chequerboard Cake

Chocolate Ginger Chequerboard Cake

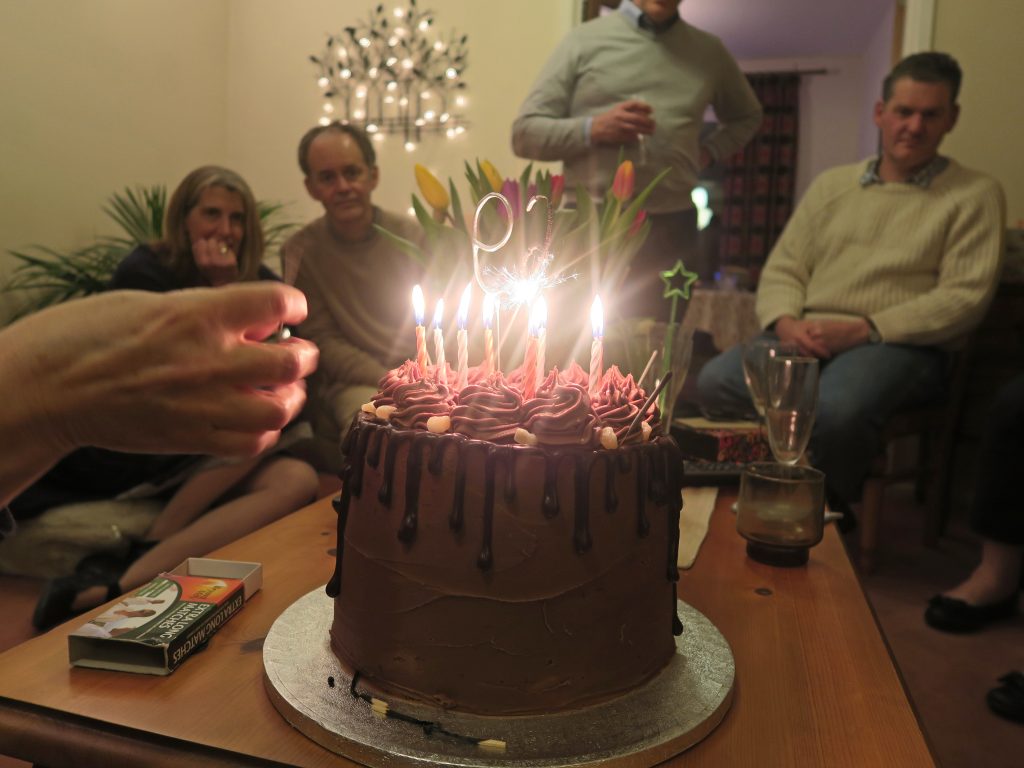
Here comes the return of the chequerboard cake. I know I made one of these a while ago, but trust me, this one’s even better! The other day it was my godmother’s birthday so I made her this for the occasion – a four layer, chocolate and ginger chequerboard cake. Making really big, elegant cakes is one of my favourite things, but as they’re often for special occasions you want them to look perfect, and over the years I’ve found that these are really one of those things that you just need to practise in order to make really well. As a result I’ve constantly straddled the line between having slightly messy cakes and having way too much cake in my life. Therefore when the occasion comes round to make cakes for other people I leap at the opportunity, as it’s great practise and also a great way of showing someone how much they mean to you!
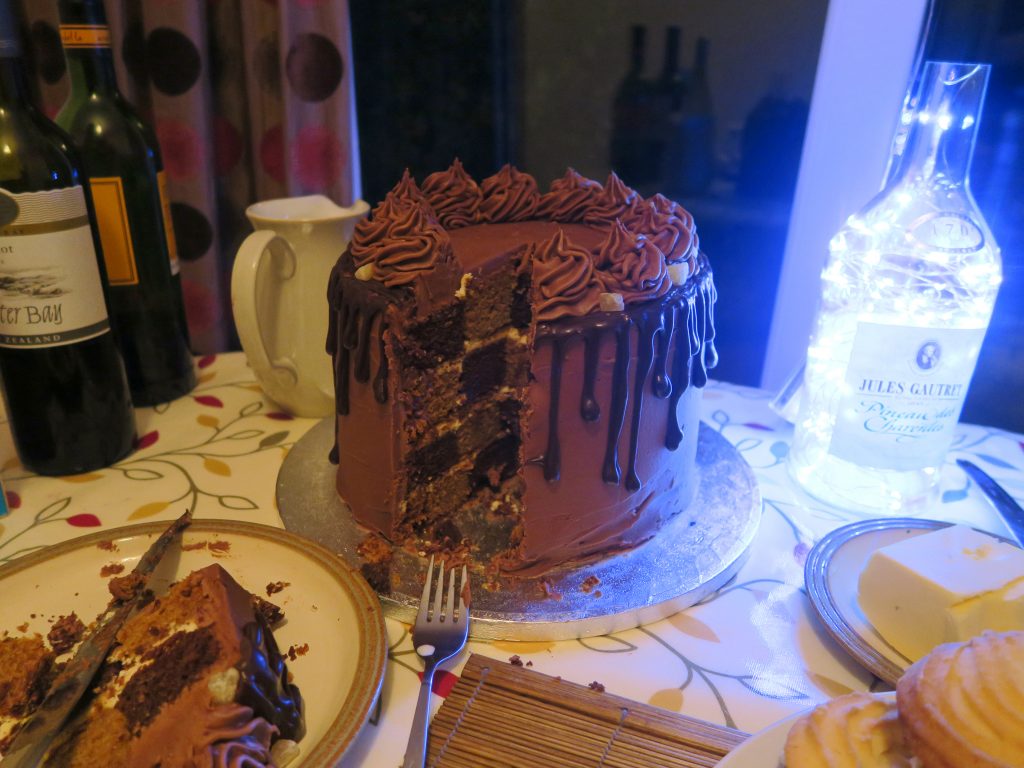
Most of the photos I have of the chequerboard inside this one are pretty dark and weirdly lit from this light-filled bottle next to it, but it still shows a little of what it’d look like when it’s cut into. A great thing about these kinda cakes is that they look really impressive as they are, and then when they’re cut into they have this surprise pattern inside, so you’ll get a lot of ooos and ahhhhhs! This one is also the first cake I’ve ever managed to get with really smooth icing. I’ve finally developed a good icing recipe which is the perfect consistency and will set really well. This means that with two layers of icing, a crumb coat and a finish coat, you can get a really professional finish!

The two cakes in this are also so insanely moist that they practically melt in the mouth and are packed full of flavour. Chocolate and ginger are two of my favourite cake flavours, so for me when they’re slotted in together the result is insane! Chequerboard cakes can be made with pretty much any combo of flavours though, as long as they go well together and have contrasting enough colours to make the pattern stand out. If chocolate and ginger isn’t your thing I’d recommend chocolate and vanilla, almond and raspberry, mint and chocolate, or anything else that takes your fancy.

Recipe

Serves 15

Time: 3 hours, plus chilling and baking time

Ingredients

For the chocolate cake

  • 180g Unsalted butter
  • 100g Dark chocolate
  • 240g Plain flour
  • 280g Caster sugar
  • 3 tbsp Cocoa powder
  • 1 tsp Bicarb
  • 2 Large eggs
  • 142ml Greek yoghurt
  • 142ml Milk

For the ginger cake

  • 140g Butter
  • 300g Self Raising Flour
  • 1 tsp Bicarb
  • 5 tsp Ground ginger
  • 2 tsp Mixed spice
  • 140g Light brown sugar
  • 290g Golden syrup
  • 300ml Milk
  • 1 Large egg

For the chocolate ginger icing

  • 300g Unsalted butter
  • 600g Icing sugar
  • 150g Dark chocolate, melted and cooled
  • ½ tsp Ground ginger

For the filling

  • 300ml Double cream
  • 25g Icing sugar
  • ½ tbsp Vanilla bean paste

For the chocolate drip

  • 100g Dark chocolate
  • 75ml Double cream

To Decorate

  • Crystallised ginger
  • Anything else you like (biscuits, sparklers, candles, chocolates etc.)

Method

  1. Preheat the oven to 180˚C. Grease and line four 7.5 inch cake tins.
  2. First make the chocolate cake. Melt the butter and chocolate together in a heat-proof bowl over a pan of simmering water.
  3. In a bowl mix the flour, sugar, bicarb and cocoa together.
  4. In another bowl whisk together the egg and yoghurt. Add this mixture and the chocolate mixture to the flour mixture, along with 100ml boiling water. Whisk quickly until combined and then pour this into two of the lined tins.
  5. Bake in the oven for 25-30 minutes, or until a skewer comes out clean once inserted. Leave the cakes to cool for 15 minutes before turning them out onto wire racks and leaving to cool.
  6. Now make the ginger cake. Put the butter, flour, bicarb and spices into a large bowl. Cut the butter up into the flour with a round-bladed knife. When you can’t cut the chunks of butter any smaller go in with your hands and rub the butter into the flour with your fingertips. Shake the bowl from side to side every so often to get the bigger lumps of butter coming to the top, and rub these in until the whole mixture is like breadcrumbs.
  7. Then put the sugar, syrup and milk into a small pan and heat whilst stirring until the sugar has dissolved. Then stop stirring and bring the mixture up to the boil.
  8. Crack the egg into the flour mix. Then pour the syrup into the flour mix, a little at a time, whisking in between additions.
  9. When fully combined pour the mix into the lined tins and bake for 45-50 minutes until a skewer inserted into the middle comes out clean. Take out of the tin and leave to cool on wire racks.
  10. Whilst the cakes are cooling, make the buttercream icing. Beat the butter and icing sugar until smooth. Then add the melted dark chocolate and ground ginger, and mix until fully combined. Spoon the icing into a piping bag, fitted with a round nozzle.
  11. To prepare the filling put the cream, icing sugar and vanilla into a bowl and gently whisk until it just holds it’s shape. Then spoon it into a piping bag fitted with a small round nozzle and leave in the fridge until needed.
  12. Now start assembling. Lay your cakes out on a board and compare the heights of them. They should all be the same, but if they’re not use a serrated knife to level them so they’re all the same thickness. This will mean that the rings will be the same height as they cakes they’re put into in the next step.
  13. Take a 5 and 2.5 inch smooth, round cookie cutter. Then in all four cakes cut out a circle from the centre with the 5 inch cutter, and then take the 2.5 inch cutter and cut a circle out of the 5 inch piece.
  14. Take the middle ring out of each cake and swap it into a cake of the other type (so the chocolate rings will go into the ginger cakes and visa versa).
  15. Take your icing and put a little on the cake board or plate you’re going to be presenting on, this will stop the cake from sliding around. Then put one of the cakes that has two rings of chocolate and one of ginger and put it in the centre of the cake. Pipe 1/3 of the cream in the pipping bag over the top and smooth it over with a palette knife.
  16. Then put one of the cakes which has two ginger rings and one chocolate on top and repeat with the cream and the other layers of cake, but with the final layer of cake don’t top with cream.
  17. Now make the crumb coat of icing. This is the first layer which aims to trap the crumbs and stop them from getting into your final icing finish. Take your chocolate icing and spoon 1/2 of it over the top of the cake. Then use a palette knife to gently work the icing around the sides of the cake. Smooth the icing as best you can so that it’s even, but don’t worry about it looking too finished at this stage. Then put it in the fridge to set for at least 2 hours.
  18. When set, take the cake out again and repeat with the icing, this time making sure that the finish is super smooth and glossy. (A palette knife and turn table is really helpful for this!) Keep any excess icing for later and leave the cake in the fridge until needed.
  19. Now make the chocolate drip icing. Chop the chocolate finely and put it into a bowl. Then put the cream into a pan and heat gently. When the cream just starts to boil take it off the heat and pour it over the chocolate. Stir to combine and to help melt the chocolate. Then leave it for a couple of minutes so that it thickens up enough to be pourable but not runny.
  20. Pour the drip icing into a piping bag with a small round nozzle. Then gently pipe around the top edge of the cake, letting uneven drips roll down the cake.
  21. Take the excess icing from earlier and put it into a piping bag with a star shaped nozzle. Pipe rosettes around the edge of the cake so that the join of the chocolate drips to the icing is hidden.
  22. Top with the crystallised ginger and any other decorations you want (e.g ginger biscuits, candles or sparklers). Enjoy!
Thanks for reading!

Emma x