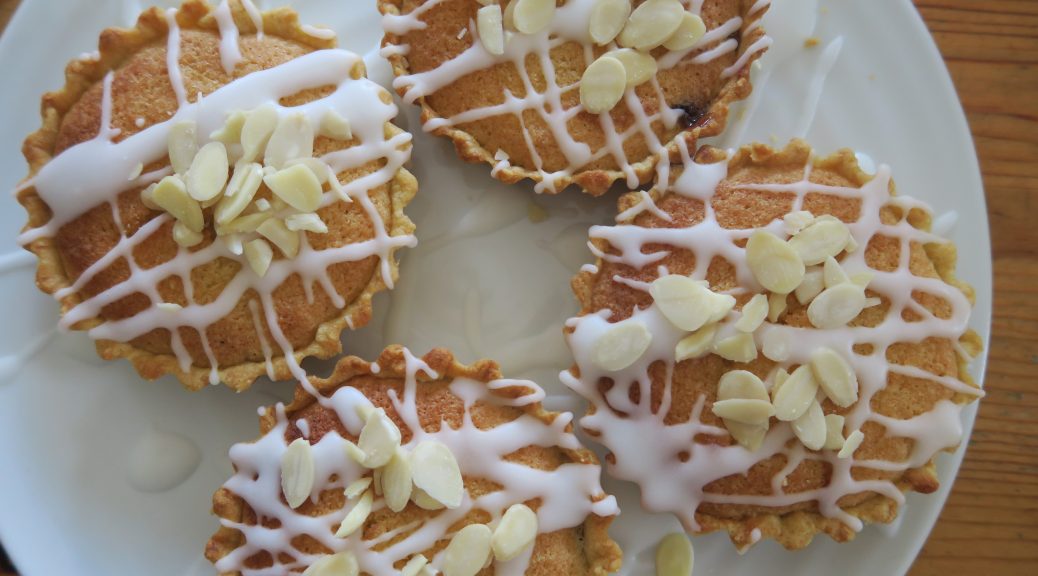
Tag: Pastry

Bakewell Tartlets

Bakewell Tartlets

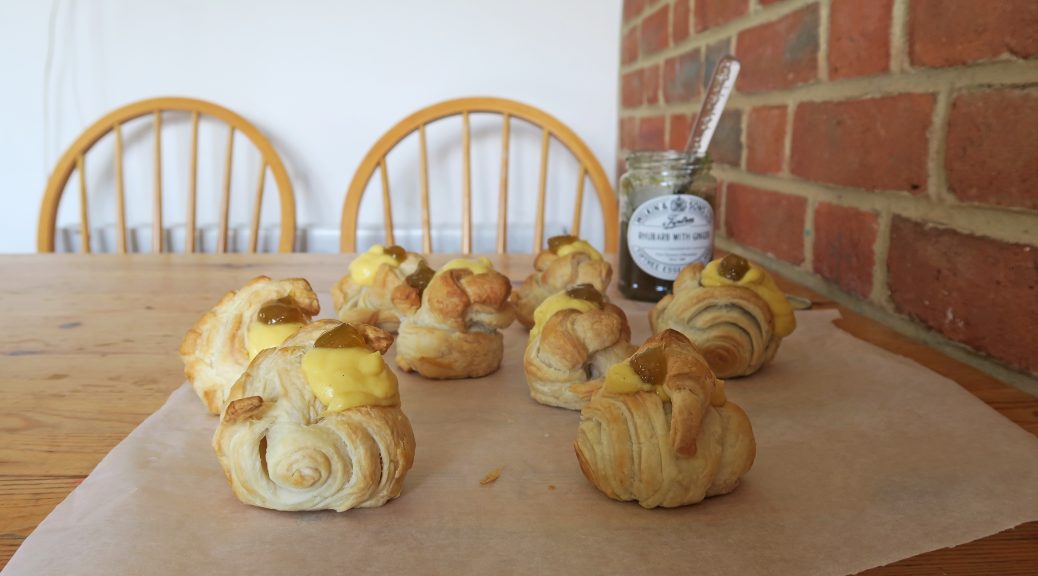
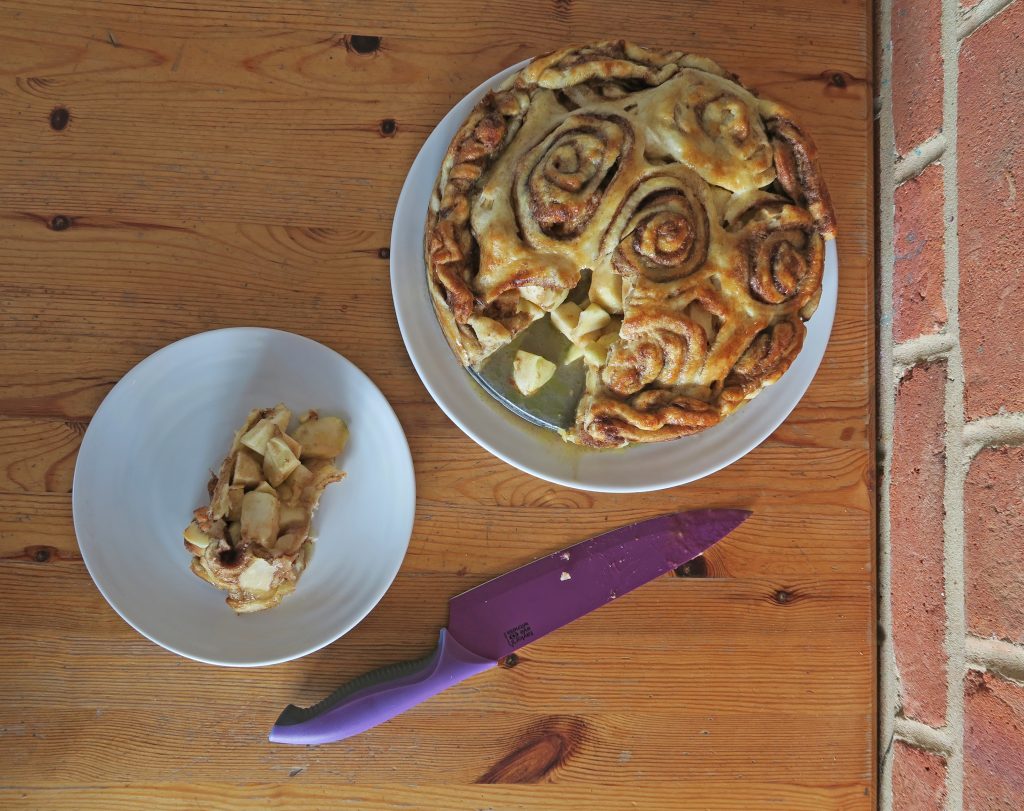
As the summer is coming to an end we’re starting to hit peak jam making time where any fresh fruit left over from the summer is being stewed into lots of jam. Down the bottom of our lane we have tonnes of apple and damson trees which are currently laden with fruit ripe for the picking. These can be used to make amazing jams and compotes which work really well in desserts like these delicious bakewell tartlets.

These are by far my favourite tart to make as they don’t require blind baking (baking the pastry before adding the filling) as the filling is baked with the pastry. This makes them so much easier to make and a lot less hassle than most other tarts, so they’re my go-to pastry. The main components of a bakewell tart are pastry, jam, frangipane (an almond cake mix) and icing. Beyond that the whole concept of bakewell tarts are pretty flexible and easy to play with.  I’ve made bakewell tartlets for this as they can be cut into quarters which make great bite-sized treats for an afternoon tea stack! You could also just make these as one big tart which is fab for cake sales and sharing.

Recipe

Makes 4

Time: 90 minutes, plus chilling time

Ingredients

For the pastry

  • 175g Plain flour
  • A pinch of Salt
  • 2 tbsp Caster sugar
  • 115g Unsalted butter
  • 1 medium Egg yolk
  • 2 tbsp cold Water

For the filling

  • 60g Unsalted butter
  • 60g Caster sugar
  • 1 Medium egg
  • 30g Self raising flour
  • ½ tsp Baking powder
  • 50g Ground almonds
  • A few drops of Almond essence
  • 2 tbsp Raspberry jam

To decorate

  • 100g Icing sugar
  • 1 tbsp Lemon juice
  • A few flaked almonds (optional)

Method

  1. Begin by making the pastry. Put the flour, salt and sugar into a bowl and mix together with a round bladed knife to combine. Add the butter and then use the knife to cut the butter up into small chunks. When you can’t cut the butter up any further, go in with your hands and rub the butter into the flour until the mixture resembles fine breadcrumbs.
  2. Add the egg yolk and water to the mixture and stir again with a round bladed knife until the mixture comes together to form a dough. Wrap the dough in cling film and then chill in the fridge for at least 30 minutes.
  3. Meanwhile make the filling. Put the butter, sugar, egg, flour, baking powder, ground almonds and almond essence into a bowl and mix together until smooth.
  4. Pre-heat the oven to 180˚C. Take your pastry out of the fridge and divided it into 4. Roll each portion out on a floured surface into a thin disc and then line a tarlet tin with each of them. I find the best way to do this is to carefully lay the pastry over the tin and then to ease into the shape, before pressing into the flutes of the tin. Then take a rolling pin and roll over the top of the tarlet tins to remove the excess pastry.
  5. Spread a little jam over the base of each of the tartlets. Then portion out the frangipane and spread it so that it covers the jam and is even.
  6. Put the tartlets onto a baking tray and bake them in the oven for 15-20 minutes until the frangipane and pastry is golden brown. Set to one side to cool.
  7. To prepare the decoration put the icing sugar and lemon juice into a bowl and mix together until smooth.
  8. When the tartlets have cooled drizzle them with this icing. Then Sprinkle the tartlets with flakes almonds (optional) and serve!

Thanks for reading!

Emma x

Rhubarb and Custard Cruffins

Rhubarb and Custard Cruffins

If I’m being honest, cruffins to me sounds more like a dodgy disease than a bake, but thankfully it’s not. It’s actually a delish fusion of a flaky croissant and a muffin, resulting in a kinda cruffin lovechild if you will. The croissant dough is shaped and then baked in a muffin tin, and then these pastries are traditionally filled with all sorts of custards, creams and jams.

Whilst rhubarb and custard are a great classic combo, custard will go with pretty much anything so don’t feel as though you have to go with this particular pairing. My Dad really hates rhubarb and he won’t go near the stuff, so if you’re likewise averted to rhubarb you can use any other fruit jam you like.  I’d recommend going for something with a bit of bite, like a lemon curd or a raspberry jam rather than a strawberry or cherry jam, as otherwise things can get a bit sweet. Likewise, if you don’t like custard, whipped cream works really well to! If you do use cream though make sure you chill them in the fridge when not needed, and eat them within 2-3 days.

Recipe

Makes 8

Time: 20 minutes

Ingredients

  • Butter for greasing
  • 350g Ready-to-roll Croissant pastry (see mince pie croissants recipe if you’d like to make your own dough!)
  • 175ml Whole milk
  • 1 tsp Vanilla bean paste
  • 2 Egg yolks
  • 30g Caster sugar
  • 25ml Double cream
  • 13g Custard powder
  • 2 tbsp Rhubarb jam
  • Icing sugar to dust

Method

  1. Pre-heat the oven to 180˚C. Grease 6 hole in a 12-hole muffin tin with butter.
  2. Unroll the croissant dough on a worktop and cut the dough into three, equally sized rectangles. Then cut each of these strips diagonally to make two right-angled triangles from each rectangle.
  3. Lay them so the long side is facing you. Then roll up the triangle along the long side to make a tight coil with a flat base. Then take a knife and cut the roll in half from the top to about half way down the roll. Then stand the dough up on it’s flat edge and twist the two tails round eachother, pressing them into the dough at the end to join it together. Then put the cruffin into a hole in the greased muffin tin. (This process can be seen in the photo at the top of the post).
  4. Break the egg into a bowl and beat with a fork. Then brush the pastry with the beaten egg to glaze. Bake in the oven for 15-17 minutes until crisp and golden. Then leave them to cool on a wire rack until needed.
  5. Now make the custard filling. Put the milk and vanilla into a pan and bring to the boil.
  6. Meanwhile put the egg yolks, sugar, cream, and custard powder into a bowl and whisk together to make a smooth paste. Pour the hot milk over the egg mixture, whisking constantly until combined. Then put the mix back into the pan and pop back on the heat, still whisking constantly. Continue to whisk until the mixture thickens. Then pour the custard into a bowl and leave to cool.
  7. When the cruffins and custard have cooled down you’re ready to start filling! Spoon the jam and custard into a two separate piping bags with small round nozzles. Then pipe a little of the jam into the middle of each cruffin, followed by some of the custard.
  8. Dust with icing sugar and serve!

Thanks for reading!

Emma x

Cornish Pasties

Cornish Pasties

So back into the south for some inspiration this week. It’s kind of a necessity to eat a pasty at some point when you’re in the West-country, and though there’s dozens of kinds out there for the picking, a good old Cornish pasty will always be my favourite. When I think of pasties I think of wandering barefoot along the beach with a warm, slightly over-flowing pasty in hand. Flakes of buttery pastry flying into your face in the wind, and shooing off seagulls left, right and centre. This might not paint the most relaxing experience of dining there is, but it’s rough, rustic and nostalgic which is what I love most about it.

I know that quite often people hate pasties because they’re thought of being greasy and stodgy. These homemade ones are a lot cleaner than you’d think, and the rough-puff pastry is way lighter than the stuff you find on traditional pasties.  The key is to make sure you season the filling A LOT as it’ll totally transform the flavour of the pasty and make it really moreish. Traditionally beef skirt is used to fill a pasty as it releases gorgeous juices that taste amazing. That said, beef skirt is almost impossible to find in a local supermarket, so if you can’t find it I’d recommend using frying steak, escalopes or any cut of beef that’s relatively thin.

Recipe

Makes 6

Time: 90 minutes, plus chilling

Ingredients

For the pastry

  • 450g Strong bread flour
  • Large pinch of salt
  • 100g Cold, unsalted block butter
  • 100g Cold lard
  • 200ml Cold water

For the filling

  • 200g Potatoes
  • 1 Small onion
  • 100g Swede (1 small)
  • 200g Lean beef skirt (or frying steak if you can’t find beef skirt)
  • Salt and pepper to season
  • 1 Beaten egg

Method

  1. Begin by making the pastry. Put the flour and salt into a large bowl. Then take the chilled blocks of lard and butter and grate them into the butter. I’d recommend giving everything a little mix regularly as you do the grating so that the fats can be coated in flour, this will stop them all re-forming into a lump when you mix it all together.
  2. Then take a round-bladed knife and mix the fat into the flour so it’s all coated. Pour the cold water into the bowl and continue to mix to form a soft dough.
  3. Tip the dough out onto a surface and knead a little to bring the dough together into a ball. Wrap the pastry in cling film and chill in the fridge for at least 30 minutes.
  4. Now prep the filling. Peel the potatoes, onions and swede. Then chop the potato into chunks, about the thickness of a £1 coin. Then finely chop the onion, and chop the swede into chunks the same size as the potato.
  5. Now prep the meat. Using a sharp knife remove any gristle from the meat, but leave the fat as it’ll add great flavour to the pasty. Then chop the meat into chunks about the same size as the potato.
  6. Pre-heat the oven to 180˚C.
  7. Split the pastry into 6 and then roll each one out to a 14cm diameter circle. Using a plate as a stencil can be helpful here to get a neat circle.
  8. Distribute the onions between the pastry discs, spreading them in a semi-circle over one half of the dough, leaving a 1 cm boarder around the edge for sealing. Sprinkle over a little salt and pepper. Then top with a layer of swede, then meat and finally potato, seasoning a little between each layer.
  9. Take a cup of water and dip your finger into it. Then moisten the rim of the pastry circle with your finger. Fold the unfilled half of the pastry over the filling and use the edge of your hand to gently seal the pastry.
  10. Now it’s time for the crimping that’ll keep the pastry together. Working from right to left fold the pastry over itself and then press down. Repeat along the seam of the pasty to make a rope pattern until you reach the end.
  11. Put the pasties onto a baking tray and brush with the beaten egg. Bake for 15-20 minutes until golden brown, then reduce the oven temperature to 160˚C and continue to bake for 15 minutes. Then turn off the heat and leave the pasties to cool/keep cooking in the oven for another 30 minutes. Serve!

Thanks for reading!

Emma x

Banana Maple Pain au Raisin

Banana Maple Pain au Raisin

I’d say that generally bananas are my fruit of choice. They’re easy to eat, with none of the effort that comes with peeling an orange, and they taste really good. There is always that problem though when you buy a bunch of them. To begin with they’re all rock solid, green, and basically inedible. Then they all hit perfect ripeness at the same time and you feel compelled to eat them all before they go bad. Inevitably though at least one will go brown, then black and just slowly worse as you pass it everyday thinking ‘I really should eat that’, but at the same time ‘I really don’t want to eat that’. This is exactly the process that happened in the lead up to these beauties. I had a couple of dying bananas next to the fruit bowl, but I really didn’t want to eat them, so I started brainstorming anything that I could put them in so they didn’t go to waste.

My first choice for old bananas would normally be a banana chocolate cake. However I made one of those for my blog already, and as I’m watching my weight I’ve decided to only bake things that appear on the blog, so another chocolate banana cake, whilst delicious, wasn’t the answer. Then, I’m not sure how, the idea of banana in crème patisserie, all rolled up into a Danish popped into my mind and these were born! It’s best to make these with really ripe, almost gone bananas as they have a really intense flavour. I found that this means you don’t have to use so much banana to get the flavour coming through in the crème pat, and therefore you don’t mess around with the consistency too much! I’ve used home-made pastry here as I love making it. I will warn you though that it does take a little time and tlc, so if you’re in a hurry you can use ready rolled croissant or puff pastry instead.

Recipe

Makes 12

Time: 2 hours plus lots of chilling, resting, and baking time

Ingredients

For the dough

  • 500g Strong white bread flour
  • 10g Salt
  • 80g Caster sugar
  • 10g Instant yeast
  • 300ml Cool water
  • 300g Unsalted block butter
  • 1 Egg, beaten

For the crème patisserie

  • 200ml Whole milk
  • 1 tbsp Vanilla bean paste
  • 45g Caster sugar
  • 3 Egg yolks
  • 10g Plain flour
  • 10g Cornflour
  • 1 tsp Cinnamon
  • 2 Very ripe bananas
  • 100g Raisins

For the topping

  • 3 tbsp Maple syrup
  • 100g Icing sugar

Method

  1. First make the dough. Put the flour, salt, sugar, yeast, and water into a big bowl and use a large spatula to mix it into a dough.
  2. Turn the dough out onto a lightly floured surface and knead for 8-10 minutes until smooth and elastic. Then tip it into a lightly oiled bowl, cover with clingfilm, and leave to chill in the fridge for an hour.
  3. Meanwhile, take the block butter and place it between two sheets of cling film. Using a rolling pin beat the butter out into a rectangle about 40 x 19 cm. Cover it in clingfilm and put back into the fridge to chill until needed.
  4. Lightly flour your surface and take the dough out of the fridge. Roll it out into a 60 x 20 cm rectangle, about the thickness of a pound coin. The dough will spring back and resist being shaped, but just persist and you will get there.
  5. Put the butter sheet onto the dough so that it covers two thirds, leaving the top third exposed.
  6. Fold the exposed dough onto the first third of the butter, and then fold the bottom third, covered in butter, up onto the dough you’ve just folded down. You should now have layers of dough, butter, dough, butter, dough. Loosely clingfilm the dough and put back into the fridge for an hour.
  7. Take the dough out of the fridge and put onto a floured surface with the short end facing you. Roll it out to a rectangle 60 x 20cm. Fold the top third down and then fold the bottom third up on top, as you did before. Turn the square block 90˚ and repeat the rolling and folding. Wrap the dough in clingfilm and chill the pastry in the fridge for 1 hour.
  8. Repeat step 7 two more times, leaving the dough to chill for an hour in between turns. After the last rolling and folding wrap the dough very loosely (wrapping tightly will stop the dough from rising) and leave in the fridge overnight (or for at least 8 hours).
  9. Meanwhile make the crème pat filling. Put the milk and vanilla into a pan and put over a medium heat. Bring the mixture to a simmer.
  10. In another bowl put the sugar, egg yolks, flour, cornflour, and cinnamon and whisk them all together to make a smooth paste. Pour the warm milk over the egg mix, whisking constantly. Once all combined pour the mixture back into the pan and heat whilst whisking until the mixture starts to thicken.
  11. Take the bananas and mash them with a fork to make a smooth puree. Stir this puree into the crème pat and then leave it to cool completely
  12. Once the dough has rested and you’re ready to start shaping. Line 3 baking trays with baking paper.
  13. Lightly flour a surface and roll out the dough to 50 x 30cm, trimming the edges so you have a neat rectangle. Spread the crème pat over the dough and then sprinkle over the raisins.
  14. Roll the dough up from the long edge like a swiss roll. Then leave the roll to chill in the freezer for 30 minutes – this will make it a lot easier to cut later.
  15. When ready slice the roll into 12 slices, about 2-3cm thick and lay them flat on the baking trays. Leave for a final time to rise for an hour.
  16. Pre-heat the oven to 180˚C. Brush the pain au raisin with the beaten egg to glaze and then bake in the oven for 30-40 minutes until golden brown and risen.
  17. Take the pastries out of the oven and brush with half the maple syrup whilst they’re still warm. Then leave them to cool.
  18. Mix the icing sugar and the rest of the syrup in a bowl and drizzle it over the cooled pastries, then serve!

Thanks for reading!

Emma x

Cinnamon Roll Apple Pie

Cinnamon Roll Apple Pie

My bakes never last very long in my house. Leave something on the kitchen table and it seems to disappear within a day or two, and this cinnamon roll apple pie is no exception! This style of pie crust is becoming a bit of a food trend, flooding every kind of social media. My sister knows I’m a big fan of cinnamon rolls and apple pie so I first saw the idea when my she tagged me in a post on it, and as soon as I saw it I knew I had to make my own!

Instead of making (or buying) a dough for the crust – as you would if you were making cinnamon rolls – I’m using a shop-bought shortcrust here for two reasons, 1) it’s more sturdy and therefore a better container for the apple filling, and 2) it’s a lot quicker and easier to work with, and will therefore help you get a tight roll which should make the pie more aesthetically appealing. This also means that it’s not too tricky or time consuming to make, so if you want to make something that looks cool but doesn’t require too much culinary nous this is a good one to try.

I was experimenting on this one a bit which is why it doesn’t look very neat, but I’ve now worked out how to make it look better. Originally I tried to roll the little rolls together into one sheet (as above) but this didn’t work as the individual rolls didn’t fuse together. Therefore I’d recommend doing what I ended up doing next – roll each little roll out to the thickness you want it to be (about 1/2 the thickness of a pound coin) and then line the tin with these flat discs, overlapping and pressing adjacent rolls together so they fuse when cooking and so there’s no gaps. That said though, even if it doesn’t look completely neat it’s guaranteed to taste good so don’t worry!

Recipe

Serves 8

Time: 1 hour

Ingredients

For the crust

  • 2 tbsp Ground cinnamon
  • 80g Light brown sugar
  • 2 packs of ready rolled shortcrust pastry (I used Jus-Rol)
  • 60g Butter
  • Flour for dusting
  • 1 Egg, beaten

For the filling

  • 6 Medium sized Bramley apples
  • 140g Caster sugar
  • ½ tsp Ground cinnamon
  • 3 tbsp Flour

Method

  1. Pre-heat the oven to 180˚C.
  2. Mix the cinnamon and sugar in a bowl and set to one side. Lay out the pastry on your surface. Spread over the butter and then sprinkle over the cinnamon sugar mix so that it covers the whole sheet of pastry in an even layer.
  3. Roll the pastry up from the short end, like a swiss roll, to make a tightly rolled log. Wrap the roll in cling film and chill for 30 minutes.
  4. Meanwhile begin to prep the filling. Peel, core and slice the apples and then wrap them in layers of kitchen roll and set to one side, (this will help to take some of the moisture out of the fruit so you don’t end up with soggy bottom pastry).
  5. Put the sugar, cinnamon and flour for the filling into a bowl, mix and set aside for later.
  6. Take the pastry out of the fridge and put it onto a chopping board. Take a sharp knife and slice the roll into discs about the thickness of a pound coin.
  7. Lightly flour a surface. Then take one of the discs and use a rolling pin to flatten it into a thinner disc, about half the thickness it was before. Repeat with 2/3 of the discs.
  8. Take these discs and line the tin with them, starting from the centre of the base and working up the sides of the tin until you have a little overhang. Press the discs together so that they fuse and there’s no gaps.
  9. Put the apples into the bowl of sugar, cinnamon and flour. Mix everything together and then tip this into the pie case.
  10. Cover your work surface with a sheet of clingfilm and arrange the rest of the pastry rolls on it in a round shape, making sure they’re close together. Cover these with another layer of clingfilm (this will make it easier to work with them) and then roll over them with a rolling pin to merge them into a single sheet. You want this sheet to be about 1 cm wider than the pie tin do that it comes into contact with the overhanging pastry.
  11. Brush the edge of the pie with a little water. Then take off one of the layers of clingfilm and flip the pastry sheet onto the top of the pie. Then take the other sheet of clingfilm off the pastry sheet.
  12. Take a knife and use it at a 45˚ angle to cut off the extra pastry around the edge. Then crimp the edge of the pie to seal everything by pinching the pastry between your thumb and first finger on one hand and your first finger on the other.
  13. Brush the top of the pie with the beaten egg to glaze and then bake in the oven for 35-40 minutes until the pastry is golden brown and crisp.
  14. Leave to cool slightly before serving with cream, custard or ice cream!

Thanks for reading!

Emma x