Tag: Desserts

Chia Seed Breakfast Pots

Chia Seed Breakfast Pots

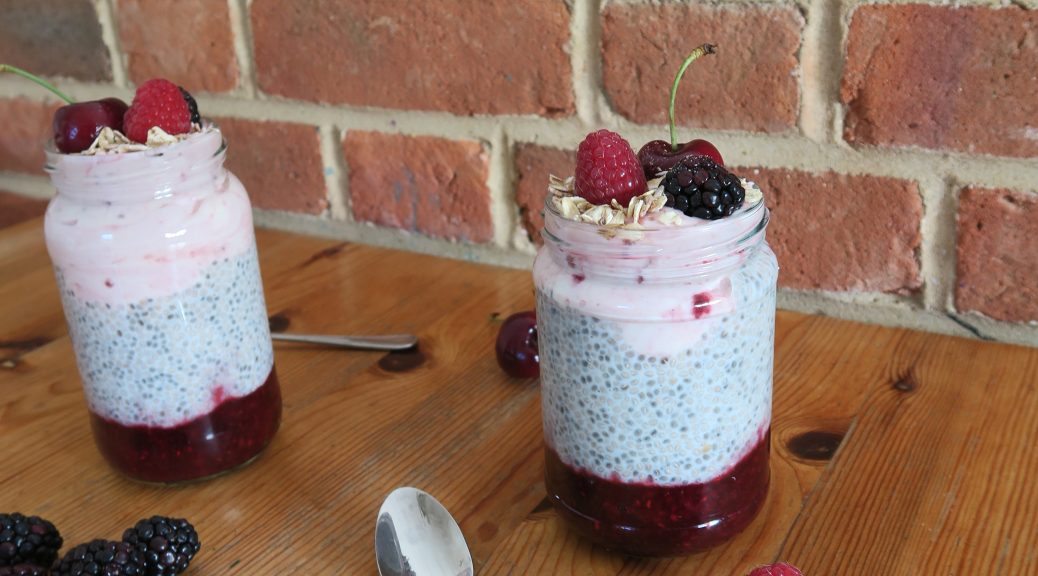
Chia seeds are the new super-food that is flooding cookbooks and blogs. They’re full of fibre, omega-3, calcium, protein, phosphorus and much more, and they can be used to help tackle diabetes, heart problems and obesity. So if you’re looking for a nutritious breakfast, simply bung some of these in.

These little pots can be put together the night before so you can gobble it down in the morning without any fuss or bother. I’ve used berries to make the compote and to decorate, but you could use any fruits you like (mango and passion fruit is a really good combo!) You can also present these differently if you want to. I went for jam jars as I think they pretty cool, but you could also just make up the individual elements and serve them up in a bowl if you want.


Recipe

Serves 2

Time 20 minutes, plus chilling time

Ingredients

  • 100g Frozen raspberries
  • 100g Frozen strawberries
  • 100g Frozen blackberries
  • 1 tbsp Honey
  • 80g Chia seeds
  • 450ml Almond milk
  • 1 tsp Vanilla bean paste
  • 300ml Greek yoghurt/fruit yoghurt of your choice
  • A few fresh berries to decorate (I went for cherries, raspberries and blackberries)
  • 2 tbsp Granola

Method

  1. Begin by making the fruit compote. Put the frozen fruits and honey into a small pan and heat gently until they’ve softened and pulpy. Set aside to cool and then put into the bottom of a jar.
  2. Now make the chia seed middle. Put the chia seeds, milk, and vanilla into a jug and stir with a fork. Let sit for 15 mins then stir again to break up the clumps. Put into fridge for at least 2 hours to set (overnight works well to).
  3. When the chia seed filling is ready spoon it over the fruit compote. Then take your yoghurt of choice and spoon it over the chia seed filling. Top with granola and fresh fruit and serve!

Thanks for reading!

Emma x

Coconut Entremets (Vegan, Gluten-free, No Refined Sugar)

Coconut Entremets (Vegan, Gluten-free, No Refined Sugar)

I know what you’re thinking. What am I doing making entremets during detox January eh? Well, as predicted I couldn’t resist touching on some French Patisserie this month, but I’ve done my best to make it as healthy as possible, meaning it’s dairy free, vegan, gluten free and has no refined sugars (providing your chocolate has no refined sugars or dairy in it).

Normally when I come across something which has more than one dietary tag on it I become suspicious as it normally involves 20+ ingredients that you can only find in special shops, and/or results in an unsatisfying, oddly textured waste of a dish. But fear not, all the ingredients I used for this you can buy really easily from any supermarket, so you won’t have to waste time searching for xanthan gum down side alleys. I was also surprised by how tasty this ended up. The coconut milk is a great double cream substitute, so the middle is as creamy as a full-fat panna cotta, and the base (made with nuts and dried fruit) is just as tasty as any butter/biscuit combo you’d find in a cheesecake. The most unhealthy bit is probably the chocolate on top, but this really depends on what chocolate you end up using, and as it complements filling really well it’s worth keeping.

Recipe

Serves 4

Time: 1 hour (Plus chilling time)

Ingredients

For the Base

  • 80g Walnuts
  • 30g Desiccated coconut
  • 50g Pecans
  • 15g Chia seeds
  • 80g Dried dates
  • 6 Dried figs

For the Coconut middle

  • 2 Sachets of veggie gel (Personally I’d use 3 gelatine leaves to set the centre of this as I find it easier to work with, but if you’re making this for a vegan or vegetarian powdered gelatine will also work well)
  • 130ml Coconut milk
  • ½ tbsp Vanilla bean paste
  • 160ml Coconut cream
  • 30g Maple syrup

For the Coconut ganache

  • 100g Dark chocolate with high cocoa solids (about 75%+) (you can get really healthy dark chocolate in special food shops if you want)
  • 75ml Coconut cream

To decorate

  • Coconut slices

Method

  1. Put all the ingredients for the base of the etremet into a food processor and whizz up until crumb-like and starting to bind.
  2. Distribute this mix between your four moulds (I went for 7 x 6cm round metal moulds) and press down with the back of a spoon to compact and make an even thickness. Put this into the fridge whilst you make the next layer.
  3. To make the coconut cream layer begin by dissolving the gelatine powder in 15ml of water (or soak the leaves in a bowl of cold water if using).
  4. Then put the coconut milk and vanilla into a small saucepan and heat gently until it starts to bubble. Then take off the heat and stir the gelatine into the hot milk until smoothly combined.
  5. Then wait for the milk to cool completely before adding the coconut cream and syrup. Whisk this all up to combine and then pour into the moulds, over the base.
  6. Chill these in the fridge until completely set, this’ll take about 3 hours.
  7. When your coconut layer is set you can move onto the next step – making the glaze. Put the chocolate into a heatproof bowl over a pan of simmering water. Melt the chocolate gently and then cool slightly before adding the coconut cream. Leave until the mix isn’t too warm and holds its shape, but is still pourable.
  8. Take the coconut entremets out of their moulds by pushing them up and out from underneath (if they’re metal moulds a blowtorch can help).
  9. Put the coconut ganache into a pipping bag with a small round nozzle and pipe little drips of the mixture over the edge of the entremets. You want the drips to be uneven so vary the amount you put over the edge. Then fill in the middle with the ganache so that the whole top is covered and put back into the fridge to set.
  10. When ready to eat plate them up with any left over crumbs from the base mix and some coconut shards to garnish!

Thanks for reading! Next post coming on Wednesday…

Emma x

Nutella Buche de Noel

Nutella Buche de Noel

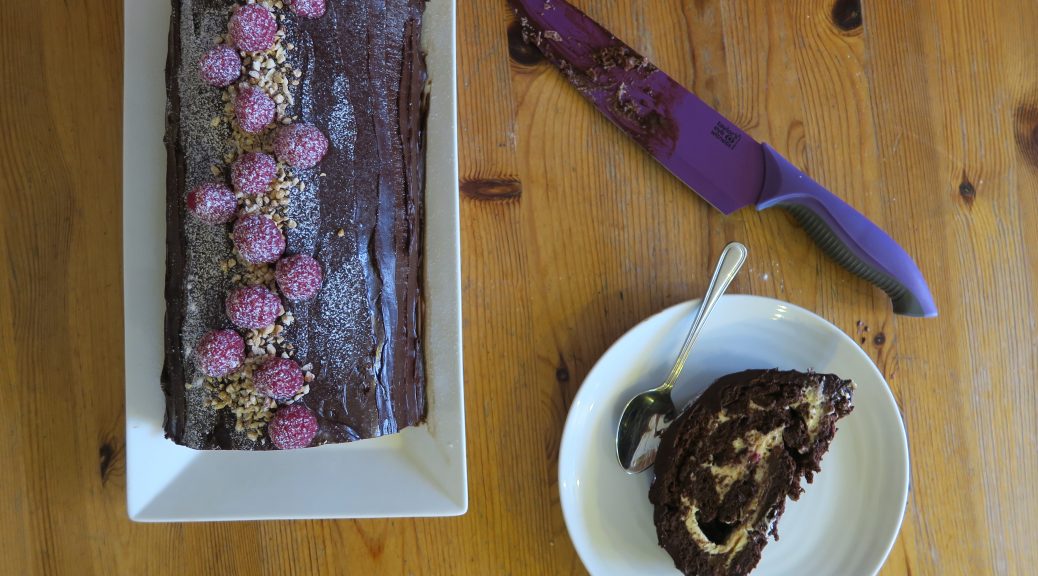
Christmas is probably one of the most traditional times of the year, and every family has their own way of doing it – especially when it comes to the food. For me, I can’t remember a year we didn’t have one of my Granny’s chocolate logs on the table on boxing day. Whilst she always claims not to be a cook, she whizzes round the kitchen and whips this up, and there’s something about the layers of chocolate cake, filling and icing which always has me excited.

This one could be called a blinged up version of the one I have at my Granny’s. I’ve never met someone who doesn’t like nutella, and so when you have a chocolate sponge, filled with nutella, hazelnuts, cream and raspberries and then coated in a rich ganache, you can’t really lose. This works really well as a dessert for Christmas day, or even as a cake to take along to a Christmas party, as it’s easily transportable and can be cut to serve as many people as needed. Also, the cake is really thin it’s really quick to make and to cool, and therefore doesn’t take too long to make, which is just what you need at Christmas.

Recipe

Serves 8

Time: 90 minutes

Ingredients

For the Cake

  • 150g Caster sugar
  • 6 Large eggs
  • 250g Dark chocolate
  • Icing sugar for dusting

For the filling

  • 200g Nutella
  • 350ml Double cream
  • 80g Icing sugar
  • 150g Rapberries, halved – plus extra for decoration
  • 100g Chopped roasted hazelnuts

For the ganache

  • 250g Dark chocolate, finely chopped
  • 250ml Double cream

Method

  1. Pre-heat the oven to 180˚C. Grease and line a 23 x 33cm Swiss roll tin with butter and baking paper.
  2. Put the chocolate and 4 tbsp water into a heat-proof bowl and melt over a pan of simmering water.
  3. Meanwhile whisk the egg whites in a really clean bowl with an electric whisk until they make stiff peaks.
  4. Put the sugar and egg yolks into another bowl and whisk with an electric whisk until pale, fluffy and thick enough to leave a trail.
  5. Fold the egg yolk mix into the chocolate mix. Then fold the egg whites into the chocolate mixture until fully combined.
  6. Pour the mixture into the lined tin and bake for 10-15 minutes until risen, bouncy and cooked through. Dust a sheet of baking paper with icing sugar and then, whilst warm, turn the cake out onto it. Make a cut about 1 cm from the edge of the short end, making sure not to cut all the way through. Roll the sponge up, with the baking paper inside, into a tight roll and leave to cool rolled up.
  7. When cool unroll the sponge and spread with the Nutella. Lightly whisk the cream and icing sugar together until it just starts to hold its shape. Smooth this over the sponge in an even layer. Then sprinkle the halved raspberries and hazelnuts over the cream.
  8. Roll the cake up, this time without the paper inside, making a tight roll. Transfer the cake onto a plate.
  9. Now make the ganache icing. Put the cream into a pan and bring just up to the boil. Put the chopped chocolate into a bowl and pour the hot cream over it. Stir until the chocolate is melted and everything’s combined.
  10. Leave the ganache in the fridge to set slightly. When it starts to hold it’s shape you can start to ice the roll. Using a palette knife smooth the ganache over the cake and the ends of the roll. Leave to set.
  11. Finish with extra raspberries and hazelnuts and dust with icing sugar. Serve!

Thanks for reading! Any comments, queries or requests don’t hesitate to ask…

Emma x

Kladdkaka (Sticky Chocolate Cake)

Kladdkaka (Sticky Chocolate Cake)

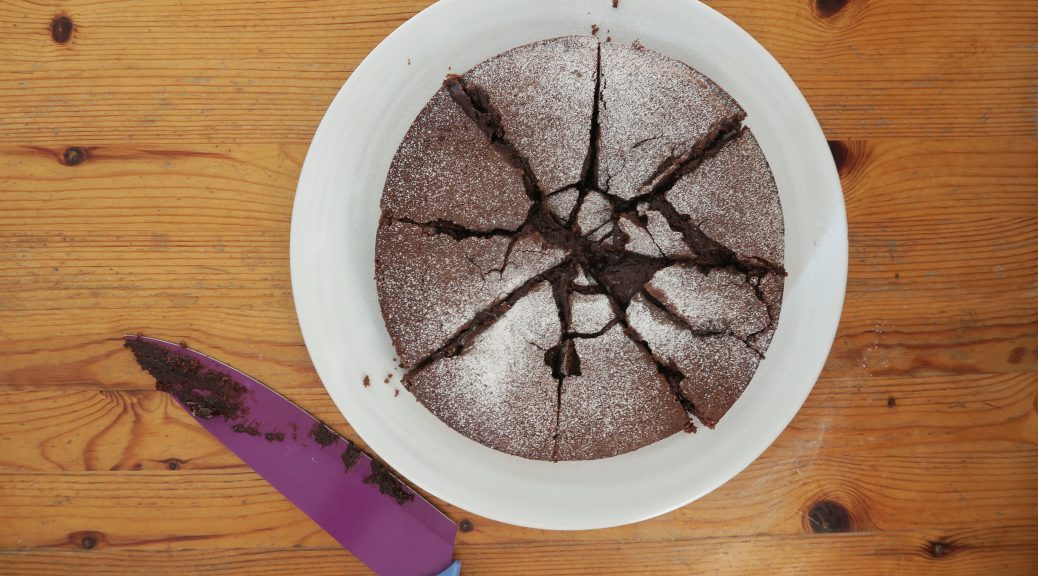
This is a Swedish cake which, from what I’ve read, is probably the most popular cake in the country. It looks like a normal chocolate cake, but somehow it turns out really gooey and light – almost like a softer, but just as sticky version of a brownie. I’m not sure how it works out like this, but it does. It’s also insanely easy and quick to make. Just put all the ingredients together, whop it in a tin, bake and boom!

This cake is in cafes all over Sweden, but as it’s pretty plain in appearance and as it’s deliberately underbaked it can make it come out pretty fragile, so I’d  recommend serving it as a dessert, rather than as an afternoon tea cake. When I first made this I hadn’t planned to make it, I’d just had the recipe for a while, realised I had all the ingredients and decided to give it a go.  As it’s so quick to make, and doesn’t require any unusual ingredients you could make this as a last minute dessert to finish a dinner party – and it’ll probably be quicker to make than a trip to the shops to buy a dessert (it’s really that quick). I’ve found that it tastes best when it’s warm from the oven and served with vanilla icecream.

Recipe

Serves 8

Time 30 minutes

Ingredients

  • 100g Unsalted butter, plus extra for greasing
  • 2 Medium eggs
  • 210g Light brown sugar
  • 1 tsp Vanilla bean paste
  • 150g Plain flour
  • 3 tbsp Cocoa powder

Method

  1. Preheat the oven to 180˚C. Grease and line a 20cm loose-bottomed cake tin with butter and baking paper.
  2. Put the butter into a small pan and melt gently. Leave to one side to cool.
  3. Put the eggs, sugar and vanilla into a bowl and whisk with electric beaters until light and fluffy (about 3 minutes).
  4. Sift the flour and cocoa into the mix and fold together with a large spatula or metal spoon. Pour in the butter and then fold together until smooth.
  5. Pour the mixture into the lined tin and bake for about 15 minutes. It’s ready to come out when a light crust has formed on the top, and there it’s still slightly undercooked in the middle (you want it to be underbaked so take it out about 5 minutes before you would a normal cake).
  6. If eating later, leave the cake to cool in the tin and then turn out onto a plate. If eating immediately, turn out and serve with berries and icecream!

Thanks for reading!

Emma x

Kaiserschmarrn with Spiced plums

Kaiserschmarrn with Spiced plums

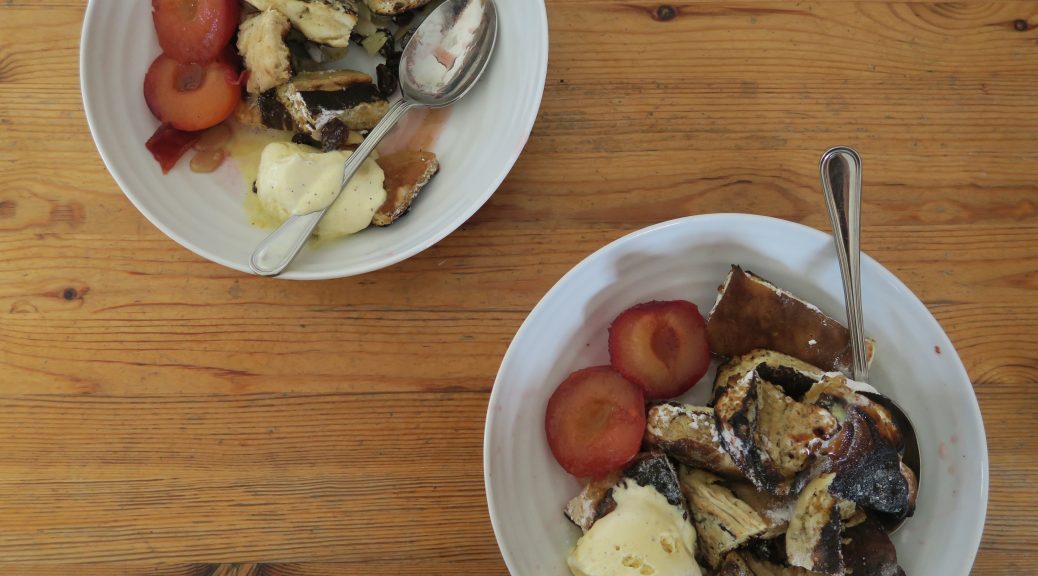
We’re almost into the excitement of Christmas, but here’s one last autumn recipe before the winter warmers come in. I first came across Kaiserschmarrn when I was browsing in the cook book section in a massive book shop. I’ve always loved foreign dishes that I haven’t heard of before, and so I made a note to look it up when I got home. It’s not the prettiest or most refined of dishes, but it tastes really good which is just as important. If you’re not Austrian, Kaiserschmarrn essentially means cut up pancakes with rum and dried fruits. It’s then sprinkled with sugar and put under the grill to caramelise. All in all this elevates the classic pancake to a perfectly delicious dessert.

I’ve paired this with spiced plums, as the first time I made it it came out pretty dry. The plums and the juices from them hydrate the dish and bring some warming fruity flavours which work really well with the soft pancakes and rum. I think traditionally this is made with thin pancakes, more similar to a french crepe, but I’m using thick Scotch pancakes for this as I think the light, fluffy texture works really well. They also soak up the juices and rum a lot better, but you can go for crepes if you prefer.

Recipe

Serves 8

Time 45 minutes

Ingredients

For the pancakes

  • 300g Self-raising flour
  • 1 ½ tbsp Baking powder
  • 60g Caster sugar
  • 2 Large eggs
  • 200ml Milk
  • Vegetable oil for greasing
  • 4 tbsp Rum
  • 190g Raisins
  • 80g Butter
  • 100g Flaked almonds
  • 2 tbsp Icing sugar
  • 1 tsp Ground cinnamon

For the plum sauce

  • 8 Plums, halved and stoned
  • 125g Caster sugar
  • 65ml Orange juice
  • 65ml Water
  • 1 Cinnamon stick
  • 1 Vanilla pod

Method

  1. Begin by making the pancakes. Put the flour, baking powder and caster sugar into a bowl. Mix to combine and then make a well in the centre. Add the egg and milk in the well and then whisk until combined and smooth.
  2. Put a large frying pan with 1 tbsp of vegetable over a medium heat. Using a ladle pour a neat circle of batter into the middle of the pan. Leave to cook for 1-2 minutes, until bubbles start to form on top, and then turn over and cook on the other side.
  3. Once cooked on both sides transfer onto a large plate. Repeat with the rest of the mixture to create a large stack of pancakes.
  4. Cut the stack of pancakes into 5 strips and then cut these strips into 5 to get squares.
  5. Now make the spiced plums. Put the all the ingredients for the sauce in a pan over a high heat. Bring to the boil, cover with a lid and then leave on a low heat to gently simmer until the plums soften – about 20 minutes.
  6. Take the sticks and vanilla pod out of the pan and then set aside for later.
  7. Now finish the kaiserchmacchan. Heat the rum in a small saucepan. Add the raisins and then leave off the heat to soak.
  8. Pre-heat the grill on high heat. Melt the butter in a large frying pan. Add the pancake squares, the raisins and rum mix, and the almonds. Cook for 3-4 minutes whilst stirring until warmed through and starting to brown.
  9. Sift the cinnamon and icing sugar over the top and then put under the grill. Once the sugar starts to caramelise, take out from under the grill and serve immediately with the plums and vanilla ice cream.

Thanks for reading!

Emma x