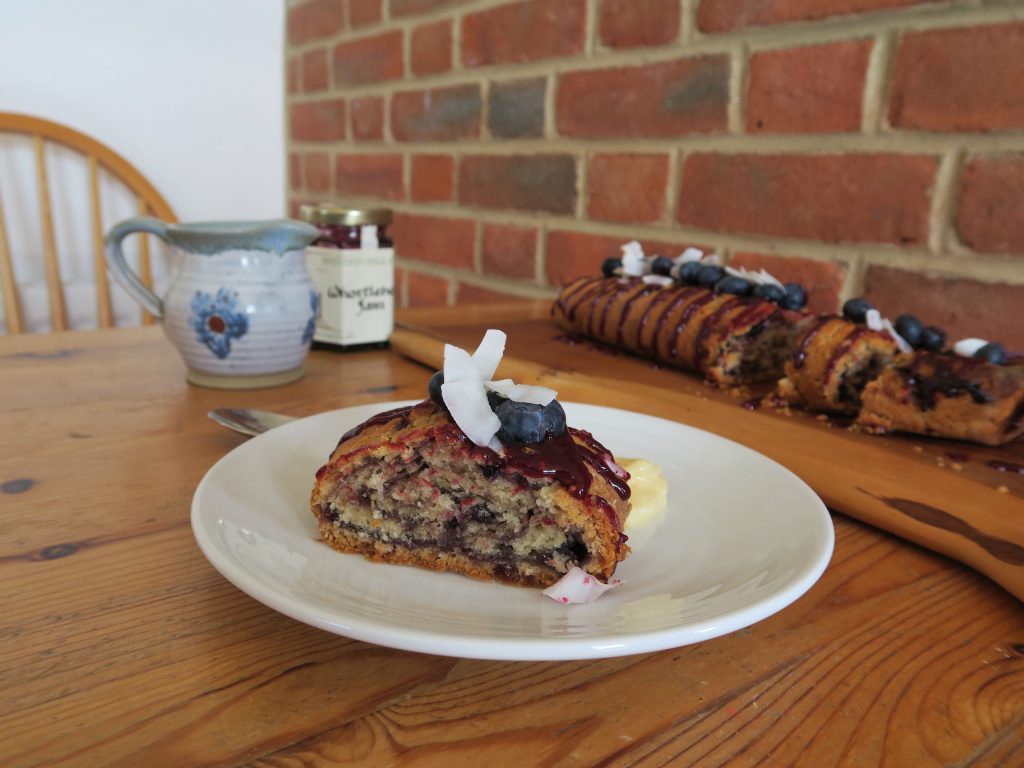
Whortleberry and Coconut Roly Poly with Coconut Custard
What a magnificent word is whortleberry eh? I’d never heard of it before my trip down to Devon last month when I came across a jar of whortleberry jam in a little corner shop. It sounded really weird but I’m always one for trying new flavours so I knew I had to give it a go. Flavour wise it’s a kinda cross between a blueberry and a blackberry, but it also just makes the perfect combo with coconut. I really wanted to use this stuff in a recipe but I wasn’t sure how to incorporate jam into something as fun as it’s name. Then I remembered just how much I love a good roly poly, and the name whortleberry jam roly poly was something too good to pass on.
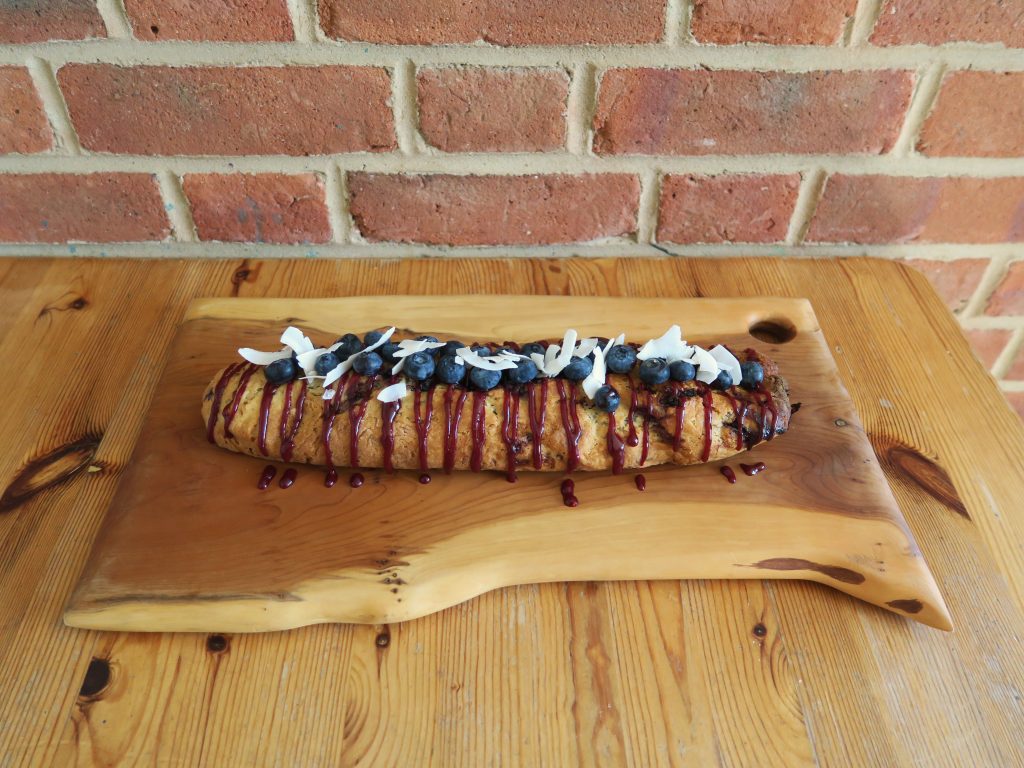
It might seem a bit weird to have a traditional sticky British pud in summer, but I personally see no reason to put an expiration date on these beauties. I mean I kid you not when I say that I saw snow, rain and glorious sunshine within hours of each other yesterday so anything goes. Besides, this is comfort food 101 and that stuff is needed all year round so I’m bringing the roly poly into May – coconut, whortleberry, custard and all!
Recipe
Serves 8
Time: 1 hour plus extra time for cooking
Ingredients
- 50g Coconut Oil, plus extra for greasing
- 200g Self raising flour
- 50g Desiccated coconut
- ½ tbsp Vanilla bean paste
- 50g Vegetable suet, shredded
- 150ml Coconut milk
- 150g Whortleberry (or blueberry) jam
For the custard
- 250ml Coconut milk
- 1 tbsp Vanilla bean paste
- 50g Caster sugar
- 3 Egg yolks
- 10g Plain flour
- 10g Cornflour
To serve
- A handful of Blueberries
- 75g Whortleberry (or blueberry) jam
- 25g Flaked coconut
Method
- Preheat the oven to 180˚C. Take a deep roasting tin and fill it with water about 2/3 full. Put this onto the bottom shelf, or base of the oven and leave in the oven.
- Take a sheet of foil and another of greaseproof paper and lay the paper on top of the foil. Grease the paper lightly with a little coconut oil, and set aside for later.
- Now it’s time make the roly-poly. Put the coconut oil, flour, desiccated coconut, and vanilla into a bowl. Cut into the oil with a round bladed knife to chop it into small lumps. Once you can’t cut it up any further, go in with your fingers and rub the oil into the flour until you have a rough bread-crumb texture. Shake the bowl from side to side every now and then to get the lumps to the top so you can rub them in.
- Stir the suet into the mixture. Then pour in the coconut milk and bring together with a round-bladed knife until a dough forms. If the dough is dry add some more milk – you want the dough to be a little sticky.
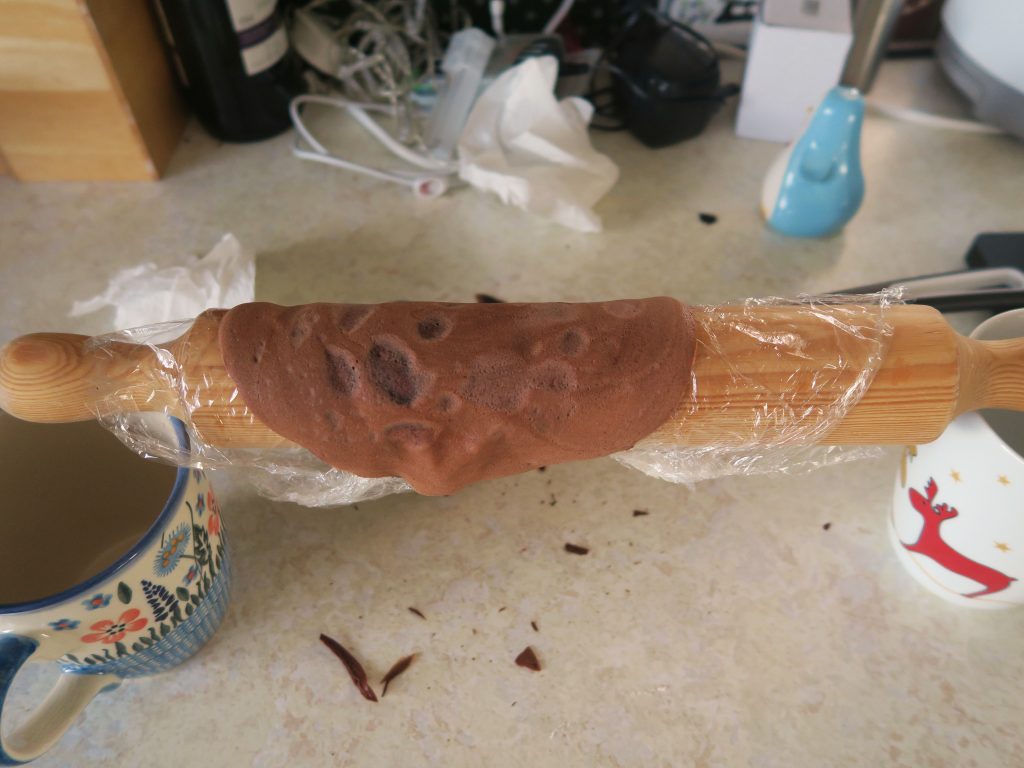
- Flour a surface (a lot) and tip out the dough. Shape into a rough square and then roll out to around 25x25cm. Don’t roll it as thin as you would pastry, and this dough is very soft and will tear easily.
- Spread the jam over the sheet of dough, leaving a 1cm strip at one end. Roll the dough up from the other end into a tight spiral. Pinch the non-jammy dough into the roll to seal it.
- Lift the roll onto the greased baking paper, making sure that the join is on the paper and not facing up. I know this part is much harder than you would expect, but I found that it’s true to it’s name and literally rolling it onto the grease-proof was the best way to get the roll off the work surface.
- Bring the foil and paper up around the roly-poly and fold over the top and scrunch the ends to seal the parcel. Don’t wrap the dough too tightly as it’ll need to stretch when cooking.
- Make sure a rack is above the tin of water in the oven and place the parcel onto the rack. Steam in the oven for at least 1 hour.
- Meanwhile make the custard. Put the coconut milk and vanilla into a saucepan and bring to the boil.
- Mix the sugar, egg yolks and two flours until fully combined. Once the milk is heated, remove the pan from the heat and mix 1/3 of the milk into the egg mixture.
- Whisk the mixture quickly and then pour the egg mixture into the milk. Put the pan back over a medium heat and whisk until the mixture boils and thickens. Pour into a jug and cover with cling-film to prevent a skin from forming. Set aside for later.
- Once the pudding is ready take it out of the oven and let it sit for a few minutes before unwrapping. When this is going on you can prep the decorations.
- Put the flaked coconut into a small roasting tin and roast in the oven for 3-5 minutes, or until starting to brown. Set aside for now. Take the extra jam and put into a pan. Heat gently for around 2 minutes, until it’s thinned out slightly. Put into a pipping bag with a small round nozzle.
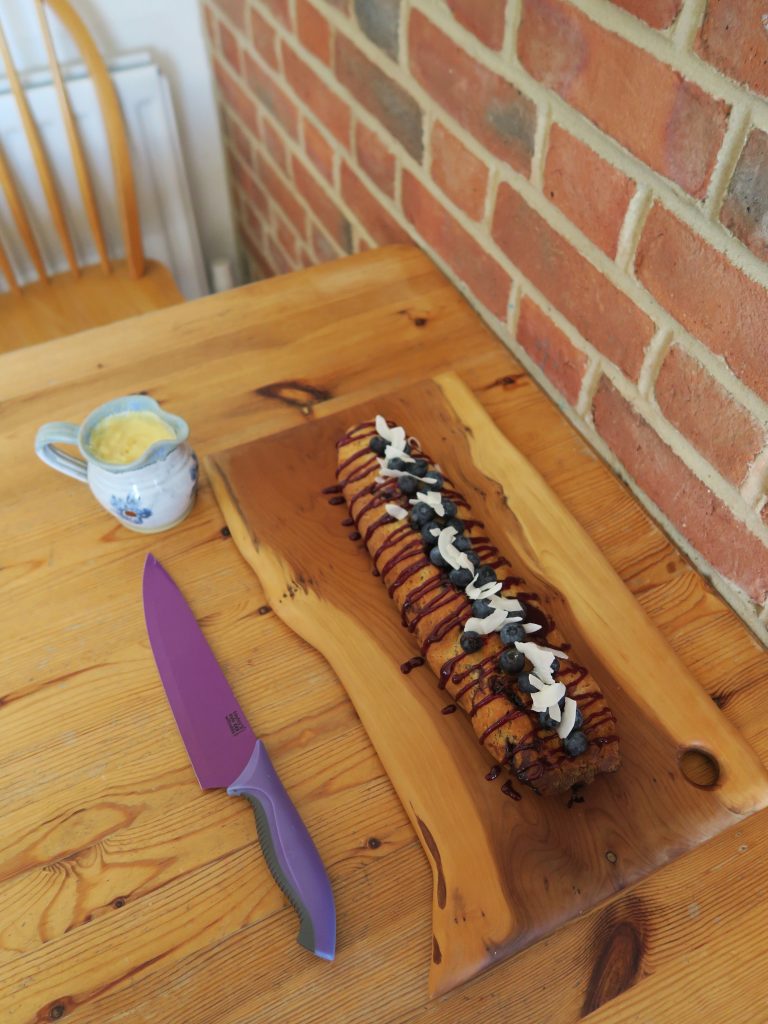
- Unwrap the roly-poly and put it onto a serving plate. Arrange the extra bluberries on top of the pudding. Then pipe the thinned jam on top of the blueberries in a zig-zag and top with the flaked coconut. Serve with the custard and enjoy!
Thanks for reading!
Emma x