Tag: Comfort

Mississippi Mud Pie

Mississippi Mud Pie

It’s thanksgiving tomorrow, and how better to celebrate it than with a huge Mississippi mud pie. Being a Brit I don’t normally celebrate, or even know when thanksgiving is. Yet luckily last Sunday I was at one of my drama rehearsals, and when we were trying to work out who was free for a rehearsal this Thursday a fellow cast memeber, who’s American, replied ‘yes, even though it’s Thanksgiving’. The convo then spiralled off into talks of pumpkin pie and pastry crusts, but this got me thinking.  Why not look into classic American dishes and make one to celebrate? I know Mississippi Mud Pie isn’t strictly traditional for thanksgiving, and the Americans out there will be gritting their teeth that I haven’t made a pumpkin or pecan pie. But personally I find the later overly sweet and not suited to my British palette, whereas this chocolate binge of a pie is heaven on a plate to me.

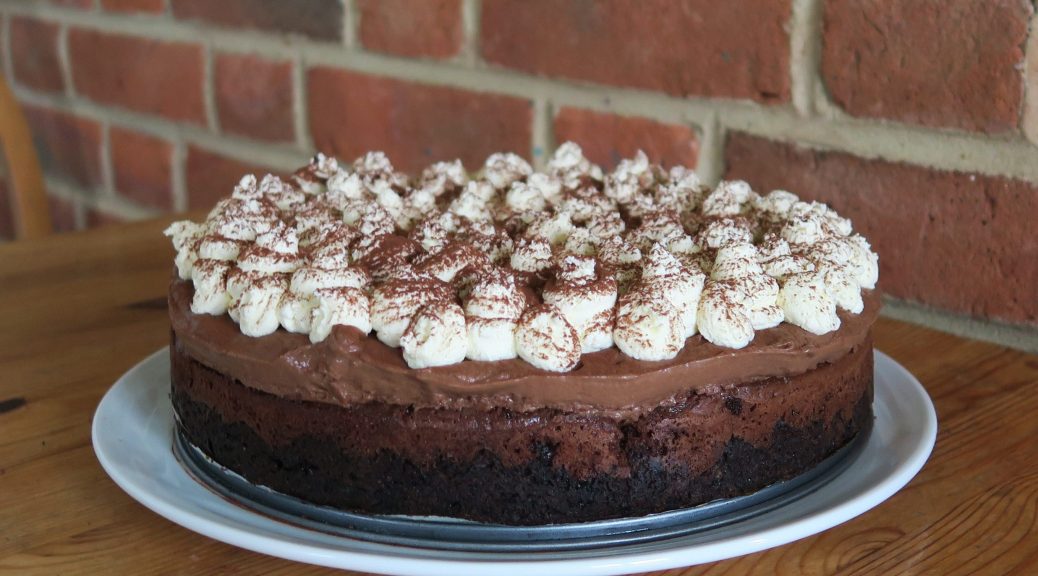
I’m not sure why it’s called Mississippi mud pie – the name unfortunately doesn’t do the dish justice. I’ve been skipping past it in cook books for years, not even looking to see what it is, and stupidly I think it’s probably because of the name. There have been many variations from the original, but it’s essentially a chocolate biscuit base, a gooey chocolate brownie on top, then a smooth chocolatey creamy mousse thing, and finally topped off with freshly whipped cream. I’m a huge chocoholic, and as I was making this I was getting way too excited with each layer I was putting on. You might be looking at it and thinking that’s way too much chocolate, but it’s actually not overpowering. Think of it as an ombre cake where each layer is slightly more subtle than the last. The Oreo and Bourbon base is really rich, then the brownie is slightly sweeter and less rich, then the next layer is chocolatey and creamy, and the top layer of cream is a great break from the chocolate.

With the days getting darker at the moment I’m constantly struggling to make my dishes before the light dims and so I was a little rushed making this. As I wanted to photograph this before the natural light started to go, to avoid the yellow wash that comes from my kitchen lights, I took it out of the mould after only two hours of resting. When you read the recipe you’ll see that I recommend at least 4 hours, or even better overnight, which is why in some of the pictures the chocolate filling is pouring out everywhere. Trust me though, if you leave it for long enough it will set and look beautiful when cut. I left mine in the fridge over night and this morning the chocolate filling had set and gone all beautiful, so be patient. That said, it still tasted amazing after 2 hours, so if you can’t wait, and you don’t need it to look neat and elegant when cut into, an hour is long enough for chilling.

Recipe

Serves at least 8

Time 1 hour 15 minutes, plus lots of time for chilling

Ingredients

For the Chocolate crust

  • 160g Oreos
  • 200g Bourbon biscuits
  • 100g Unsalted butter, melted, plus extra for greasing

For the Chocolate brownie

  • 150g Butter
  • 210g Dark chocolate
  • 3 Medium eggs
  • 210g Caster sugar
  • 40g Plain flour
  • 100g White chocolate, roughly chopped

For the Chocolate filling

  • 100g Dark chocolate
  • 290ml Whole milk
  • 3 Egg yolks
  • 60g Caster sugar
  • 15g Plain flour
  • 1 tbsp Cocoa powder
  • 20g Cornflour
  • 150ml Double cream

For the Topping

  • 350ml Double cream
  • 1 tsp Vanilla bean paste
  • Cocoa powder for dusting

Method

  1. Pre-heat the oven to 180˚C. Grease and line a 24cm loose bottomed cake tin with butter and baking paper.
  2. Put the biscuits into a large bowl and crush with the end of a rolling pin to make into a fine crumb. Pour over the butter and mix to combine.
  3. Tip the mixture out into the tin and smooth out into an even thickness with a spoon. Put into the oven and bake for 5 minutes to firm it up.
  4. Now make the brownie mix. Put the butter and chocolate into a bowl over a pan of simmering water and leave to melt.
  5. Take another bowl and whisk the eggs until pale and fluffy with an electric whisk. Add the sugar and continue to whisk until it leaves a trail when the whisk is taken out.
  6. Fold the chocolate into the eggs, sieve in the flour and add the chopped white chocolate. Fold everything again until combined.
  7. Pour the mixture into the biscuit case and bake again for about 15-20 minutes until a crust has formed on top and it feel slightly firm. Set aside to cool.
  8. Now make the chocolate filling. Put the chocolate into a heat-proof bowl and melt over a pan of simmering water. Put the milk into a pan and heat until just boiling.
  9. In another bowl whisk the egg yolks, sugar, plain flour, cocoa powder and cornflour until smooth. Pour in the milk whilst whisking until smooth.
  10. Pour the mixture back into the pan and cook gently until just starting to thicken. Take off the heat, stir in the melted chocolate and leave in the fridge to cool completely.
  11. Take the filling out of the fridge and whisk to break up. In another bowl whisk the double cream to soft peaks. Fold the cream into the chocolate mix and then pour this over the cool brownie. Put this into the fridge to chill for 2 hours.
  12. Finally whip up the double cream and vanilla into soft peaks. Spoon this into a pipping bag with a round nozzle and pipe in blobs over the chilled chocolate filling. Put all this back into the fridge to chill for at least another 2 hours, or even better overnight.
  13. When ready to eat, take it out of the mould and dust with cocoa powder before serving.

Thanks for reading and happy Thanksgiving for tomorrow!

Emma
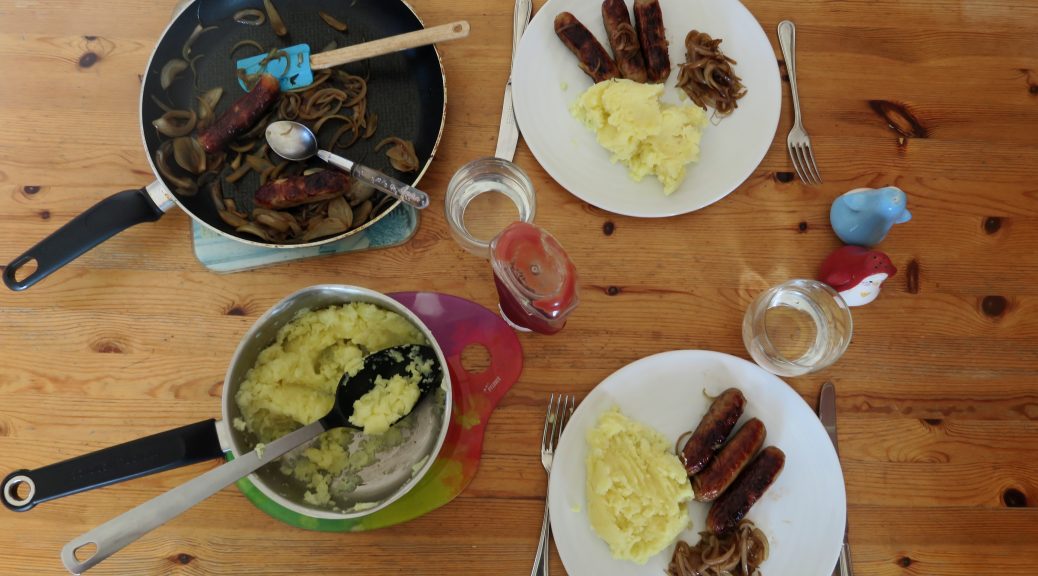
 

Sausages, Mash and Sticky Balsamic Onions

Sausages, Mash and Sticky Balsamic Onions

Whilst I love complicated French patisserie, when it’s the middle of the week and I’m tired, stressed and short of time, all I want is a quick dinner that tastes good. In times like these there’s nothing more comforting than some good homemade mash, and there’s nothing better to put that mash with than some pork sausages and sticky balsamic onions. These onions also work really well on burgers and with steak, so if you’re making either of those any time soon you can give that a go. I’m gonna leave the writing there this time, as I’m all three of the above, and if you’re the same you’re going to be wanting to get onto the recipe, so here it is…

Recipe

Serves 2

Time: 45 minutes

Ingredients

  • 6 Cumberland sausages (or any variety you prefer)
  • 2 Large baking potatoes, peeled and cut into chunks
  • 150g Butter
  • 2 Red or white onions, finely sliced
  • 2tsp Caster sugar
  • 2tsp Balsamic vinegar
  • Salt and pepper to season

Method

  1. Heat a grill to full heat. Put the sausages onto a grill pan, pierce them slightly with a knife, and then put them under the grill to cook. Turn them over once they’ve browned on one side, so that they colour evenly. If you don’t have a grill you can oil a pan and fry the sausages in there until no longer pink in the middle.
  2. Now start the mash. Fill a large pan with water and bring to the boil. Add the potatoes and leave until a knife goes into them easily – 8-10 minutes should do it.
  3. Meanwhile make the sticky balsamic onions. Take a large pan, preferably one with a lid, and put in 50g of the butter. Put over a medium heat to melt it, and then add the sliced onions. Cook for 2 minutes whilst stirring, and then leave to cook for around 7 minutes with the lid on to let them soften.
  4. Once soft, take the lid off and fry for another 2-3 minutes, stirring occasionally,  until they begin to caramelise and brown slightly. Then add the sugar and vinegar and stir to combine. Fry for another 2-3 minutes until all sticky and delicious, and then cover and put to one side.
  5. Once the potatoes are tender, drain them and put them back into the pan. Using a fork or potato masher, break up the potatoes until they’re smooth and lump-free. Add the other 100g butter and add it to the potatoes. Continue mashing to mix it in and make it even more lump free – it should melt if the potatoes are still warm.
  6. Season the mash with salt and pepper, and then serve the sausages, onions and mash with some tomato ketchup!

Thanks for reading!
Emma x


Apple and Blackberry Crumble

Apple and Blackberry Crumble

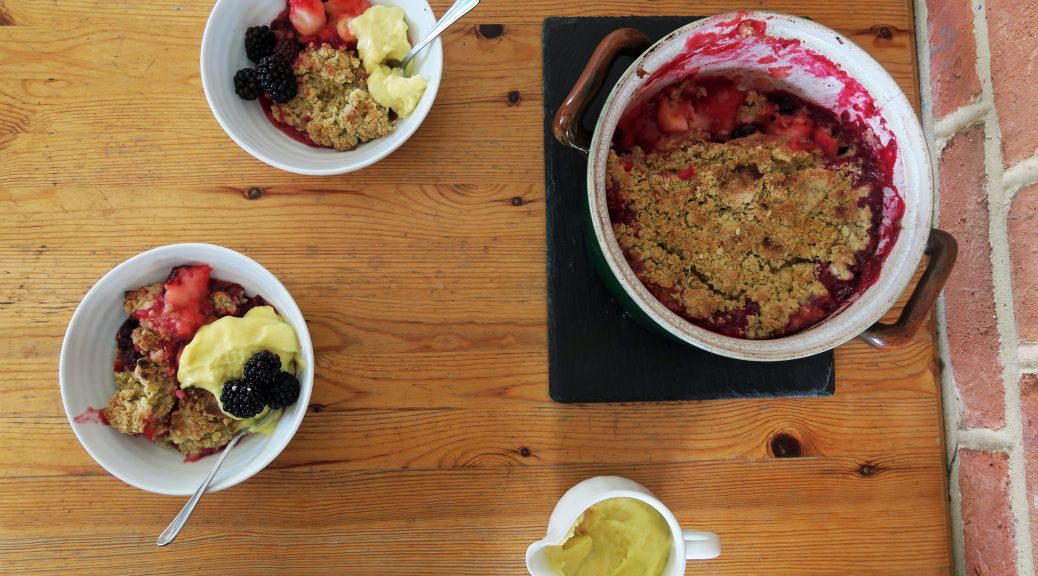
Being a country girl, pretty much every hedgerow and tree around where I live is covered in blackberries or apples at the moment, and it’s times like these – when fruit is literally falling onto your doorstep – that you need to make the most of it. The other day a big bag of cooking apples magically appeared on the kitchen table, which happens a lot now that my Mum has discovered foraging. But lucky for me I knew exactly what I wanted to do with them –  when life gives you apples, make apple crumbles.

Ever since I was small a big bowl of this with some custard would put a smile on my face, and it still does to this day. You can put almost any fruit into a crumble – rhubarb, berries or pears just to name a few other classics. Blackberries and apples are definitely my go-to couple though, as they carry a lot of flavour, and they’re the perfect combo of sweet and sharp.

I’d recommend serving this with a really good custard. You can either make this powdered, in which case follow the back of the packet’s instructions, or you could make an even better custard from scratch. For this I have a really good recipe which is on two of my other posts – Bakewell roly poly and French fruit tarts – the links to which are at the bottom of this post under ‘you may also like’ (if they’re not there, refresh the page and they’ll pop up or go to my recipe index).

Recipe

Serves 8

Time: 1 hour

Ingredients

  • 4 Bramley apples
  • 85g Brown sugar
  • 150g Blackberries
  • 150g Butter
  • 150g Caster sugar
  • 150g Plain flour
  • 150g Rolled oats
  • 1 tsp Ground cinnamon

Method

  1. Preheat the oven to 180˚C.
  2. Peel, core and chop the apples into chunks.
  3. Put the apples into a pan with the brown sugar and heat gently until they begin to break down and soften. At this point remove them from the heat, add the blackberries, and set aside for now.
  4. Now make the crumble topping. Put the butter and caster sugar into a bowl and beat with a wooden spoon until smooth and light. Add the flour and rub it into the butter mixture with your fingers. Work this until you get a bread-crumb texture, shaking the bowl from side to side every so often to bring the lumps to the top.
  5. Add the oats and cinnamon, and then mix with a round bladed knife to combine with the breadcrumb mixture. Don’t worry if clumps form, this will happen as the butter will have softened, it’ll taste good.
  6. Take a large oven-proof pot or dish and put the stewed apples and blackberries into it. Spoon the crumble over the top loosely, not pressing down as you want it to remain crumbly.
  7. Put the crumble into the oven for 25-35 minutes until the topping is golden brown and slightly crisp.
  8. Serve immediately with lots of custard, cream or ice cream.

Thanks so much for reading and happy national baking week! We’re getting halloweeeny on the next few posts so make sure you look out for them.

Emma x

Ham-N-Pea Mac-N-Cheese

Ham-N-Pea Mac-N-Cheese

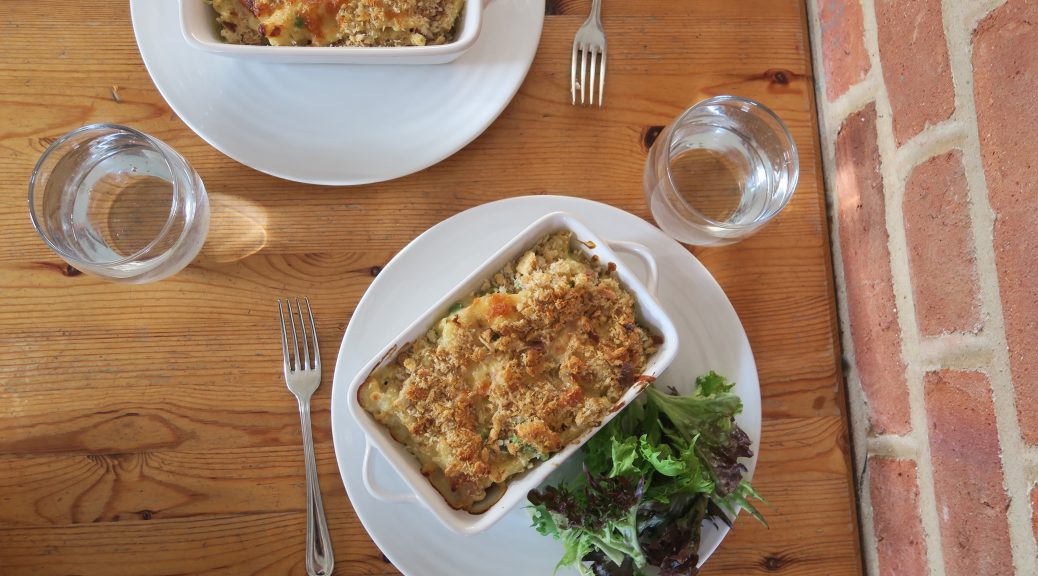
This is one of those rare occasions where I make something savoury. After all the puddings I’ve been making recently I decided to turn my hand to something different. This summer I became obsessed with mac n cheese, probably because pretty much every restaurant I went into had a variation of this dish. From the classic pasta and cheese combo to an… interesting version containing maple syrup and bacon, I can proudly say that I’ve tried lots of these.

When it came down to making my own I improvised a bit. Ham and peas are a beloved couple who work well together in most dishes, and are not strangers to a big bowl of pasta, so there’s no surprise that they also work really well in this. The first time I made this I was surprised that it actually worked – most dishes need a few nips and tucks. But this one was a first-time wonder, and was so easy to make that I’m sure even the most novice of chefs can make themselves a delicious meal with this.

Now many people are going off/ have gone off to uni now, and this is a great cheap one to make once you get there. It’s a classic taste of home, and so if you’re feeling homesick this one is a great comfort. It also freezes really well so if you make too much you can put the rest away for a rainy day, rather than having to throw it away. This also teaches you to make a white sauce, one of the most useful sauces to master as a home cook, and once you can make a white sauce you can make a cheese sauce by simply adding cheese, as in this recipe.

Recipe

Serves 4

Time: 1 hour 15 mins

Ingredients

  • 300g Macaroni
  • 100g Frozen peas
  • 50g Unsalted butter
  • 50g Plain flour
  • 500ml Milk
  • 1 tsp English mustard
  • 100g Strong cheddar cheese, grated
  • Pepper to season
  • 4 Thick slices of ham, cut into small pieces
  • 80g Bread crumbs (or bread crusts dried in the oven and then blitzed to crumbs)
  • 50g Parmesan, grated

Method

  1. Pre-heat the oven to 180˚C.
  2. Bring a large pan of water to the boil. Add the macaroni and cook it to the packets instructions. Leave the pasta in the pan with the water and then add the peas. Cover and leave until needed.
  3. Now make the cheese sauce. Firstly melt the butter in a pan. Then add the flour and mix until a paste forms – this is called a roux. Cook the paste out gently over a medium heat to cook out the flour. Slowly add some of the milk, whisking as you do so that the flour is fully incorporated. Slowly add the rest of the milk, whisking as you do so to make a lump-free sauce. If you feel as though it’s going lumpy and horrible, don’t worry, just persevere and beat the hell out of it with the whisk and everything should be fine.
  4. Whisk the sauce over a medium-high heat until it has thickened. Add the mustard and cheddar to the sauce and then season with pepper to taste. (You can also season the sauce with salt, but the cheese and ham are already quite salty, so you don’t really need to).
  5. Drain the pasta and peas and then add them to the sauce. Add the ham and mix to fully combine.
  6. Pour the pasta mix into an oven-proof container. Top with the breadcrumbs and then with the parmesan. Bake in the oven for 15-20 minutes, until golden brown and crisp.
  7. Serve warm with a leafy side salad.

Thanks for reading! Any questions or comments don’t hesitate to ask. Next post coming out on Wednesday as always, keep a look out!

Emma x

Bakewell Roly-Poly Pudding

Bakewell Roly-Poly Pudding

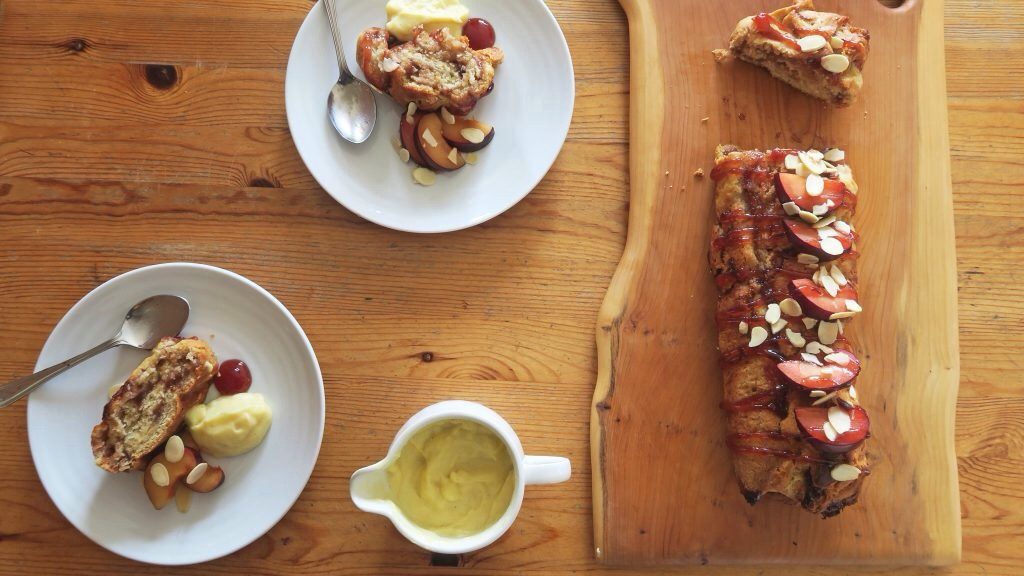
I think this might just be the most British pudding that has ever existed. Not only is it a roly-poly pudding – the Lord of quintessentially British desserts – but it’s a bakewell roly-poly pudding.  For years this steamed suet roll has been gracing our tables in the UK, whether it be in the school canteen or at a humble family meal, and so it’s naturally become synonymous with warmth and comfort. Thus, if you need a little comfort food, all you need to do is rustle up one of these –  it’s bound to bring back memories of cosy autumn evenings and home baking, even if you never had this as a kid.

The flavours of a bakewell pudding can be summarised as almonds + raspberry. In this case I’m going to use plums instead as they’re in season and also work really well with the almonds. I’m also not going to use traditional animal suet as it isn’t vegetarian and vegetable suet is just as readily accessible. You could use it if you want the true ‘authentic’ version, but it’s completely your choice. I must warn you that suet is weird. If you’ve never worked with it before, imagine those pellets that you feed rabbits, then imagine them made out of wax. That’s the kind of stuff we’re dealing with here. But, that said, it does make really good puddings, so we’re going to use it.

I should probably write more for this post, but a simple pudding only needs a simple write-up. So, in summary, this tastes good and it’s comforting, perfect for now!

Recipe

Serves 8

Time:  1 hour plus extra time for cooking

Ingredients

  • 50g Slightly salted butter
  • 200g Self raising flour
  • 50g Ground almonds
  • ½ tsp Almond essence
  • ½ tbsp Vanilla bean paste
  • 50g Vegetable suet, shredded
  • 150ml Milk
  • 150g Plum jam

For the custard

  • 250ml Whole milk
  • 1 tbsp Vanilla bean paste
  • 50g Caster sugar
  • 3 Egg yolks
  • 10g Plain flour
  • 10g Cornflour

To serve

  • 2 Plums
  • 75g Plum jam
  • 25g Flaked almonds


Method

  1. Preheat the oven to 180˚C. Take a deep roasting tin and fill it with water about 2/3 full. Put this onto the bottom shelf, or base of the oven and leave in the oven.
  2. Take a sheet of foil and another of greaseproof paper and lay the paper on top of the foil. Grease the paper lightly with butter, and set aside for later.
  3. Now it’s time make the roly-poly. Put the butter, flour, ground almonds, almond essence and vanilla into a bowl. Cut into the butter with a round bladed knife to chop it into small lumps. Once you can’t chop the butter any further, go in with your fingers and rub the butter into the flour until you have a bread-crumb texture. Shake the bowl from side to side every now and then to get the lumps to the top so you can rub them in.
  4. Stir the suet into the mixture. Then pour in the milk and bring together with a round-bladed knife until a dough forms. If the dough is dry add some more milk, you want the dough to be a little sticky.
  5. Flour a surface (a lot) and tip out the dough. Shape into a rough square and then roll out to around 25x25cm. Don’t roll it as thin as you would pastry, and this dough is very soft and will tear easily.
  6. Spread the jam over the sheet of dough, leaving a 1cm strip at one end. Roll the dough up from the other end into a tight spiral. Pinch the non-jammy dough into the roll to seal it.
  7. Lift the roll onto the greased baking paper, making sure that the join is on the paper and not facing up. I know this part is much harder than you would expect, I found that it’s true to it’s name, and so literally rolling it onto the greaseproof was the best way to get the roll off the work surface.
  8. Bring the foil and paper up around the roly-poly and fold over the top and scrunch the ends to seal the parcel. Don’t wrap the dough too tightly as it’ll need to stretch when cooking.
  9. Make sure a rack is above the tin of water in the oven and place the parcel onto the rack. Steam in the oven for at least 1 hour.
  10. Meanwhile make the custard. Put the milk and vanilla into a saucepan and bring to the boil.
  11. Mix the sugar, egg yolks and two flours until fully combined. Once the milk is heated, remove the pan from the heat and mix 1/3 of the milk into the egg mixture.
  12. Whisk the mixture quickly and then pour the egg mixture into the milk. Put the pan back over a heat and whisk on a medium heat until the mixture boils and thickens. Pour into a jug and cover with cling-film to prevent a skin from forming. Set aside for later.
  13. Once the pudding is ready take it out of the oven and let it sit for a few minutes before unwrapping. When this is going on you can prep the decorations.
  14. Put the almonds into a small roasting tin and roast in the oven for 3-5 minutes, or until starting to brown. Set aside for now. Then halve, stone and thinly slice the plums. Take the extra plum jam and put into a pan. Heat gently for around 2 minutes, until it’s thinned out slightly. Put into a pipping bag with a small round nozzle.
  15. Unwrap the roly-poly and put it onto a serving plate. Arrange the plum slices on top of the pudding. Pipe the thinned jam on top of the plum slices in a zig-zag and top with the flaked almonds. Serve with the custard and enjoy!

Thanks so much for reading. I hope this one brings you a little warmth and comfort for the cold days ahead. Next post coming out on Sunday!

Emma x