Tag: Cake

Tahini Chocolate Cake

Tahini Chocolate Cake

What the hell is tahini I hear you ask? To be honest, the first time I heard about it I thought it could be an exotic grass skirt dance from the Caribbean. But alas… no.  It’s actually a sesame seed paste that is used a lot in Middle Eastern cooking and is a key component of hummus. So if you like hummus you’ll definitely like this, but fear not, this is not hummus cake! The tahini goes in the icing to make a salty, sweet, nutty filling for these super moist chocolate cakes that just works so so well.

This is one of those things that will only make sense when you try it, so if you’re looking at this a little doubtingly then I’d recommend just giving it a go! I made my own sesame snaps for this as I couldn’t for the life of me find any anywhere in the shops, but in the recipe I’ve said use sesame snaps as they taste better and make your life so much easier.

Recipe

Serves 12

Time: 90 minutes

Ingredients

For the chocolate cake

  • 180g Unsalted butter
  • 100g Dark chocolate
  • 240g Plain flour
  • 280g Caster sugar
  • 1 tsp Bicarbonate of soda
  • 3 tbsp Cocoa powder, plus extra for dusting
  • 2 Large eggs
  • 142ml Milk
  • 142ml Greek yoghurt
  • 2 tbsp Tahini

To Decorate

  • 230g Unsalted butter
  • 3 tbsp Tahini
  • 320g Icing sugar
  • 2 Packets of sesame snaps

Method

  1. Preheat the oven to 180˚C. Grease and line two 7.5 inch cake tins.
  2. First make the chocolate cake. Melt the butter and chocolate together in a heat-proof bowl over a pan of simmering water.
  3. In a bowl mix the flour, sugar, bicarb and cocoa together.
  4. In another bowl whisk together the egg, milk, and yoghurt. Add this mixture and the chocolate mixture to the flour mixture, along with the tahini and 100ml boiling water. Whisk quickly until combined and then pour this into the two lined tins.
  5. Bake in the oven for 25-30 minutes, or until a skewer comes out clean once inserted. Leave the cakes to cool for 15 minutes before turning them out onto wire racks and leaving to cool completely.
  6. Now make the icing. Put the butter and tahini into a bowl and mix with a wooden spoon until smooth and creamy. Add the icing sugar and beat it into the mixture until smooth. Spoon the icing into a piping bag fitted with a round nozzle and leave in the fridge until needed.
  7. When the cakes have cooled completely put one onto a plate. Pipe blobs of the icing over the base layer and then place the other cake on top.
  8. Pipe the rest of the icing over the top of the cake in blobs.  Dust the cake with a little cocoa powder. Then break the sesame snaps into shards and place them around the top of the cake. Serve!

Thanks for reading!

Emma x

Banana, Cinnamon and Rum Friands

Banana, Cinnamon and Rum Friands

The first time I had a friand was in NYC on an Art trip a couple of years ago . My friends and I found this amazing patisserie shop near where we were staying and consequentially had delicious viennoisserie and patisserie for breakfast every morning. One day I had a raspberry friand – which is basically a chewy but very light cake, and it was so insanely good! I can still remember sitting on a bench in central park, everything turning orange and red because it was on the cusp of autumn, and biting into this moist fruity cake with a delicious chew on it. Since then whenever I’ve made friands they’ve reminded me of my amazing trip and so I thought it was about time I make some and write up a recipe of my own for them.

I’ve always loved the flavour combination of cinnamon and banana, so I thought this in a  friand would be cool. I’ve topped these with  rum icing which is optional but is also very delicious so I’d really recommend trying it out. This icing also goes really well with any sponge cake, crumble or generally warm pudding, so if you make too much just keep it in a pot in the fridge for when you need it! Traditionally these are made in little oval tins, but as I didn’t have a specific financier tin I just used a well-greased muffin tin which seemed to do the trick.

Recipe

Makes 12 Friands

Time: 20 minutes, plus cooking time

Ingredients

For the Friand

  • 55g Ground almonds
  • 110g Caster sugar
  • 30g Plain flour
  • ½ tsp Ground cinnamon
  • A large pinch of Salt
  • 50g Butter, melted
  • 3 large Egg whites
  • 2 large Bananas

For the rum caramel icing

  • 60g Butter
  • 75g Light brown sugar
  • 3 tbsp Whole milk
  • 1 tbsp Rum
  • 100g Icing sugar

Method

  1. Pre-heat the oven to 180˚C and then grease a 12 hole muffin tin with butter.
  2. Now make the cake mixture. Put the ground almonds, sugar, flour, cinnamon and salt into a bowl and whisk together. Add the melted butter and egg whites to the mix and whisk until smooth.
  3. Take one of the bananas and mash it in a bowl with a fork. Then add it to the mix and whisk it in.
  4. Then take the other banana and slice it into slices the thickness of a £1 coin. Put one of these slices into the bottom of each of the muffin holes. Top with an ice cream scoop of the cake mixture and then bake the firands in the oven for 20 minutes until golden brown on top and cooked all the way through (a knife or skewer inserted into the centre will come out clean).
  5. Take a knife and run it round the edge of the cakes to loosen them from the tin and then turn the cakes out onto a wire rack and leave to cool completely.
  6. Now make the icing. Put the butter into small pan and melt gently. Then add the sugar and heat whilst stirring until the sugar dissolves.
  7. Add the milk and bring to the boil. Then remove from the heat and add the rum. Stir and then leave to cool to room temperature.
  8. Once cooled add the icing sugar to the mixture and stir to make a smooth icing. Pour the icing into a pipping bag with a small nozzle and then drizzle over the friands.  Serve!

Thanks for reading!

Emma x

Chocolate Ginger Chequerboard Cake

Chocolate Ginger Chequerboard Cake

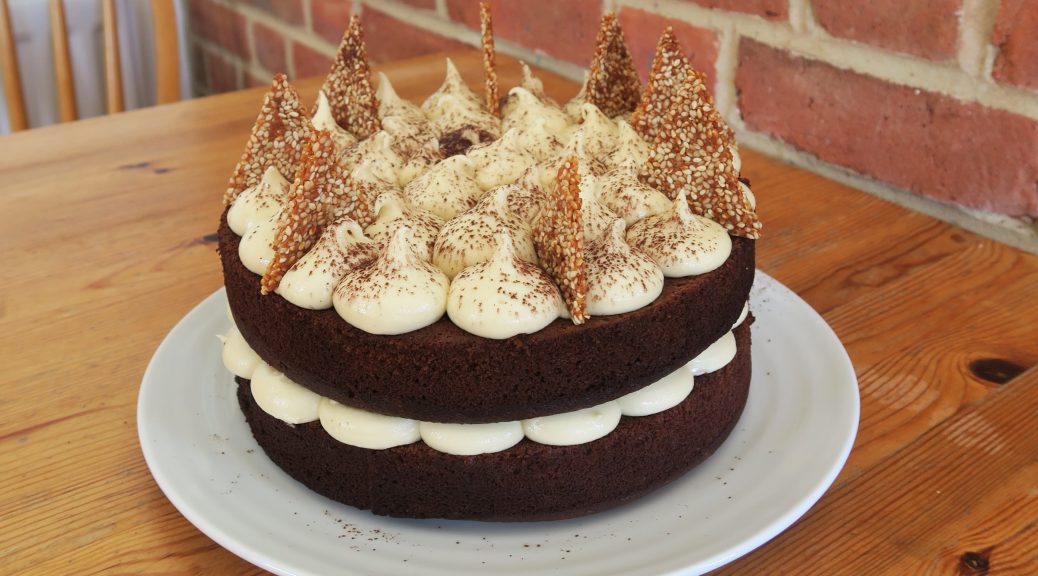
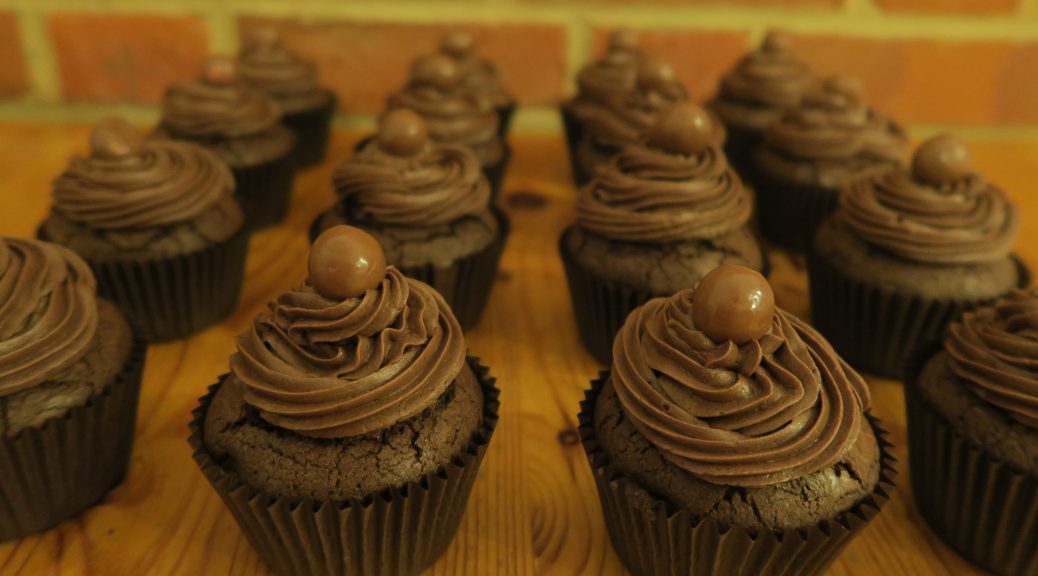
Here comes the return of the chequerboard cake. I know I made one of these a while ago, but trust me, this one’s even better! The other day it was my godmother’s birthday so I made her this for the occasion – a four layer, chocolate and ginger chequerboard cake. Making really big, elegant cakes is one of my favourite things, but as they’re often for special occasions you want them to look perfect, and over the years I’ve found that these are really one of those things that you just need to practise in order to make really well. As a result I’ve constantly straddled the line between having slightly messy cakes and having way too much cake in my life. Therefore when the occasion comes round to make cakes for other people I leap at the opportunity, as it’s great practise and also a great way of showing someone how much they mean to you!

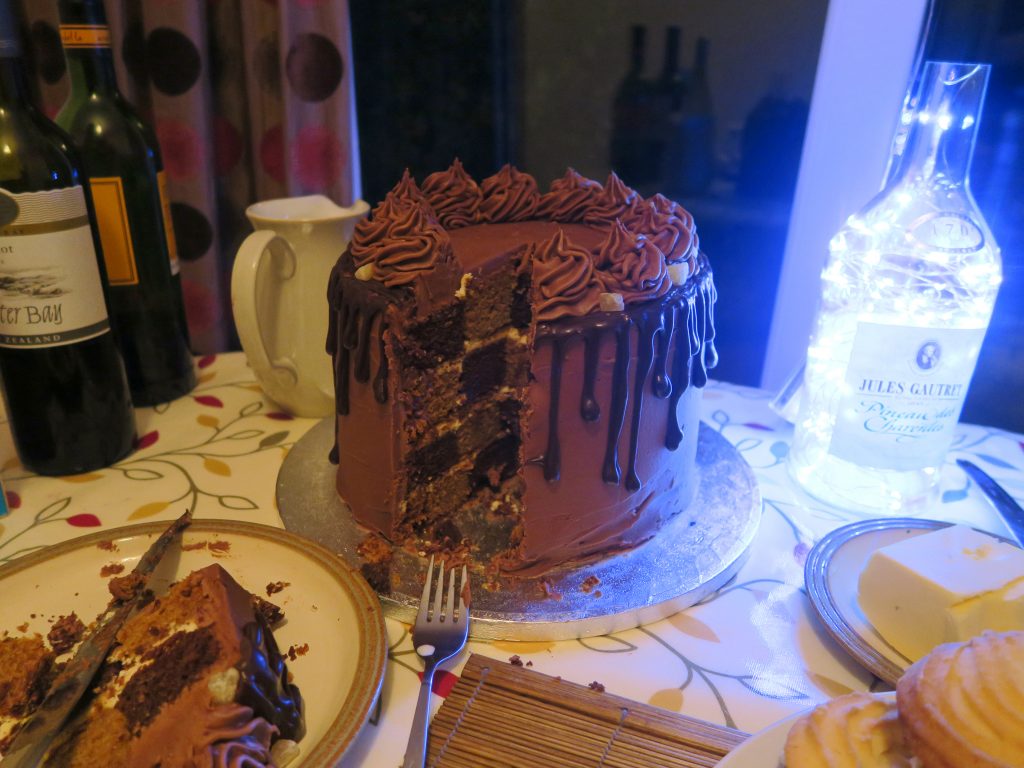
Most of the photos I have of the chequerboard inside this one are pretty dark and weirdly lit from this light-filled bottle next to it, but it still shows a little of what it’d look like when it’s cut into. A great thing about these kinda cakes is that they look really impressive as they are, and then when they’re cut into they have this surprise pattern inside, so you’ll get a lot of ooos and ahhhhhs! This one is also the first cake I’ve ever managed to get with really smooth icing. I’ve finally developed a good icing recipe which is the perfect consistency and will set really well. This means that with two layers of icing, a crumb coat and a finish coat, you can get a really professional finish!

The two cakes in this are also so insanely moist that they practically melt in the mouth and are packed full of flavour. Chocolate and ginger are two of my favourite cake flavours, so for me when they’re slotted in together the result is insane! Chequerboard cakes can be made with pretty much any combo of flavours though, as long as they go well together and have contrasting enough colours to make the pattern stand out. If chocolate and ginger isn’t your thing I’d recommend chocolate and vanilla, almond and raspberry, mint and chocolate, or anything else that takes your fancy.

Recipe

Serves 15

Time: 3 hours, plus chilling and baking time

Ingredients

For the chocolate cake

  • 180g Unsalted butter
  • 100g Dark chocolate
  • 240g Plain flour
  • 280g Caster sugar
  • 3 tbsp Cocoa powder
  • 1 tsp Bicarb
  • 2 Large eggs
  • 142ml Greek yoghurt
  • 142ml Milk

For the ginger cake

  • 140g Butter
  • 300g Self Raising Flour
  • 1 tsp Bicarb
  • 5 tsp Ground ginger
  • 2 tsp Mixed spice
  • 140g Light brown sugar
  • 290g Golden syrup
  • 300ml Milk
  • 1 Large egg

For the chocolate ginger icing

  • 300g Unsalted butter
  • 600g Icing sugar
  • 150g Dark chocolate, melted and cooled
  • ½ tsp Ground ginger

For the filling

  • 300ml Double cream
  • 25g Icing sugar
  • ½ tbsp Vanilla bean paste

For the chocolate drip

  • 100g Dark chocolate
  • 75ml Double cream

To Decorate

  • Crystallised ginger
  • Anything else you like (biscuits, sparklers, candles, chocolates etc.)

Method

  1. Preheat the oven to 180˚C. Grease and line four 7.5 inch cake tins.
  2. First make the chocolate cake. Melt the butter and chocolate together in a heat-proof bowl over a pan of simmering water.
  3. In a bowl mix the flour, sugar, bicarb and cocoa together.
  4. In another bowl whisk together the egg and yoghurt. Add this mixture and the chocolate mixture to the flour mixture, along with 100ml boiling water. Whisk quickly until combined and then pour this into two of the lined tins.
  5. Bake in the oven for 25-30 minutes, or until a skewer comes out clean once inserted. Leave the cakes to cool for 15 minutes before turning them out onto wire racks and leaving to cool.
  6. Now make the ginger cake. Put the butter, flour, bicarb and spices into a large bowl. Cut the butter up into the flour with a round-bladed knife. When you can’t cut the chunks of butter any smaller go in with your hands and rub the butter into the flour with your fingertips. Shake the bowl from side to side every so often to get the bigger lumps of butter coming to the top, and rub these in until the whole mixture is like breadcrumbs.
  7. Then put the sugar, syrup and milk into a small pan and heat whilst stirring until the sugar has dissolved. Then stop stirring and bring the mixture up to the boil.
  8. Crack the egg into the flour mix. Then pour the syrup into the flour mix, a little at a time, whisking in between additions.
  9. When fully combined pour the mix into the lined tins and bake for 45-50 minutes until a skewer inserted into the middle comes out clean. Take out of the tin and leave to cool on wire racks.
  10. Whilst the cakes are cooling, make the buttercream icing. Beat the butter and icing sugar until smooth. Then add the melted dark chocolate and ground ginger, and mix until fully combined. Spoon the icing into a piping bag, fitted with a round nozzle.
  11. To prepare the filling put the cream, icing sugar and vanilla into a bowl and gently whisk until it just holds it’s shape. Then spoon it into a piping bag fitted with a small round nozzle and leave in the fridge until needed.
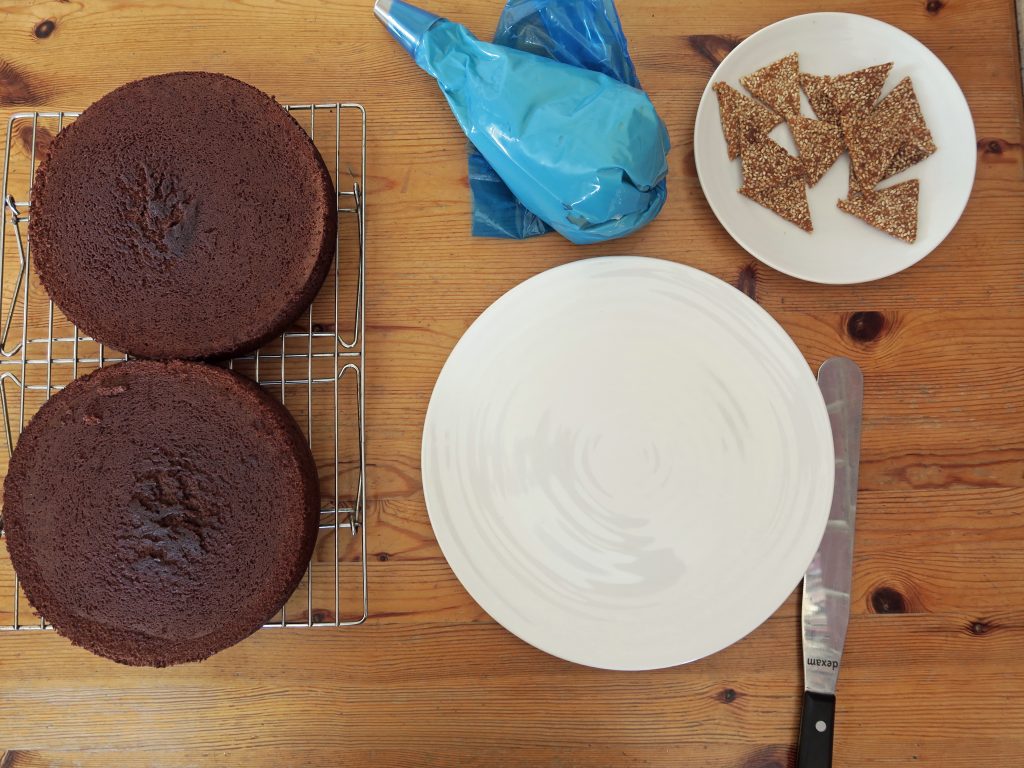
  12. Now start assembling. Lay your cakes out on a board and compare the heights of them. They should all be the same, but if they’re not use a serrated knife to level them so they’re all the same thickness. This will mean that the rings will be the same height as they cakes they’re put into in the next step.
  13. Take a 5 and 2.5 inch smooth, round cookie cutter. Then in all four cakes cut out a circle from the centre with the 5 inch cutter, and then take the 2.5 inch cutter and cut a circle out of the 5 inch piece.
  14. Take the middle ring out of each cake and swap it into a cake of the other type (so the chocolate rings will go into the ginger cakes and visa versa).
  15. Take your icing and put a little on the cake board or plate you’re going to be presenting on, this will stop the cake from sliding around. Then put one of the cakes that has two rings of chocolate and one of ginger and put it in the centre of the cake. Pipe 1/3 of the cream in the pipping bag over the top and smooth it over with a palette knife.
  16. Then put one of the cakes which has two ginger rings and one chocolate on top and repeat with the cream and the other layers of cake, but with the final layer of cake don’t top with cream.
  17. Now make the crumb coat of icing. This is the first layer which aims to trap the crumbs and stop them from getting into your final icing finish. Take your chocolate icing and spoon 1/2 of it over the top of the cake. Then use a palette knife to gently work the icing around the sides of the cake. Smooth the icing as best you can so that it’s even, but don’t worry about it looking too finished at this stage. Then put it in the fridge to set for at least 2 hours.
  18. When set, take the cake out again and repeat with the icing, this time making sure that the finish is super smooth and glossy. (A palette knife and turn table is really helpful for this!) Keep any excess icing for later and leave the cake in the fridge until needed.
  19. Now make the chocolate drip icing. Chop the chocolate finely and put it into a bowl. Then put the cream into a pan and heat gently. When the cream just starts to boil take it off the heat and pour it over the chocolate. Stir to combine and to help melt the chocolate. Then leave it for a couple of minutes so that it thickens up enough to be pourable but not runny.
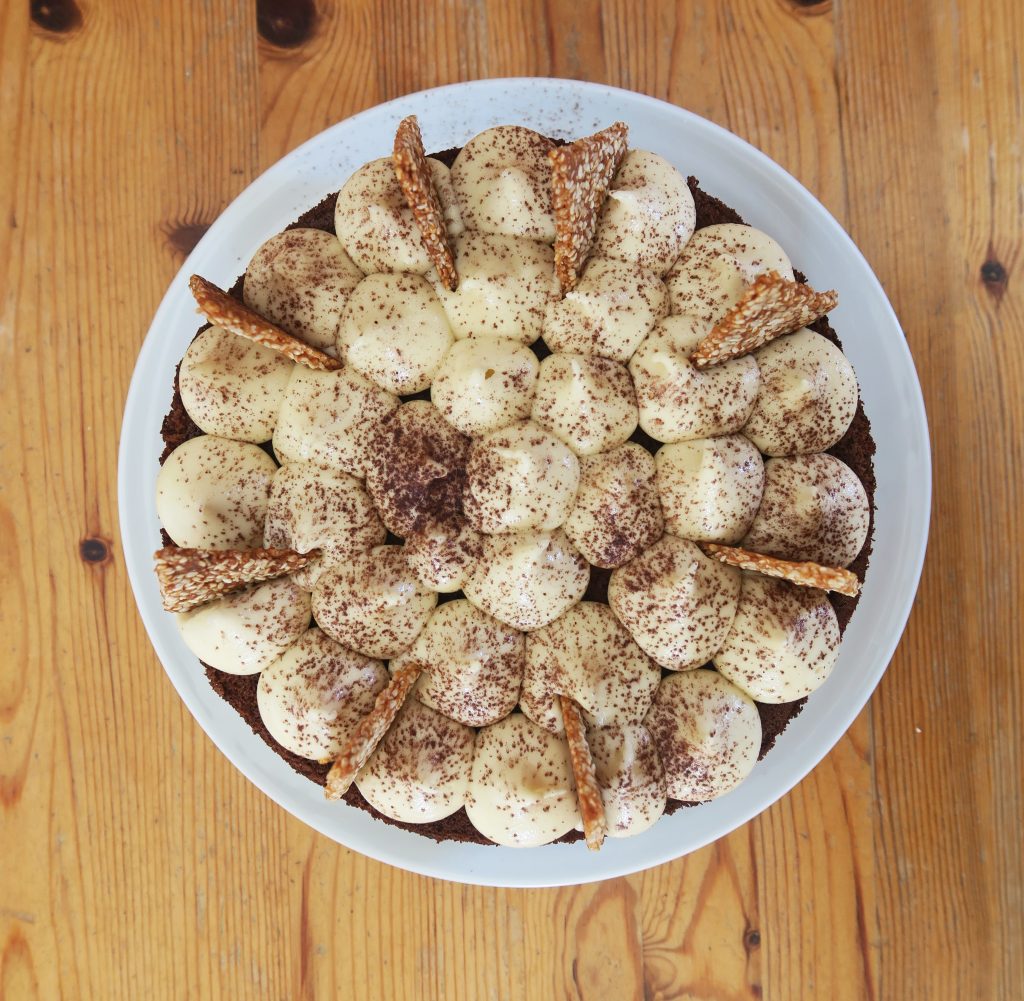
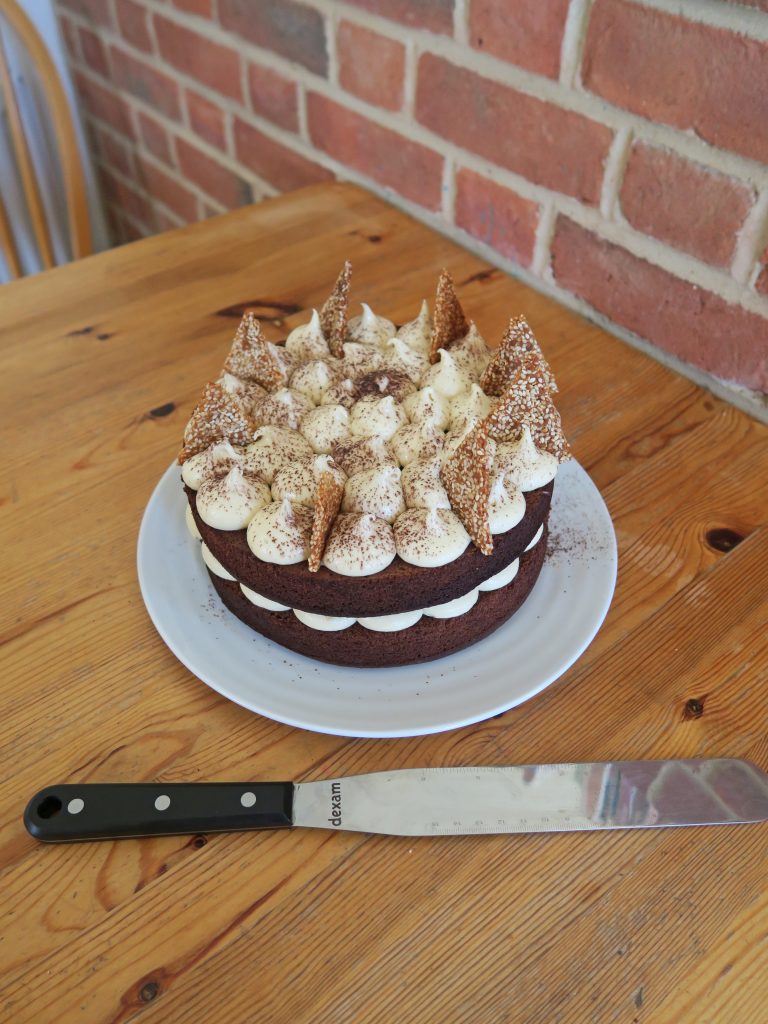
  20. Pour the drip icing into a piping bag with a small round nozzle. Then gently pipe around the top edge of the cake, letting uneven drips roll down the cake.
  21. Take the excess icing from earlier and put it into a piping bag with a star shaped nozzle. Pipe rosettes around the edge of the cake so that the join of the chocolate drips to the icing is hidden.
  22. Top with the crystallised ginger and any other decorations you want (e.g ginger biscuits, candles or sparklers). Enjoy!

Thanks for reading!

Emma x

Banana, Peanut Butter and Chocolate Loaf Cake

Banana, Peanut Butter and Chocolate Loaf Cake

In every family there’s always a scale of culinary abilities. There’s the Delia Smith – the one who does the majority of the cooking, the ‘I cook to survive’ one who could make pasta and boil an egg if needed, and the one who could burn water and would die trying to find their way to the kitchen. Whilst in my family we have a kinda scale like this, everyone of us has, admittedly, a pretty good knack in the kitchen, and we all have our signature dishes. For me it’s my chocolate fondants, for my Mum it’s her chicken and leek pie, my Dad’s is his ultimate apricot tiffin, and my sister makes a mean chocolate banana cake.

However, since my sister left home we haven’t had many of her incredible banana cakes around, so I thought I’d make one of my own. This one’s just like hers – packed with banana and chocolate chips which melt into delicious puddles when served warm! I’ve also added some peanut butter though as I love a good PB and chocolate combo. This one is also really easy and fun to make, but when served fresh from the oven it’s everything you could want from a cake.

Recipe

Makes 1 loaf

Time: 45 minutes

Ingredients

  • 50g Unsalted butter
  • 75g Peanut butter
  • 250g Caster sugar
  • 2 Medium eggs
  • 250g Plain flour
  • 2 tsp Baking powder
  • 2 Ripe bananas
  • 200g Dark chocolate

Method

  1. Pre-heat the oven to 180˚C.
  2. Put the butter, peanut butter and sugar into a bowl and beat with a wooden spoon until smooth.
  3. Add the eggs and then whisk until combined. Then sift the flour and baking powder into the mixture and fold in to make a smooth batter.
  4. Mash the bananas in another bowl with a fork until they’re a pulp. Then roughly chop the chocolate. Add the bananas and 150g of the chocolate to the batter and stir until fully combined.
  5. Line a 1L loaf tin with butter and baking paper. Pour in the mixture and then bake in the oven for about 1 hour until a skewer comes out clean when inserted into the middle. If the top starts to brown too much cover it loosely with kitchen foil to protect it.
  6. When ready take the cake out of the oven and leave to cool for a few minutes before turning it out of the tin. Leave to cool on a wire wrack.
  7. Meanwhile put the rest of the chopped chocolate into a heatproof bowl and melt over a pan of gently simmering water. Pour this chocolate into a pipping bag with a small round nozzle and drizzle over the cake. Then serve!

Thanks for reading!

Emma x

Chocolate Cupcakes

Chocolate Cupcakes

When I was a lot younger I used to earn money by making and selling cupcakes at school fetes and bizarres. Most of my memories of these events are spending hours into the night before stressing out and piping onto hundreds of differently flavoured cakes. The picture below is of a very timid me at my first Christmas stall when I was 12. At this one I sold vanilla, lemon, coffee and walnut, ginger, chocolate, and caramel cakes.

Without a doubt my best seller was my chocolate cupcakes topped with a Malteaser. I’d always have to make twice as many of them as any of my others as they’d sell out within the first half of the event.

Unfortunately, although I’ve made hundreds of these, I have no good photos of them. The two above photos are old ones from my cupcake selling days, before I learnt how to use a camera properly, and so they’re pretty blurry. Recently I made another batch (see below) for my Dad’s birthday, which inspired me to write a post on them. However, as I made them in the evening they have the unavoidable dark yellow tone that comes with artificial light. Nevertheless, they taste really good and by using a brownie-like mix they come out really squidgy and rich.

Recipe

Makes 12 Cupcakes

Time: 1 hour

Ingredients

  • 210ml Vegetable oil
  • 320g Light brown sugar
  • 1 tsp Vanilla extract
  • 4 Medium eggs
  • 80g Cocoa powder (not drinking chocolate, as it has added sugar and less cocoa, and so has much less flavour)
  • 130g Plain flour
  • 12 Malteasers

For the icing

  • 300g Unsalted butter
  • 265g Icing sugar
  • 50g Cocoa powder

Method

  1. Preheat the oven to 170˚C. Put 12 muffin cases into a muffin tin.
  2. In a large bowl whisk together the oil, sugar and vanilla. Add the eggs and whisk until fully combined. Add the cocoa and whisk again (go slowly here as the cocoa will go everywhere if whisked too fast). Add the flour and then whisk until fully mixed.
  3. Distribute the mixture between the cases using two table spoons, (I find about 1 1/2 tbsp for each cake works well). Put the cupcakes in the oven and bake for 20 minutes. Then reduce the oven temperature 150˚C and continue to bake until a skewer comes out clean when inserted into the middle of the cupcake (about 15 minutes more).
  4. Take the cakes out of the tins and leave to cool completely on wire racks.
  5. Meanwhile make the icing. Put the butter and icing sugar into a bowl and beat with a wooden spoon until smooth. Add the cocoa powder and continue to mix until it’s all combined.
  6. Put the icing into a piping bag fitted with a star shaped nozzle. Pipe the icing onto the cooled cakes in a spiral shape.
  7. Top each cake with a Malteser and serve!

Thanks for reading! Check out my social media pages (links on the side bar), and like/follow to stay updated.

Emma x