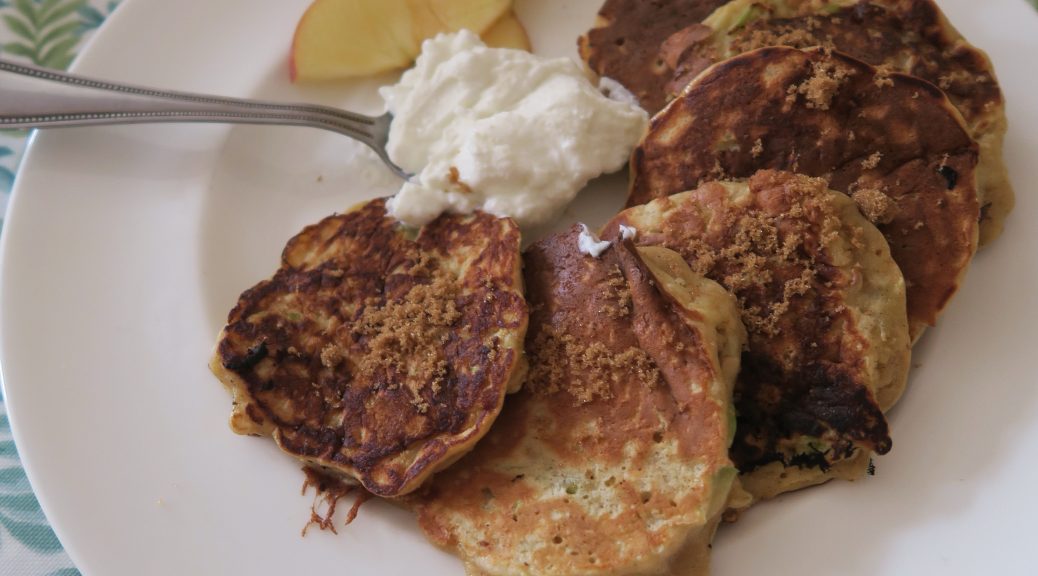
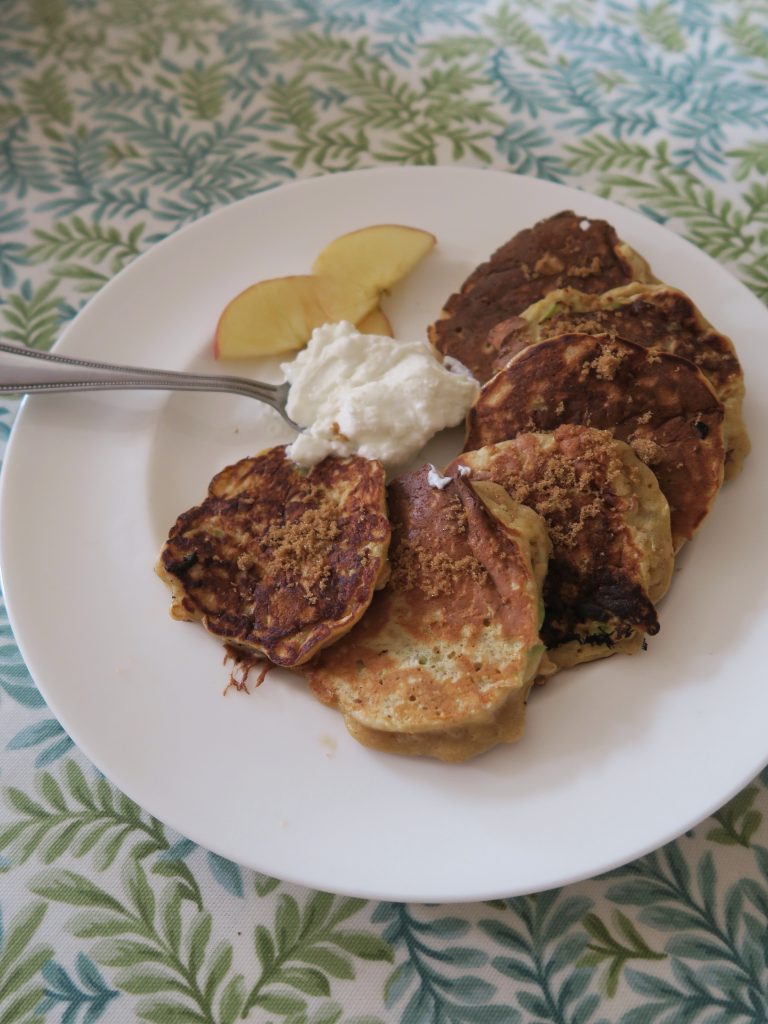
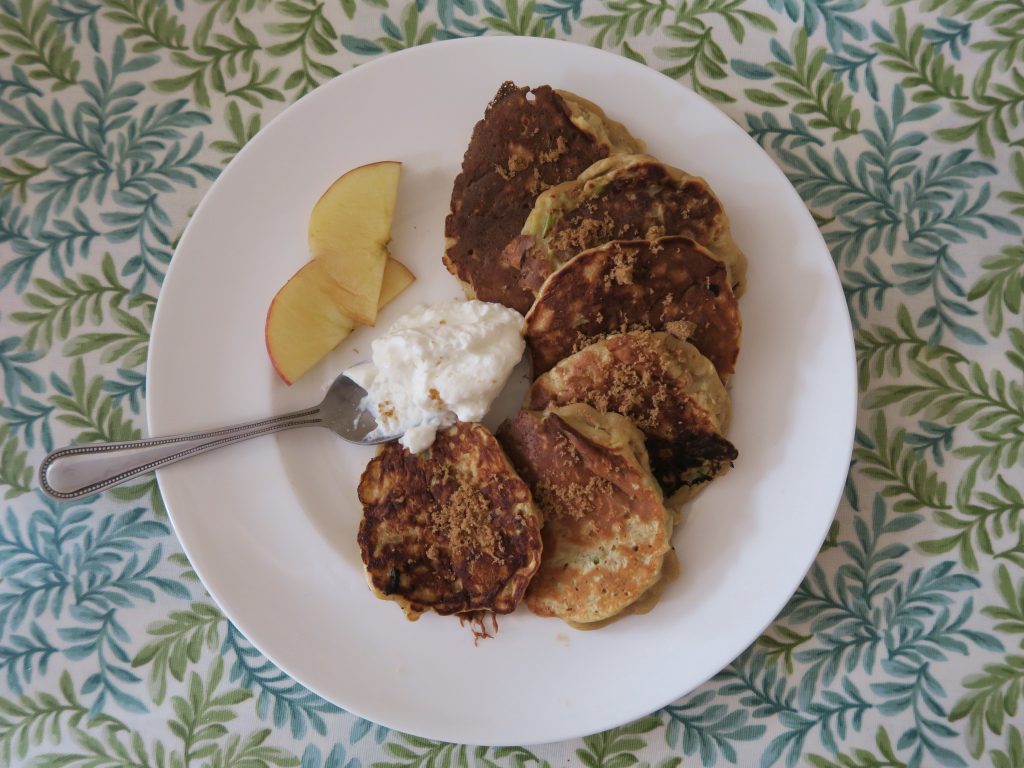
Category: Student

Apple Pancakes

Apple Pancakes

Stress. Yup, stress is officially the key work of the week. Everything’s blowing up a bit atm but we’re getting through it with the help of some amazing friends and (as always) lots of food. This recipe takes me back to the chilled few days when I was down in Devon walking the south west coastal path last month. We didn’t have access to big shops with lots of ingredients so instead I made simple dishes like these sweet apple pancakes with Greek yogurt.

My opinion of healthy pancakes fluctuates regularly. Some days I think they’re the key to all healthy eating and God’s gift to sweet toothed brunchers, and on other days I really can’t see the point as they essentially just take the best bits out of the pancake and replace them with ingredients more closely resembling gravel. That said these do have the element of feeling a little healthy due to the apple floating through the batter and make a great semi-low-sugar brunch to get your day started.

Recipes

Serves 2

Time: 15 minutes

Ingredients

  • 40g Self raising flour
  • 1 Egg
  • 20ml Milk
  • 1 tsp Brown sugar
  • ½ tsp Ground cinnamon
  • 1 Green apple
  • 1 Red apple
  • 1 Cal oil spray (or 1/2 tsp Sunflower oil)
  • 2 tbsp Greek yogurt to serve
  • 2 tbsp Maple syrup to serve (optional)

Method

  1.  Put the self raising flour into a bowl and make a well in the middle. Break in the egg and mix together. Then pour in the milk a litttle at a time to get a runny batter.
  2. Add the sugar and cinnamon to the mixture and stir these in. Then grate the apples into the batter and stir to combine (you can leave the skin on the apples to grate them if you want).
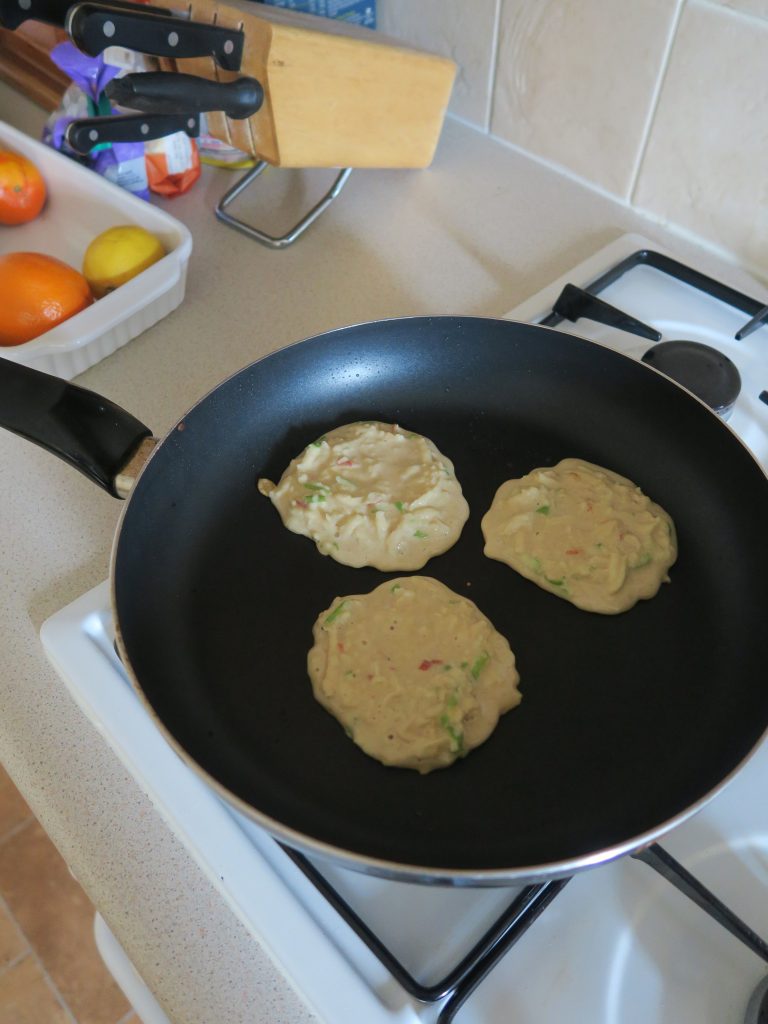
  3. Put a little oil into a large pan and use it to grease it. Then place it over a medium heat and leave for about a minute to warm up.
  4. Spoon blobs of the batter onto the pan (I got about 3 at once in mine) and fry until you can see the underside starting to cook through. Flip the pancakes over with a fish slice and fry again until golden brown.
  5. Put the cooked pancakes on a plate to one side and repeat with the rest of the batter. Serve warm with Greek yogurt and a little maple syrup.

Thanks for reading!

Emma x

Oven Baked Arancini with a Spicy Tomato Sauce

Oven Baked Arancini with a Spicy Tomato Sauce

I kid you not when I say that this is the most delicious savoury thing I’ve ever made. I’m a sucker for Italian food in general so maybe I’m biased but these Italian crispy risotto balls are out of this world – try them yourself and you will not be disappointed! Combine a rich, tomato-y squidgy rice ball, coated in crispy bread crumbs and stuffed with oozying mozerella, with a side of a sweet, sour, spicy tomato sauce and bam, you’ve got one hell of a starter/maincourse/snack thing. Arancini are traditionally deep fried, but as I don’t have a deep fat fryer I decided to try oven-baking them and I think it worked out really well. You still get the crispy, crunchy outside to the arancini but without the added calories and grease of deep-fat frying.

On another exciting note I’m officially going to Italy this summer on an inter-railing trip with some friends. We’ll be starting in Rome and will wind our way north, soaking up the beauty and of course trying all the food we can on the way! Needless to say I’m more than a little excited at the prospect of pizza, pasta, risotto, tiramisu, and mountains of gelato so I’ll come back with lots of Mediterranean inspiration for future recipes. If you have any recommendations for foods to try/places to stop off please ping them my way!

Recipe

Serves 4

Time: 90 minutes

Ingredients

  • 600ml Vegetable stock (or 1 vegetable stock cube in 600ml water)
  • 50g Unsalted butter
  • ½ Large white onion, diced
  • 1 Bay leaf
  • 200g Arborio rice
  • 260ml Bolognese sauce
  • ½ tbsp Garlic puree
  • 50g Parmesan, grated
  • 80g Mozzarella, torn in chunks
  • 2 Egg whites
  • 100g Bread crumbs

For the sauce

  • ½ Large white onion
  • 1 tsp Olive oil
  • 1 tsp Cayenne pepper
  • 1 tsp Smoked paprika
  • 75ml Balsamic vinegar
  • 20g Caster sugar
  • 1.2kg Chopped tomatoes
  • 1 Bay leaf
  • ½ tsp Thyme
  • ½ tbsp Garlic puree

Method

  1. In a large pan bring the vegetable stock to the boil and leave to simmer until needed.
  2. Melt the butter in a large pan over a medium heat and then add the bay leaves and diced onions. Fry the onions until they just begin to caramelise, then season with a little salt and pepper.
  3. Add the rice to this pan and cook whilst stirring for around 2 minutes.
  4. Slowly add the stock to the rice, one ladle full at a time, constantly stirring as you do. Keep doing this until the rice is sticky and just overcooked.
  5. Then add the Bolognese sauce to the rice and mix it in. Remove the pan from the heat and set to one side until needed.
  6. Stir the garlic, parmesan and mozzarella into the risotto and then take the bay leaves out of the mixture. Taste to check the seasoning and then pour the mixture into a large tray and leave to cool.
  7. Break the egg whites into a bowl and beat a little with a fork to make it runny. Then pour the breadcrumbs into a separate bowl. Shape the rissotto mixture into small balls – about 1 heaped tbsp for each one. Dip each ball into the egg whites and then the breadcrumbs, making sure they are coated fully and then put them on a tray in the fridge until needed.
  8. Now make the tomato sauce. Peel and then dice the onions. Add them to a pan with the olive oil and fry until caramelised.
  9. Add the pepper and paprika to the mixture and stir. Add the balsamic and sugar and stir them in. Then leave to reduce for a couple of minutes.
  10. Add the chopped tomatoes, bay leaves, thyme, and garlic puree to the mixture and stir. Then leave to simmer for a couple of hours until reduced and thick. (You could boil it for less time but you get the best flavour if you leave it to properly reduce).
  11. Once the sauce is almost ready pre-heat the oven to 180C. Place the arancini on a lined baking tray and bake them in the oven for around 20 minutes until crisp, golden brown and so that the cheese is bubbling.
  12. Taste the sauce again and season to taste before serving with the arancini balls.

Thanks for reading!

Emma x

Bacon and Leak Hash with Eggs and Beans

Bacon and Leak Hash with Eggs and Beans

Did someone say brunch? Sorry it’s been a while since my last post, even on holiday things can be a little crazy. There’s a saying at Oxford that holidays (or ‘vacations’) are not times to stop working and relax but rather times when you just ‘vacate’ Oxford and go and work somewhere else. So much for rest and recuperation eh! At least my degree is basically what I do for fun anyway, so I get to spend my days drawing, cooking and planning various drama projects I’ve got lined up for next term.

So, back to brunch. When you’ve not got a lot of time on your hands what’s better than to combine two meals into one and have a hippy, hearty, filling bowl of comforting deliciousness? Since coming home I’ve basically stopped having breakfasts at all and I really miss starting the day with a hot plate of fried up morsels, so the other I decided to get off my arse and actually make myself a cooked breakfast. This bacon and leek hash might seem like a bit of a paph – especially when you can just fry up some bacon and have it with potato smiley faces from the freezer (and why not – they’re so good!) – but trust me, if you want a fancied-up snazzy brunch try adding it to your classic eggs and beans and you won’t regret it!

Recipe

Serves 2

Time: 45 minutes

Ingredients

  • 300g Potatoes (about 2 medium)
  • 1 Leek, trimmed, washed and sliced
  • 3 Rasher of bacon
  • A sprinkling of Paprika
  • 100g Cheddar cheese, grated
  • 4 Eggs
  • 1 Large tin of baked beans to serve (optional)

Method

  1. Wash and chop the potatoes into small chunks. Then bring a pan of water to the boil and boil the potatoes for around 5 minutes until just cooked through. Drain and leave to steam-dry.
  2. Take a large frying pan and put it over a medium heat. Add the bacon rashers (as many as will cover the base of the pan at any one time) and fry for 2-3 minutes on each side until crispy and golden brown. Transfer the cooked bacon to a plate and repeat with the rest of the bacon until all the rashers are done. Leave until needed.
  3. Wash the leek and then cut the ends off it (top and tail). Half lengthways and then finely slice. Add the leek to the pan the bacon was cooked in and fry for 5-10 minutes until soft and starting to caramelise.
  4. Cut the bacon up with a pair of scissors to make small pieces and then add it to the leeks. Add the drained potato and paprika and mix together.
  5. Transfer the hash mixture to a small roasting tin and then bake in the oven for 15-20 minutes until golden brown and crispy. If using cheese sprinkle a little of it over the top of the hash 5 minutes before coming out of the oven.
  6. Meanwhile prep the eggs. Spray a little oil into the pan you cooked the bacon in to add a little more grease. Then crack the eggs into the pan and leave to fry until the whites are opaque. Using a fish slice transfer them to a couple of plates.
  7. Whilst the eggs are cooking heat the beans in a pan or in a microwave until piping hot. Serve with the eggs and the hash!

Thanks for reading!

Emma x

Blood Orange Salad

Blood Orange Salad

Everything’s a little bit hectic at the moment so I’ll keep this short and sweet like this salad recipe…

Blood orange + Hazelnuts + Feta cheese = an incredible combination!

Recipe

Serves 1

Time: 5-10 minutes

Ingredients

  • 1 Blood orange
  • A handful of salad leaves
  • 1 tbsp Chopped hazelnuts
  • A little Feta (around 15g)
  • 1 tsp Clear honey
  • A small drizzle of Balsamic vinegar

Method

  1. Slice the ends of the orange and use a knife to cut the skin off. Then slice the orange horizontally into discs.
  2. Scatter some salad leaves on a plate and then arrange the blood orange on top.
  3. Sprinkle over the chopped hazelnuts, crumble over the feta and then finish with a drizzle of honey and balsamic.

Thanks for reading!

Emma x

Plum and Amaretto traybake

Plum and Amaretto traybake

There’s this weird tradition in Oxford (and Cambridge) where once someone’s finished their end of year exams they get ‘trashed’ – aka they get pelted with whatever their friends can find at the local Tescos. Being Oxford based my whole life I’ve seen numbers of students crawling onto the high street covered in shaving foam, silly string and paint, but it wasn’t until the past few weeks that I got to do some trashing of my own. After a slightly surreal shopping trip we arrived at exam schools, belted up with prosseco, honey, ketchup, party poppers and confetti, ready to celebrate the freedom of some of our friends from the clutches of revision! This was the result… (RIP Nik’s sub fusc)…

Afterwards came the jumping into the river, the crash back to reality, and then a growing chorus of ‘food?’ being passed around. That’s where this fab amaretto plum cake came in. At uni I didn’t have the chance to bake as much as I would have liked as I was short on time, ingredients and equipment, so since coming home I’ve been going a little crazy in the kitchen and have been making way more than I can feasibly eat. Therefore when I headed back up to uni I thought something like this tray bake would be the perfect thing to share with lots of de-stressed students – and it was!

Recipe

Serves 16

Time: 1 hour

Ingredients

  • 200g Butter
  • 200g Caster sugar
  • 4 Eggs
  • ½ tsp Almond extract
  • 180g Self-raising flour
  • 85g Ground almonds
  • ½ tsp Baking powder
  • 100ml Milk
  • 2 tbsp Amaretto (optional)
  • 3 Plums

Method

  1. Pre-heat the oven to 180˚C. Line a roughly 20 x 15cm cake tin with butter and baking paper.
  2. Put the butter and sugar into a bowl and beat together with a wooden spoon until pale and creamy.
  3. Add the eggs one by one and whisk them in. Then add the almond extract, flour, ground almonds and baking powder. Then add the milk and amaretto, and whisk it all  together to make a smooth batter. Pour the mixture into the lined tin and smooth it over so it evenly fills the tin.
  4. De-stone and then cut the plums into 1/8s. Then scatter them over the top of the cake, pressing them into the mixture a little. Bake in the oven for 20-25 minutes until risen and golden brown.
  5. Leave to cool and then cut into 16 squares.

Thanks for reading!

Emma x