Category: Baking

Choco-nana-offee Rocks

Choco-nana-offee Rocks

Ok, so I know these look more like something from a sci fi film than something from the kitchen, but bare with. As you know I’ve been trying out the ‘healthy’ lifestyle to help me get some consistency back in my life, however, even the healthy eaters need some comfort food sustenance every now and then. This started as all things do, with good intentions. “I’ll just make a chocolate cookie” I said to myself. Innocent enough. Little did I know that by the time I’d finished I’d end up with a bubbling tray of molten salted caramel, dotted with floating bananas, and sandwiched between two layers of warm chocolate cookie-shortbread. Eyo.

That said, I have no regrets! This was 100% about food to feed the soul and boy did it do that. I know it’s not traditional in the food blogging-sphere to see things that look less that perfect. Even rustic home food is preened and touched up to get the perfect shot these days, however when getting these out of the pan it was clear there was no hope in making them look beautiful. But hey, looks aren’t everything, right? Whop them on a board, snap a few shots and then make the most of the best bit – the eating!

After some time in the fridge these work really well as on-the-go bars, however they do become a bit more gloopy and unpredictable the warmer they get. I think this is because the shop-bought caramel I used for the filling was more of a pouring-consistency than a block one, which had both ups and downs. On the one hand it made for the ultimate gooey masterpiece, on the other it was a bit hard to handle. Therefore I’ve found these bars work at their best as a deconstructed splat in a bowl – looks: 0, taste: 10. Alternatively you could make your own caramel or find a thicker one so you can actually slice these into nice, neat squares… But seriously though, if you’re looking for comfort food in a bowl, this is your guy!

Just one last note – the name. Yeah… um… wasn’t sure how to christen these as there was so much going on in them and for something so much about the taste a long description of it’s component parts seemed too resturant-like. Hence choco-nana-offee rocks. Quick, to the point, leaves more time for the eating. Any other ideas welcome though!

Recipe

Makes roughly 16 squares/rocks/blobs

Time: 1 hour

Ingredients

  • 340g Butter
  • 220g Caster sugar
  • 240g Icing sugar
  • 1 tbsp Vanilla bean paste (or vanilla extract)
  • 490g Plain flour
  • 55g Cocoa powder
  • 400g Caramel sauce (I used 1 can of Carnation’s caramel)
  • 1 Banana
  • A large pinch of Salt

Method

  1. Pre-heat the oven to 180˚C and line a baking tray with butter and baking paper.
  2. Beat together the butter and sugar with a wooden spoon until smooth and creamy. Then mix in the vanilla and icing sugar until smooth. Finally mix in the cocoa powder and flour until a dough has formed.
  3. Split the dough in half and wrap one half in cling film and put it into the fridge.
  4. Take the other half of dough and press it into the base of the tin to fill it evenly. Bake the base in the oven for around 15 minutes until starting to to look baked on top.
  5. Pour the caramel over the base and then scatter over the chopped bananas in an even layer. Finally sprinkle over the remaining dough in a sort of crumble. Return to the oven and bake for another 20-25 minutes until the topping is crispy and the caramel is bubbling.
  6. Take the tray bake out of the oven and leave it to cool to room temperature. Then put it into the fridge until set (about an hour should do it).
  7. Cut the traybake into 16 squares (or blobs) and enjoy!

Alternatives

Another great thing with these squares is that you can try all sorts of different swaps and alterations to make them perfect for you! Why not try…

  • Swapping 100g of the butter with 100g of nut butter (like peanut butter) to get a nutty biscuit top and bottom?
  • Swapping the cocoa powder for 70g Plain flour to make vanilla flavoured dough?
  • Adding fresh berries instead of bananas?
  • Adding 50g chopped chocolate to the dough to make it chocolate chipped?

Thanks for reading

Emma x

Plum and Apple Crumble Flat Crust

Plum and Apple Crumble Flat Crust

This summer’s been pretty crazy for me. Not because I’ve been all around the world or have gone on a fascinating internship or the like, but because it’s been the first summer in well over 4 years that I’ve just stopped and let myself think. I tend to plow on through life head first, doing as much as I can and I often wear myself out in the process, so this summer I’ve let myself rest, re-coup and try to sort out my head a bit.

I’ve been thinking a lot about mental health guilt recently and the downward spiralling effect this can have on an already fragile mind. By mental health guilt I mean feeling as though you have no right to be depressed or feeling low because you think others have it worse than you. I think this something that a lot of people with depression experience at some point and I’ve been feeling it a lot myself recently. After all, I’m a white, middle class woman from a stable family in a relatively stable part of the world. I’ve had all the education I could wish for, all the opportunities I could imagine and yet I still find myself coming back to this really dark place.

Something I think that’s important to remember when you feel this way is that all pain is relative and personal. Everyone has different life experiences and struggles, and you can never know the full story behind what someone else is experiencing. Therefore, when it comes to mental health, it’s ultimately impossible to say that one person deserves help more than someone else, or that someone’s pain is worse than another’s. Surely if you feel in pain and it’s affecting you, you deserve the help and support you need, regardless of whether someone else has it worse or not. Unfortunately, this is not reflected in the UK’s mental health system from my experience. At the moment there is massive under funding in the NHS and so as a result the only ones getting real treatment (and even then after a long waiting time) are those who are suffering at the most extreme level. This of course makes sense and it is important that we treat the most serious cases first, but it does make those with more minor, yet still serious conditions, feel as though their problems aren’t serious enough to warrant treatment – which when you’re feeling like you have no right to feel depressed in the first place isn’t helpful.

We can’t change this overnight, but we can start to make those who can make the changes more aware of the mental health crisis in the UK by talking about it more openly. There are great charities and campaign groups such as Young Minds and Heads Together who are doing amazing work to get better mental health provision in the UK, and supporting them in their work is probably the best shot we have to influence major change at ground level. For now though I’ll just say it’s worth remembering that it doesn’t matter if someone has it worse than you or if you don’t feel like you have the right to feel depressed.  Depression isn’t a choice, and although it can be formed out of circumstance it is inherently biological and beyond a person’s control. Therefore if you do feel down or low, in need of treatment or even just in need of a talk, reach out for it. Don’t feel like it needs to get worse before you’re allowed to get better, or that you’re being over-dramatic and should just calm down. It’s thoughts like that which lead people to end up in really bad places that are even harder to get out of.

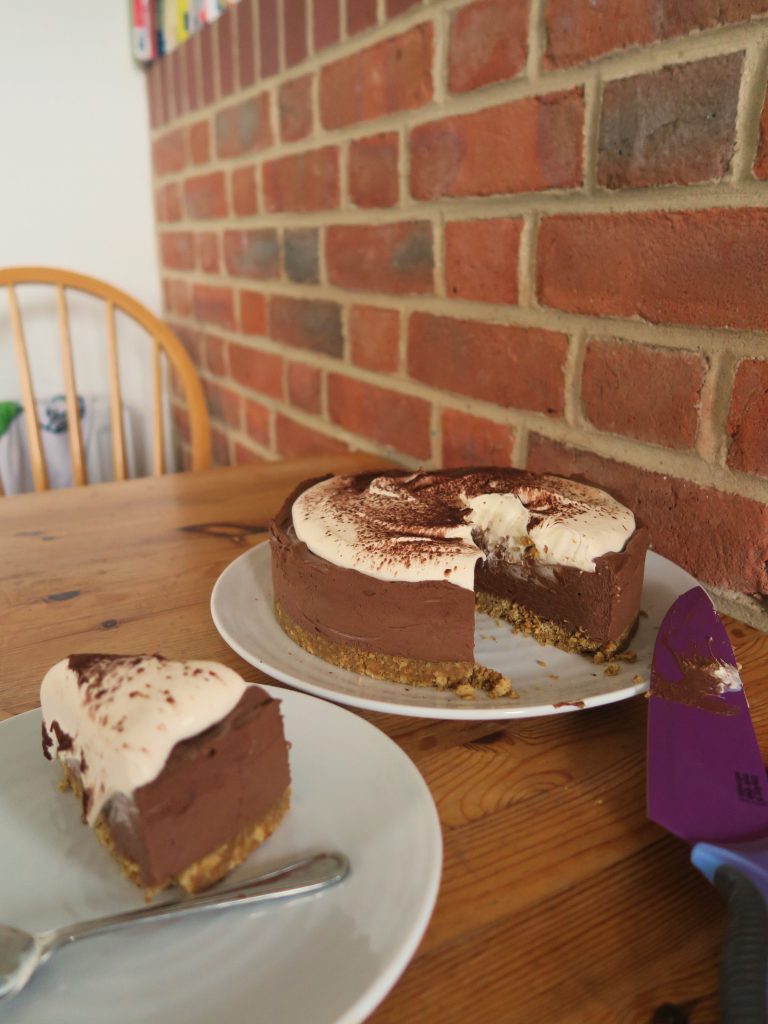
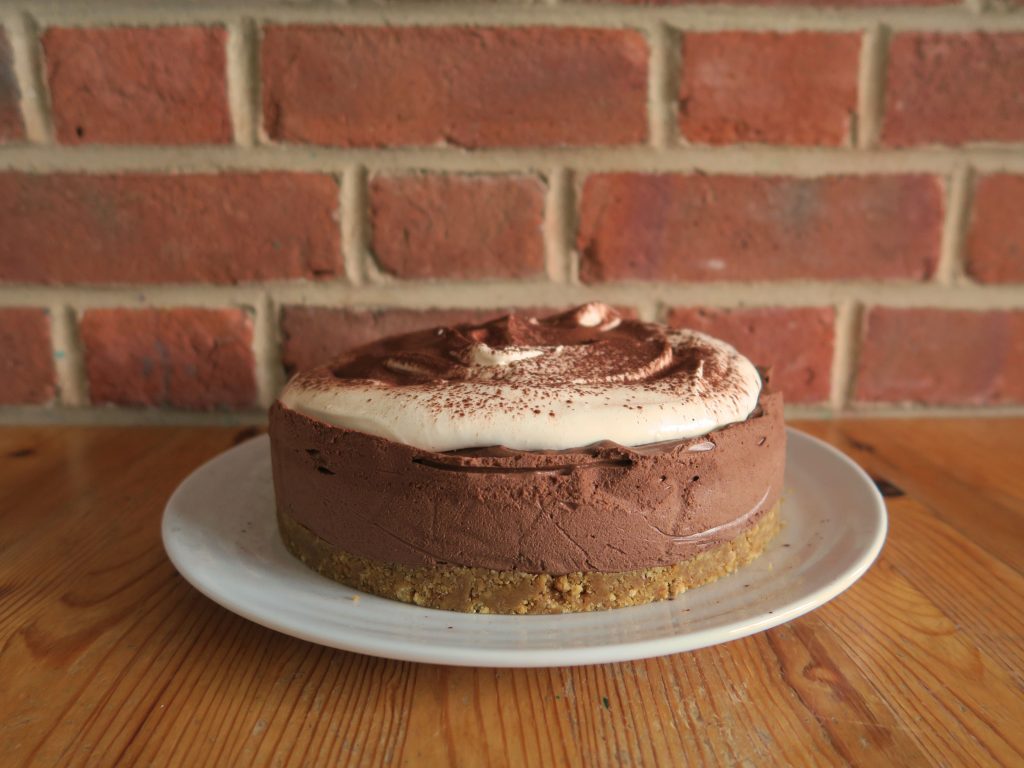
For me it’s by no means been an easy summer, and I doubt it’ll be an easy autumn but I am looking forward to a new academic year and a change of scene. By taking it slow over the past couple of months I’ve found a rhythm for living which I hope I can translate into my working term at Uni and fingers crossed I can keep myself relatively stable. Most importantly for me I have re-kindled my love of cooking. Now, of course this never really went away but I’ve had a tricky relationship with food in that I cook to de-stress, but recently the mere idea of cooking has stressed me out.  Sometimes I don’t have the energy to cook, sometimes I don’t want to eat anything, and sometimes I just don’t have the patience. However I’ve started to find that these times are all totally fine and normal, and the important thing is that I always come back to the kitchen sooner or later and have fun when I’m there!

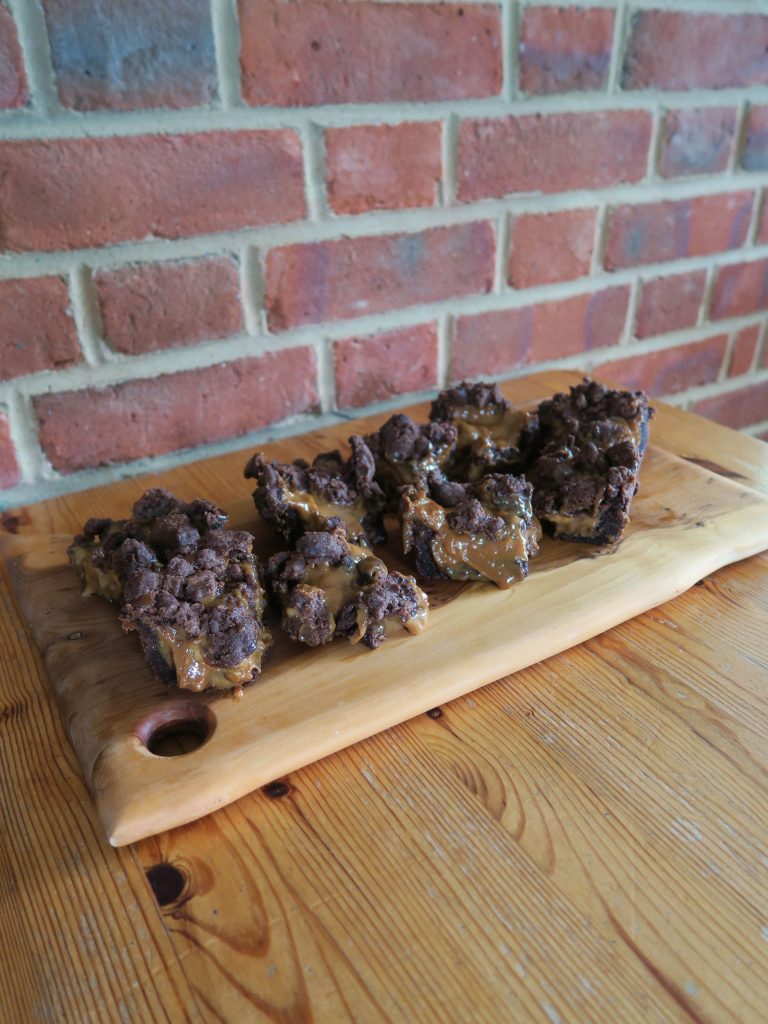
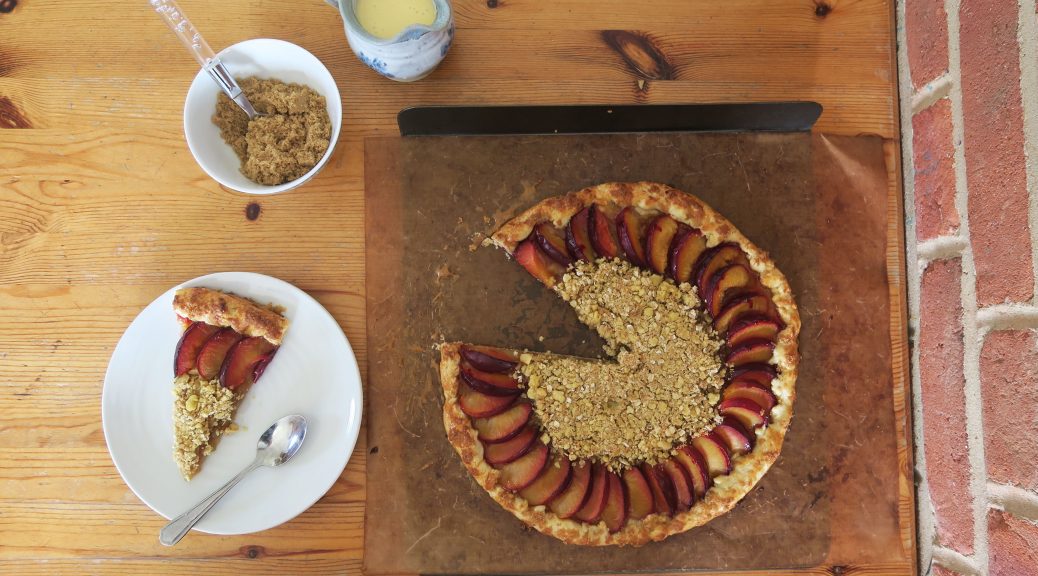
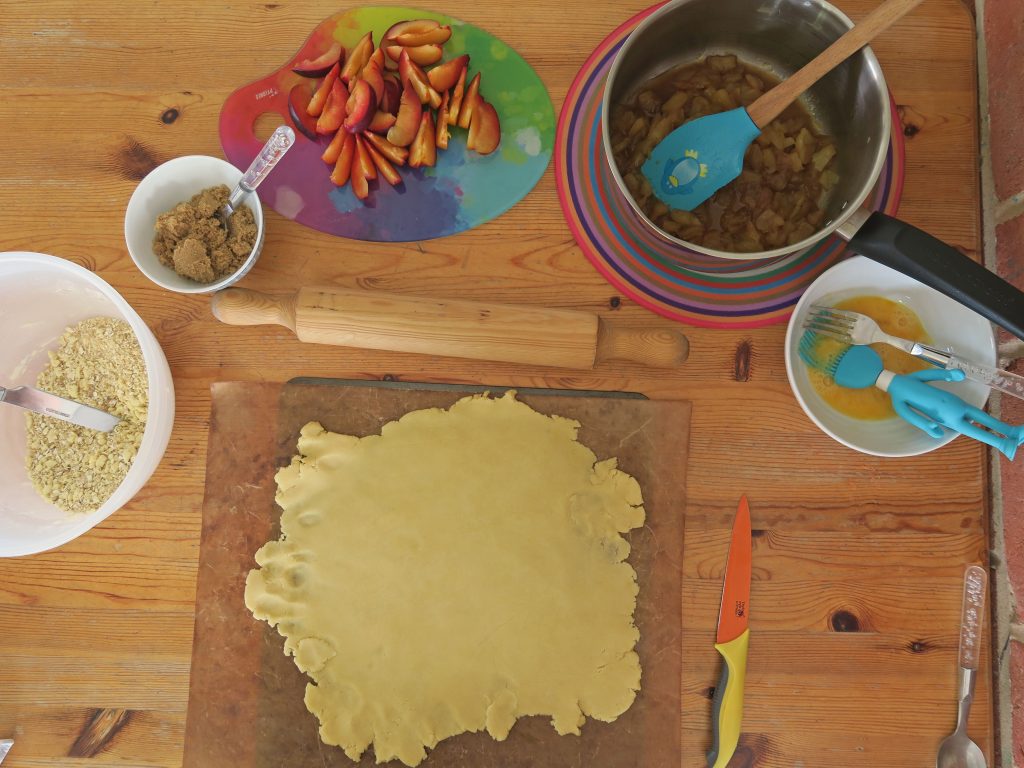
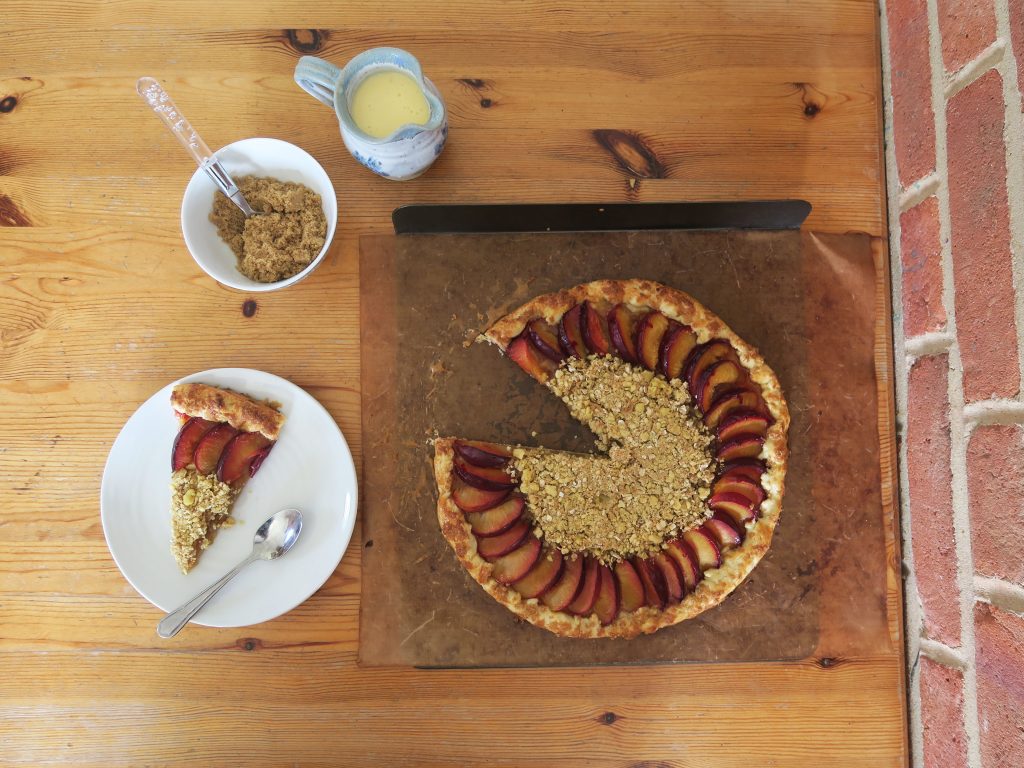
This new, relaxed approach to my cooking is how I eventually came up with this plum and apple crumble ‘flat-crust’. I wanted to make a tart but really couldn’t face the paph of lining a tart tin or blind baking etc, so I found that this was a great compromise. As it’s not made in a tin you don’t have to worry too hard about what awful shape your pastry is being rolled into which is a really nice thing. As long as it’s vaguely round and flat, you’re good. Quick, delicious, full of warming autumn flavours and all that good home comfort stuff we like to see around this time of year!

Recipe

Serves 12

Time: 90 minutes

Ingredients

For the pastry

  • 175g Plain flour
  • 2 tbsp Caster sugar
  • 115g Butter
  • 1 Egg yolk
  • 1 tbsp Water

For the filling

  • 2 Bramley apples (or medium sized cooking apples)
  • 1 tbsp Brown sugar, plus extra for sprinkling
  • ¼ tsp Ground ginger
  • ¼ tsp Ground cinnamon
  • 3 Plums
  • 1 Egg

For the Crumble topping

  • 75g Butter
  • 2 tbsp Plain flour
  • 2 tbsp Porridge oats
  • 1 tbsp Brown sugar
  • ¼ tsp Ground cinnamon

Method

  1. Begin by making the pastry. Put the flour and sugar into a bowl and mix together with a round bladed knife (a regular table knife). Add the butter and use the knife to cut it into chunks in the flour.
  2. When you can’t cut the butter up any more, go in with your fingers and rub the butter into the flour until the mixture looks like breadcrumbs. (Shaking the bowl from side to side every now and then will help bring the lumps to the top).
  3. In a small bowl mix together the egg yolk and water and then mix this into the breadcrumb mixture. Mix with a table knife until a smooth dough forms. Wrap the dough in cling film and then leave it to chill in the fridge for at least an hour, or until needed.
  4. Now move onto the filling. Peel, core and then roughly dice the apples and put them into a large pan. Add the sugar, ginger and cinnamon and bring to a gentle simmer over a low heat. Leave to simmer for 25-30 minutes until broken down and golden, stirring the mixture every now and then to make sure nothing burns on the bottom of the pan. Take the pan off the heat and leave to cool until needed.
  5. Meanwhile halve and de-stone the plums. Then slice the plums into smallish pieces (I find I get around 5 slices from each half).
  6. Now make the crumble topping. Put the butter and flour into a large bowl and rub the butter into the flour until you have a breadcrumb texture again, like you did with the pastry. Add the sugar and oats and then mix together with a spoon to make a crumbly mixture.
  7. When ready to start assembling pre-heat the oven to 180˚C and line a baking tray with baking paper.
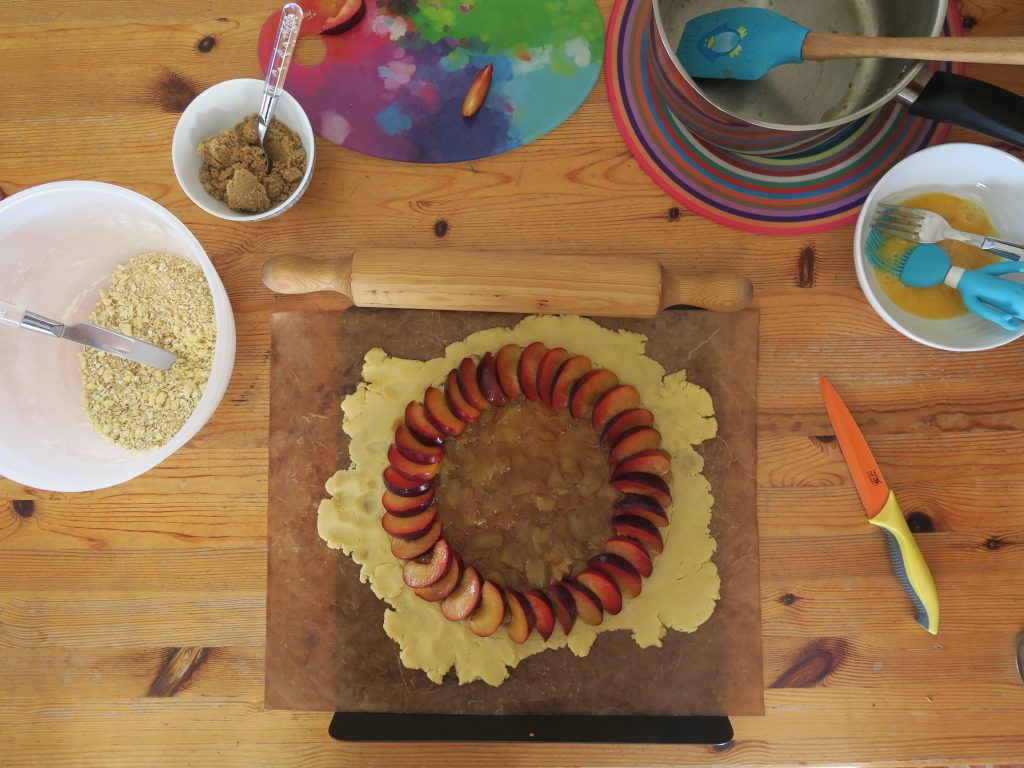
  8. Take your pastry out of the fridge and place it on a sheet on clingfilm on a work top. Place another sheet of clingfilm over the top and gently roll the pastry into a rough circle (don’t worry if you end up with more of a square, it won’t matter in the end!). Take a plate, cake tin or generally round object around 11” in diameter and use it as a guide as to how far to roll the pastry. You’ll want it around 0.5 – 1 inch wider all around, than this template.
  9. Peel the top sheet of clingfilm off the pastry and flip it over onto your lined baking tray. Then peel off the other sheet of clingfilm. Lay your template on top of the pastry and gently score the circular shape into the dough with a knife, being careful not to cut all the way through!
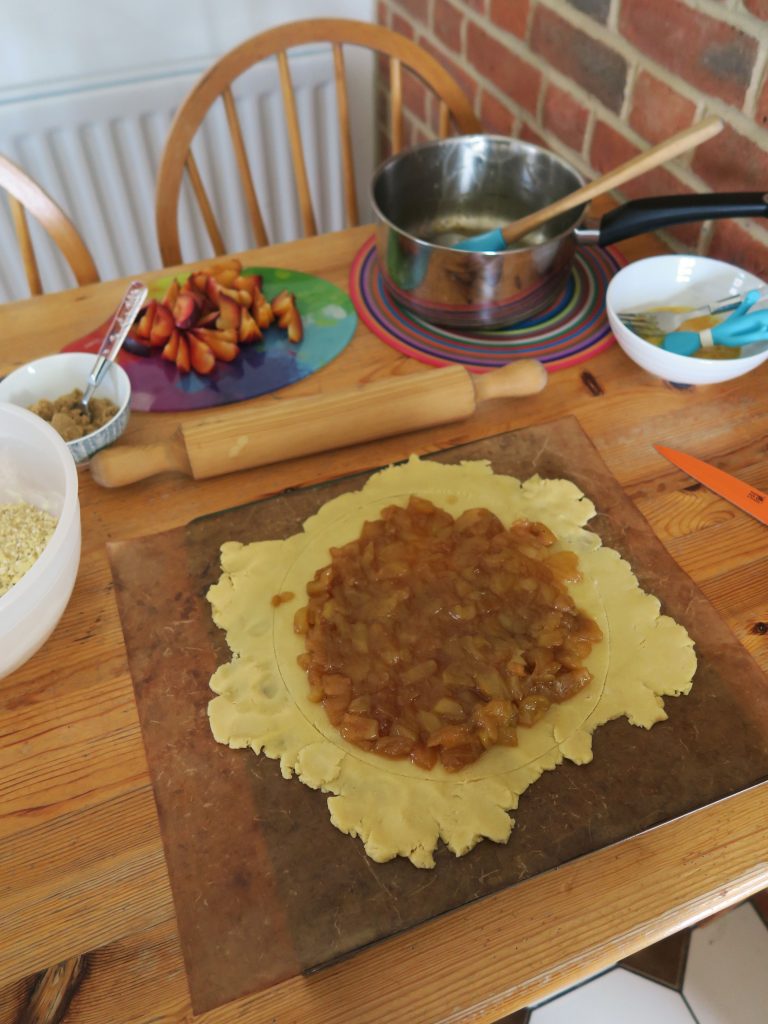
  10. Spoon the stewed apple inside the circle you’ve just marked, leaving a ½ inch gap around the edge. Next take your plum slices and lay them around the edge, making their top edges line up with the circle you’ve made. You should now have a ring of plum slices bordering a pile of apples.
  11. If you were worried about the edge of your pastry now’s the time we’re going to sort that out. If you have any bits that are really sticking out from the plum edge, and some other bits that are really close to it you can carefully peel off a chunky bit and squish it onto somewhere lacking in pastry. Then gently roll up the pastry all around the edge until you reach the plum boarder, to make a crust.
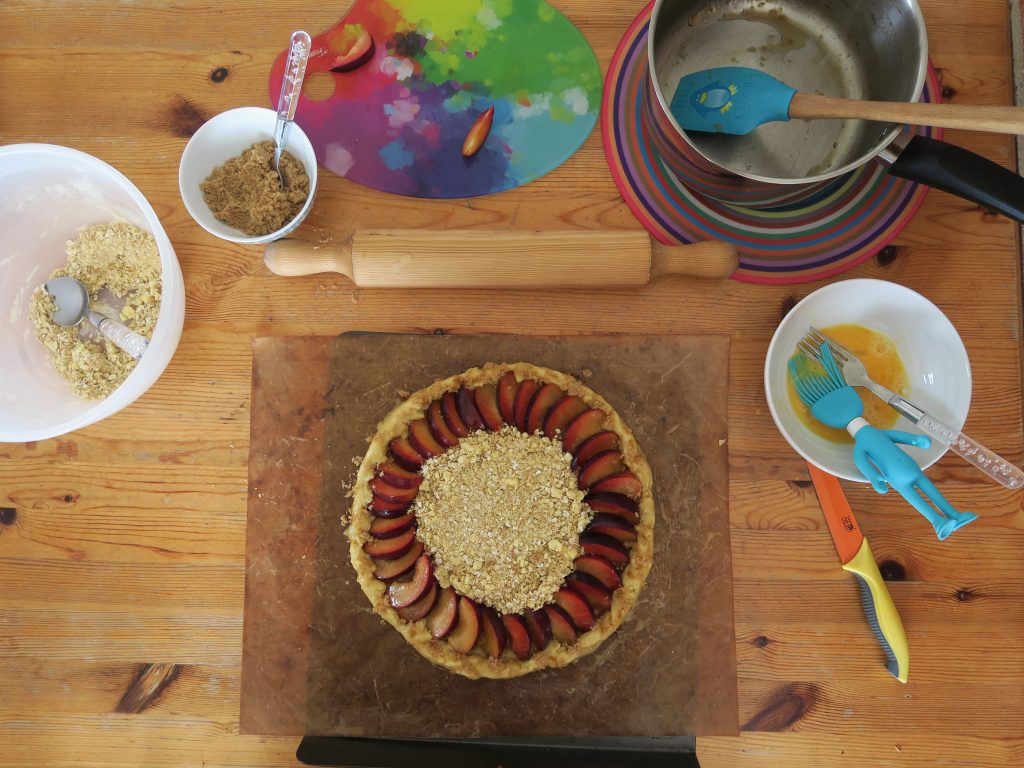
  12. Take the crumble topping and sprinkle it over the exposed apple filling. Then crack the egg for the topping into a bowl and whisk it up with a fork until the yolk and white are mixed. Brush a little egg around the edge of the pastry and then sprinkle over a little more brown sugar to give a crunchy crust.
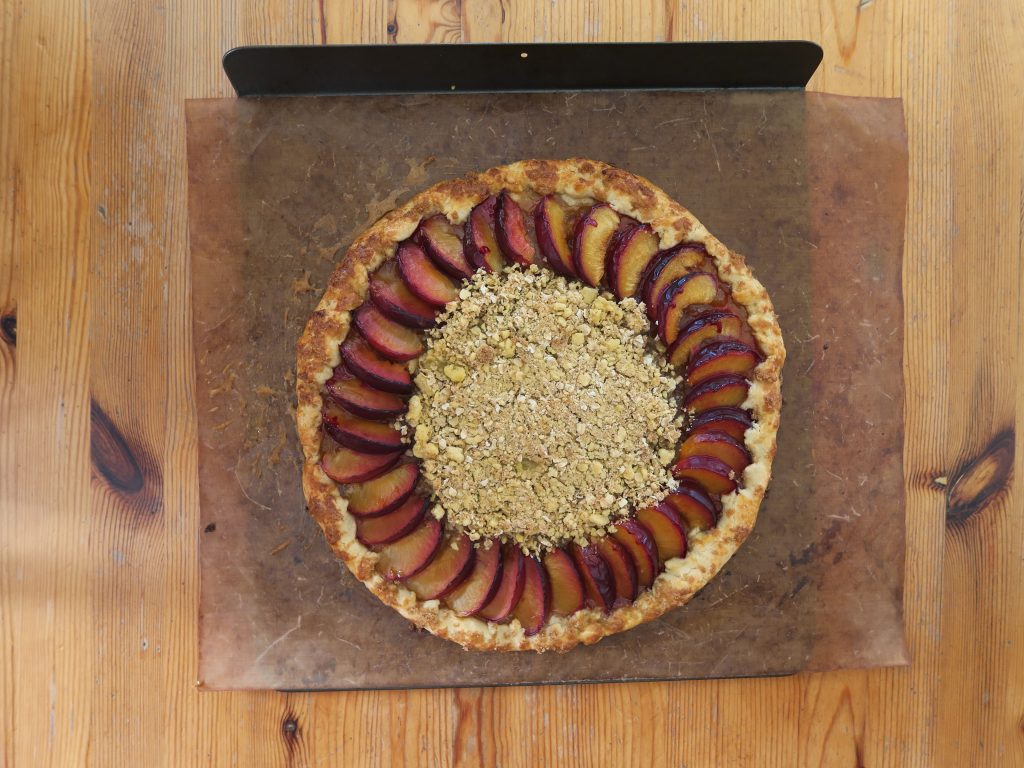
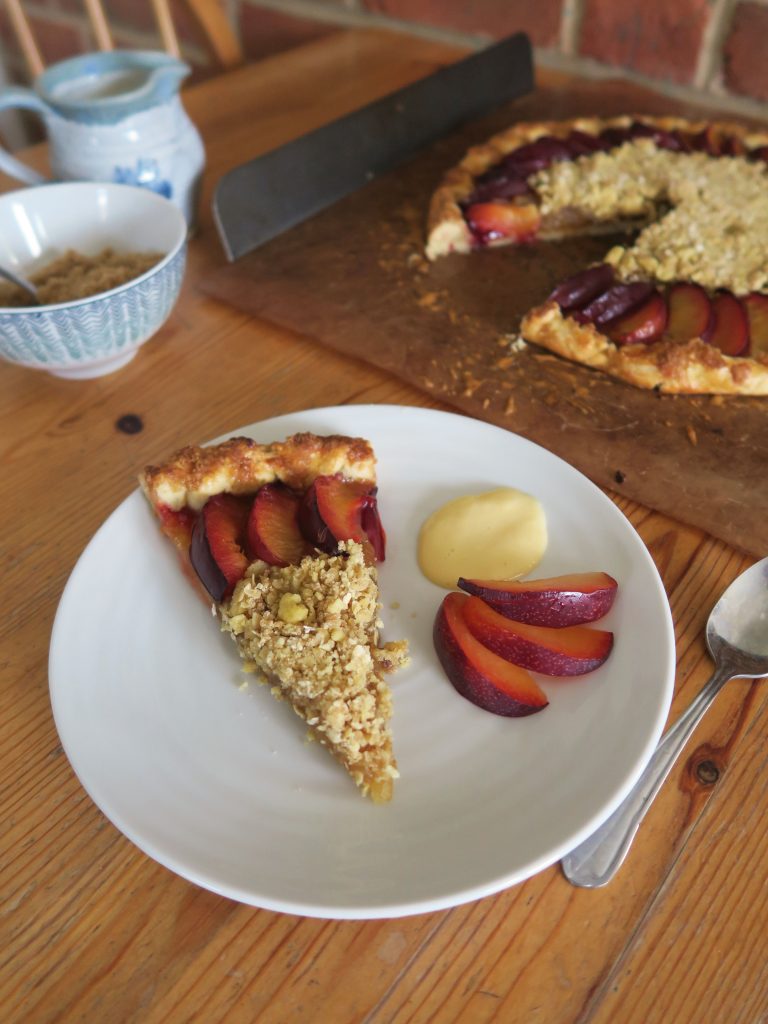
  13. Bake the tart in the oven for around 15-20 minutes until the plums are shrivelled, and the crumble top and pastry are golden brown. Serve warm with fresh plums and custard!

Thanks for reading! Feel free to leave any comments, thoughts or feelings on anything in this post below!

Emma x

Warm Feta Cheesecake with a 100% cocoa base and Watermelon Ice cream

Warm Feta Cheesecake with a 100% cocoa base and Watermelon Ice cream

I’ve just got back from an incredible weekend at Greenbelt Festival and will no doubt be posting lots of thoughts, ideas and recipes inspired from all that. For today though I’ve got this fun lil’ recipe for you!

It’s been a while since I’ve tried anything wacky and elegant in the kitchen so I thought it was about time I got experimental again. I always have around 3-4 ideas for dishes in my head at a time, but it’s the effort needed to work out the recipe and make the dish that slows me down in actually getting them tried and tested. As for this dessert, the flavour ideas and components have been in my mind for a long time, so it’s really satisfying to finally see it all on a plate and tasting delicious!

I first came across the idea of feta cheesecake in a little Mediterranean restaurant in a remote village in north Devon (as you do). It easily caught my attention on the menu as it’s something I’d never even heard of before, let alone eaten, and I just had to know if it worked. Needless to say it was a revelation! The salty tang of the feta works really well in a simple cheesecake, and even more so in a dessert like the one I tried in Lynton and this one I developed at home.

(This is the feta dessert I tried at the Vanilla Pod in Lynton – if you’re ever nearby I’d really recommend eating there!)

The ideas for the other flavour components in this came from my current obsession with super bitter dark chocolate and that delicious watermelon ice cream I first tasted in Rome (recipe went up last week!). What resulted from these ideas and flavour inspirations that I’ve been wanting to couple up for ages is a rich, warm feta cheesecake with a bitter cocoa base, served with a refreshing watermelon gelato! Sounds fancy, looks fancy, tastes amazing, and is not too complicated to put together – so it’s pretty much a win all round!

Recipe

Serves 3

Time: 2 hours

Ingredients

For the base

  • 50g Dark chocolate biscuits (I used oreos with the creamy centre scraped out)
  • 55g Unsalted butter
  • 50g 100% cocoa chocolate

For the filling

  • 50g Feta Cheese
  • 30g Heavy cream
  • 60g Cream cheese
  • 1 Small egg
  • ¼ tsp Lemon zest
  • 2 tbsp Lemon juice
  • ½ tbsp Vanilla bean paste
  • ½ tbsp Plain flour
  • 55g Caster sugar

To serve

  • 50g Dark chocolate
  • 50 ml Double cream
  • Watermelon ice cream (see last week’s recipe – a fruit sorbet could also work here, but I really recommend the watermelon!)
  • Fresh mint to garnish (optional)

Note: This recipe uses metal dessert rings which gives the cheesecakes their beautiful cylindrical shape. However, if you don’t have these to hand you could use a greased muffin tin, metal ramekins or even make one big one in a lined cake tin!

Method

  1. Pre-heat the oven to 180˚C and line a baking tray with baking paper.
  2. Begin by making the base. But the biscuits into a bowl and crush with the base of a rolling pin to make a fine crumb. Grate the chocolate into the biscuits and stir to combine.
  3. Meanwhile melt the butter in a small pan and then pour this over the crushed biscuits. Stir to make a mixture with the texture of damp sand.
  4. Take 3 metal dessert rings (about 7.5cm in diameter and 6cm tall) and place them on your lined baking tray. Press the biscuit mixture into the base of your moulds with the back of a spoon (or your fingers) and then bake in the oven for around 10 minutes until starting to crisp.
  5. Meanwhile make the filling. Put the feta and cream into a bowl and beat with a wooden spoon until smooth. Then add the cream cheese and mix again. Next add the egg, lemon zest, lemon juice and vanilla and mix together, before adding the flour and sugar and stirring again to make a smooth mixture.
  6. Pour the mixture over the cooked bases and shake the trays a little from side to side to knock out any air bubbles. Bake the cheesecakes in the oven for 15-20 minutes until they start to brown a little on top. Then leave them in their moulds whilst you prepare the topping.
  7. Finely chop the chocolate for the topping and place into a heatproof bowl. Then heat the cream in a small saucepan until it just reaches the boil. Quickly pour the warm cream over the chocolate and stir until the chocolate is melted and the ganache is smooth.
  8. To plate up begin by putting the cheesecakes onto separate plates. Take a sharp prep knife and run it under some warm water to warm it up. Then dry it and run it around the edge of the cheesecakes to loosen them from their moulds. Carefully lift the moulds up and off of the cheesecakes and set to one side. Drizzle the cheesecakes with a little of the chocolate ganache and then finish a scoop of watermelon ice cream and a garnish of fresh mint!

Thanks for reading!

Emma x

Strawberries and Cream Jammy Dodgers

Strawberries and Cream Jammy Dodgers

So it’s been a while since my last post as I’ve been taking a rest from everything. I’m one of those people who will try and do everything and then a little bit more on top, which is great fun until you realise you’ve burnt yourself out. But now I’m feeling refreshed and ready to start going crazy in the kitchen again, fully in the knowledge that I will inevitably crash in the short term future – but hey, you’ve got to make the most of your productive times as and when they hit you right?!

These beauties are in homage to my all time favourite British biscuit – the Jammy Dodger! Generally I’m not a biscuit person, but give me one of these and I’m instantly taken back to happy childhood memories of packed lunches and picnics in my back garden. I’ve fancied these up a little by using a rich clotted cream shortbread as the biscuit component. Essentially by using clotted cream as well as butter you end up with an even richer, melt-in-the-mouth biscuit than your regular shortbread (it’s pretty good if I say so myself!).

Recipe

Makes 12

Time: 90 minutes

Ingredients

For the biscuit

  • 100g Cold butter
  • 100g Clotted cream
  • 100g Caster sugar
  • 300g Plain flour
  • 1 Egg yolk

For the filling

  • 4-5tbsp Strawberry jam

Method

  1. Put the butter, clotted cream and sugar into a bowl and beat together until smooth. Then add the flour and rub the sugar/butter mixture into the flour until it resembles fine breadcrumbs.
  2. Mix the egg yolk with 2 tsp water and then add this to the main bowl. Mix together again until a smooth ball of dough forms. Split the dough into 2 equal balls and then cover each one in cling film and chill in the fridge for 30 minutes – 1 hour.
  3. Pre-heat the oven to 180˚C and line two baking trays with baking paper.
  4. Take one of the balls of dough out of the fridge and put it onto a lightly floured surface. Roll it out to about 5mm thick and then cut out 12, 6cm circles using a round cookie cutter. Place these discs on a baking tray and then gather up and re-roll the dough until it’s all used up.
  5. Roll out the other block of dough to the same thickness and repeat the cutting out of circles. Then take a smaller cookie cutter (diameter about 1cm) and stamp out the middles of the second batch of biscuits to create doughnut-like rings.
  6. Bake the biscuits in the oven for around 15 minutes until golden brown and just starting to crisp. Then leave to cool completely on wire racks.
  7. To prepare the filling put the jam into a bowl and mix a little with a small spoon to loosen it up. Turn over the cooled base biscuits (the full circles) and spread a little of the jam over the base of each one. Top with the biscuits with the holes in the top and then enjoy!

Thanks for reading!

Emma x

Mocha Torte

Mocha Torte

It’s coming to the end of term, the end of an era and a bit of a change in mind on my part. I started this blog mainly as a project for myself – I wanted to create recipes and have a place to put them, a catalogue if you will. Then, last summer I decided to also use this as a platform to explore the topic of mental health and mental health awareness. These are areas I’m still interested in exploring and writing about, however I’ve now decided to let it come more naturally. I’m one of those people who when they set their mind to something will do whatever it takes to make it happen, even if it isn’t the best thing for themselves. In this case I was determined to turn out two recipes a week, every week. However, as I’m restricted to cooking in my holidays, because I don’t have the space or time here at uni, I essentially binge-cook in my vac and then post later on. I also eat ALL the cakes, pastries and general sweet things I make during those times, (roughly 2 recipes a day), leading to me having a really bad diet and so on. Needless to say that isn’t a healthy way of living.

Therefore I’ve decided to keep on going, but to just be more relaxed and varied with my posts. Rather than sticking to a strict twice a week schedule I’ll post as and when I feel inspired to do so. I’ll keep blogging my own recipes, but will also write about mental health, my culinary travels and whatever else feels particularly inspiring. In essence this will continue to be The Mindfulness Kitchen, I’ll just be looking after myself a little more which at this point in my life is something I need to be doing. It’s slightly worrying that it’s taken me this long to realise this – but just because you can doesn’t mean you should. Just because you want to do something, feel like you should do something or feel like you can do something it doesn’t mean you should. Take a second to really think about what you’re doing. Take a minute to think about your life choices and ask yourself is this what’s best for me? Of course, beyond that you should think about others and what’s best for them, but you can’t help anyone if you’re in an emotional pothole, so you should first make sure you don’t end up in one!

(On a side note, anyone else made massively peckish by this wonder of a mocha torte?)

Recipe

Serves 16

Time: 1 hour, plus chilling time

Ingredients

For the base

  • 150g Digestive biscuits
  • 75g Unsalted butter, melted

For the filling

  • 260g Dark chocolate
  • 2 tbsp Golden syrup
  • 600ml Double cream
  • 4 tsp Instant coffee granules

To decorate

  • 300ml Double cream
  • 1 tsp Vanilla bean paste
  • A sprinkling of cocoa powder

Method

  1. Grease and line a 20cm round cake tin with butter and baking paper. Now make the base. Crush the biscuits with the back of a rolling pin to make a rough crumb. Then add the melted butter and stir to make a mixture that resembles damp sand.
  2. Spoon the mixture into the lined tin and level it out with the back of a spoon. Leave in the fridge until needed.
  3. Put the chocolate, syrup and ¼ of the cream into a heatproof bowl and place over a pan of gently simmering water. Leave for 15-20 minutes to allow the chocolate to melt. Stir to make the mixture smooth, remove from the heat and leave to cool until just warm.
  4. Pour the rest of the cream into a bowl and add the coffee. Leave to dissolve and then whisk until just starting to thicken but not yet holding peaks.
  5. Fold the cream into the cooled chocolate with a stiff spatula or large metal spoon until the mixture is smooth and completely combined.
  6. Pour the mixture over the biscuit base and leave to set in the fridge for 1-2 hours.
  7. Pour the cream and vanilla for the topping into a large bowl and whisk until soft peaks form. When the base is set dollop this cream on top. Un-mould the dessert and place it on a plate. Then finish with a sprinkling of cocoa powder and serve!

Thanks for reading!

Emma x