Category: Baking

Chocolate Chip Cookies

Chocolate Chip Cookies

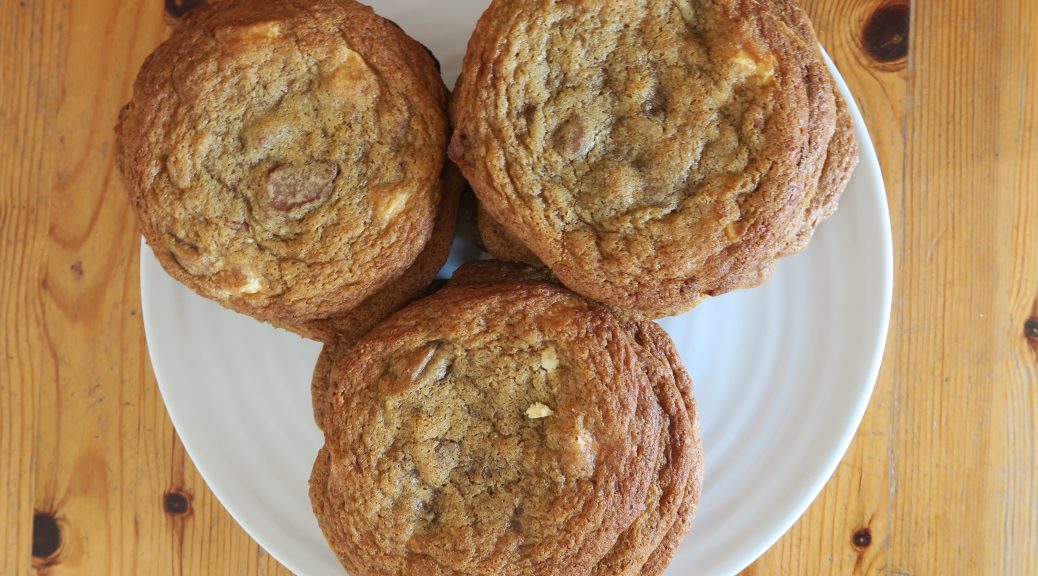
Can anything truly top a good chocolate chip cookie? Especially when they’re warm from the oven and the chocolate is just melted when you bite into them. It’s always hard with classics like these to  know which recipes will work and which won’t. The expanse of the internet means that there’s thousands of variations out there, and unfortunately too many of them result in burnt, tasteless disappointments. After some research, though, I think I’ve found the perfect combination which’ll, fingers crossed, work without fail.

I do have a couple of top tips though to make sure that they end up the best they can be. Firstly, it’s important to make sure the dough is as cold as possible before going into the oven. Why I hear you ask? Well this means that they’ll keep their shape more in the oven, which will stop them from spreading too thinly. This makes it easier to get a soft, chewy bake, rather than a crisp, burnt one. It’s also kinda obvious, but when buying your ingredients make sure you buy chocolate you like the taste of. Sometimes it can be tempting to buy super cheap chocolate to bake with, but when you have chunks of chocolate, like in this, you can really taste it. My general rule is go for a chocolate you’d be happy to eat on it’s own, that way your cookies will be super delicious.

Recipe

Makes 20

Time 25 minutes, plus time for chilling

Ingredients

  • 220g Unsalted butter, softened
  • 170g Light brown sugar
  • 150g Caster sugar
  • 1 tsp Vanilla extract
  • 2 Large eggs
  • 330g Plain flour
  • 3/4 tsp Baking powder
  • Pinch of Salt
  • 100g White chocolate, roughly chopped into chunks
  • 100g Milk chocolate, roughly chopped into chunks
  • 1 tsp Sea salt to top (it’s really worth it)


Method

  1. In a bowl put the butter, sugars and vanilla, and beat together until pale and fluffy. Using an electric mixer can help with this.
  2. Add the eggs, one at a time, to the mix and whisk together after each addition to combine.
  3. Sift the flour, baking powder and salt into the main bowl and stir to combine.
  4. Stir the chocolate chunks into the mix so that they’re evenly distributed.
  5. Turn the dough out onto some clingfilm, wrap it up and then put it into the fridge to chill for at least 2 hours. (If you’re short on time or just can’t wait put it into the freezer for 30 minutes).
  6. 20 minutes before the dough finishes chilling, pre-heat the oven to 170˚C.
  7. Line 4 baking trays with baking paper.
  8. Roll the dough out between two sheets of clingfilm (I find this easier than using a floured surface). You want the dough to be the thickness of about 2 pound coins.
  9. Using a round cookie cutter, cut out circles of the dough. Put the circles onto the baking sheets, making sure they’re well spaced out as they will spread. I put about 5-6 on each of mine. Put them back into the fridge for 30 minutes to re-chill.
  10. Take the baking trays out of the fridge and sprinkle the dough circles with the sea salt. You only want a little on each cookie, but it works wonders in bringing out the flavour.
  11. Bake in the oven for 15-20 minutes until just starting to brown at the edges and puffed up. They will feel fairly soft, but they’ll firm up some more once they’ve cooled down. Eat as soon as you can!

Thanks for reading!

Emma x

The Almighty Sticky-Apple-Ginger-Praline Cake

The Almighty Sticky-Apple-Ginger-Praline Cake

This is the third cake in our trio of big cakes – and I think I’ve saved the best till last! This kinda snowballed until it became what we see here, which is why I’ve named it ‘the almighty…’ – as it’s jam packed with flavours and textures. As always it began as just a simple ginger cake. Then I thought why not add apples and dates to make it extra sticky and moist. Sticky cakes work really well with crunchy pecan praline, so that got added in, and then some  sparklers were clearly needed to put the cherry on the top.

That said, I did have bonfire night in mind, and I wanted to make a cake which encompassed all flavours of the occasion. From warming ginger to caramel apples, this cake is everything you could want for a cold autumnal evening. If you don’t have a crowd to feed, and trust me this cake will feed a crowd, you can use 2/3 of the cake mix and do a two layer version which will work just as well. Similarly, if you want a cake that’s easy to transport and share you can use 2/3 of the mix and do a large tray-bake, or even make cupcakes, so that you can distribute it easily.

Recipe

Serves 14

Time: 2 1/2 hours

Ingredients

For the sticky apple and ginger cake

  • 500g Chopped dates
  • 500ml Water
  • 6 Large eggs
  • 300g Light brown sugar
  • 75 Dark brown sugar
  • 50g Golden syrup
  • 3 tsp Vanilla extract
  • 300g Butter, melted
  • 4 Medium cooking apples, peeled and cored (about 600g)
  • 525g Self raising flour
  • 5 1/2 tsp Ground ginger
  • 3 tsp Bicarbonate of Soda
  • Pinch of salt

For the icing

  • 140g butter
  • 400g cream cheese
  • 1kg icing sugar

For the pecan praline

  • 100g Sugar
  • 75g Pecans

To decorate

  • 1 Granny Smith apple
  • 100g Caster sugar
  • 1 Can of Carnations Caramel (about 375g)
  • Sparklers (optional)

Method

  1. Pre-heat the oven to 180˚C. Then line three 7.5inch tins with butter and baking paper.
  2. Put the chopped dates and water into a saucepan and bring to the boil. Leave to simmer for 5 minutes and then take off the heat and set aside.
  3. With an electric whisk, whisk the eggs, sugars, syrup and vanilla together until pale and fluffy. Then, whilst whisking, slowly pour in the melted butter.
  4. Using a large spatula, fold the date mixture into the egg mixture. Then grate the peeled and cored apple into the main bowl and fold this in.
  5. Sift the flour, ginger, bicarb and salt into the wet ingredients and fold with a large spatula until fully combined.
  6. Pour the mixture into the three lined tins and bake for 35-45 minutes, until a skewer comes out clean when inserted into the centre of the cakes.
  7. Turn the cakes out onto cooling racks and leave to cool completely.
  8. Now make the cream-cheese frosting. Put the butter into a large bowl and beat until smooth and soft. Add the cream cheese and half the icing sugar an beat again until smooth. Add the rest of the icing sugar and beat again until smooth. Leave in the fridge until needed.
  9. To make the pecan praline put the sugar into a saucepan with 60ml of water. Put the pan over a medium heat and bring to the boil, without stirring, and leave until a golden brown colour has developed.
  10. Put the pecans onto a baking sheet, pour the caramel over them and then leave to cool completely.
  11. Once cooled, break the praline up, either with a rolling pin or by hand. Then put it into a food processor and blitz into a coarse crumb.
  12. Now start to build the cake. Put a dollop of the icing onto the board you’ll present the cake on, and put the base sponge onto this blob – this will stop the cake moving around. Spoon some of the icing onto the cake and spread over, making the side slightly more raised than the centre. Sprinkle ½ of the praline into the centre of the cake, and then put the second sponge on top. Repeat the icing and then praline on this second cake, and then top with the final cake.
  13. Using a palette knife, spread the frosting over the cake, trying to make as smooth a surface as possible – this is called the ‘crumb-coat’. I find putting a big blob on the top of the cake and then working it over and round the sides a good way of getting the icing on. Keep enough of the icing to do another coat and to pipe rosettes on top (about 1/3 – 1/2 of the original amount). Put the cake in the fridge until the icing has set slightly.
  14. Meanwhile make the apple decorations. Quarter the apple and core it. Then slice each quarter into 3 to make 12 apple segments. In a pan put the sugar and 50ml of water, like you did above for the praline. Bring to the boil and heat until a golden caramel forms. Add the apple segments and shake in the pan to coat fully (don’t stir as this may crystallise your caramel). Turn the apples out onto a greaseproof sheet, and leave to cool completely – if you can separate them before they cool this will make it easier later!
  15. Take the cake out of the fridge and make a second coat of icing, making sure it’s really smooth as this will be on show. Heating a palette knife slighting under hot water or with a blow torch can be a good way to get a smooth finish. Leave in the fridge to set.
  16. Pour the caramel into a bowl and heat in a microwave or pan until just starting to loosen. Stir to make an even consistency, and then pour into a jug or pipping bottle – anything that’s easy to operate and will give you control when pouring.
  17. Pipe the caramel around the edge of the cake so that it just drips over the edge. You want the drips to be slightly uneven, so you can vary how much is squeezed over the edge in various places. Fill the middle of the cake with the rest of the caramel and then leave in the fridge for 15 minutes to set.
  18. Take the pipping bag with the frosting and pipe rosettes around the edge of the cake. Sprinkle the rest of the praline into the centre and then top with the caramelised apples. Finish with some sparklers to bring some extra bonfire magic!

Thanks for reading and happy bonfire night!

Emma x


Chocolate Orange Celebration Cake

Chocolate Orange Celebration Cake

Time for another flamboyant cake! I’m always excited by the prospect of making something big and elaborate, and this one was no exception. Today is my sister’s 21st birthday, and so it followed that a super kick-ass cake was needed for the occasion. This one looks pretty fancy, but it’s actually not too complicated, so it’s a good one to try if you want to turn your hand to big cakes for the first time.

When looking for a flavour combo to go for this was the first that came to mind. It’s my sister’s favourite, and a total classic, so it’s hard to get wrong. We have two chocolate sponges, one orange sponge, lots of chocolate orange buttercream and some Terry’s chocolate orange segments to top it all off. If you know anyone who loves chocolate oranges, you need to make this for them!

Recipe

Serves 10

Time: 2 1/2 hours

Ingredients

For the chocolate cake

  • 170g Unsalted butter
  • 100g Dark chocolate
  • 240g Plain flour
  • 280g Caster sugar
  • 3 tbsp Cocoa powder
  • 1 tsp Bicarb
  • 2 Large eggs
  • 142ml Greek yoghurt
  • 142ml Milk

For the orange cake

  • 175g Butter
  • 175g Golden caster sugar
  • 175g Self-raising flour
  • 3 Large eggs
  • 1 Orange, zested and juiced
  • 1/2 Tube orange food colouring (optional)

For the chocolate orange icing

  • 300g Unsalted butter
  • 675g Icing sugar
  • 1 tsp orange extract
  • Zest of 1 orange
  • 1/2 Tube orange food colouring
  • 150g Dark chocolate, melted and cooled

For the decoration

  • 1 Terry’s chocolate orange

Method

  1. Pre-heat oven to 180˚C. Grease and line three 7.5inch cake tins.
  2. First make the chocolate cake. Melt the butter and chocolate together in a heat-proof bowl over a pan of simmering water.
  3. In a bowl mix the flour, sugar, bicarb and cocoa together.
  4. Whisk together the egg and yoghurt. Add this mixture, and the chocolate mixture to the flour mixture, along with 100ml boiling water. Whisk quickly until combine and then pour into two of the lined tins.
  5. Bake in the oven for 25-30 minutes, or until a skewer comes out clean once inserted. Leave the cakes to cool for 15 minutes before turning them out onto wire racks and leaving to cool.
  6. Now make the orange cake. Put the butter, sugar, flour, and eggs into a bowl. Beat with a wooden spoon or whisk until smooth and fully combined. Add the orange zest, juice and colouring, and mix again until it’s all combined.
  7. Spoon the mixture into the lined tin and bake in the oven for 20-25 minutes. Check if it’s cooked through by inserting a skewer. If it comes out clean it’s ready. Leave to cool for 15 minutes before turning out onto a wire rack.
  8. Whilst the cakes are cooling, make the buttercream icing. Beat the butter, 600g of the icing sugar, orange extract and orange zest until smooth. Spoon 280g into a bowl, mix in the orange food coloring and the other 75g of icing sugar, and then set to one side.
  9. In the main bowl add the melted dark chocolate and mix with a spatula until fully combined. Spoon both icings into separate piping bags, fitted with round nozzles.
  10. Now you can assemble the cake. Pipe a small blob of the chocolate icing onto the board or plate you’ll present the cake on – this will stop the cake from sliding around. Put one of the cooled chocolate cakes onto your board. Pipe blobs of chocolate icing onto the cake and then top with the orange sponge. Repeat the piping of blobs on the orange sponge, and then top with the chocolate sponge. Pipe alternate blobs of chocolate and orange icing over the top of the cake and then finish with segments of Terry’s chocolate orange.

Thanks so much for reading! This is the second in a trio of big cakes, so look out for the final one coming out in a week’s time. Meanwhile, the next post is going to be bonfire night themed, so get your sparklers at the ready!

Emma x

Apple and Blackberry Crumble

Apple and Blackberry Crumble

Being a country girl, pretty much every hedgerow and tree around where I live is covered in blackberries or apples at the moment, and it’s times like these – when fruit is literally falling onto your doorstep – that you need to make the most of it. The other day a big bag of cooking apples magically appeared on the kitchen table, which happens a lot now that my Mum has discovered foraging. But lucky for me I knew exactly what I wanted to do with them –  when life gives you apples, make apple crumbles.

Ever since I was small a big bowl of this with some custard would put a smile on my face, and it still does to this day. You can put almost any fruit into a crumble – rhubarb, berries or pears just to name a few other classics. Blackberries and apples are definitely my go-to couple though, as they carry a lot of flavour, and they’re the perfect combo of sweet and sharp.

I’d recommend serving this with a really good custard. You can either make this powdered, in which case follow the back of the packet’s instructions, or you could make an even better custard from scratch. For this I have a really good recipe which is on two of my other posts – Bakewell roly poly and French fruit tarts – the links to which are at the bottom of this post under ‘you may also like’ (if they’re not there, refresh the page and they’ll pop up or go to my recipe index).

Recipe

Serves 8

Time: 1 hour

Ingredients

  • 4 Bramley apples
  • 85g Brown sugar
  • 150g Blackberries
  • 150g Butter
  • 150g Caster sugar
  • 150g Plain flour
  • 150g Rolled oats
  • 1 tsp Ground cinnamon

Method

  1. Preheat the oven to 180˚C.
  2. Peel, core and chop the apples into chunks.
  3. Put the apples into a pan with the brown sugar and heat gently until they begin to break down and soften. At this point remove them from the heat, add the blackberries, and set aside for now.
  4. Now make the crumble topping. Put the butter and caster sugar into a bowl and beat with a wooden spoon until smooth and light. Add the flour and rub it into the butter mixture with your fingers. Work this until you get a bread-crumb texture, shaking the bowl from side to side every so often to bring the lumps to the top.
  5. Add the oats and cinnamon, and then mix with a round bladed knife to combine with the breadcrumb mixture. Don’t worry if clumps form, this will happen as the butter will have softened, it’ll taste good.
  6. Take a large oven-proof pot or dish and put the stewed apples and blackberries into it. Spoon the crumble over the top loosely, not pressing down as you want it to remain crumbly.
  7. Put the crumble into the oven for 25-35 minutes until the topping is golden brown and slightly crisp.
  8. Serve immediately with lots of custard, cream or ice cream.

Thanks so much for reading and happy national baking week! We’re getting halloweeeny on the next few posts so make sure you look out for them.

Emma x

Pecan Praline Brownies

Pecan Praline Brownies

Finding the time to write a new post this week was a balancing act. I’ve just started a new job, my course requirements are growing, and drama rehearsals are kicking off, and yet I think this just shows how easy and quick these are to knock up. When looking for an old favourite to fall back on these were definitely the ones to go for. These are the things I make most often, and almost everyone who knows me will have, at some point, been offered one. They’re simple, satisfying, and great for sharing – so if you’re a uni fresher, or just starting somewhere new, these are perfect for making friends. I also use the base mix (without the praline topping) as my chocolate cupcake mix, as they produce chewy, indulgent cakes, with a lot more chocolate flavour than most other chocolate cake mixes. So if you prefer your cakes cupcake-style you can use this recipe for that as well.

The original recipe for this came from the back of a Hersey’s Cocoa Powder pot from when my parents lived in America. Since then it’s been memorised, prodded, and tweaked by my family until we’ve got to the one we see here. Slightly unusually I use oil instead of butter – but don’t let this put you off. In the original recipe it said take a cup of butter and melt it, so I just cut out the middle man and went straight to a liquid fat source. Somehow it works really well to make the brownies moist, and technically it’s healthier as it’s got a lot less saturated fat in it than butter (not that anyone eating these will be THAT calorie conscious, but every little helps). I’ve also slowed down the cooking time to make the finished texture gooey and delicious, which also has the benefit that it’s harder to overcook them.

I usually make my brownies plain, without the praline top, but if you want to make them extra special you can go the extra mile and finish them with this crunchy nutty topping like I do here. The crunchy, nutty, sugar hit on the top just takes the whole thing one step further and makes them truly decadent.

Recipe

Makes 20 squares

Time: 1 hour

Ingredients

  • 420ml Vegetable oil
  • 640g Light brown sugar
  • 2 tsp Vanilla extract
  • 8 Medium eggs
  • 160g Cocoa powder (not drinking chocolate, as it has added sugar and less cocoa, and so has much less flavour)
  • 260g Plain flour
  • 75g White chocolate, chopped
  • 75g Milk chocolate, chopped

Topping:

  • 75g Butter
  • 150g Caster sugar
  • 225g Pecans, chopped

Method

  1. Preheat the oven to 170˚C. Line a large rectangular tin (mine was 30×25 cm ) with butter and baking paper.
  2. In a large bowl whisk together the oil, sugar and vanilla. Add the eggs and whisk until fully combined. Add the cocoa and whisk again (go slowly here as the cocoa will go everywhere if whisked too fast). Add the flour and the chopped chocolates and whisk until fully mixed.
  3. Pour the mixture into the lined tin and smooth out with a spatula.
  4. Now make the praline topping. In a pan melt the butter over a medium heat. Add the sugar and stir until the sugar has dissolved. Then bring the sugar mix to the boil, before adding the nuts. Stir to coat the nuts and then leave to boil until caramelized (around 3 minutes).
  5. Spoon the pecan mix over the brownies, making sure they’re evenly distributed over the whole tray, and bake in the oven for 25-35 minutes. Be careful not to over bake here, as you want brownies to be slightly gooey in the middle. If you’re used to baking cakes I’d say take them out 5 minutes before you’d think it’d be ready if you were making a cake.
  6. Cut into 20 squares and serve. (They’re really good with raspberries and double cream!).


Thanks so much for reading! Check out my social media pages (links on the side bar), and like/follow to stay updated.

Emma x