Category: Fun

For the times when you just want to get in the kitchen and get hands on.

Neapolitan Brownie Cheesecake

Neapolitan Brownie Cheesecake

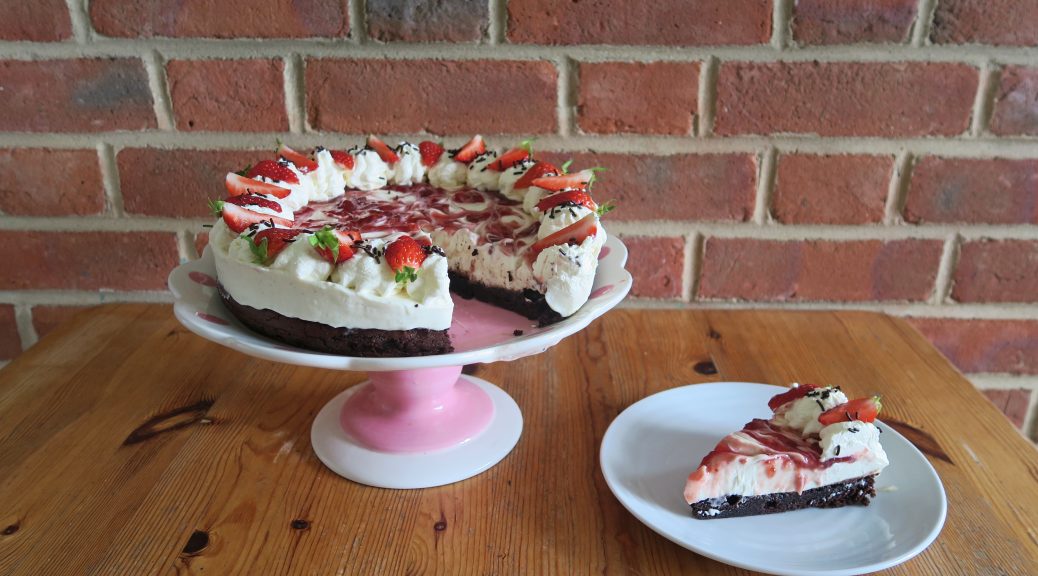
My parent’s are aiming to walk the South West Coastal Path over the next few years and so last week we were all on holiday to kick-start the journey. As we were walking loads, we were in Devon, and it was insanely hot, it goes without saying that we ate a tonne of ice cream. So in homage to all of that I decided to do an ice-cream themed bake for Father’s day.

In truth, I’m more of a mint choc chip girl than Neapolitan, but I thought that the classic vanilla, chocolate, strawberry layer thing was too good to not use for this. I also finished my Art Foundation course the other day (silent whoop!) and so after that I treated myself to a brownie cheesecake thing from Tescos. I’ve seen brownies being used in cheesecakes for years but that was the first time I tried it myself, and boy was it good. So rather than having a biscuit base for this one I made a fudgy brownie, and dare I say it I think it’s better than a biscuit base. It’s chewy, rich, and is way easier to transport/slice into as you don’t have crumbs flying everywhere!

This one has a few elements to it, but it’s all very easy to put together when broken down. For the swirls on the top I used strawberry jam which worked way better than I thought it would! If you’d prefer something sharper for the topping you could use marmalade, raspberry jam or boil up equal parts fruit and sugar to make a thick puree.

Recipe

Serves 12

Time: 1 hour, plus chilling

Ingredients

For the Brownie

  • 230g Caster sugar
  • 100ml Vegetable oil
  • 2 Medium Eggs
  • ½ tsp Vanilla extract
  • 55g Cocoa powder
  • 90g Plain flour

For the Cheesecake

  • 1 tbsp Vanilla bean paste
  • 550g Cream cheese
  • 50g Icing sugar
  • 250ml Double cream

For the Topping

  • 2 tbsp Strawberry jam
  • 200ml Double cream
  • 4 Small fresh strawberries, plus extra for serving
  • 2 tbsp Chocolate sprinkles

Method

  1. Begin by making the brownie. Pre-heat the oven to 160˚C. Grease and line a 9-inch cake tin with baking paper.
  2. Put the sugar and oil into a large bowl and whisk to combine. Add the eggs and vanilla and whisk these in to make a smooth mix. Add the cocoa and whisk it in carefully, it will explode out of the bowl a lot! Finally, add the flour and whisk it in to make a smooth batter.
  3. Pour the mixture into the lined cake tin and bake in the oven for 15-20 minutes so that a crust has formed and the middle is goey but baked through. Leave to cool in the tin.
  4. Now make the cheesecake layer. Put the vanilla and cream cheese into a bowl and whisk together until smooth. Add the icing sugar and double cream and then whisk again until the mixture is lump-free and beginning to thicken.
  5. Once the brownie is completely cooled pour the cheesecake mix on top and smooth it over with a spatula.
  6. Spoon the strawberry jam into a small bowl and beat it with a small spoon to break it up and make it slightly runny. Spoon blobs of the jam onto the cheesecake and then mix it around with a knife a little to get a swirl effect.
  7. Put the whole cheesecake into the freezer for 1 hour, and then leave in the fridge for another 3 hours, or better still over night to set.
  8. When ready start prepping the topping. Pour the double cream into a bowl and whisk until soft peaks form. Spoon the mixture into a piping bag fitted with a star-shaped nozzle. Pipe rosettes of the cream around the edge of the cheesecake.
  9. Quarter the strawberries and then push them into the gaps between the cream rosettes. Finish with some of the sprinkles and serve chilled!

Thanks for reading!

Emma x
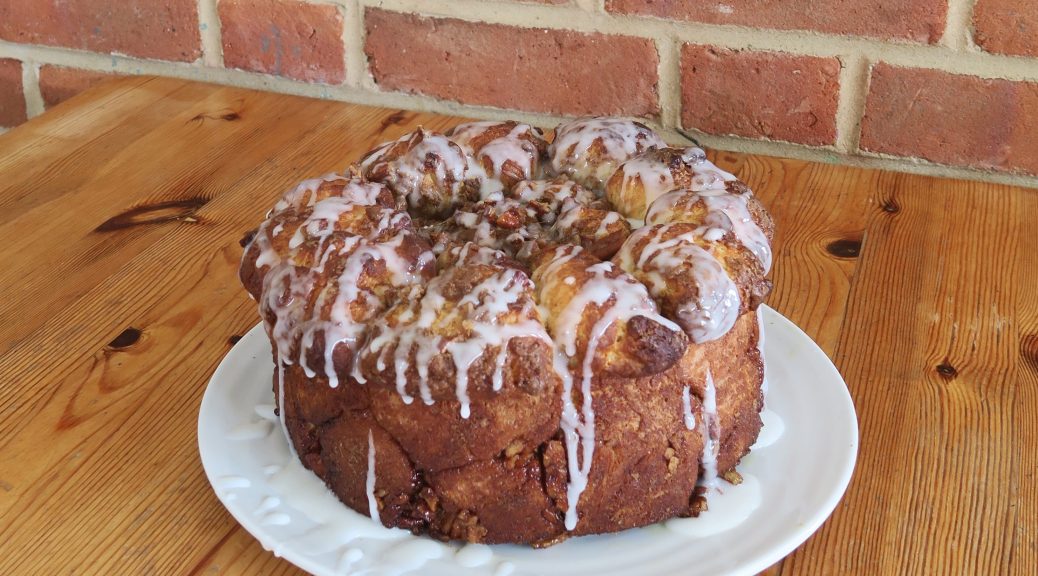
Monkey Bread

Monkey Bread

I think that bread is one of those things people rarely bake at home for two main reasons. 1) It takes ages to make and 2) the end result is often really disappointing, and so on the whole it normally would have been a lot quicker to just buy a loaf from the local shop. This bread will take a bit of time, as with most other breads it does need to prove and (obviously) bake. However, in my opinion this one’s way more fun to make than other breads as the dough is really nice to work with, it’s assembled as little tear-and-share style balls, and it’s all lathered in cinnamon and butter so it tastes insane!

The identifiable feature of monkey bread is the mosaic-like pattern of the finished loaf, made by rolling the dough into balls which are individually dipped in butter and then cinnamon sugar to make each piece of bread sumptuous and sticky. Then the whole thing is scattered with pecans to give a delicious crunchy nuttiness to the whole thing. The shaping also makes it a great loaf for sharing as you can pull bits off without the need for a knife! This is traditionally made in a Bundt tin (one with a hole in the middle – not sure why but meh), but as I didn’t have one I just popped them all into a 9 inch cake tin which seemed to do the job just as well.

Recipe

Serves 8-10

Time: 1 hour, plus proving and baking time

Ingredients

For the dough

  • 220ml Milk
  • 90g Unsalted butter
  • 550g Strong white bread flour, plus extra for dusting
  • 10g Fast-action dried yeast
  • 5g Salt
  • 50g Caster sugar
  • 2 Large Eggs

To decorate

  • 125g Unsalted butter
  • 1 tbsp Ground cinnamon
  • 2 tsp Ground ginger
  • 230g Light brown sugar
  • 160g Pecans, chopped roughly
  • 1 Large egg, beaten

For the icing

  • 1 tbsp Milk
  • 100g Icing sugar

Method

  1. To start making the dough put the milk and butter into a saucepan and leave to simmer on a medium heat until the butter has melted.
  2. Next put the dry ingredients into a large bowl and mix together. Add the egg and the milk mix and stir to make a sticky dough.
  3. Turn the dough out onto a lightly floured surface and knead for about 10 minutes until smooth and elastic.
  4. Tip the dough into a clean bowl and cover with clingfilm. Leave to rise in a warm space for 90 minutes, until doubled in size.
  5. Next melt the butter for the topping in a small pan and set to one side.
  6. In another bowl mix the spices, sugar and a little salt. Then add the chopped pecans and mix together.
  7. Take a Bundt or 9 inch cake tin and brush the inside with a little of the melted butter to grease. Then spoon a little of the pecan mix into the base of the tin.
  8. Tip the dough out onto a lightly floured surface and knead for 5-10 seconds to knock out the air. Then split and roll the dough into 50 small balls. Dip one of the balls in the butter and then roll in the spiced sugar. Chuck it into the tin and then repeat with the other dough balls until the base of the tin is filled. Scatter with the rest of the pecans and then continue with the rest of the dough. If you have any butter or sugar left over at the end pour it over the loaf.
  9. Cover the whole thing with cling film again and leave to rise at room temperature for 1 hour.
  10. Pre-heat the oven to 180˚C. Take the beaten egg and brush it over the top of the loaf to glaze. Then bake the loaf in the oven for 35-40 minutes until risen and golden brown. Leave to cool in the tin.
  11. To make the icing put the icing sugar and milk into a small bowl and mix together to make a smooth paste.
  12. Turn the monkey bread out of the tin and drizzle with the icing. Serve!

Thanks for reading!

Emma x

Rugelach

Rugelach

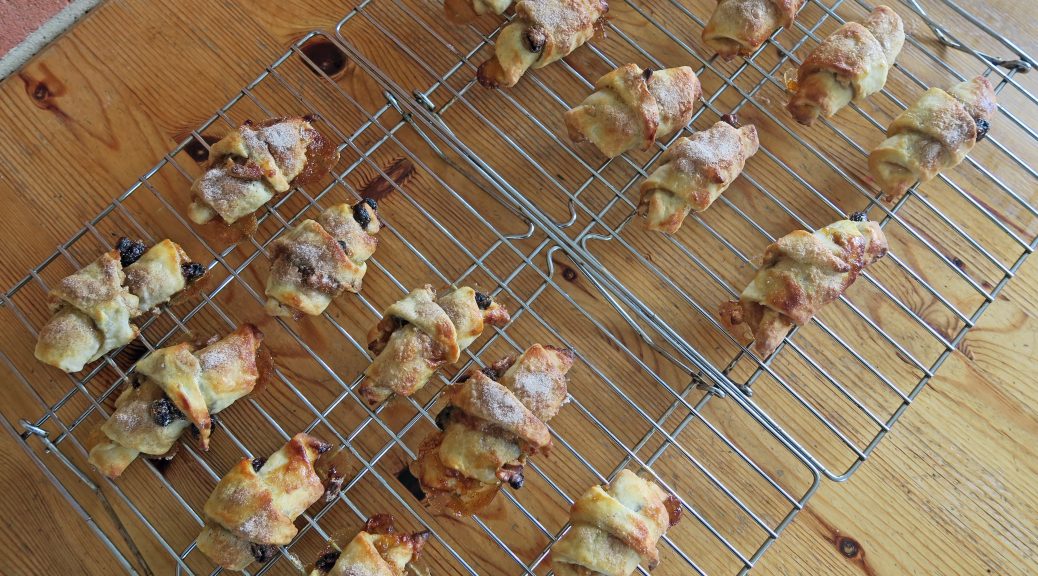
What is this? Another unusual bake that no one’s ever heard of before? Well you’d be right there. As you can probably tell I’m pretty obsessed with foreign baking, and over the course of the year I’ve been really pushing that side of my cooking. In my town there’s this really old bookshop that has a massive cookbook section, full of every style, theme, and cuisine of cookbook you could imagine. I love flicking through the books there, making mental notes of any unusual flavours, techniques, and ideas to give a go.

I first came across these in a Nordic recipe book and I immediately knew they’d be something I’d want to work on myself. Despite finding them in a Nordic cookbook though, these are actually a Jewish pastry, mainly found in the middle east. The dough is made with cream cheese which creates a really interesting, soft texture. These are then stuffed with apricot jam, nuts, raisins and cinnamon which makes them super moreish.

I quite like these as small, one-mouthful bites, but if you want to make them chunkier you can easily do this by cutting your circle into 6 or 8 triangles, rather than 12 like I have. I also haven’t tried this, but I wouldn’t be surprised if this filling works really well with shortcrust, puff, or even filo pastry, so you can really play around with these to suit your personal taste.

Recipe

Makes 24

Time: 45 minutes plus chilling and baking

Ingredients

  • 230g Cream cheese
  • 250g Unsalted butter
  • 155g Caster sugar, plus 3 tbsp for dusting
  • ½ tsp Salt
  • 1 tsp Vanilla extract
  • 300g Plain flour
  • 40g Light brown sugar
  • 1 ½ tsp Ground cinnamon
  • 140g Raisins
  • 140g Walnuts, finely chopped
  • ½ cup Apricot jam
  • 1 Large egg, beaten

Method

  1. Put the cream cheese and butter into a bowl and whisk until light and pale. Add 55g of the caster sugar, salt and vanilla and mix again to combine. Slowly add the flour and mix slowly until a dough forms.
  2. Roll the dough into a ball. Then cut the ball into quarters, roll each quarter into a ball and wrap in cling film. Leave in the fridge for an hour.
  3. Meanwhile make the filling. Put the 100g of the caster sugar, the brown sugar, ½ tsp cinnamon, raisins and chopped walnuts into a bowl and mix together.
  4. Lightly flour a surface and roll each dough ball out into a 9 inch circle. Spread the apricot jam over the circles and sprinkle with some of the filling mix, pressing it into the dough slightly.
  5. Cut the dough circle into 12 wedges. Then, starting at the wide end of the wedge roll the dough up like a croissant.
  6. Line a baking tray with baking paper and put the rolled up cookies on the tray, making sure the point where the folded bit of pastry ends is underneath. Chill for 30 minutes.
  7. Pre-heat the oven to 180˚C. Lightly brush each biscuit with the beaten egg. Then combine the rest of the caster sugar and cinnamon in a bowl and sprinkle over the biscuits.
  8. Bake the rugelach in the oven for 15-20 minutes until golden brown and crisp.
  9. Leave to cool on a wire rack and then serve!

Thanks for reading!

Emma x

Sweet Potato Gnocchi with Homemade Passata

Sweet Potato Gnocchi with Homemade Passata

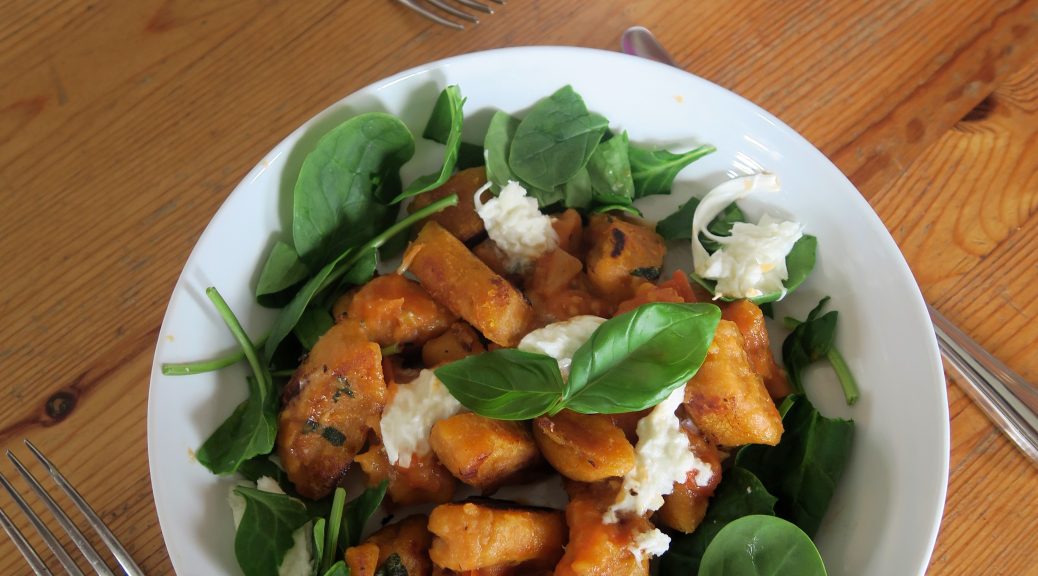
The first time I had gnocchi was in Sorrento in Italy and it was one of the most delicious things I’ve ever eaten. We were in a very Italian restaurant in the middle of the town, with red chequered table cloths and plastic tables, and as the Italians eat a lot later than we do we were the only ones in there at the time. I remember being served this very simple-looking bowl of potato dumplings with a basic tomato sauce and a little sprinkle of parmesan, so it didn’t look like much, but the taste of it was just perfection in a bowl.

Every time I go back to Italy now I always order gnocchi, and it never fails to impress. Not to mention the incredible passata (aka tomato sauce) they can make over there to go with it. If you’ve been following my other posts you’ll know by now I’m obsessed with Italian tomatoes. Apparently the volcanic soil makes them super good, and it’s really true! Whilst we don’t have tomatoes like that here, I find that a way of making the most of what we do have is to make your own homemade tomato passata, which will always taste so much better than the ones you buy in shops.

It’s a bit weird that it’s taken me this long to get round to making my own gnocchi, especially as it’s a lot easier than you’d think to make and it’s really tasty. These are slightly different to the traditional as they’re made with sweet potato, which makes them slightly heavier than the normal potato gnocchi, but it also gives them a really rich, sweet flavour, which works really well with the sauce! This recipe makes quite a lot of gnocchi, so if you can’t get through it all in one sitting you can blanch it (as in step 6) and then put it in an airtight pot in the fridge for up to 48 hours before carrying on and frying it.

Recipe

Serves 6

Time: 1 hour

Ingredients

  • 2 Medium sized Sweet potatoes (about 500g)
  • A sprinkle of Salt
  • 300g Pasta flour (plus extra for dusting)
  • 50g Unsalted butter

For the Passata:

  • 1 Small white onion
  • 2 Garlic cloves
  • 1 tbsp Olive oil
  • 8 Beef tomatoes
  • 3 tbsp Sundried tomato paste
  • 2 tsp Mixed herbs

To serve:

  • 2 Balls of Mozerella
  • 4 Handfuls of Baby spinach
  • A few leaves of Basil

Method

  1. Pre-heat the oven to 180˚C.
  2. Put the potatoes onto a baking tray and sprinkle over the salt. Leave to roast in the oven for about an hour until soft. Cut in half and then leave to cool.
  3. Once cool enough to handle, scoop the flesh out of the potatoes with a spoon. (The skins aren’t used in this recipe, but keep them as they’re great for making crispy, stuffed potato skins!)
  4. Mash the potato flesh with a fork so it becomes smooth. Season with a little salt and pepper and then slowly add the flour, squeezing he dough with your hands to make a pliable dough.
  5. Divide the dough in half and roll each half into a thin sausage, about 60cm long. Cut the lengths into little pillow shapes about 2cm wide.
  6. Bring a pan of water to the boil. Drop the gnocci into the water and boil for a couple of minutes to blanch them. Normal potato gnocchi will rise to the surface when ready, but these are a little heavier so they might not. Scoop the gnocchi out of the water and place on a plate to cool.
  7. Now make the passata. Peel and finely chop the onion and garlic. Put the oil into a pan and heat gently. Add the chopped onion and garlic and fry, stirring occasionally, for a few minutes until the mixture starts to caramelise.
  8. Then chop the beef tomatoes into chunks and add them to the onions. Stir in the sundried tomato paste, mixed herbs and a little salt and pepper to season. Then leave to simmer on a medium heat for about 15 minutes, until the tomatoes have gone mushy and the mixture has begun to reduce down.
  9. You can leave your passata like this, but if you’d prefer it to be smooth take a hand-blender and puree the passata to make a smooth sauce. Taste again and season the sauce if needed. Then keep warm until the gnocchi is ready.
  10. Put the butter into a large frying pan and leave to melt. Then add the gnocchi and fry for 2-3 minutes. When one side is golden brown flip them over and cook on the other side. Once all the gnocchi have become crispy and golden-brown all over, transfer them to a plate and then serve with the passata, mozerella, baby spinach and a handful of fresh basil.

Thanks for reading!

Emma x

Chocolate, Orange, and Chilli Bread

Chocolate, Orange, and Chilli Bread

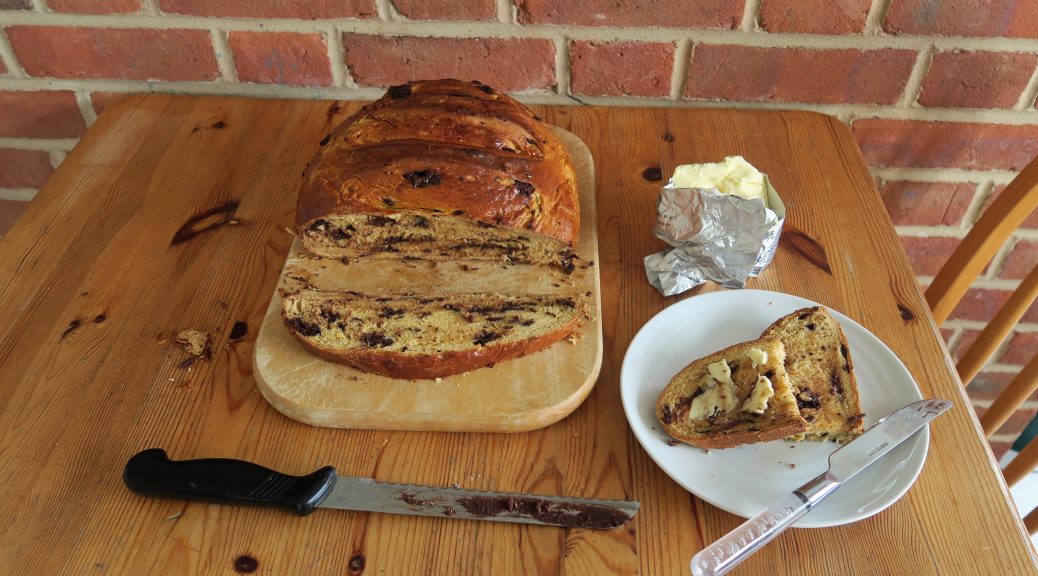
 I haven’t made bread in waaay too long so I thought that it was time I entered back into that world again – and since it’s chocolate month, it’s chocolate bread! Though rather than a ‘chocolate, orange and chilli bread’,  as I’ve called it, it’s probably better to think of this as an orange bread with chocolate chips and a gentle wave of chilli heat after it’s eaten. I love a bit of heat in the background of any bake, but I’m not a fan of blow-your-head-off heat, so the amount of paprika in this is just enough to prickle the tongue. But of course if you like your food really hot you can increase the quantity of paprika going in, put in 3 tsp for a moderate warmth, and 4 1/2 tsp for a strong heat!

By using really rich, dark chocolate it also means that the loaf, whilst sweet and enriched, feels as though it borders the line between sweet and savoury. This makes the whole thing really moreish, and with a bit of butter it goes down really well with a good cup of coffee.

Recipe

Makes 1

Time: 45 minutes, plus proving and baking time

Ingredients

  • 350ml Milk
  • 80g Sugar
  • 16g Yeast
  • 12g Salt
  • 700g Strong white bread flour
  • 1 ½ tsp Paprika
  • 2 Large eggs
  • 100g Butter
  • 3 Oranges, zest only
  • 200g Dark chocolate, chopped

Method

  1. Put the milk into a saucepan and bring to the boil.
  2. Meanwhile put the sugar, yeast, salt, flour, and paprika into a large bowl and mix together.
  3. Add one of the eggs, butter, zest and ¾ of milk to the dry ingredients. Mix everything together and then slowly add the rest of the milk until you get a sticky dough.
  4. Turn the dough out onto a lightly floured surface. Knead for about 10 minutes until smooth and elastic. Add the chopped chocolate knead for another few minutes to incorporate it.
  5. Lightly oil a bowl and tip the dough into it. Cover with clingfilm and leave to rise for about 2 hours, until doubled in size.
  6. Turn the dough out onto a lightly floured surface. Knead for a few seconds to get rid of the air bubbles. Then tuck the dough under itself to make a loaf-shape with a tight surface. Place onto a lined baking tray, cover loosely with clingfilm and leave to rise for another hour.
  7. Pre-heat the oven to 180˚C. Take a sharp knife and score the top of the loaf with three confident slices. This will help shape the bread as it rises.
  8. Take the other egg, crack it into a bowl and beat it with a fork. Then take this beaten egg and brush the top of the loaf with it to glaze. Then put the bread into the oven to bake for about 40 minutes, until it sounds hollow when lightly tapped on the bottom. Serve!

Thanks for reading!

Emma x