Category: Fun

For the times when you just want to get in the kitchen and get hands on.

Devils Fruit Pie

Devils Fruit Pie

I’ve always loved a good bit of folklore and when I was down in Devon the other day I came across something I’d never heard before, so here’s some storytime for your day. We were on a coastal walk with some friends, winding our way through sandy dunes and forest paths, when we started walking past isles of blackberry bushes laden with tones of juicy fruit ripe for the plucking. My mum is a keen forager and at this time of year always carries bags and Tupperware on walks in case we pass anything edible that can be picked (if we hit Armageddon I’m sticking close to her!). So we pulled out the bags and started picking off the biggest blackberries we could find, eating a few, then bagging a few for later.

 Then, I can’t quite remember how, Simon began talking about the Devil spitting on blackberries and impending doom awaiting those who’d eat blackberries after 11th October, as you do. Being me I missed half the story through drifting in and out of the conversation, so when I got home I looked it up and to find out what the blazes he was on about. Apparently when Lucifer fell from heaven, on the 11th October (who knew!), he fell on a thorny blackberry bush. As a result he now spits on all the blackberries on 11th October and so anyone who eats them after this time is doomed . What a cheery story right?  You learn something new every day.
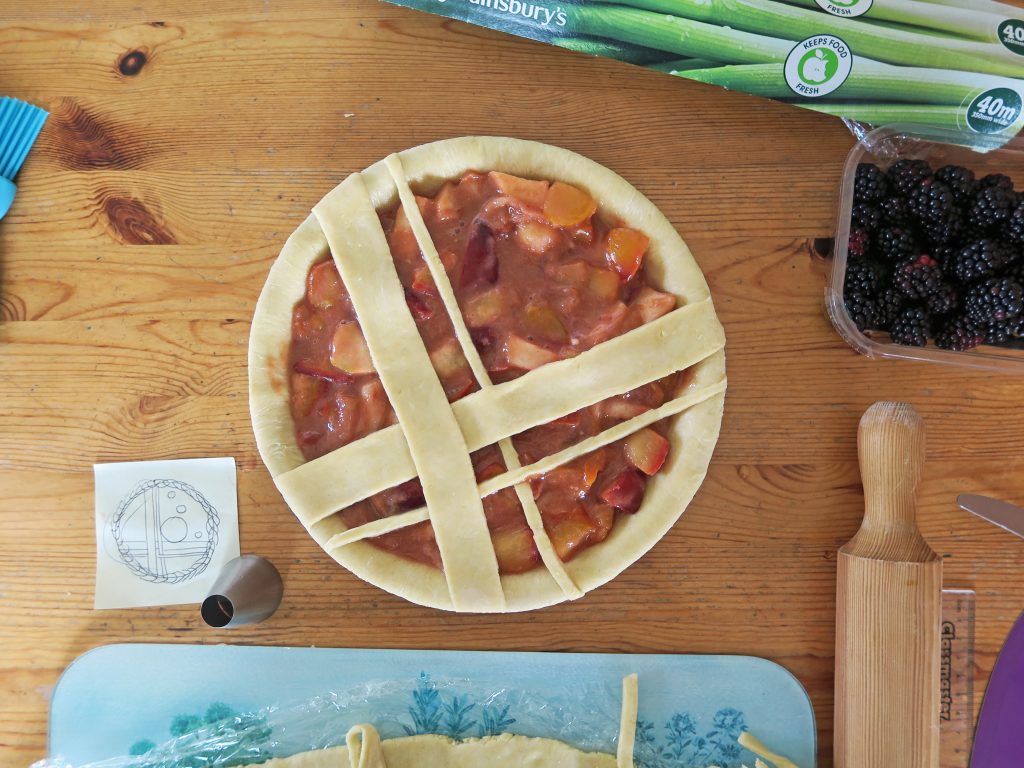
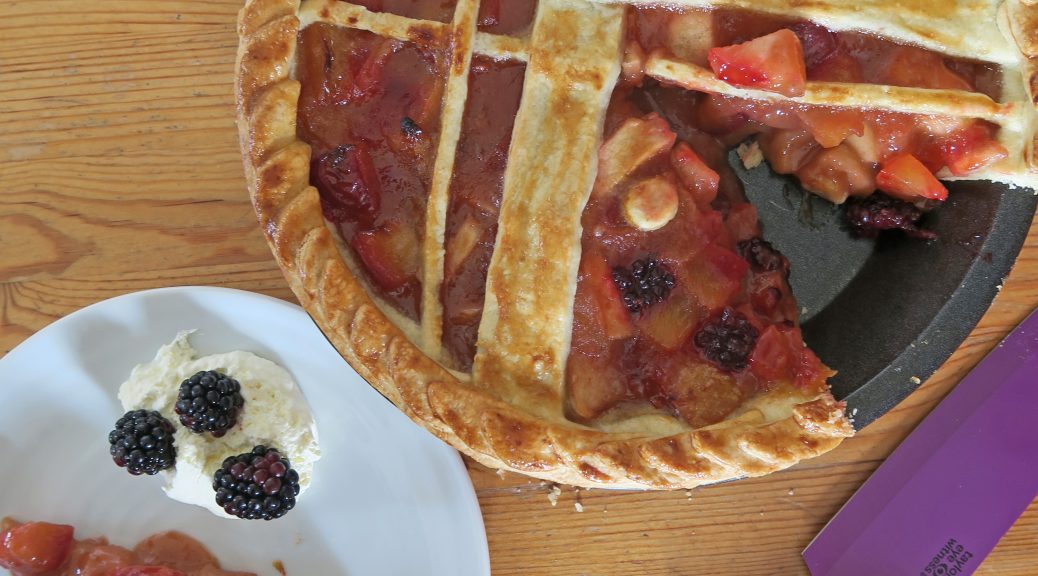
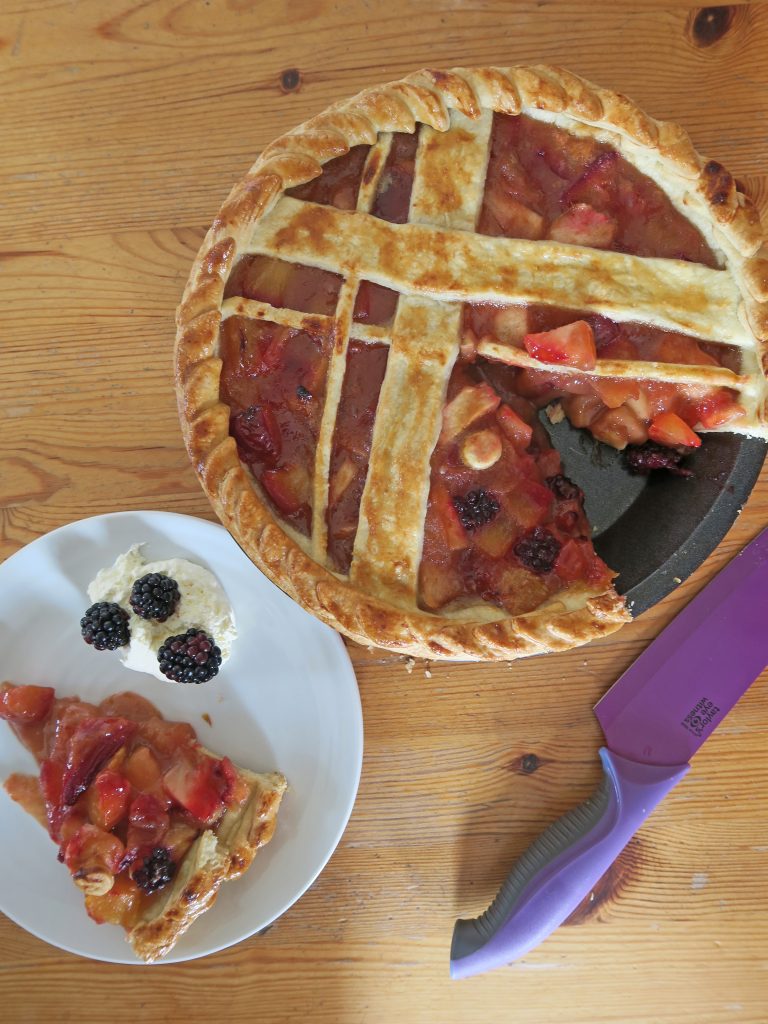
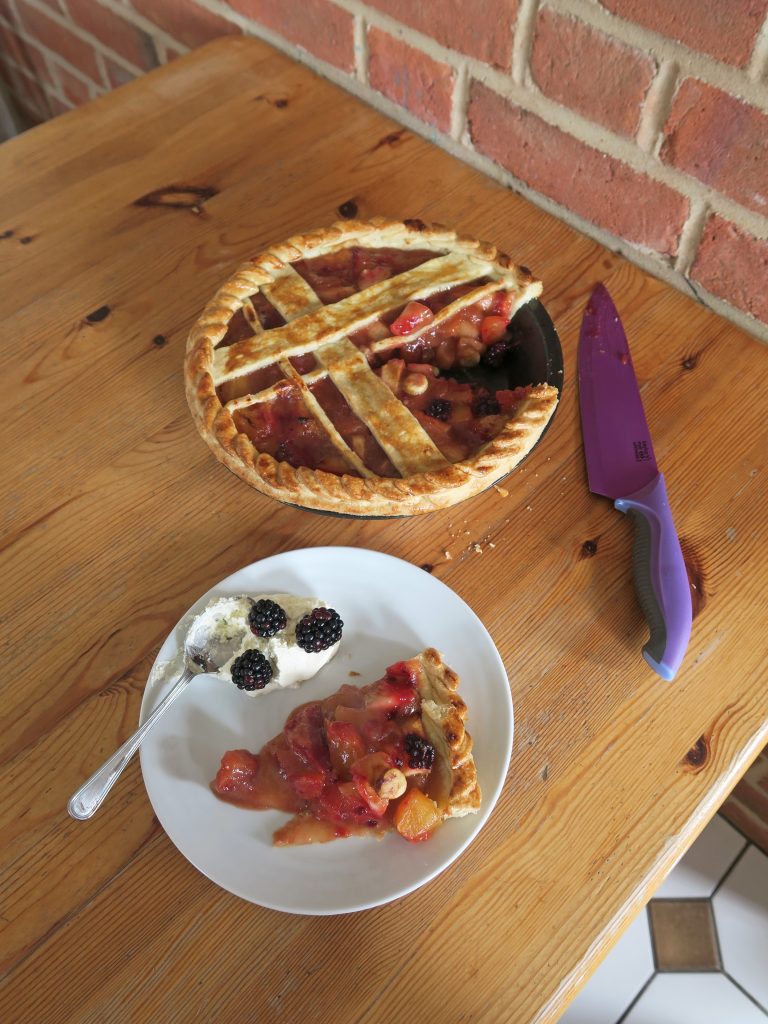
Luckily you have another week or so to forage for all the blackberries you can find and stuff them into as many pies, scones or tarts as you can before they get spat on by the devil! This pie is made up of a whole load of fruit we foraged for and just shows that pretty much anything can go in a pie (within reason – don’t go all Sweeney Tod on me). Here I’ve used apples, plums, damson and blackberries. I’ve also done a decorative top because I wanted to get a little creative, but you could also cover the whole thing in pastry to get the traditional look, or do something wacky yourself.
Recipe

Serves 12

Time: 1 hour, plus chilling time

Ingredients

For the pastry

  • 340g Plain flour
  • 150g Unsalted butter
  • 1 tbsp Caster sugar
  • A pinch of salt
  • 3 tbsp Water

For the filling

  • 1 Large cooking apple ( I used Bramley)
  • 4 Plums
  • A handful of Blackberries
  • 6 Small damsons (or 2 more plums)
  • 3 tsp Brown sugar
  • 1 tsp Ground cinnamon
  • 1 tsp Ground ginger
  • 1 tbsp Plain flour
  • 1 tsp Cornflour

Method

  1. Begin by making the pastry. Put the flour and butter into a large bowl. Rub the butter into the flour with your fingers until the mixture resembles breadcrumbs.
  2. Stir the sugar and the salt into the flour with a round bladed knife and then keep mixing as you add the water until a smooth dough forms. Bring the dough together with your hands to make a ball and then wrap the dough in cling film and leave in the fridge to chill for at least 1 hour.
  3. Meanwhile prepare the filling. Peel, core and dice the apple. Then de-stone and dice the plums and damsons into similarly sized chunks to the apples.
  4. Put all the fruit into a large pan with the sugar, cinnamon, and ginger. Place over a medium heat and bring to a gentle simmer, stirring occasionally until the fruit is starting to soften and let out its juices. Add the flour and the cornflour to the pan, stir to combine and then set aside to cool.
  5. Pre-heat the oven to 180˚C. When the pastry is ready take it out of the fridge and place on a lightly floured worktop. If you’re going to make a full pastry top cut the pastry into two, if not cut 1/3 of the pastry off and leave to one side for later. Shape the larger block of pastry into a ball and then roll it out into a circle slightly wider than the pie tin (so you’ll have some over hang).
  6. Transfer the pastry disc into the pie tin, making sure it fits into any flutes or creases in the tin. Allow any excess pastry to hang over the edge for now. Pour the fruit filling into the pie and level it off so it’s an even layer.
  7. Now shape the topping. For this pie I cut 4 pastry strips to make a small lattice on top and then cut out some leaves for the boarder, but you could shape the pastry for the top in any way you like. Alternatively you could roll out the pastry into a disc to cover the whole top like an original pie.
  8. Once you’ve added any lids, pastry strips or the like, but before you add any decorations to the rim of the pie you’ll need to trim the excess pastry. Hold the pie in one hand and take a knife with the other. Cut around the edge of the pie at a 45˚ angle against the tin to cleanly cut off the excess.
  9. When the pie is ready brush with the beaten egg or milk to glaze and then bake in the oven for 20-30 minutes until golden brown and crisp. Serve with cream or custard!
Thanks for reading!

Emma x
 

Salted Caramel Cookie Bars

Salted Caramel Cookie Bars

During my time in Canada this summer I was surprised to find myself being more sociable than I’d ever been in my 19 years living in the UK. As my sister used to live out there she had loads of people to catch up with, and as all of them were so lovely and hospitable we were invited to more BBQs and picnics than I can count! It was so amazing to be in a culture where everyone is so welcoming. Maybe it’s because I’m English, or maybe it’s because I’m more specifically a Southerner, but until then I’d never experienced so many strangers being so hospitable and kind to me. A few plates of ribs, wings and chicken breasts and it felt like you were slipping into a community you were already apart of, sitting around with friends you’d known for years.

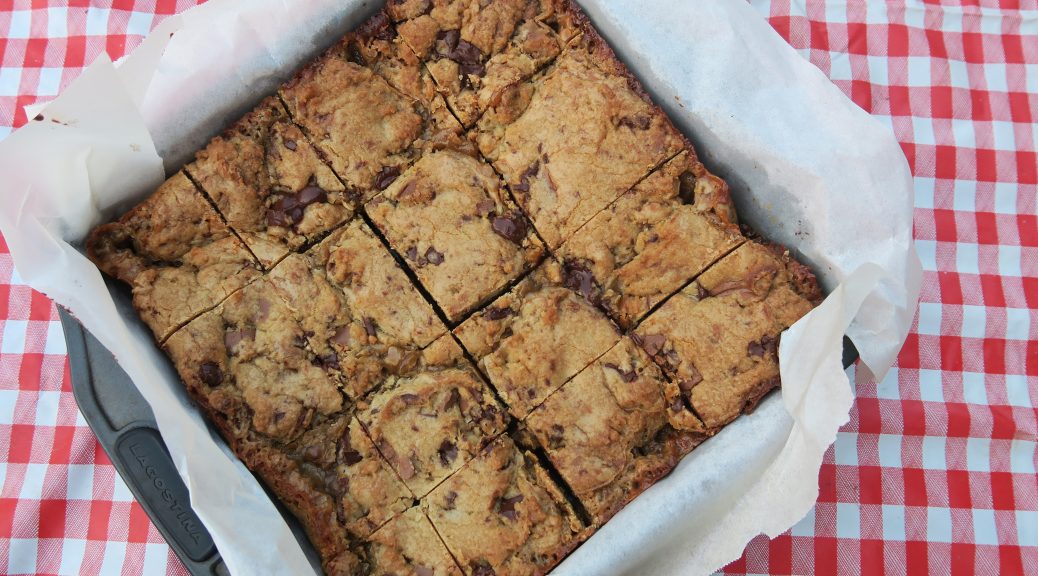
On the evening’s we were lucky enough to have a BBQ to go to we’d always take some food to add to the table, and being a keen baker it was often a dessert that I contributed. I made these particular bad boys to take to a BBQ at my sister’s old work friends Bonnie and Wanda’s house. They were super quick to make, really easy to transport and perfect for sharing as we could cut them up into as many pieces as we needed. For these I made my own caramel because I happened to have to ingredients for it lying around, but you could use a pre-made caramel to make these super easy!

Recipe

Makes 16 squares

Time: 20 minutes, plus cooking time

Ingredients

For the caramel

  • 125g Light brown sugar
  • 350ml Double cream
  • 50g Unsalted butter

For the cookie dough

  • 300g Plain flour
  • A pinch of salt
  • ½ tsp Bicarbonate of soda
  • 180g Unsalted butter, melted
  • 130g Light brown sugar
  • 100g Granulated sugar
  • 1 Large egg
  • 1 Large egg yolk
  • 2 tsp Vanilla extract
  • 100g Milk chocolate, chopped roughly
  • 100g Dark chocolate, chopped roughly

Method

  1. Begin by making the caramel. Put the butter, sugar and half the cream into a pan and bring to the boil whilst stirring. Leave to boil for 5 minutes, until starting to thicken and turning golden, and then take off the heat. Stir in the rest of the cream and set aside to cool until needed later.
  2. Preheat oven to 170˚C and then line an 19x19cm square tin with baking paper.
  3. In a bowl whisk together flour, salt and bicarb.
  4. In another bowl mix together the melted butter and the sugars. Then add the egg, egg yolk, and vanilla and beat until smooth.
  5. Slowly add dry ingredients, mixing as you do, and then the chopped chocolate. Mix together until combined.
  6. Divide the dough into two and put half the cookie dough in the lined tin. Smooth over with a spatula to make an even layer.
  7. Pour the cooled caramel over the cookie layer. Then spread the rest of the cookie dough over the top. (Spooning it on first can help here as the caramel will make it hard to spread out. If you can’t cover all the caramel don’t worry as they dough will spread itself out during baking).
  8. Bake for 25-30 minutes until the top is golden brown and the edges have started to crisp. Leave to cool and then cut into 16 bars.

Thanks for reading!

Emma x

Peach Crumble Slices

Peach Crumble Slices

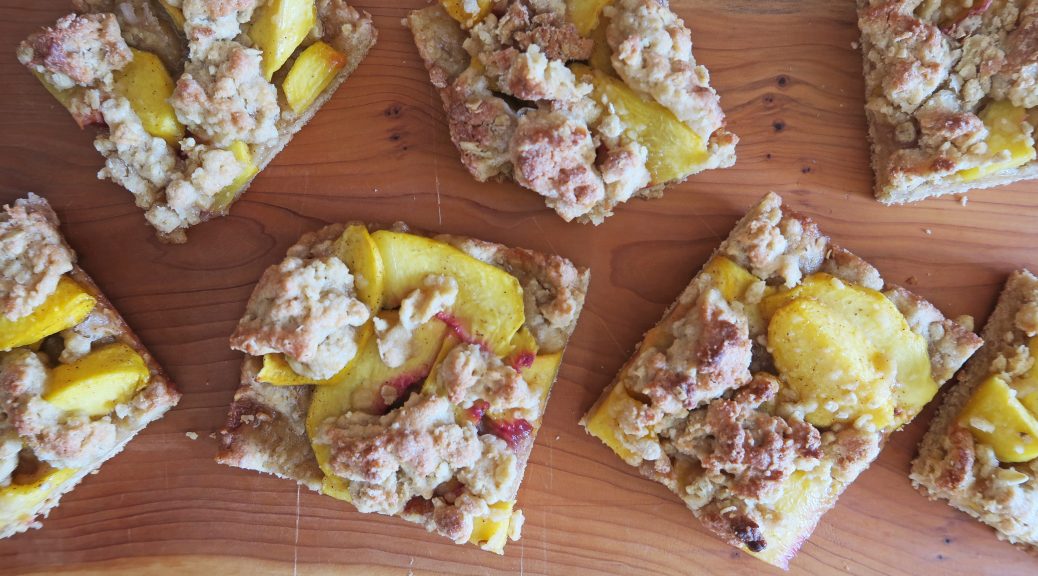
Is it too ott to say that my favourite thing about autumn are the crumbles? I mean yeah the leaves and the wooly jumpers are great, but there’s something so intrinsically comforting and autumnal about a crumble. It’s like an edible hug that makes use of all the beautifully plump fruit getting ripe at this time of year, and at the same time warms you up at the end of a long day when you went outside dressed in shorts and a strapy top because it was sunny and you forgot that as of 1st September the world is cold. I normally make apple crumbles because I’m English and apples are everywhere at this time of year, however this year the peaches have been so plump and delicious that I’ve turned to making peach crumbles.

The one thing, in my opinion, that crumbles lack is the ability to be eaten on the move. They’re amazing but they can’t really be sliced up, popped into a pot and eaten with your packed lunch. That’s why these little crumble bars are a bit of a hallelujah moment! They’re easy to make, just as tasty as a regular crumble, and they can be cut into squares and taken anywhere. You can even spread some custard over the base before topping with the peaches and the crumble if you want the full shebang in a bar to go.

Recipes

Makes 9-12 Squares

Time: 30 minutes

Ingredients

For the crumble

  • 115g Unsalted butter
  • 225g Plain flour
  • 90g Rolled oats
  • 100g Caster sugar
  • 50g Light brown sugar
  • A pinch of salt
  • 1 Egg

For the filling

  • 2 Large peaches
  • 65g Caster sugar
  • 8g Cornflour
  • ¼ tsp Ground cinnamon

Method

  1. Pre-heat the oven to 180˚C and then line a 20x20cm tin with butter and baking paper.
  2. Put the butter into a small pan and melt gently, then set to one side to cool.
  3. Put the flour, oats, sugars and salt into a bowl and mix together.
  4. Pour the butter into the dry ingredients, followed by the egg, and mix everything together until a crumbly dough forms.
  5. Put 2/3 of the dough into the lined tin and then press it down to make an even layer covering the bottom of the tin. Bake this layer in the oven for 10 minutes, until starting to harden.
  6. Meanwhile de-stone and peel the peaches. Then cut the peaches into thin slices.
  7. Put the peach slices, sugar, cornflour and cinnamon into a large bowl and mix together until fully combined.
  8. When the base has cooked, spread the peach mix out all over the base so that they form a layer. Then take the rest of the crumble mix and crumble it over the peaches so it covers as much as possible.
  9. Bake the slices in the oven for 15-20 minutes, until the top is golden brown and the peaches are soft.
  10. Leave the traybake to cool a little before slicing it into 9 squares or 12 rectangles.

Thanks for reading!

Emma x

Maneesh Bread with Hummus and Lamb

Maneesh Bread with Hummus and Lamb

Ok so, for those of you who were frequent Cocoa and Thyme visitors thank you for following me over to this new site and for those of you who are new, hello and welcome! As you’ve probably worked out by now I’ve changed the name and direction of m’ blog to be more centred around mental health awareness and support through food, (if you’re lost see my previous blog post or my ‘about’ page for more info). I’m still going to be the one behind each post so the style and general inspiration behind each recipe will be staying pretty much the same, but I will now be opening up more about my own mental health and will be aiming what I’m cooking more towards those who need quick, easy, comforting and/or nutritious food on a regular basis (whether that’s because of a mental health issue or just a general need). For now it’s worth saying that I normally prep my recipes a month in advance anyway, and most of what’ll be coming out over the next month will be stuff I made ages ago, so if it looks like it’s taking me a while to get into the swing of ‘The Mindfulness Kitchen’ that’s why.

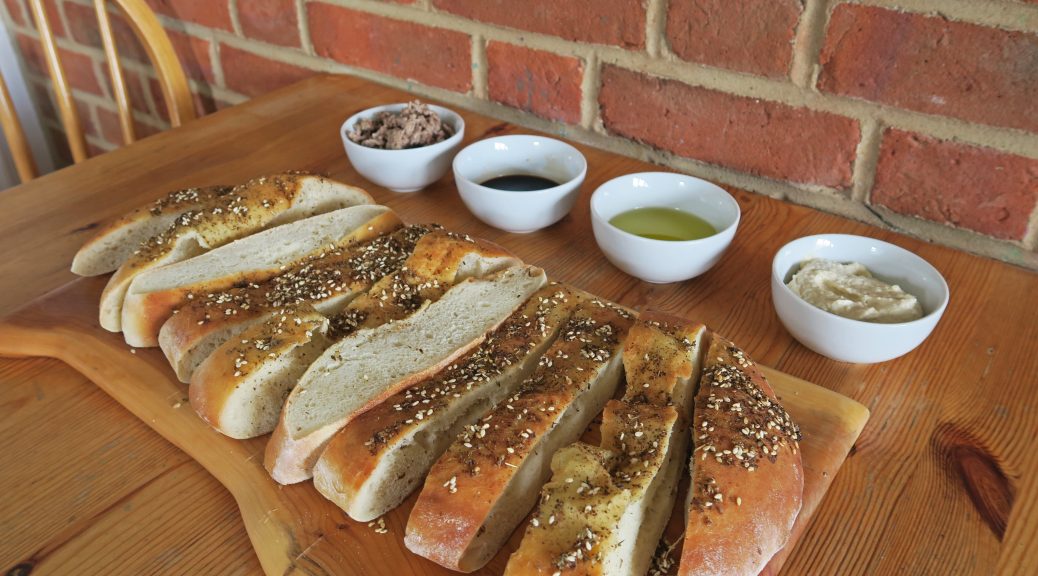
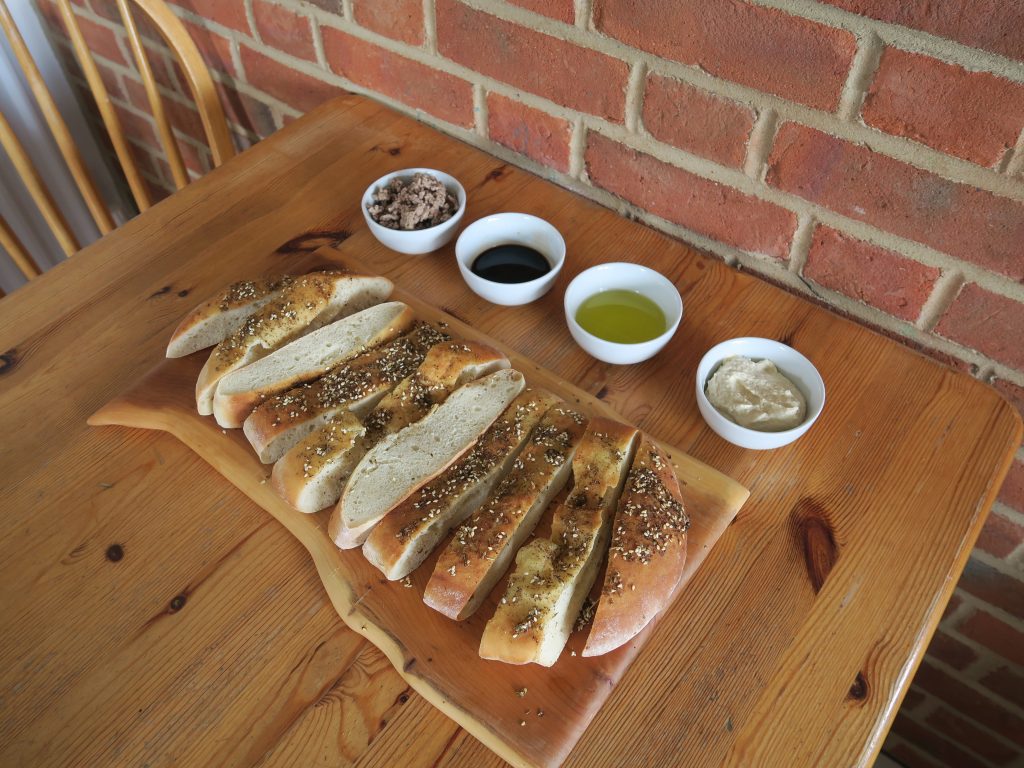
So enough with the slightly angst explaining of what the hell I’m doing, onto the food! During my amazing time at Greenbelt we worked 4 hours shifts, often that went over a lunchtime or the time in the evening when you start to get peckish (some people call it dinner?). Luckily we were positioned right next to an little food truck that sold insanely good Middle Eastern dishes, so it was super easy to go and get some really good food in the calmer moments of a shift! My favourite of these was their maneesh, a soft flatbread topped with za’atar spice blend, which they stuffed with lamb and hummus. It was so good that as soon as I got home I just had to make my own, and this was the result!

This particular maneesh bread isn’t really a flatbread, more of a  flat soft bread, but it still works well as dipping device. If you want more a pita type thing you could just roll your dough thinner but personally I wouldn’t for two reasons – 1. The big chunks of bread mean that this can double as a hearty lunch-type bread that’ll actually fill you up, and 2. the dough is really stubborn when it comes to rolling and springs back a lot, so you’ll be there ages if you try to get the dough thin enough to be a proper flatbread. Whatever you go for though, this is an amazing sharing bread that’s especially good served with oil, hummus, balsamic and minced lamb, so its perfect for parties or meze/tapas style dinners.

Recipe

Serves 4

Time: 40 minutes, plus proving and baking time

Ingredients

  • 360g Strong white bread flour
  • 8g Salt
  • 15g Caster sugar
  • 7g Fast action dried yeast
  • 1 tbsp Olive oil, plus extra for greasing
  • 250ml Water
  • 2 tbsp Zaatar spice blend

To Serve (optional)

  •  4 tbsp Olive oil
  • 400g Minced lamb
  • A little Balsamic vinegar
  • 4 tbsp Hummus

Method

  1. Begin by making the bread. Put the flour, salt, yeast, and sugar into a bowl and mix together. Add the oil and ½ the water and then mix together until combined. Slowly add the remaining water, mixing constantly, until a soft dough forms.
  2. Tip the dough out onto a lightly oiled worktop and knead until smooth and elastic, about 10 minutes should do it. Kneading is the process by which you stretch the dough, so as long as you’re stretching the dough as much as possible you’re doing it right, but if you want some more technique this is how I do it. With your left hand hold the end of the dough closest to you, then with the heel of your right hand push the dough away from you as far as you can. Roll the dough back towards you with your right hand, turn the dough 90˚and repeat.
  3. When the dough is sufficiently kneaded (ie is smooth and lovely) form the dough into a ball, tip it into a lightly oiled bowl and cover with clingfilm. Leave for an hour or two until doubled in size.
  4. When risen knead the dough a little on a worktop to knock the air out. Split the dough into two, roll each portion out into a circle about 1 cm thick, then place on a lined baking tray.
  5. Mix the zaatar with a little olive oil to make a paste. Spread this paste over the bread circles and leave for another 15-30 minutes to rise slightly.
  6. Pre-heat the oven to 180˚C. Bake the breads in the oven for 15-20 minutes until golden brown and slightly risen.
  7. Meanwhile prep the lamb. Put 1 tbsp of the oil into a pan and heat gently. Add the minced lamb and then fry until browned all over but not dry. Season with a little salt and pepper and then serve with the rest of the oil, the bread, balsamic, and hummus!

Thanks for reading!

Emma x
Pita Bread

Pita Bread

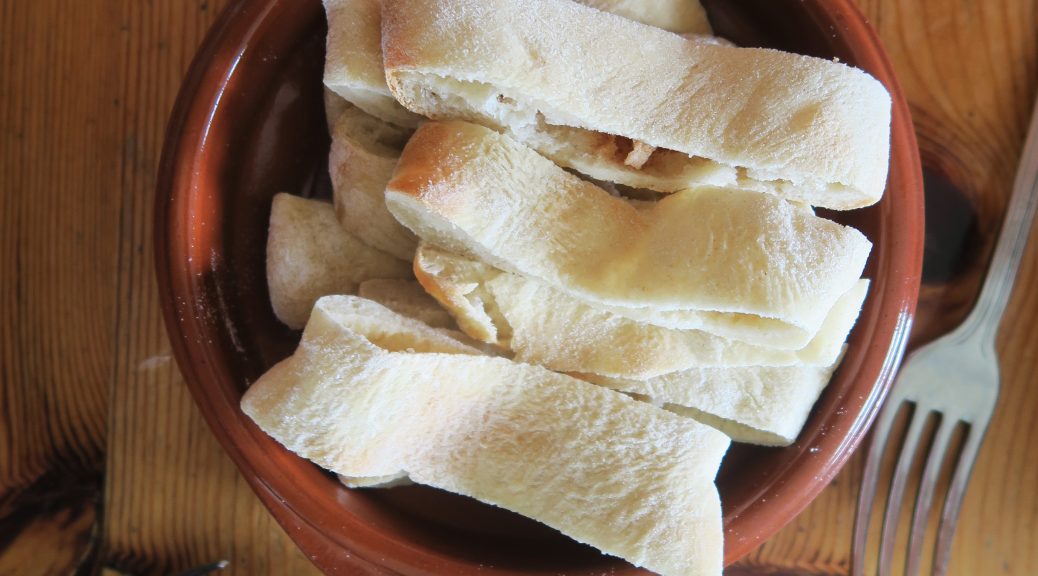
Pita bread is one of those incredible foods that is so versatile and will just work with everything. Whilst now I prefer my pita dipped in hummus, back in primary school I used to stuff them with Mini Cheddars to make an improvised crisp/cheese sandwich. My culinary experiments have moved on a lot since then, but I still have a fondness for these bread pockets and they pair super well with the other meze dishes in this banquet!

Recipe

Makes 4 Pitas

Time: 20 minutes, plus proving and baking time

Ingredients

  • 250g Strong white bread flour
  • 7g Instant yeast
  • 1 tsp Salt
  • 160ml Water
  • 2 tsp Olive oil

Method

  1. Put the flour, yeast and salt into a bowl and stir to combine. Be careful not to put the salt directly on top of the yeast as this will kill it and prevent your dough from rising. Add the oil and then slowly add the water, mixing as you do, to get a smooth dough.
  2. Turn the dough out onto a worktop and knead for about 10 minutes, until smooth and stretchy. Place this dough into a clean bowl, cover with clingfilm and leave to rise until doubled in size (about an hour).
  3. Pre-heat the oven to 200˚C and pop a baking tray in the oven to warm up.
  4. When the dough is ready turn it out onto your surface and knead for 20 seconds to knock out the air bubbles.
  5. Split the dough into 6 and roll each portion into a ball. Then lightly flour a surface and roll each ball out into a 5cm long oval.
  6. Take the tray out of the oven and lightly dust with flour. Put each pitta onto it and then bake for 5-10 minutes until they start to brown slightly.
  7. Serve with lots of hummus!

Thanks for reading!

Emma x