Category: Easy

For the times when you want something super simple to make.

Baked Egg Pots

Baked Egg Pots

Now that it’s 2018 we’re into the new year and new years resolutions are flying all over the place. One that I’ve taken on along with thousands of others over the country is to eat more healthily. Whilst I can’t see this lasting long for the main reason that I write a bi-weekly food blog and I love patisserie, I thought a detox January would be a good way of exploring healthy food. So you can expect a month full of healthy (or healthy attempts) of recipes.

I first heard of baked eggs when I was on French exchange and loads of my friends were being served them by their host families. Since then I’ve wanted to give it a go and so now here we are! I instantly liked making these as I could just delve into my fridge and pull out the first things I could see which I thought would work well together. Whether you have some leftover roast chicken, or some about-to-go-off tomatoes, this is a great way of using it up. I’ve included three variations at the bottom of the post to get your imagination running as to how you could personalise your own baked egg pot.

As well as being really versatile in terms of ingredients, they also have loads of uses. As they’re so quick to make they’re a great little warm snack for a cold day, or you could serve them as simple starters at a dinner party. This is especially useful as they take very little preparation and can be easily altered to suit different dietary requirements! Alternatively you could do what I do and make one for lunch and serve it with a side salad to get a healthy, high-protein meal.

Recipe

Serves 4

Time: 10 minutes prep, 15 minutes to cook

Ingredients

  • 3 Plum tomatoes
  • 1 Small pepper (I went for yellow)
  • 12 tsp Light Cream cheese
  • 8 Large eggs
  • 2 Cherry tomatoes
  • Pinch of salt and pepper
  • Basil to garnish

Method

  1. Pre-heat the oven to 180C.
  2. Chop the plum tomatoes into chunks and put them into the bottoms of 4 ramekins.
  3. Chop the pepper up into chunks and again distribute them between the ramekins.
  4. Take a teaspoon and put three little blobs of cream cheese into each pot.
  5. Crack two eggs into each pot – you don’t need to whisk them up or anything, just pop them straight in.
  6. Chop the cherry tomatoes into quarters and put two quarters into each pot.
  7. Season with salt and pepper (a very important step so do not miss!)
  8. Bake in the oven for 15-20 minutes, the time will vary depending on how you like your eggs cooked.
  9.  Take out of the oven and garnish with fresh basil. Eat with bread and/or a side salad!

Variations-

Smoked salmon – Take out the plum tomatoes and instead add 1 handful of wilted spinach to each pot. Then put some smoked salmon in with the cream cheese before you put on the eggs. Serve with sour cream and chives!

Bacon and Cheese – If you’re not bothered about the whole healthy eating thing you can use full fat cream cheese, or even go two steps further and add bacon and cheddar cheese to make them really indulgent.

Chicken and Sweetcorn – Take some leftover roast chicken, or chopped up cooked chicken breast, and 4 tbsp cooked sweetcorn and divvy it up between the pots with the cream cheese, eggs and seasoning.

Thanks for reading!

Emma x
Kladdkaka (Sticky Chocolate Cake)

Kladdkaka (Sticky Chocolate Cake)

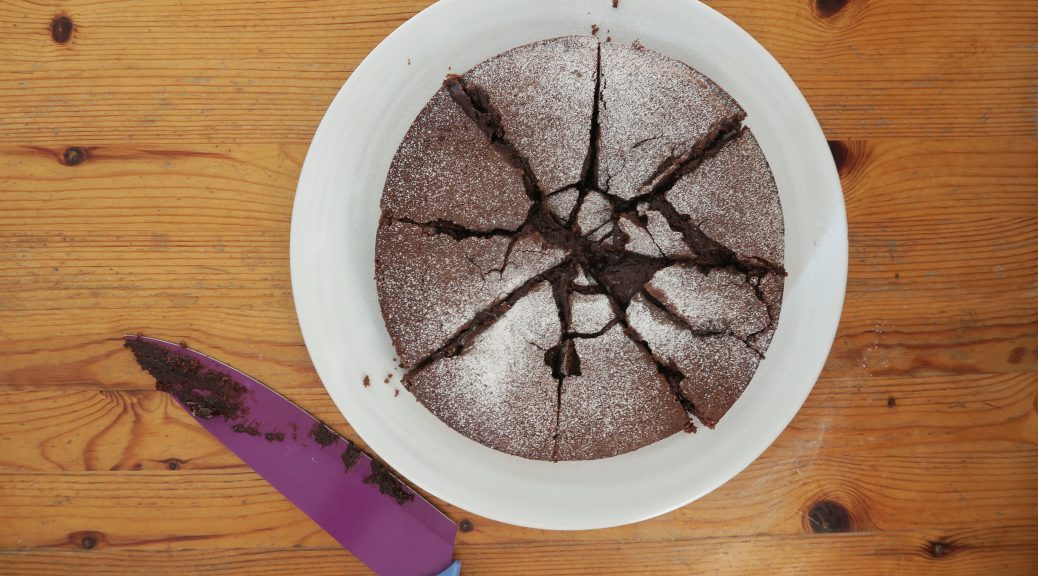
This is a Swedish cake which, from what I’ve read, is probably the most popular cake in the country. It looks like a normal chocolate cake, but somehow it turns out really gooey and light – almost like a softer, but just as sticky version of a brownie. I’m not sure how it works out like this, but it does. It’s also insanely easy and quick to make. Just put all the ingredients together, whop it in a tin, bake and boom!

This cake is in cafes all over Sweden, but as it’s pretty plain in appearance and as it’s deliberately underbaked it can make it come out pretty fragile, so I’d  recommend serving it as a dessert, rather than as an afternoon tea cake. When I first made this I hadn’t planned to make it, I’d just had the recipe for a while, realised I had all the ingredients and decided to give it a go.  As it’s so quick to make, and doesn’t require any unusual ingredients you could make this as a last minute dessert to finish a dinner party – and it’ll probably be quicker to make than a trip to the shops to buy a dessert (it’s really that quick). I’ve found that it tastes best when it’s warm from the oven and served with vanilla icecream.

Recipe

Serves 8

Time 30 minutes

Ingredients

  • 100g Unsalted butter, plus extra for greasing
  • 2 Medium eggs
  • 210g Light brown sugar
  • 1 tsp Vanilla bean paste
  • 150g Plain flour
  • 3 tbsp Cocoa powder

Method

  1. Preheat the oven to 180˚C. Grease and line a 20cm loose-bottomed cake tin with butter and baking paper.
  2. Put the butter into a small pan and melt gently. Leave to one side to cool.
  3. Put the eggs, sugar and vanilla into a bowl and whisk with electric beaters until light and fluffy (about 3 minutes).
  4. Sift the flour and cocoa into the mix and fold together with a large spatula or metal spoon. Pour in the butter and then fold together until smooth.
  5. Pour the mixture into the lined tin and bake for about 15 minutes. It’s ready to come out when a light crust has formed on the top, and there it’s still slightly undercooked in the middle (you want it to be underbaked so take it out about 5 minutes before you would a normal cake).
  6. If eating later, leave the cake to cool in the tin and then turn out onto a plate. If eating immediately, turn out and serve with berries and icecream!

Thanks for reading!

Emma x

Chocolate Chip Cookies

Chocolate Chip Cookies

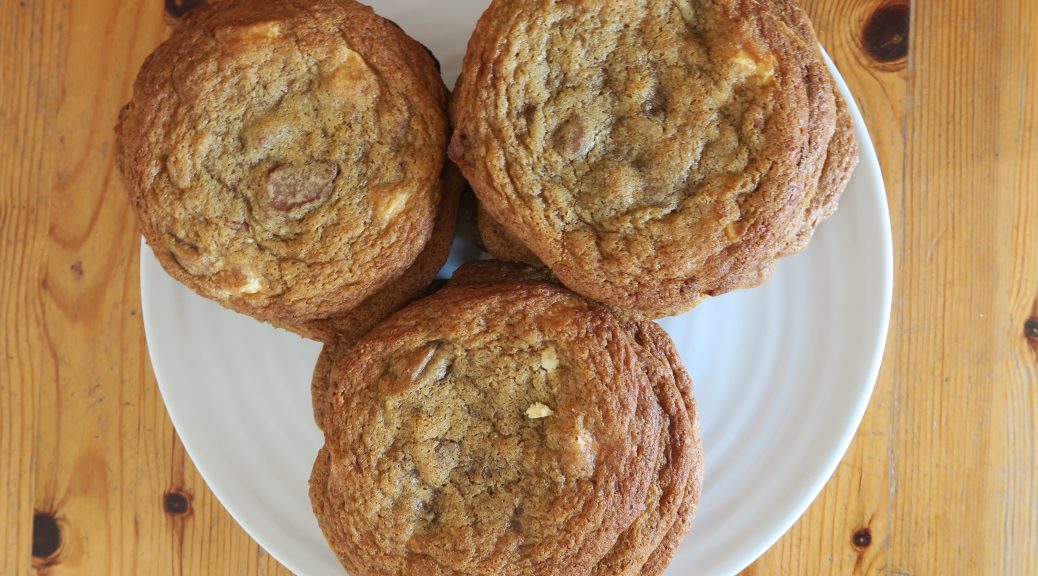
Can anything truly top a good chocolate chip cookie? Especially when they’re warm from the oven and the chocolate is just melted when you bite into them. It’s always hard with classics like these to  know which recipes will work and which won’t. The expanse of the internet means that there’s thousands of variations out there, and unfortunately too many of them result in burnt, tasteless disappointments. After some research, though, I think I’ve found the perfect combination which’ll, fingers crossed, work without fail.

I do have a couple of top tips though to make sure that they end up the best they can be. Firstly, it’s important to make sure the dough is as cold as possible before going into the oven. Why I hear you ask? Well this means that they’ll keep their shape more in the oven, which will stop them from spreading too thinly. This makes it easier to get a soft, chewy bake, rather than a crisp, burnt one. It’s also kinda obvious, but when buying your ingredients make sure you buy chocolate you like the taste of. Sometimes it can be tempting to buy super cheap chocolate to bake with, but when you have chunks of chocolate, like in this, you can really taste it. My general rule is go for a chocolate you’d be happy to eat on it’s own, that way your cookies will be super delicious.

Recipe

Makes 20

Time 25 minutes, plus time for chilling

Ingredients

  • 220g Unsalted butter, softened
  • 170g Light brown sugar
  • 150g Caster sugar
  • 1 tsp Vanilla extract
  • 2 Large eggs
  • 330g Plain flour
  • 3/4 tsp Baking powder
  • Pinch of Salt
  • 100g White chocolate, roughly chopped into chunks
  • 100g Milk chocolate, roughly chopped into chunks
  • 1 tsp Sea salt to top (it’s really worth it)


Method

  1. In a bowl put the butter, sugars and vanilla, and beat together until pale and fluffy. Using an electric mixer can help with this.
  2. Add the eggs, one at a time, to the mix and whisk together after each addition to combine.
  3. Sift the flour, baking powder and salt into the main bowl and stir to combine.
  4. Stir the chocolate chunks into the mix so that they’re evenly distributed.
  5. Turn the dough out onto some clingfilm, wrap it up and then put it into the fridge to chill for at least 2 hours. (If you’re short on time or just can’t wait put it into the freezer for 30 minutes).
  6. 20 minutes before the dough finishes chilling, pre-heat the oven to 170˚C.
  7. Line 4 baking trays with baking paper.
  8. Roll the dough out between two sheets of clingfilm (I find this easier than using a floured surface). You want the dough to be the thickness of about 2 pound coins.
  9. Using a round cookie cutter, cut out circles of the dough. Put the circles onto the baking sheets, making sure they’re well spaced out as they will spread. I put about 5-6 on each of mine. Put them back into the fridge for 30 minutes to re-chill.
  10. Take the baking trays out of the fridge and sprinkle the dough circles with the sea salt. You only want a little on each cookie, but it works wonders in bringing out the flavour.
  11. Bake in the oven for 15-20 minutes until just starting to brown at the edges and puffed up. They will feel fairly soft, but they’ll firm up some more once they’ve cooled down. Eat as soon as you can!

Thanks for reading!

Emma x

Sausages, Mash and Sticky Balsamic Onions

Sausages, Mash and Sticky Balsamic Onions

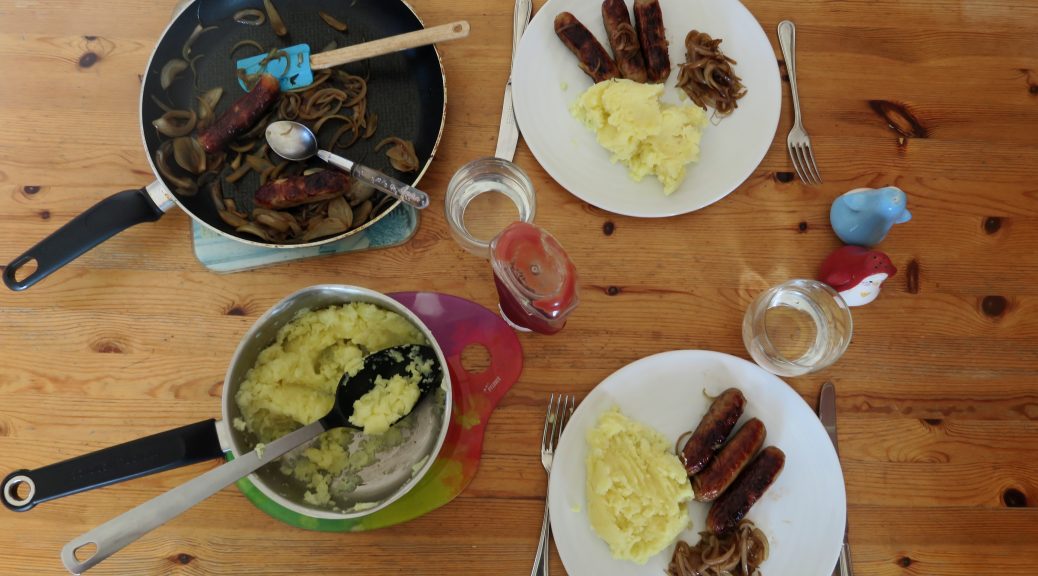
Whilst I love complicated French patisserie, when it’s the middle of the week and I’m tired, stressed and short of time, all I want is a quick dinner that tastes good. In times like these there’s nothing more comforting than some good homemade mash, and there’s nothing better to put that mash with than some pork sausages and sticky balsamic onions. These onions also work really well on burgers and with steak, so if you’re making either of those any time soon you can give that a go. I’m gonna leave the writing there this time, as I’m all three of the above, and if you’re the same you’re going to be wanting to get onto the recipe, so here it is…

Recipe

Serves 2

Time: 45 minutes

Ingredients

  • 6 Cumberland sausages (or any variety you prefer)
  • 2 Large baking potatoes, peeled and cut into chunks
  • 150g Butter
  • 2 Red or white onions, finely sliced
  • 2tsp Caster sugar
  • 2tsp Balsamic vinegar
  • Salt and pepper to season

Method

  1. Heat a grill to full heat. Put the sausages onto a grill pan, pierce them slightly with a knife, and then put them under the grill to cook. Turn them over once they’ve browned on one side, so that they colour evenly. If you don’t have a grill you can oil a pan and fry the sausages in there until no longer pink in the middle.
  2. Now start the mash. Fill a large pan with water and bring to the boil. Add the potatoes and leave until a knife goes into them easily – 8-10 minutes should do it.
  3. Meanwhile make the sticky balsamic onions. Take a large pan, preferably one with a lid, and put in 50g of the butter. Put over a medium heat to melt it, and then add the sliced onions. Cook for 2 minutes whilst stirring, and then leave to cook for around 7 minutes with the lid on to let them soften.
  4. Once soft, take the lid off and fry for another 2-3 minutes, stirring occasionally,  until they begin to caramelise and brown slightly. Then add the sugar and vinegar and stir to combine. Fry for another 2-3 minutes until all sticky and delicious, and then cover and put to one side.
  5. Once the potatoes are tender, drain them and put them back into the pan. Using a fork or potato masher, break up the potatoes until they’re smooth and lump-free. Add the other 100g butter and add it to the potatoes. Continue mashing to mix it in and make it even more lump free – it should melt if the potatoes are still warm.
  6. Season the mash with salt and pepper, and then serve the sausages, onions and mash with some tomato ketchup!

Thanks for reading!
Emma x


Firework Bark

Firework Bark

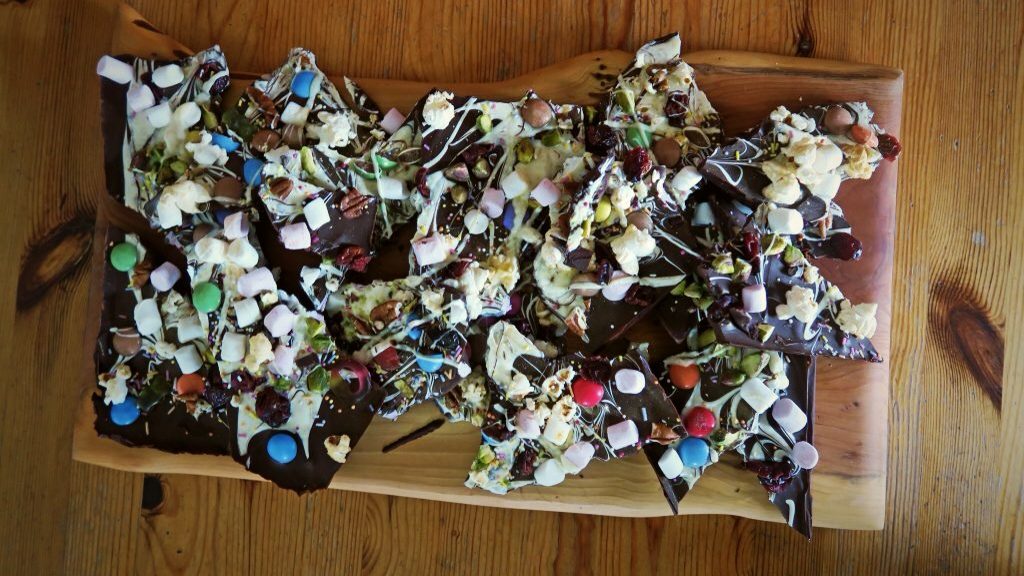
It’s bonfire night this Saturday, and I can’t wait for the fireworks, wrapping up warm, and hot chocolate which comes with it all. This is a really tasty snack, which can easily be wrapped in clingfilm and popped in a bag- perfect for taking to the bonfires as a little treat. This is also really good for dunking in hot chocolate, giving as gifts, or even as a decoration for the top of a cake, so you can let your imagination run wild!

When I was little, my sister and I would make chocolates full of our favourite sweets. We used to wander around Sainsburys, trying to decide which ones to put into the mix, and then once we got home we’d smoother them all in some melted milk chocolate, and then dollop it onto baking paper to set. Whilst this is shards, and not blobs of chocolate, the same idea applies. You can use any type of chocolate as your base and then top it with any decorations you wish. Here I’ve gone bonfire theme, so I’ve added marshmallows, popping candy, popcorn, and lots of sweets – but you could go much more simple, for example cranberry and pistachio is very good! You’re essentially making your own chocolate bar, so you can stick to my suggestions or improvise your own, it’ s completely your choice!

Recipe

Ingredients 

  • 200g Dark chocolate
  • 200g Milk chocolate
  • 150g White chocolate
  • Edible glitter
  • Popping candy
  • Marshmallows
  • Smarties
  • Sprinkles
  • Haribos
  • Pistachios
  • Pecans
  • Cranberries
  • Raisins
  • Popcorn

Method

  1. Break the milk and dark chocolate and put into a heatproof bowl. In another heatproof bowl put the white chocolate. Put each bowl over a pan of simmering water and melt gently.
  2. Line a shallow tin with cling-film. Put your nuts, berries, sweets and toppings of choice into bowls ready to decorate your bark.

3. Pour the dark and milk chocolate mix into the lined tin and smooth out with a palette knife. Spoon the white chocolate in circles onto the dark chocolate. Using a cocktail stick, or the tip of a knife, spiral the chocolate around the tin to make a firework pattern.

4. Cover the chocolate with your chosen toppings, chopping up any large nuts or sweets into bite sized pieces before putting it into the chocolate.

5. Leave to set before breaking up into shards and serving.

Thanks for reading! Look out for my next post on Sunday…

Emma x