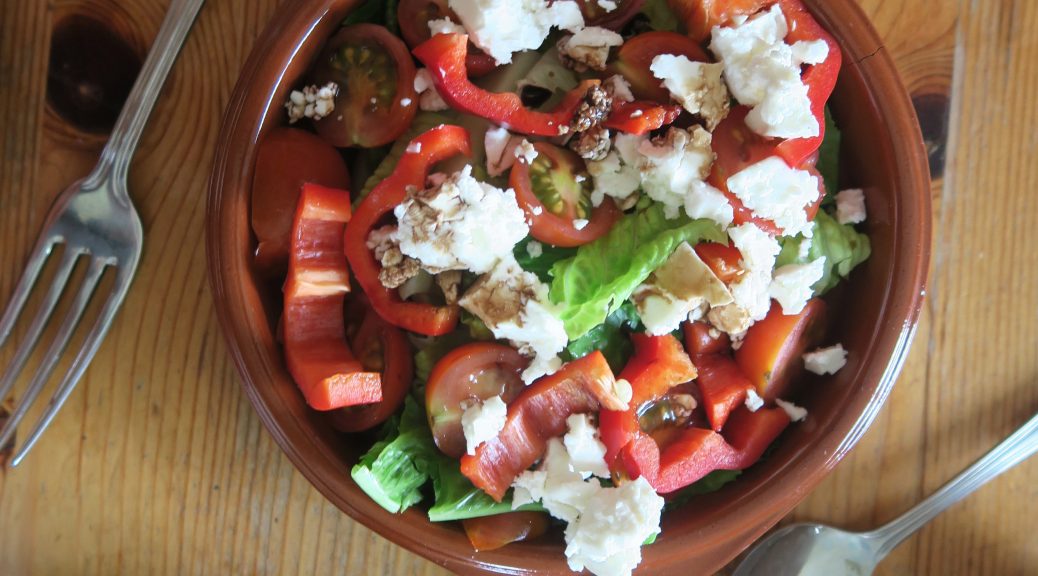
Canadian Salad
Have you heard I went to Canada this summer? Yup, in case you didn’t already know, a few weeks ago I crossed the pond once more on a spontaneous summer get away. As my sister used to live out there she and I spent our three weeks staying with her friends, going to tones of insanely good BBQs, and generally soaking up the stunning landscape. There’s something so relaxing and creatively inspiring about the mountains and the rivers out there. I found myself sketching for the first time in years (ironic as I’ve been doing an art course the past year), voluntarily exercising, and actually stopping and thinking rather than just hurtling through life like I usually do when I’m at home.

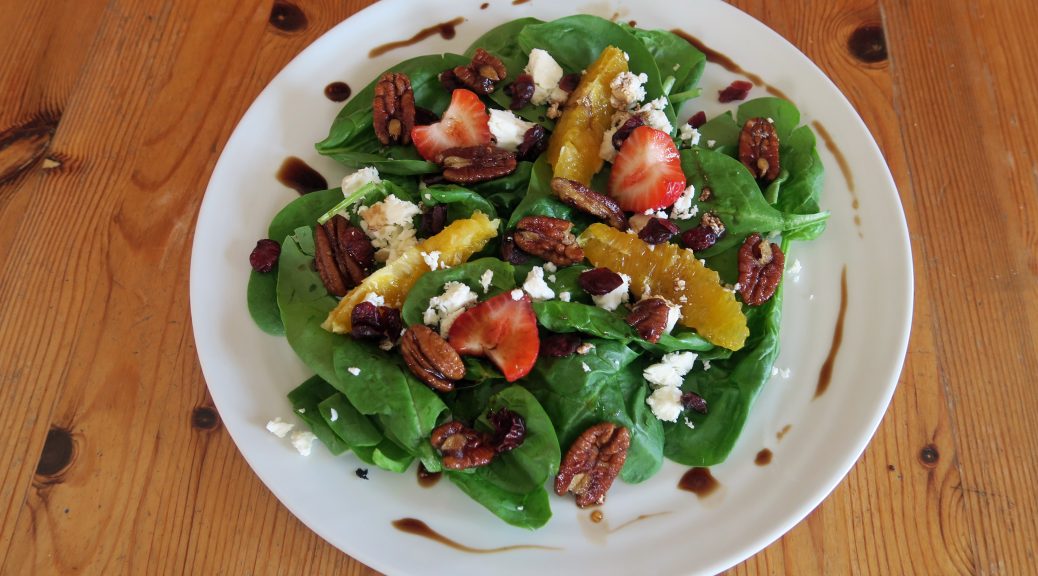
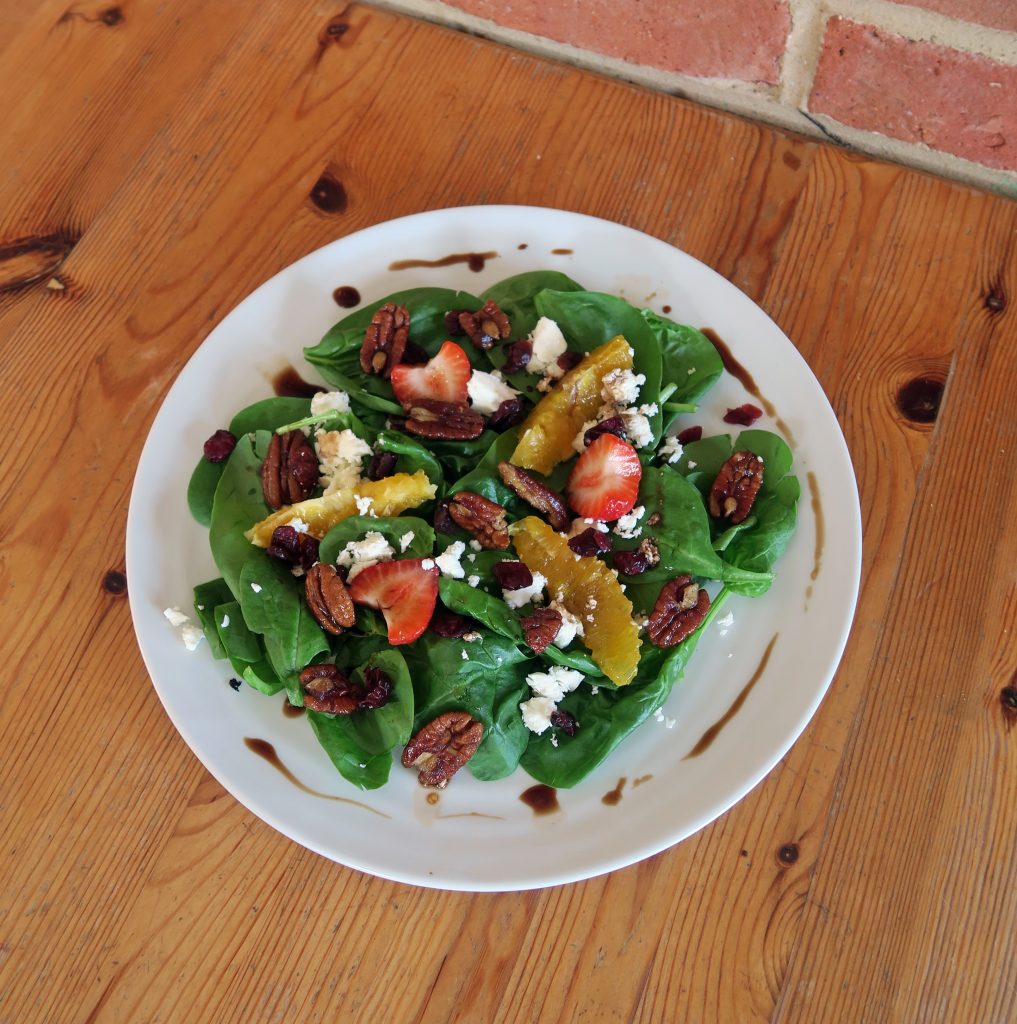
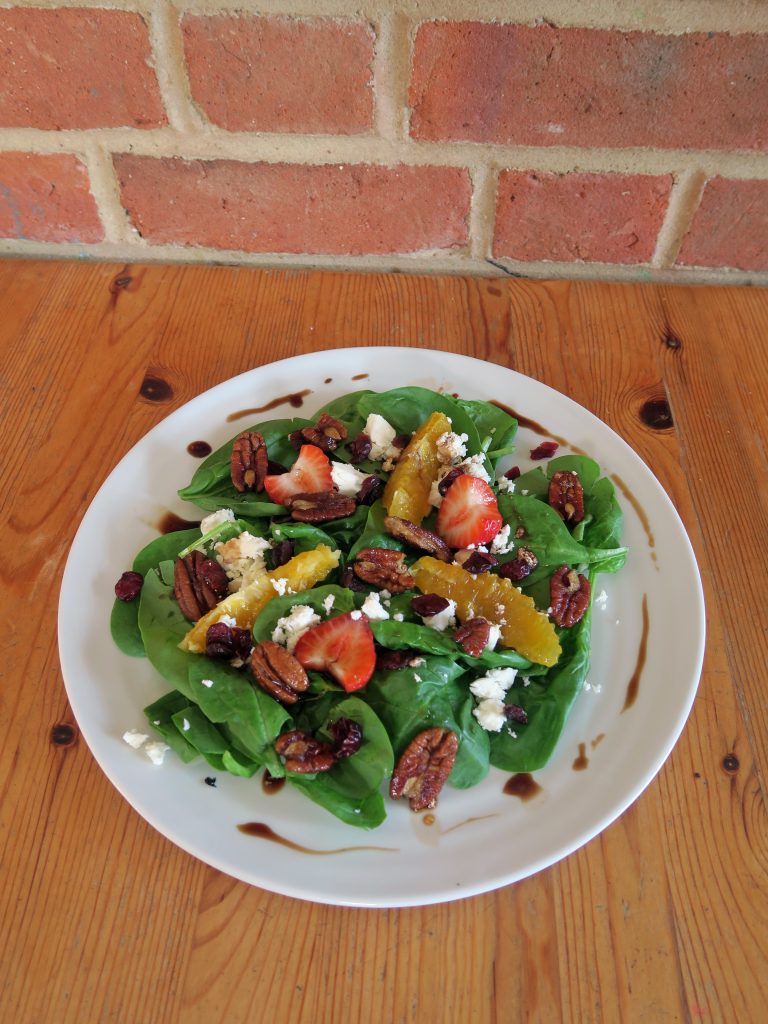
I also found myself eating more creatively – partly because I was on a tight budget and also because I was doing a lot of cooking with my sister who’s a fitness fanatic and eats way more vegetables than I’m used to! Whilst I’ve called this Canadian salad I didn’t actually make it when I was over there because food was generally expensive and this has lots of components to it. The reason for the name is that I first came across a variation of this at restaurant up the side of a mountain in Lake Louise. I’ve never seen something like this before and it tasted amazing so I thought I’d make my own, e voila!
The reason I love this salad so much is that it’s relatively healthy but it’s also sweet enough to satisfy a sugar craving. The combo of the fruit, the spiced pecans and the cheese is one of those things that shouldn’t work but just does. If you’re not a sweet-toothed person I’d recommend coating the pecans in just the butter and cinnamon, and leaving out the sugar so that the only sweetness is coming from the natural sugars in the fruit. This also originally had daikon in it (I hadn’t heard of it either, apparently it’s a vegetable like a radish), but as I couldn’t find one in Aldi this one is daikon-less, but you could use radish if you want some peppery-ness in here.
Recipe
Serves 2
Time: 10 minutes
Ingredients
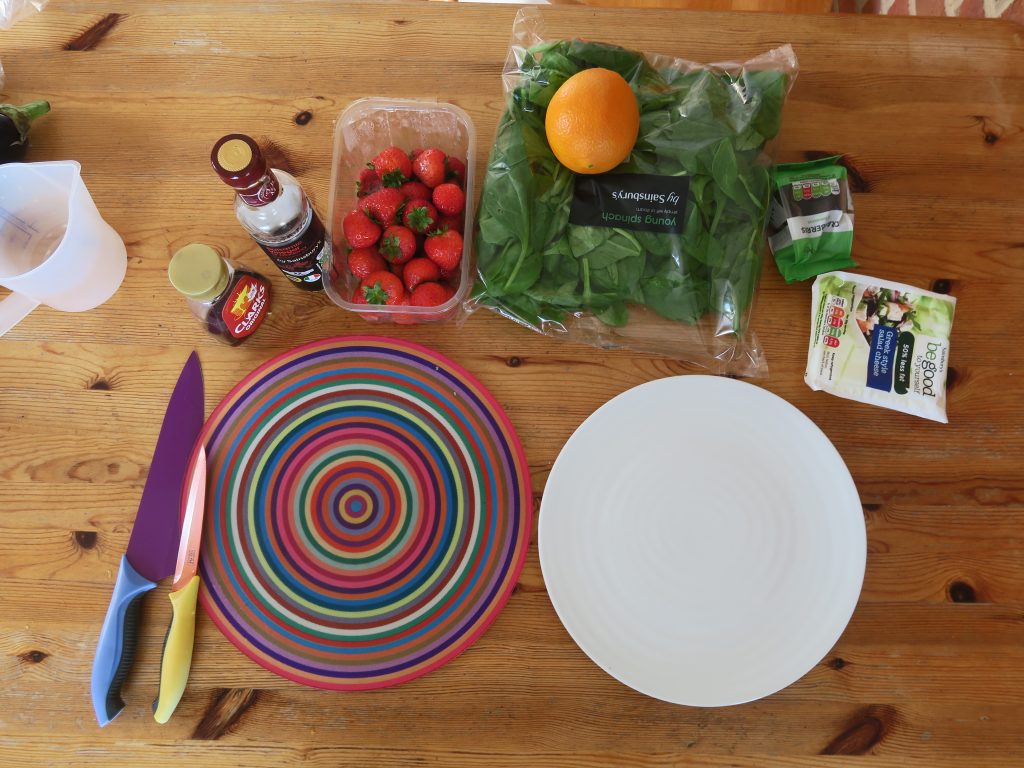
- 50g Pecans
- 1 tbsp Unsalted butter (or soya margarine)
- 1 tsp Brown sugar
- 1/4 tsp Ground cinnamon
- 2 Handfuls of Baby spinach
- Roughly 4 Strawberries
- 1 Orange
- 20g Dried cranberries
- 20g Feta cheese
- 1 tbsp Maple syrup
- 20ml Balsamic vinegar
Method
- Begin with the candied pecans. Put the pecans, butter, sugar and cinnamon in a small pan and leave the butter to melt. Stir the contents a little so that the pecans are covered in the butter/sugar mixture and then leave to bubble up for 3-5 minutes. Take off the heat and set aside for later.
- Scatter the spinach across two plates, or one large serving dish if you’re making a salad to share.
- Hull and halve the strawberries and scatter them over the salad. Then halve the orange and cut one of the halves into 6 wedges. Cut the skin and any pith off the segments and then arrange them over the salad.
- Next scatter the dried cranberries, feta cheese and candied pecans over the plate.
- To make the dressing put the maple syrup, 1 tbsp orange juice (you can get this from the other half of the orange) and vinegar into a small bowl or jug. Mix together and then drizzle over the salad. Serve!
Thanks for reading!
Emma x