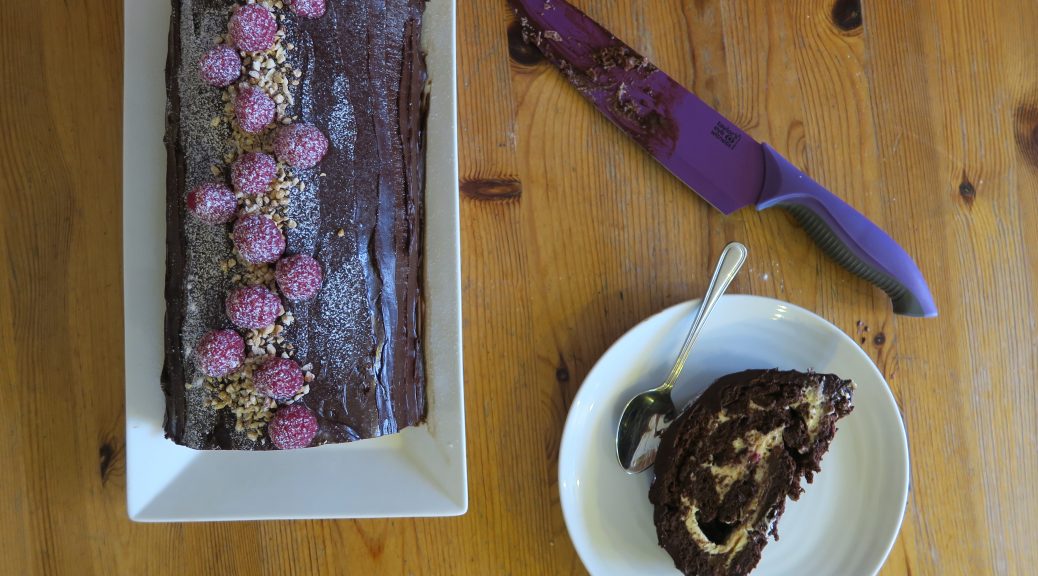
Nutella Buche de Noel
Christmas is probably one of the most traditional times of the year, and every family has their own way of doing it – especially when it comes to the food. For me, I can’t remember a year we didn’t have one of my Granny’s chocolate logs on the table on boxing day. Whilst she always claims not to be a cook, she whizzes round the kitchen and whips this up, and there’s something about the layers of chocolate cake, filling and icing which always has me excited.

This one could be called a blinged up version of the one I have at my Granny’s. I’ve never met someone who doesn’t like nutella, and so when you have a chocolate sponge, filled with nutella, hazelnuts, cream and raspberries and then coated in a rich ganache, you can’t really lose. This works really well as a dessert for Christmas day, or even as a cake to take along to a Christmas party, as it’s easily transportable and can be cut to serve as many people as needed. Also, the cake is really thin it’s really quick to make and to cool, and therefore doesn’t take too long to make, which is just what you need at Christmas.

Recipe
Serves 8
Time: 90 minutes
Ingredients
For the Cake
- 150g Caster sugar
- 6 Large eggs
- 250g Dark chocolate
- Icing sugar for dusting
For the filling
- 200g Nutella
- 350ml Double cream
- 80g Icing sugar
- 150g Rapberries, halved – plus extra for decoration
- 100g Chopped roasted hazelnuts
For the ganache
- 250g Dark chocolate, finely chopped
- 250ml Double cream
Method
- Pre-heat the oven to 180˚C. Grease and line a 23 x 33cm Swiss roll tin with butter and baking paper.
- Put the chocolate and 4 tbsp water into a heat-proof bowl and melt over a pan of simmering water.
- Meanwhile whisk the egg whites in a really clean bowl with an electric whisk until they make stiff peaks.
- Put the sugar and egg yolks into another bowl and whisk with an electric whisk until pale, fluffy and thick enough to leave a trail.
- Fold the egg yolk mix into the chocolate mix. Then fold the egg whites into the chocolate mixture until fully combined.
- Pour the mixture into the lined tin and bake for 10-15 minutes until risen, bouncy and cooked through. Dust a sheet of baking paper with icing sugar and then, whilst warm, turn the cake out onto it. Make a cut about 1 cm from the edge of the short end, making sure not to cut all the way through. Roll the sponge up, with the baking paper inside, into a tight roll and leave to cool rolled up.
- When cool unroll the sponge and spread with the Nutella. Lightly whisk the cream and icing sugar together until it just starts to hold its shape. Smooth this over the sponge in an even layer. Then sprinkle the halved raspberries and hazelnuts over the cream.
- Roll the cake up, this time without the paper inside, making a tight roll. Transfer the cake onto a plate.
- Now make the ganache icing. Put the cream into a pan and bring just up to the boil. Put the chopped chocolate into a bowl and pour the hot cream over it. Stir until the chocolate is melted and everything’s combined.
- Leave the ganache in the fridge to set slightly. When it starts to hold it’s shape you can start to ice the roll. Using a palette knife smooth the ganache over the cake and the ends of the roll. Leave to set.
- Finish with extra raspberries and hazelnuts and dust with icing sugar. Serve!

Thanks for reading! Any comments, queries or requests don’t hesitate to ask…
Emma x