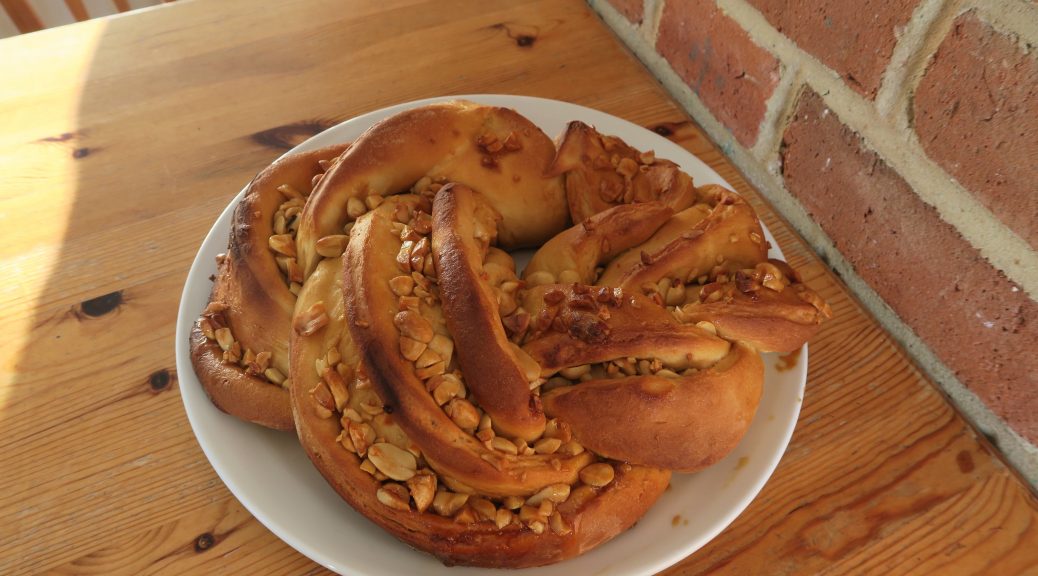
Salted Caramel Peanut Bread (Vegan)
Not gonna lie, this week has been tough. I’m used to over committing myself – it’s kinda become a defining feature of my personality – but now I’m being chased up a hill on roller-skates by several angry monsters called degree, sleep and mental-well-being. The only thing keeping me vaguely grounded are the amazing friends I have who are there to scrape me up off the floor, turn me around and put me back the in game (you know who you are and I’m so so grateful!).
If things stopped for a second or two I know I’d want to be back in the kitchen, letting out all my woes on some unfortunate bread dough like this and then devouring it as soon as it’d cooled down enough for me to eat it. I made this back at the start of Veganuary and thus it can be 100% vegan! So whether you’re a hardcore meat-eater or a strong and proud vegan, as long as you’re not allergic to nuts this is the bread for you!
So back unto the breach. Back into the storm. See you on the other side!
Recipe
Makes 1 Large loaf
Time: 2 hours, plus proving and baking time
Ingredients
- 400g Strong white bread flour
- 1 ½ tsp Salt
- 40g Caster sugar
- 45g Butter (or dairy-free spread)
- 10g Fast action dried yeast
- 130ml Milk (or dairy-free alternative)
For the caramel peanut filling
- 300g Granulated sugar
- 4 tbsp Water
- 240g Dairy-free spread
- 5g Salt
- 200g Dairy-free cream (e.g coconut or soya cream)
- 200g Peanuts (unsalted if adding the 5g salt in as above)
Method
- First make the bread dough. Put the flour, salt, sugar, butter, yeast, milk and 120ml water into a large bowl and mix together to form a lumpy dough.
- Turn the dough out onto a lightly floured surface and knead until smooth and stretchy (about 10 minutes).
- Put the dough into a clean bowl and cover with cling film. Then set to one side to rise until doubled in size (about an hour).
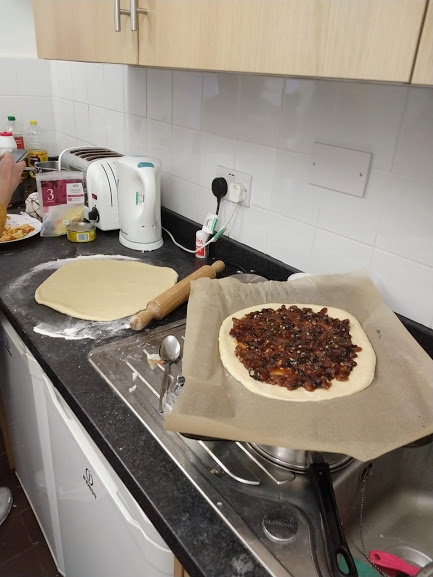
- Now make the salted caramel filling. Put the sugar and water into a large pan and cook on a low heat until the mixture starts to turn a golden amber colour. Do not mix at this stage or the caramel will crystallise.
- Add the dairy-free spread (or butter) to the mixture (be careful as it will splatter!) and mix it in with a wooden spoon.
- Add the salt to the mixture and then cook for another 2 minutes on a low heat.
- Take the pan off the heat and add the cream. Mix until well combined, then mix in the peanuts and set aside to cool.
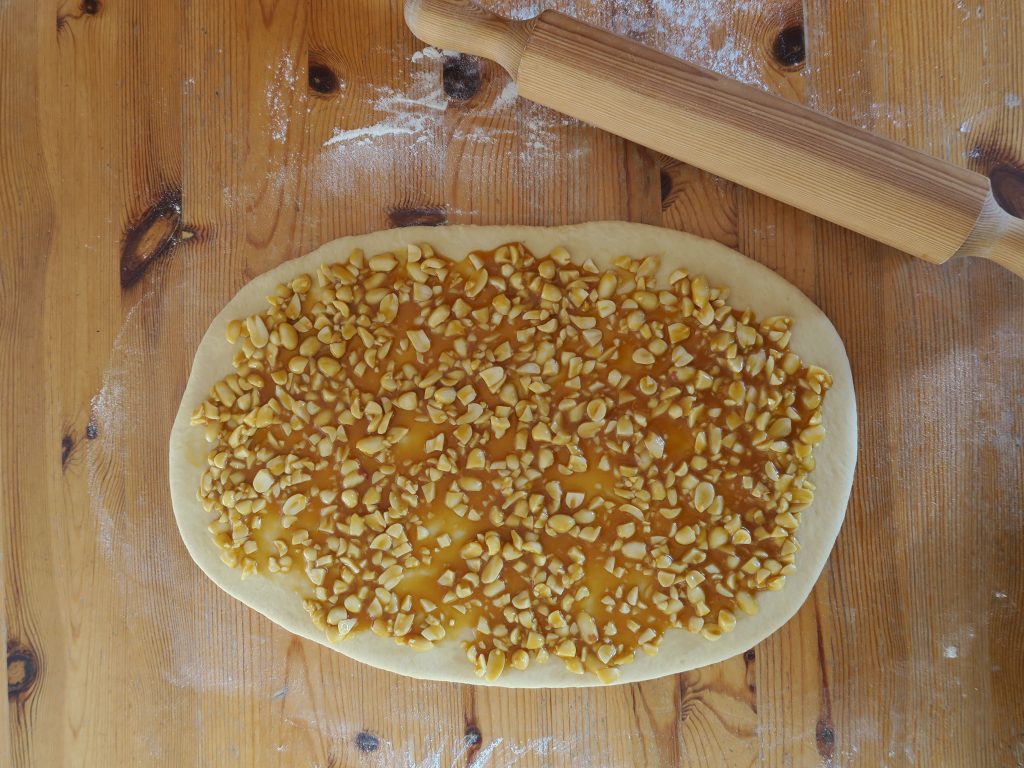
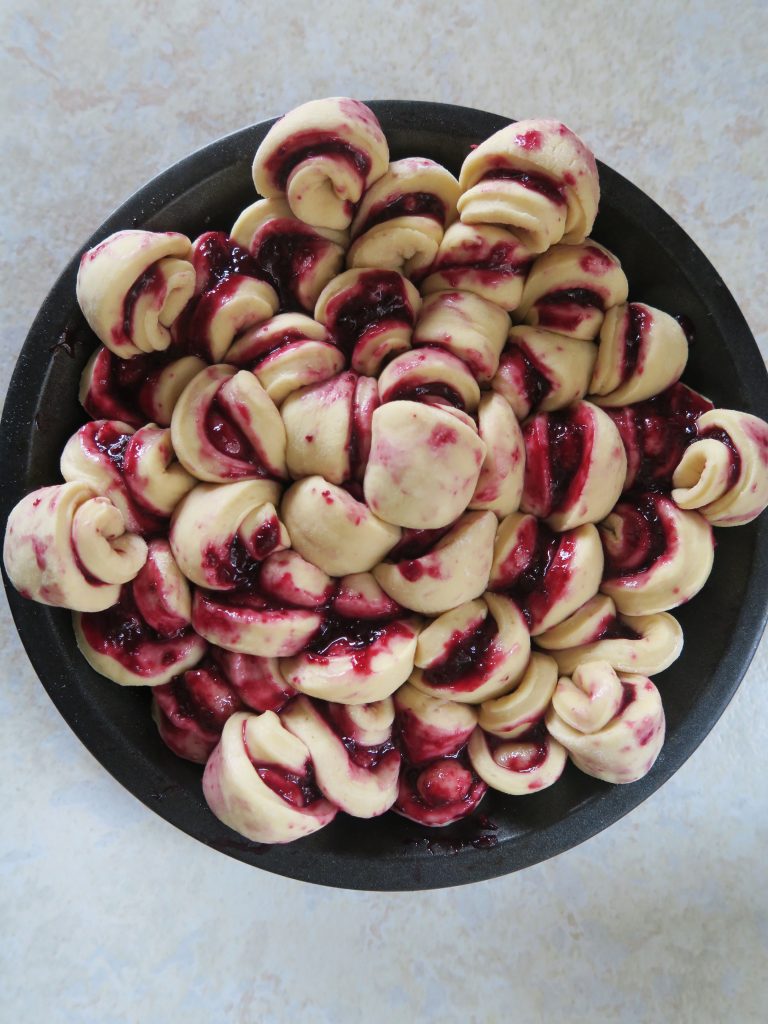
- Turn the dough out onto a lightly floured surface and knead for about 10 seconds to knock the air out. Then shape the dough into a rectangle and roll it out to a rectangle that’s 25 x 33 cm.
- Spread the cooled salted peanut mixture over the dough and then roll it up like a swiss roll from long edge to long edge.
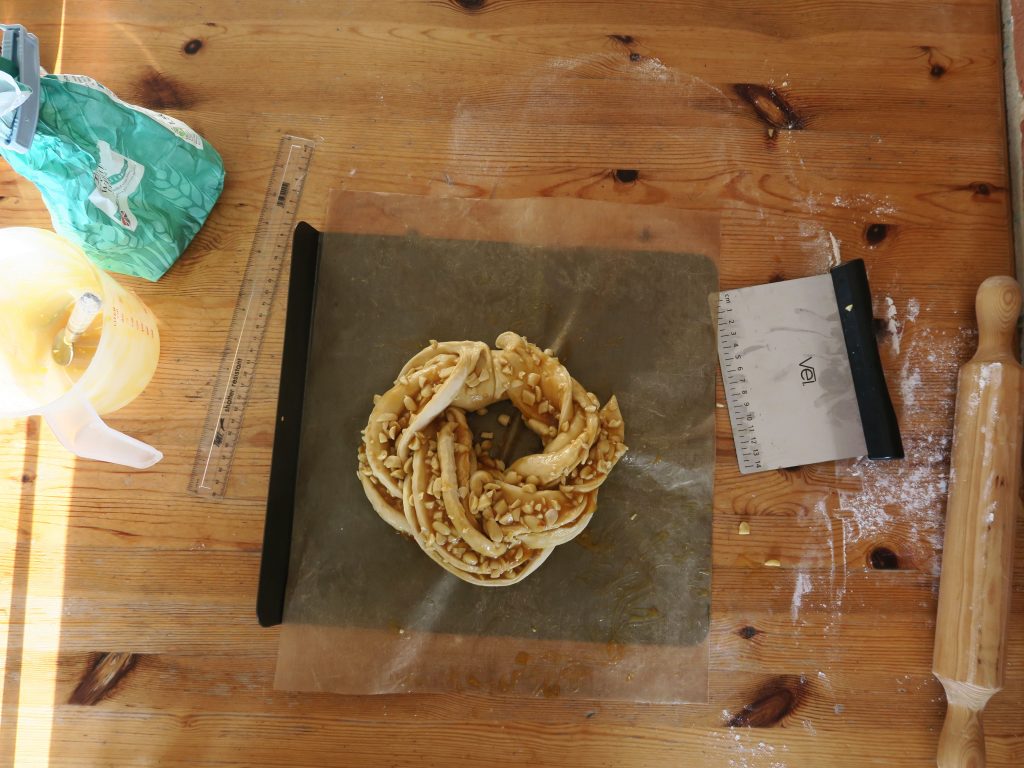
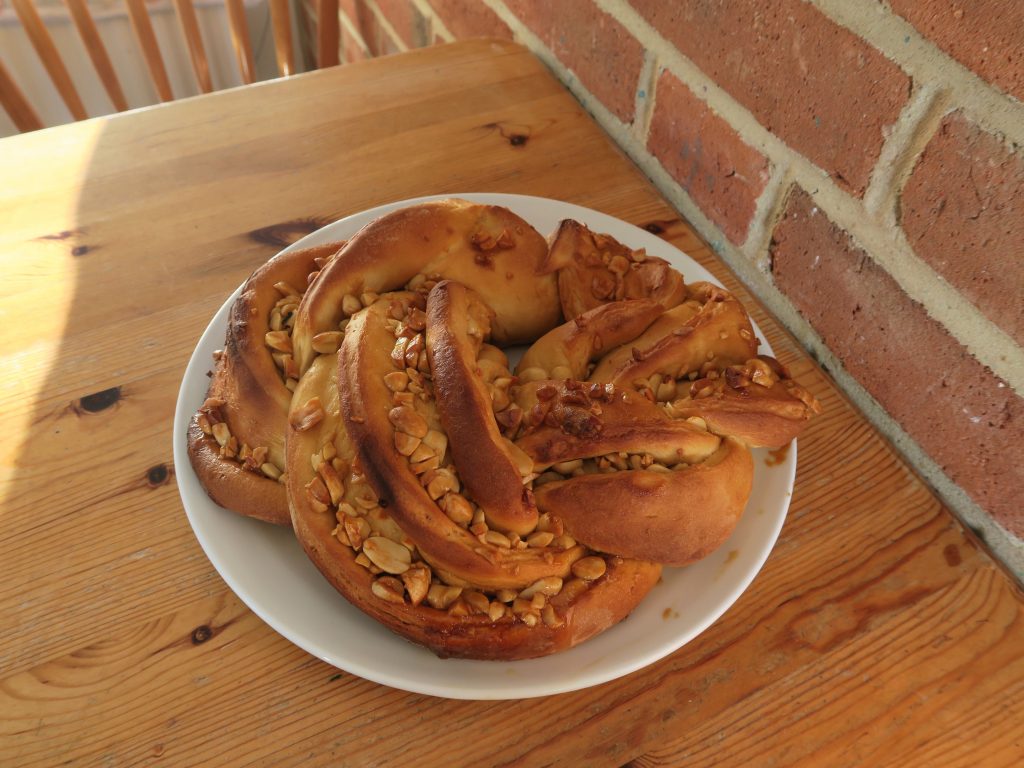
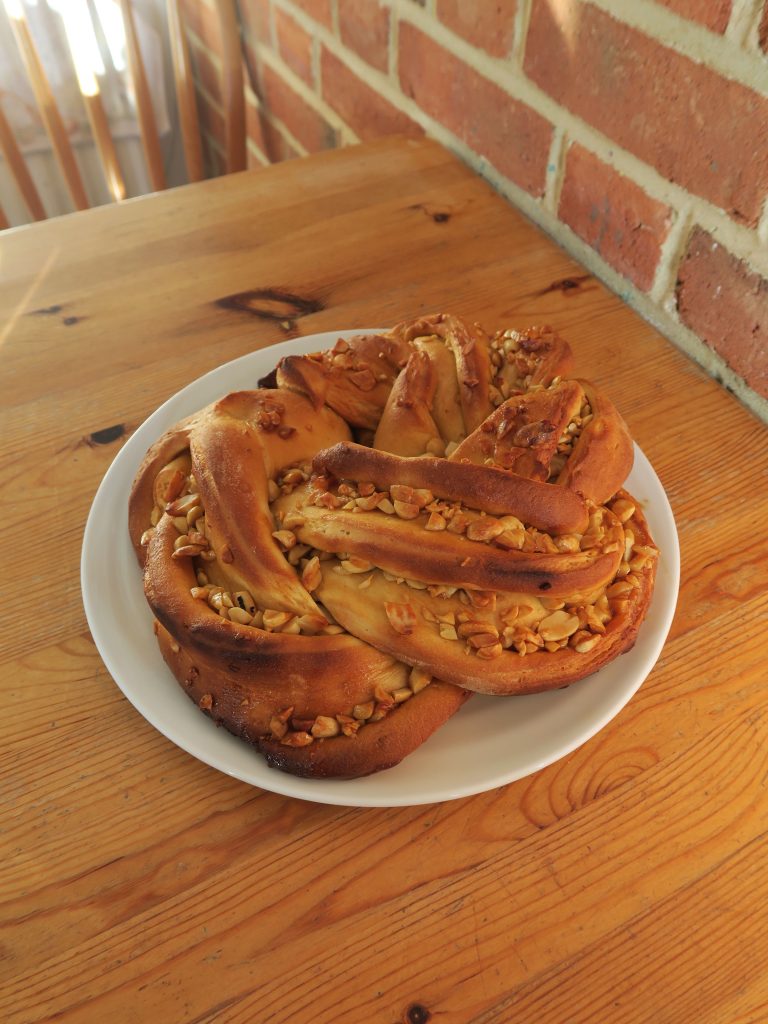
- Cut the dough in half length ways so you have two long strips. Then twist the strips over each other, trying to keep the open half facing the top.
- Wrap the dough into a ring, pressing the ends of the dough together and then place onto a lined baking tray, cover loosely with clingfilm and leave to prove for another hour until doubled in size.
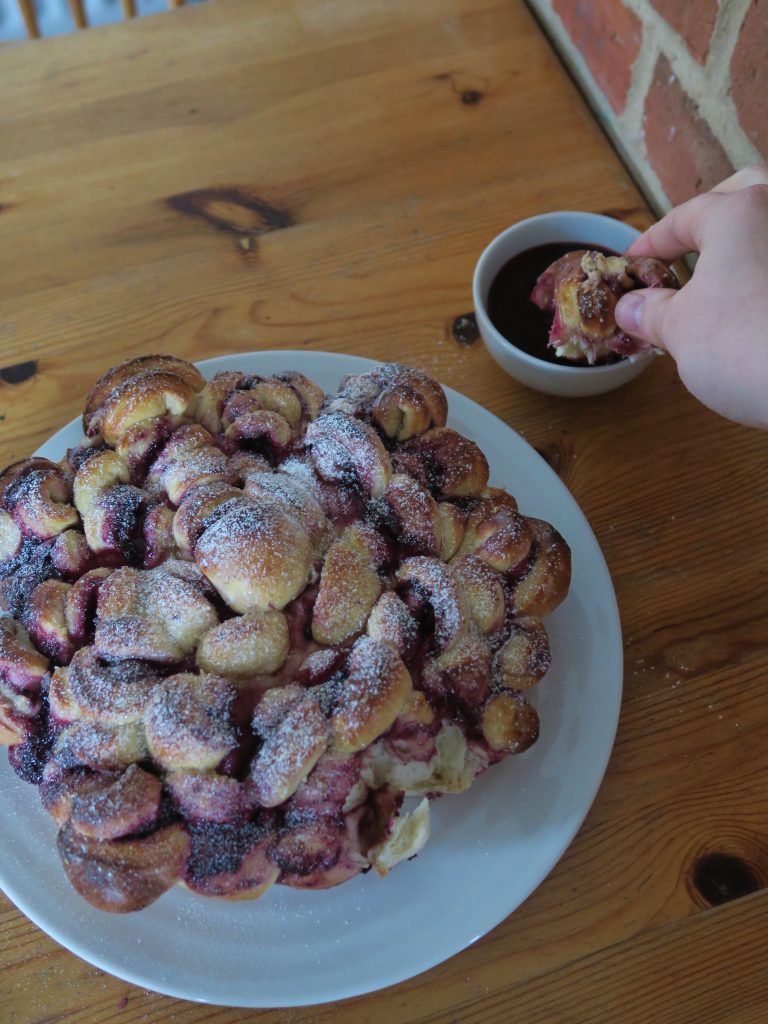
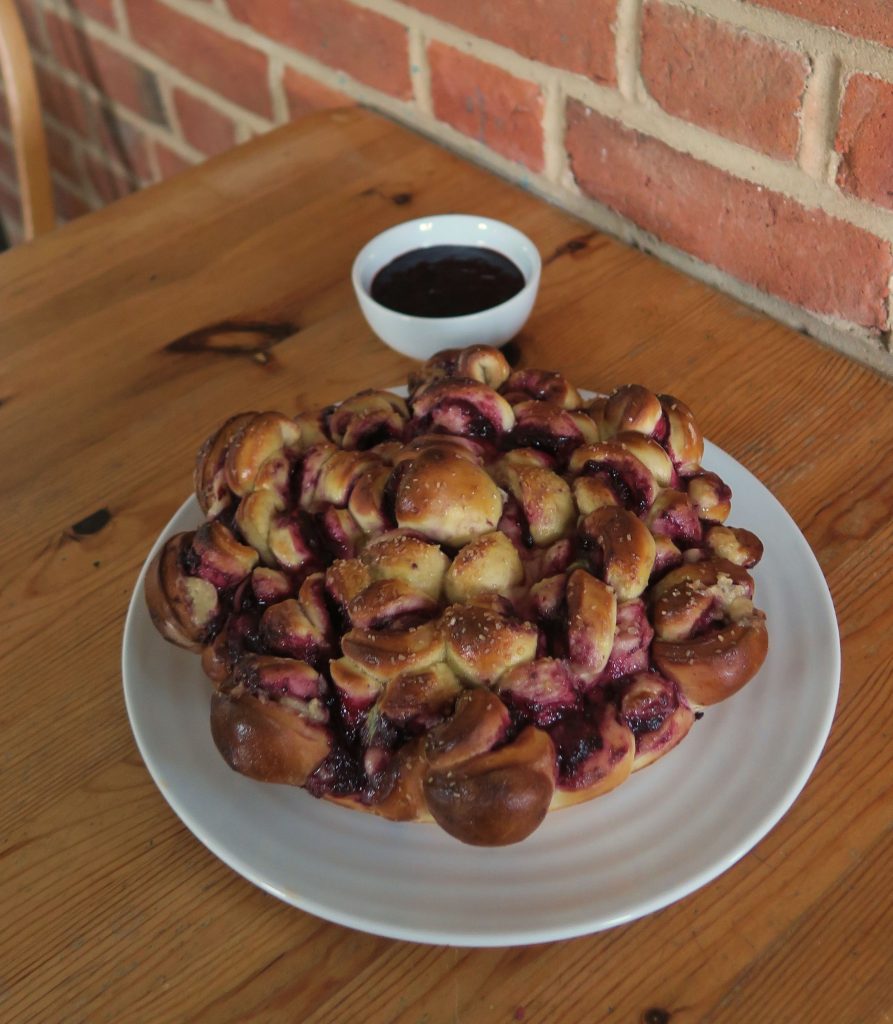
- Pre-heat the oven to 200˚C. Bake the dough for 25-30 minutes until risen and golden brown.
- Transfer the loaf to a wire rack to cool and then serve!
Thanks for reading!
Emma x
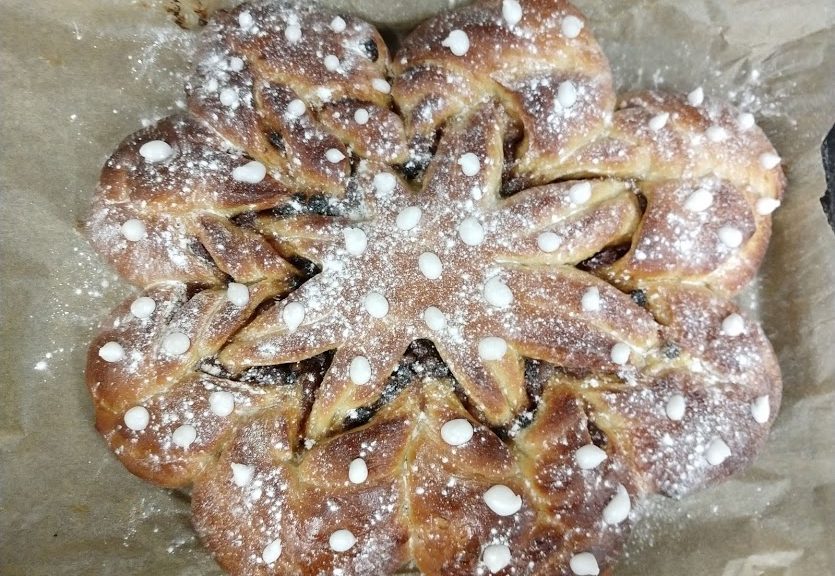
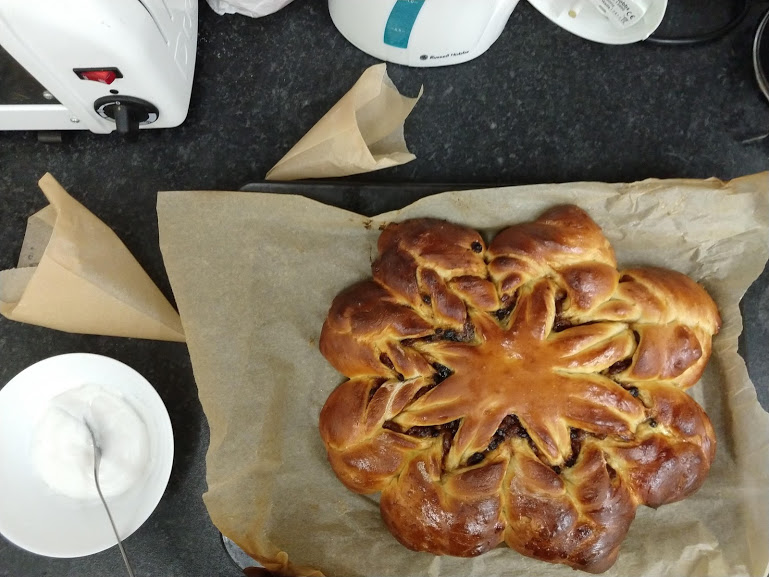
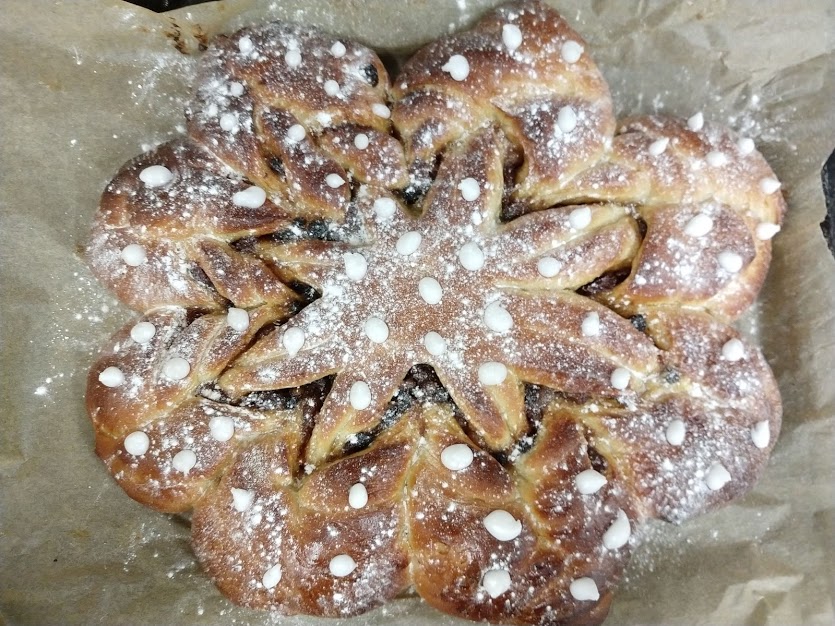
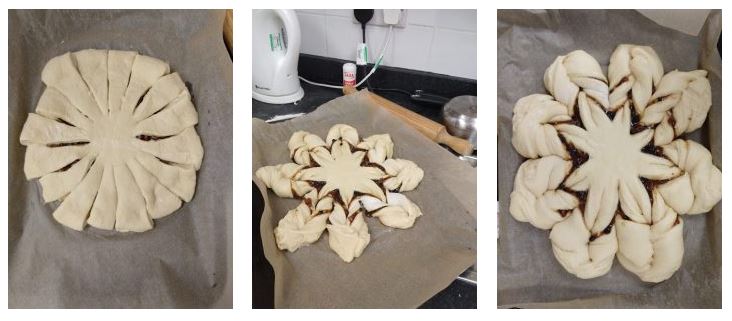 One of the other fun things about making bread is the cool shapes you can twist the dough into! I first came across this way of shaping a loaf whilst watching Bake Off a few years ago. It’s so simple to do and yet messes with everyone’s head so they go ‘ooo, how’d you do that?’. It also makes the loaf really easy to share as each person can rip off one of the snowflake branches!