Tag: Recipes

Greenbelt and a Change in Direction

Greenbelt and a Change in Direction

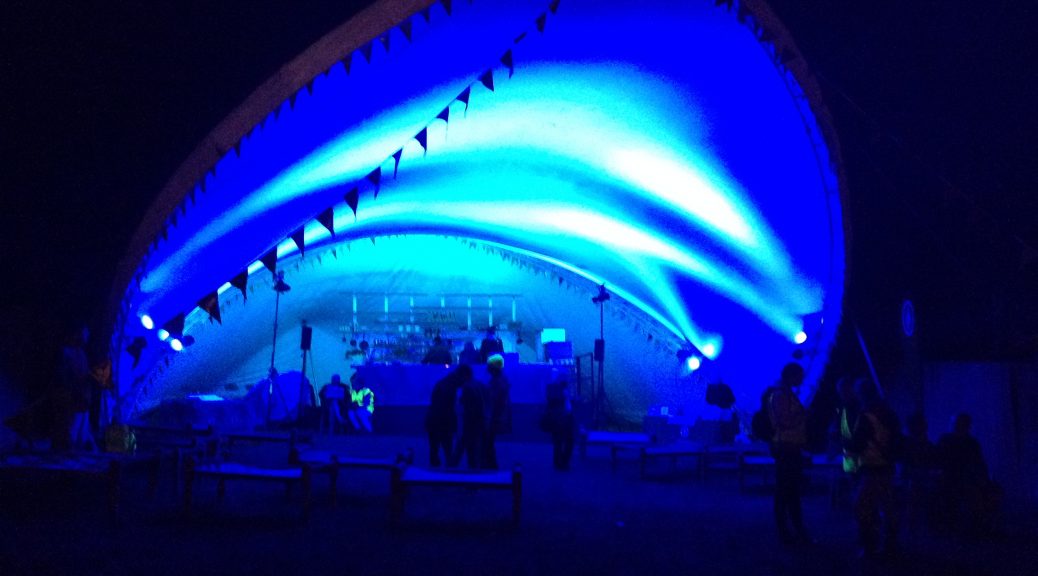
Today I’m branching out of recipe writing and so instead I’ve got a post on my recent experience at Greenbelt which has inspired me to take this blog in a new direction. (Quick heads up – the photos in this post aren’t great quality as they were taken on my ipod and not my camera!) For those of you who haven’t come across Greenbelt before it’s a festival at Boughton House in Kettering, traditionally with Christian roots, that is very egalitarian and liberal. Throughout the course of the bank holiday weekend there is a whole range of live music, theatre, art, demonstrations, workshops, poetry, dance, talks, and of course food, all themed around liberation, equality, solidarity, and community. It sounds pretty unconventional as far as most festivals go, but it’s genuinely so lovely as there’s something for absolutely everyone and everyone is so nice!

Several of months ago my god mother was asked to lead a new venue called ‘The Table’, and she asked me to join her on the team. The venue hosted a whole range of chefs focusing on different issues and topics who did really interesting live cooking demonstrations. Our job, as the venue hosts, was to help out the chefs, prep the ingredients and (of course) do the washing up.  I found this so much fun as being so close to all these amazing chefs and seeing how they each use their food to deliver a message or to fight for a cause was really inspiring!

For example, there was one chef, Pheobe Rison, who was from Palestine and was using her food as a way of keeping her Palestinian roots and culture alive, even though she herself had had her Palestinian citizenship taken away from her due to the current political unrest in the country. Her delicious food, combined with her heartfelt stories and the motivation driving her was really moving. I also met lots of other amazing chefs like Jack Monroe, author of Cooking on a Bootstrap, who writes budget for recipes those living on low incomes and for those who have to use foodbanks, and Brett Cobley (aka epivegan) who gave a really interesting demo on vegan cooking. These were really amazing examples of how food can be so much more than just pretty photos on Instagram, and it all made me think about my own cooking and the message I want to give out.

For a while now I’ve felt that it’s time for me to specialise this blog and to make it more than just a bunch of recipes, but it’s taken until now for me to nail down what it is I want to say through my food.  Mental health awareness and support is an issue that has long been very close to my heart. As someone who suffers with mental health problems herself, not to mention knowing lots of other people with mental health issues, I’m really keen on getting people to talk openly about mental health problems and I’d love to use my food to help with this.

It’ll still be me writing the posts and I’ll still be posting recipes that I’ve developed, so you can expect the same kind of food to keep coming (ie my sweet tooth will be going no where!). However, I will also be focusing on dishes that are nutritious, comforting, quick and/or easy (to suit those who are going through a bout of depression and so on) and to acknowledge my own mental health issues through what I’m cooking. For instance I often don’t feel up to writing and I frequently don’t even want to cook or eat, but rather than covering up these times in my life with dishes I made back when I was feeling more stable and putting on a happy front, I’d rather show what I do like to make when I’m going through a bad time, to show support for others who might be going through something similar.

This is a new direction for Cocoa and Thyme and so I understand that this new idea/drive behind my blog might not be for everyone. I’m choosing, however, to take on this new angle in order to be more open and to promote a message that means a lot to me, and I’m hoping that this will be helpful to some people. I’ve got a month of already prepped recipes to post so I’ll get on with those, but after that I’ll start focusing more on mental health well-being and support through my food. I’ll be writing up a more coherent aim for the blog in my bio over the next couple of days, so if this is a bit too much of a ramble for you to decipher give that a read when it comes out! (I will also be changing the name of the blog at some point so keep an eye out for that!)

Thanks for reading! Please let me know what you think of this change in direction, feedback is always valued (providing it’s constructive) and I’d love to hear from you!

Emma x

Easy Christmas Canapes

Easy Christmas Canapes

We’re hitting the party season of the year and it’s time to bring out the canapes! Here I’ve got three really simple ones which are perfect last-minute nibbles for any party. Of course vol-au-vents and palmiers are classic go-tos, but as not everyone has the time or energy to make them we have these. If the word ‘cooking’ strikes fear into your heart this is perfect for you as it’s essentially just assembling.

Pigs in Blankets

Also a favourite on the Christmas table, these work really well as canapes at a party. Just wrap them up, cook them off and stick them with a cocktail stick.

Recipe

Serves 18

Time: 5 minutes plus cooking time

Ingredients

  • 18 Mini Sausages
  • 9 Rashers of bacon, cut in half

Method

  1. Pre-heat the oven to 180˚C.
  2. Take one of the sausages and wrap it in the halved bacon rasher.
  3. Put this onto a lined baking sheet, with the bacon join on the bottom to stop it from unravelling.
  4. Repeat for all the sausages and then cook in the oven for 10-15 minutes until cooked through and so that the bacon is crispy.
  5. Take out the oven, stick cocktail sticks into them and serve warm!


Bruschetta

This is an Italian classic,  usually served as a starter, but when downsized can also act as a great canape!

Recipe

Serves 18

Time: 15 minutes

Ingredients

  • 1 Thin baguette
  • 1 tbsp Olive oil
  • 1 Garlic clove, crushed
  • 3 Plum tomatoes
  • 1 Handful basil
  • Pinch of salt and pepper
  • 2 tsp Balsamic vinegar

Method

  1. Pre-heat the oven to 180˚C.
  2. Take the baguette and slice about 2cm thick into 18 slices. If the slices are too big for a one-bite canape you can halve them. Put these slices onto a lined baking tray and drizzle with the oil. Put into the oven for 8-10 minutes and bake until crisp.
  3. Roughly chop the tomatoes into chunks and the basil into pieces. Put these and the garlic into a bowl and mix until combined. Season and set to one side until the bread is ready.
  4. Spoon this mixture onto the bread crostini.
  5. Drizzle these with the balsamic just before you serve!


Cream Cheese and Salmon

For me these are the quintessential Christmas party canape. Quick, simple, delicious and decadent they’re everything you need for a snazzy drinks party.

Recipe

Serves 18

Time: 10 minutes

Ingredients

  • 18 Small biscuits ( I used poppyseed ones).
  • 4 tbsp Cream cheese
  • 200g Smoked salmon
  • A little cress or dill to garnish

Method

  1. Take one of the biscuits and spread with a little of the cream cheese.
  2. Take some of the smoked salmon, curl it up and pop it onto one of the biscuits.
  3. Garnish with the cress or dill and then repeat with the rest of the biscuits.
  4. Serve!

Thanks for reading!

Emma x


Nutella Buche de Noel

Nutella Buche de Noel

Christmas is probably one of the most traditional times of the year, and every family has their own way of doing it – especially when it comes to the food. For me, I can’t remember a year we didn’t have one of my Granny’s chocolate logs on the table on boxing day. Whilst she always claims not to be a cook, she whizzes round the kitchen and whips this up, and there’s something about the layers of chocolate cake, filling and icing which always has me excited.

This one could be called a blinged up version of the one I have at my Granny’s. I’ve never met someone who doesn’t like nutella, and so when you have a chocolate sponge, filled with nutella, hazelnuts, cream and raspberries and then coated in a rich ganache, you can’t really lose. This works really well as a dessert for Christmas day, or even as a cake to take along to a Christmas party, as it’s easily transportable and can be cut to serve as many people as needed. Also, the cake is really thin it’s really quick to make and to cool, and therefore doesn’t take too long to make, which is just what you need at Christmas.

Recipe

Serves 8

Time: 90 minutes

Ingredients

For the Cake

  • 150g Caster sugar
  • 6 Large eggs
  • 250g Dark chocolate
  • Icing sugar for dusting

For the filling

  • 200g Nutella
  • 350ml Double cream
  • 80g Icing sugar
  • 150g Rapberries, halved – plus extra for decoration
  • 100g Chopped roasted hazelnuts

For the ganache

  • 250g Dark chocolate, finely chopped
  • 250ml Double cream

Method

  1. Pre-heat the oven to 180˚C. Grease and line a 23 x 33cm Swiss roll tin with butter and baking paper.
  2. Put the chocolate and 4 tbsp water into a heat-proof bowl and melt over a pan of simmering water.
  3. Meanwhile whisk the egg whites in a really clean bowl with an electric whisk until they make stiff peaks.
  4. Put the sugar and egg yolks into another bowl and whisk with an electric whisk until pale, fluffy and thick enough to leave a trail.
  5. Fold the egg yolk mix into the chocolate mix. Then fold the egg whites into the chocolate mixture until fully combined.
  6. Pour the mixture into the lined tin and bake for 10-15 minutes until risen, bouncy and cooked through. Dust a sheet of baking paper with icing sugar and then, whilst warm, turn the cake out onto it. Make a cut about 1 cm from the edge of the short end, making sure not to cut all the way through. Roll the sponge up, with the baking paper inside, into a tight roll and leave to cool rolled up.
  7. When cool unroll the sponge and spread with the Nutella. Lightly whisk the cream and icing sugar together until it just starts to hold its shape. Smooth this over the sponge in an even layer. Then sprinkle the halved raspberries and hazelnuts over the cream.
  8. Roll the cake up, this time without the paper inside, making a tight roll. Transfer the cake onto a plate.
  9. Now make the ganache icing. Put the cream into a pan and bring just up to the boil. Put the chopped chocolate into a bowl and pour the hot cream over it. Stir until the chocolate is melted and everything’s combined.
  10. Leave the ganache in the fridge to set slightly. When it starts to hold it’s shape you can start to ice the roll. Using a palette knife smooth the ganache over the cake and the ends of the roll. Leave to set.
  11. Finish with extra raspberries and hazelnuts and dust with icing sugar. Serve!

Thanks for reading! Any comments, queries or requests don’t hesitate to ask…

Emma x

Mince Pie Croissants

Mince Pie Croissants

There’s nothing more quintessentially Christmas than mince pies, and for me there’s nothing better on Christmas morning than a warm croissant which has just come out of the oven. I’ve never seen mincemeat in croissants before, but as chocolate, almonds and nutella make the grade I couldn’t see why it wouldn’t work – and it does – really well. The light, buttery, flakyness of the pastry really works with the rich filling, and unlike normal mince pies there isn’t so much mincemeat that it becomes sickly and overpowering. However, I know mincemeat’s like marmite – ya love it or hate it. If you’re a hater you obviously don’t have to put it in, you could either leave them plain or you could fill them great alternatives like chocolate.

As I’m a baking junkie and I love hands-on baking I’ve made my own pastry for these. This does take a long time and is a bit of a pain to do as you have to leave it a really long time between turns. You also have to make the pastry a day before you’re going to use it as it’s a yeasted dough which needs to rise. So whilst it’s really satisfying and fun to make your own dough, if you don’t have the patience or the time, as most of us don’t at Christmas, you can use ready made croissant dough or puff pastry instead. To be honest, in my opinion the best bit is the shaping, and so even using shop bought pastry can be fun and create better croissants than shop ones. In this case just skip to step 9 in the recipe and go on from there.


Recipe

Makes 12

Time: 1 ½ hours for the dough (+ chilling) and 45 minutes for the shaping and decorating

Ingredients

For the dough

  • 500g Strong white bread flour
  • 10g Salt
  • 80g Caster sugar
  • 10g Instant yeast
  • 2 tsp Mixed spice
  • 300ml Cool water
  • 300g Unsalted block butter

To finish

  • About 200g Mincemeat (or alternative like chocolate)
  • 1 Medium egg
  • 100g Icing sugar

Method

  1. Put the flour, salt, sugar, yeast, and water into a big bowl and use a large spatula to mix into a dough.
  2. Turn the dough out onto a lightly floured surface and knead for 8-10 minutes until smooth and elastic. Tip into a lightly oiled bowl, cover and leave to chill in the fridge for an hour.
  3. Meanwhile, take the chilled block butter and place it between two sheets of cling film. Using a rolling pin beat the butter out into a rectangle about 40 x 19 cm. Cover in clingfilm and put back into the fridge to chill until needed.
  4. Lightly flour you surface and take the dough out of the fridge. Roll it out into a 60 x 20 cm rectangle, about the thickness of a pound coin. The dough will spring back and resist being shaped, but just persist and you will get there.
  5. Put the butter sheet onto the dough so that it covers two thirds, leaving the top third exposed.
  6. Fold the exposed dough onto the first third of the butter, and then fold the bottom third, covered in butter, up onto the dough you’ve just folded down. You should now have layers of dough, butter, dough, butter, dough. Loosely clingfilm the dough and put back into the fridge for an hour.
  7. Take the dough out of the fridge and put onto a floured surface with the short end facing you. Roll out to a rectangle 60 x 20cm. Fold the top third down and then fold the bottom third up on top, as you did before. Turn the square block 90˚ and repeat the rolling and folding. Wrap the dough in clingfilm and chill the pastry in the fridge for 1 hour.
  8. Repeat step 7 two more times, leaving the dough to chill for an hour in between turns. After the last rolling and folding wrap the dough very loosely (wrapping tightly will stop the dough from rising) and leave in the fridge overnight (or for at least 8 hours).
  9. Once the dough has rested and you’re ready to start shaping line 3 baking trays with baking paper.
  10. Lightly flour a surface and roll out the dough into a 50 x 30cm, trimming the edges so you have a neat rectangle.
  11. Cut the rectangle in half so you have two 25 x 30cm rectangles. Then cut triangles along the length of the strip, each with a 12cm base and 25cm from middle of the base to tip. This should give you 12 triangles in total.
  12. Take one of the triangles and pull the two points making up the base to stretch the dough. Then stretch the dough lengthways so it’s as long and wide as possible.
  13. Spoon about 2 tsp of mincemeat into the wide base of the dough. Then roll the croissants up from the base to the tip. To stop the dough from unravelling in the oven press the end into the croissant to stick it together. Then put the croissant onto the lined baking tray, curling the ends in slightly to get the classic shape. Repeat with the rest of the triangles.
  14. Lightly cover the croissants in cling film again and leave for another 2 hours to rise and double in size.
  15. Heat the oven to 180˚C. Beat the egg with a fork and then lightly brush the croissants to glaze. Put in the oven for 15-20 minutes until risen and golden brown. Take out the oven and leave to cool on a cooling rack.
  16. Whilst cooling make the icing. Put the icing sugar into a bowl and add just enough water to make an icing which is just pourable – be careful not to make it too loose. Pour this into a piping bag with a small round nozzle.
  17. Once cool drizzle the croissants with the icing and serve!

Thanks for reading! Another Christmas treat coming on Wednesday…

Emma x

Kanellangd – Cinnamon Buns

Kanellangd – Cinnamon Buns

It’s December and so Christmas bakes are officially allowed! This means we have a month of sugar, spice and all things nice coming up. I’m carrying on with the theme of foreign baking, from last week’s kaiserschmarrn to kanellangd this week. Now you might be asking am I becoming obsessed with weirdly named dishes no one’s ever heard of before? Well yes, but bare with me. This one is a Swedish version of cinnamon buns, where it’s pretty much the same except for the beautiful shaping. All the buns are baked attached together as a loaf, rather than as a batch bake in a tin, and so you end up with this really cool shaped bake. Essentially though you still get the sweet cinnamony fluffy buns smothered in icing which we all love.

This takes a bit of time to make, but as with lots of my recipes recently, it’s not time you have to spend working on it, you just need to leave it a lot to rise and bake so that you get the perfectly light texture. On the one hand this can be really annoying as you just want to tuck into this delish loaf, but then again, if you have little pockets of time in a day this can be the bake for you. When making anything remotely bready I tend to do a step and then when leaving it to prove I’ll do some work before coming back to it later on, so don’t let the long resting times put you off as you can get stuff done in those times.

Recipe

Makes 1 loaf

Time 1 hour, plus time for proving

Ingredients

For the dough

  • 80g Unsalted butter
  • 260ml Full fat milk
  • 480g Strong plain bread flour, extra for dusting
  • ½ tsp Mixed spice
  • 6g Salt
  • 7g Instant yeast
  • 40g Caster sugar
  • 1 Egg (10g for dough and the rest for glazing)

For the filling

  • 75g Unsalted butter
  • 1 tsp Vanilla bean paste
  • 1 tbsp Ground cinnamon
  • 80g Caster sugar

For the glaze

  • 50g Caster sugar
  • 50ml Water

For the icing

  • 125g Icing sugar
  • 1 tbsp Water

Method

  1. Firstly make the dough by putting the butter and milk into a saucepan and melt gently.
  2. Put the flour and mixed spice into a bowl. Then add the salt and yeast on separate sides of the bowl (putting them in direct contact of each other will kill the yeast). Then add the butter, milk, sugar and 10g of the egg (keep the rest for glazing).
  3. Using a spatula at first, mix everything together. When it starts to come together go in with your fingers until a dough forms.
  4. Lightly flour a work surface, tip out the dough and then knead for around 10 minutes until smooth, elastic, and soft. Form the dough into a ball and put into a lightly oiled bowl. Cover with clingfilm and then leave to rise for about an hour, until doubled in size.
  5. Meanwhile make the filling. Put the butter and vanilla into a bowl and beat until smooth and spreadable.
  6. Put the sugar and cinnamon into another bowl and mix until fully combined.
  7. Pre-heat the oven to 200˚C and line a long baking tray with baking paper.
  8. Tip the dough out onto a lightly floured surface and knead a little to knock back.
  9. Roll the dough out to a 25x35cm rectangle, making sure the long edge is facing you. The dough will resist being rolled and will spring back into shape but persevere. Tack the far edge down onto the work surface by pushing the dough into the worktop.
  10. Spread the butter mix over the dough and then sprinkle the cinnamon sugar evenly over the top. Roll the dough up like a swiss roll from the edge nearest to you to the tacked down edge. Transfer to the lined tray.
  11. Take a pair of sharp scissors and cut 15 slices into the roll, making sure you don’t cut all the way through. Pull the slices to alternative sides to make the cool shape. Loosely clingfilm the dough and leave to prove again for 20-25 minutes, until the dough springs back when pressed lightly.
  12. Meanwhile make the sugar syrup. Put the sugar and water into a small pan and bring to the boil. Leave to reduce by half and then set to one side (it’ll thicken up even more once cooled down).
  13. Brush the loaf with the rest of the beaten egg and bake for 20-25 minutes until golden brown and soft. If it starts to brown too much cover with foil to stop it burning.
  14. Now make the icing. Put the icing sugar and 1 tbsp water into a bowl and mix to make a semi-thick icing. If it’s too thick add more water a little dribble at a time until you have a pourable mixture which still holds its shape.
  15. Take the loaf out of the oven and leave on a wire rack to cool. Brush with sugar syrup whilst it’s still warm, and then, once completely cool, drizzle with the icing. Serve and enjoy!

Thanks for reading! More Christmas bakes coming very soon…

Emma x