Tag: Christmas

Florentines

Florentines

It’s less than 24 hours till Christmas day and I’ve got a one more quick festive recipe for you. For as long as I can remember I’ve made florentines as gifts for friends and family, and this year was no exception. Somewhere amongst the art, drama rehearsals, and work I found time to make 50 florentines which I’ll be giving out over the next couple of days.

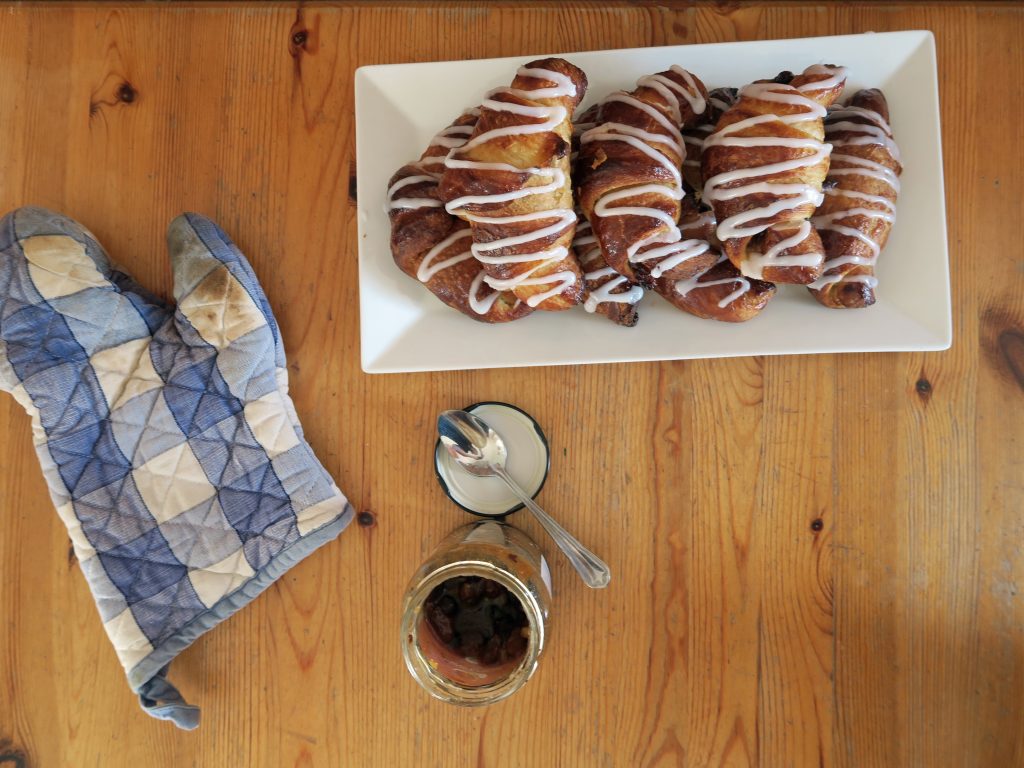
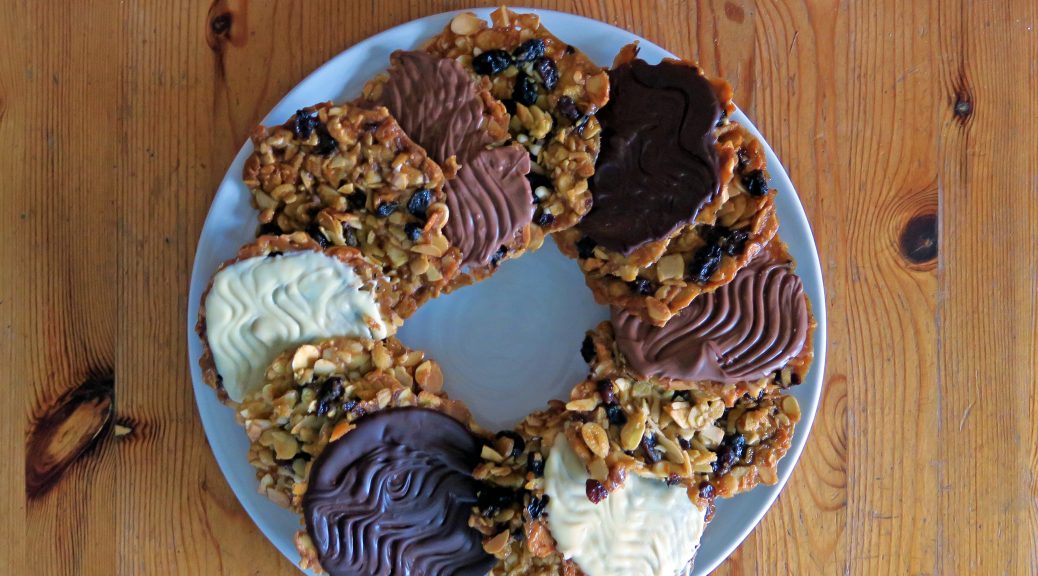
If you’ve never had one of these before they’re little orangey, almondy biscuits coated in chocolate, which are really delicious and moreish.  I’m not a huge fan of almonds or oranges, but somehow I really love these and just the smell of them baking brings back memories of Christmas. They’re also really easy to make – essentially just bung everything in a pan and then bake them in little mounds!

You can then serve them as a snack, nibble or even bag them up as I do and give them as gifts. I find 4 or 5 in a little cellophane bag, with a ribbon and tag makes perfect presents for anyone and everyone.

Recipe

Makes 30

Time: 1 hour

Ingredients

  • 225g Butter
  • 375g light brown sugar
  • 375g Flaked almonds, chopped roughly
  • 200g Raisins, chopped roughly
  • 2 Oranges, rind only
  • 150g White chocolate
  • 150g Milk chocolate
  • 150g Dark chocolate

Method

  1. Preheat the oven to 180˚C and line 3 baking trays with baking paper.
  2. Put the butter into a pan and melt on a medium heat. Add the sugar and heat slowly until the sugar dissolves in the butter and the mixture starts to bubble.
  3. Take the pan off the heat and stir in the chopped almonds, raisins and orange zest.
  4. Put blobs of mixture onto the lined baking trays, making sure they’re well-spaced apart as the mixture will spread (about 4 per-tray).
  5. Bake in the oven for 12-15 minutes until starting to turn golden. Take out of the oven and after a couple of minutes use two spoons to reshape the biscuits if they’ve spread too much and then leave them to harden completely.
  6. Transfer the biscuits to a cooling rack and then continue with spooning and baking the rest of the mixture.
  7. Once all your biscuits are baked take the chocolates and put them into three separate heat-proof bowls – one for each chocolate. Put these over pans of gently simmering water and leave to melt.
  8. Take one of the biscuits and spread a little of the chocolate over the back, flat side of them. Then use a fork to make zig-zag marks through the chocolate and then leave to set. Repeat with the rest of the biscuits, making 1/3 white, 1/3 milk and 1/3 dark chocolate. Serve!

Thanks for reading and Merry Christmas! This is my last post for this year, but I’ll be back on in January with plenty more recipes for 2018…

Emma x

Easy Christmas Canapes

Easy Christmas Canapes

We’re hitting the party season of the year and it’s time to bring out the canapes! Here I’ve got three really simple ones which are perfect last-minute nibbles for any party. Of course vol-au-vents and palmiers are classic go-tos, but as not everyone has the time or energy to make them we have these. If the word ‘cooking’ strikes fear into your heart this is perfect for you as it’s essentially just assembling.

Pigs in Blankets

Also a favourite on the Christmas table, these work really well as canapes at a party. Just wrap them up, cook them off and stick them with a cocktail stick.

Recipe

Serves 18

Time: 5 minutes plus cooking time

Ingredients

  • 18 Mini Sausages
  • 9 Rashers of bacon, cut in half

Method

  1. Pre-heat the oven to 180˚C.
  2. Take one of the sausages and wrap it in the halved bacon rasher.
  3. Put this onto a lined baking sheet, with the bacon join on the bottom to stop it from unravelling.
  4. Repeat for all the sausages and then cook in the oven for 10-15 minutes until cooked through and so that the bacon is crispy.
  5. Take out the oven, stick cocktail sticks into them and serve warm!


Bruschetta

This is an Italian classic,  usually served as a starter, but when downsized can also act as a great canape!

Recipe

Serves 18

Time: 15 minutes

Ingredients

  • 1 Thin baguette
  • 1 tbsp Olive oil
  • 1 Garlic clove, crushed
  • 3 Plum tomatoes
  • 1 Handful basil
  • Pinch of salt and pepper
  • 2 tsp Balsamic vinegar

Method

  1. Pre-heat the oven to 180˚C.
  2. Take the baguette and slice about 2cm thick into 18 slices. If the slices are too big for a one-bite canape you can halve them. Put these slices onto a lined baking tray and drizzle with the oil. Put into the oven for 8-10 minutes and bake until crisp.
  3. Roughly chop the tomatoes into chunks and the basil into pieces. Put these and the garlic into a bowl and mix until combined. Season and set to one side until the bread is ready.
  4. Spoon this mixture onto the bread crostini.
  5. Drizzle these with the balsamic just before you serve!


Cream Cheese and Salmon

For me these are the quintessential Christmas party canape. Quick, simple, delicious and decadent they’re everything you need for a snazzy drinks party.

Recipe

Serves 18

Time: 10 minutes

Ingredients

  • 18 Small biscuits ( I used poppyseed ones).
  • 4 tbsp Cream cheese
  • 200g Smoked salmon
  • A little cress or dill to garnish

Method

  1. Take one of the biscuits and spread with a little of the cream cheese.
  2. Take some of the smoked salmon, curl it up and pop it onto one of the biscuits.
  3. Garnish with the cress or dill and then repeat with the rest of the biscuits.
  4. Serve!

Thanks for reading!

Emma x


Vegan Woodland Pie

Vegan Woodland Pie

A couple of years ago I was a vegetarian, and although I liked it most of the time, when it came to Christmas, with all the turkey and trimmings on the table, I started to miss meat. Whilst at the time I had a great vegetarian substitute, it didn’t quite match up, and I just wanted something as good as the meat I couldn’t eat.  I’m no longer a veggie, but when I was I developed this pie recipe which is so insanely good you don’t even realise it’s vegan, let alone vegetarian.

Full of beans and veg, this is surprisingly healthy for a pie – especially if you eat it without the crust. It’s stuffed with cranberries and chestnuts, so it’s prefect for a veggie main course at Christmas – you could even make individual pies instead of one large one, so you can cook up the exact number you need. The filling is also so good I’d recommend using it as stuffing, or as an accompaniment to your Christmas meat.  Just make it up as instructed, but rather than putting it into a pie crust, roll it into balls and bake in the oven for 5-10 minutes to firm up and heat through.

You also don’t have to decorate it how I have. In all honesty I wasn’t going to decorate it at all apart from crimping the edge, but I was experimenting with a new pastry for this one and it dried out quicker than expected and cracked when I put the top on. As I wanted it to look nice for the blog I used the leftover pastry to make roses to cover up the cracks, and then I wanted to make enough to make a ring so that it looked uniform. But if you do want to jazz it up a bit you can use the rest of the pastry to make roses or leaves for the top.

Recipe

Serves 6

Time 1 hour (plus cooking time)

Ingredients

For the filling

  • 1 tbsp Sunflower oil
  • 1 White onion, finely chopped
  • 1 Red onion, finely chopped
  • 2 Medium leeks, finely chopped
  • 2 Cloves garlic, crushed
  • 225g Chestnut mushrooms, sliced
  • 25g Dried cranberries
  • 340g Tin of butter beans, roughly chopped
  • 225g Ready-to-eat chestnuts, roughly chopped
  • 50g Hazelnuts, chopped
  • 5 Sprigs fresh thyme, chopped finely
  • Salt and pepper to taste
  • 3 tbsp Cranberry Sauce

For the pastry

  • 280ml Water
  • 115g Vegetable suet
  • 500g Plain flour
  • 1 tsp Salt to season
  • 20ml Soya milk to glaze

Method

  1. Put the oil into a large sauce pan over a medium-high heat. Add the onions, leeks, and garlic and gently fry for 5 minutes until soft and starting to caramelise.
  2. Add the mushrooms, cranberries, beans, chestnuts and hazelnuts and cook on a medium heat until soft and dry – this will take about 10 minutes.
  3. Add the thyme to the mix, season with salt and pepper and then set to one side whilst you make the pastry.
  4. Pre-heat the oven to 180˚C. Take a deep loose-bottomed 23cm pie tin and grease with butter (you can also use individual moulds if you want to make individual pies).
  5. Put the water in a medium saucepan and bring to the boil over a medium-high heat.
  6. Once boiling add the suet and stir to melt and combine.
  7. Put the flour and salt into a bowl and pour over the melted water-suet mix. Using a round bladed knife mix everything into a dough and then turn out onto a work surface and knead for 3 minutes until smooth.
  8. Take ¼ of the pastry and set aside for now. Roll out the other ¾ of the pastry into a large circle, about the thickness of a pound coin. Unlike shortcrust you want this pastry relatively thick to that it doesn’t break.
  9. Gently fold the circle of pastry in half and in half again so you have a quarter of a circle in front of you. Put the point of the quarter into the centre of the lined tin and then unfold the circle and push the dough into the corners and up the sides of the mould. You want a little bit of overhang.
  10. Spoon 1 ½ tbsp of the cranberry sauce into the base of the pie. Spoon ½ of the filling on top, then spoon the rest of the cranberry sauce over the filling. Top with the rest of the filling. Don’t worry if the mixture goes over the top of the tin, as this will make a nice dome when covered in pastry.
  11. Roll out the other ¼ of pastry into a circle of the same thickness as before. Put the circle on top of the pie and trim the excess by slicing with a knife at a 45˚ angle to the tin.
  12. Using your thumbs and index finger crimp around the edge of the pie to seal everything together. Take the milk and brush lightly over the top of the pie to glaze.
  13. Put the pie in the oven for 45-55 minutes until the pastry is golden brown. Take out of the oven and serve immediately with gravy and vegetables.

Thanks for reading!

Emma x

Nutella Buche de Noel

Nutella Buche de Noel

Christmas is probably one of the most traditional times of the year, and every family has their own way of doing it – especially when it comes to the food. For me, I can’t remember a year we didn’t have one of my Granny’s chocolate logs on the table on boxing day. Whilst she always claims not to be a cook, she whizzes round the kitchen and whips this up, and there’s something about the layers of chocolate cake, filling and icing which always has me excited.

This one could be called a blinged up version of the one I have at my Granny’s. I’ve never met someone who doesn’t like nutella, and so when you have a chocolate sponge, filled with nutella, hazelnuts, cream and raspberries and then coated in a rich ganache, you can’t really lose. This works really well as a dessert for Christmas day, or even as a cake to take along to a Christmas party, as it’s easily transportable and can be cut to serve as many people as needed. Also, the cake is really thin it’s really quick to make and to cool, and therefore doesn’t take too long to make, which is just what you need at Christmas.

Recipe

Serves 8

Time: 90 minutes

Ingredients

For the Cake

  • 150g Caster sugar
  • 6 Large eggs
  • 250g Dark chocolate
  • Icing sugar for dusting

For the filling

  • 200g Nutella
  • 350ml Double cream
  • 80g Icing sugar
  • 150g Rapberries, halved – plus extra for decoration
  • 100g Chopped roasted hazelnuts

For the ganache

  • 250g Dark chocolate, finely chopped
  • 250ml Double cream

Method

  1. Pre-heat the oven to 180˚C. Grease and line a 23 x 33cm Swiss roll tin with butter and baking paper.
  2. Put the chocolate and 4 tbsp water into a heat-proof bowl and melt over a pan of simmering water.
  3. Meanwhile whisk the egg whites in a really clean bowl with an electric whisk until they make stiff peaks.
  4. Put the sugar and egg yolks into another bowl and whisk with an electric whisk until pale, fluffy and thick enough to leave a trail.
  5. Fold the egg yolk mix into the chocolate mix. Then fold the egg whites into the chocolate mixture until fully combined.
  6. Pour the mixture into the lined tin and bake for 10-15 minutes until risen, bouncy and cooked through. Dust a sheet of baking paper with icing sugar and then, whilst warm, turn the cake out onto it. Make a cut about 1 cm from the edge of the short end, making sure not to cut all the way through. Roll the sponge up, with the baking paper inside, into a tight roll and leave to cool rolled up.
  7. When cool unroll the sponge and spread with the Nutella. Lightly whisk the cream and icing sugar together until it just starts to hold its shape. Smooth this over the sponge in an even layer. Then sprinkle the halved raspberries and hazelnuts over the cream.
  8. Roll the cake up, this time without the paper inside, making a tight roll. Transfer the cake onto a plate.
  9. Now make the ganache icing. Put the cream into a pan and bring just up to the boil. Put the chopped chocolate into a bowl and pour the hot cream over it. Stir until the chocolate is melted and everything’s combined.
  10. Leave the ganache in the fridge to set slightly. When it starts to hold it’s shape you can start to ice the roll. Using a palette knife smooth the ganache over the cake and the ends of the roll. Leave to set.
  11. Finish with extra raspberries and hazelnuts and dust with icing sugar. Serve!

Thanks for reading! Any comments, queries or requests don’t hesitate to ask…

Emma x

Mince Pie Croissants

Mince Pie Croissants

There’s nothing more quintessentially Christmas than mince pies, and for me there’s nothing better on Christmas morning than a warm croissant which has just come out of the oven. I’ve never seen mincemeat in croissants before, but as chocolate, almonds and nutella make the grade I couldn’t see why it wouldn’t work – and it does – really well. The light, buttery, flakyness of the pastry really works with the rich filling, and unlike normal mince pies there isn’t so much mincemeat that it becomes sickly and overpowering. However, I know mincemeat’s like marmite – ya love it or hate it. If you’re a hater you obviously don’t have to put it in, you could either leave them plain or you could fill them great alternatives like chocolate.

As I’m a baking junkie and I love hands-on baking I’ve made my own pastry for these. This does take a long time and is a bit of a pain to do as you have to leave it a really long time between turns. You also have to make the pastry a day before you’re going to use it as it’s a yeasted dough which needs to rise. So whilst it’s really satisfying and fun to make your own dough, if you don’t have the patience or the time, as most of us don’t at Christmas, you can use ready made croissant dough or puff pastry instead. To be honest, in my opinion the best bit is the shaping, and so even using shop bought pastry can be fun and create better croissants than shop ones. In this case just skip to step 9 in the recipe and go on from there.


Recipe

Makes 12

Time: 1 ½ hours for the dough (+ chilling) and 45 minutes for the shaping and decorating

Ingredients

For the dough

  • 500g Strong white bread flour
  • 10g Salt
  • 80g Caster sugar
  • 10g Instant yeast
  • 2 tsp Mixed spice
  • 300ml Cool water
  • 300g Unsalted block butter

To finish

  • About 200g Mincemeat (or alternative like chocolate)
  • 1 Medium egg
  • 100g Icing sugar

Method

  1. Put the flour, salt, sugar, yeast, and water into a big bowl and use a large spatula to mix into a dough.
  2. Turn the dough out onto a lightly floured surface and knead for 8-10 minutes until smooth and elastic. Tip into a lightly oiled bowl, cover and leave to chill in the fridge for an hour.
  3. Meanwhile, take the chilled block butter and place it between two sheets of cling film. Using a rolling pin beat the butter out into a rectangle about 40 x 19 cm. Cover in clingfilm and put back into the fridge to chill until needed.
  4. Lightly flour you surface and take the dough out of the fridge. Roll it out into a 60 x 20 cm rectangle, about the thickness of a pound coin. The dough will spring back and resist being shaped, but just persist and you will get there.
  5. Put the butter sheet onto the dough so that it covers two thirds, leaving the top third exposed.
  6. Fold the exposed dough onto the first third of the butter, and then fold the bottom third, covered in butter, up onto the dough you’ve just folded down. You should now have layers of dough, butter, dough, butter, dough. Loosely clingfilm the dough and put back into the fridge for an hour.
  7. Take the dough out of the fridge and put onto a floured surface with the short end facing you. Roll out to a rectangle 60 x 20cm. Fold the top third down and then fold the bottom third up on top, as you did before. Turn the square block 90˚ and repeat the rolling and folding. Wrap the dough in clingfilm and chill the pastry in the fridge for 1 hour.
  8. Repeat step 7 two more times, leaving the dough to chill for an hour in between turns. After the last rolling and folding wrap the dough very loosely (wrapping tightly will stop the dough from rising) and leave in the fridge overnight (or for at least 8 hours).
  9. Once the dough has rested and you’re ready to start shaping line 3 baking trays with baking paper.
  10. Lightly flour a surface and roll out the dough into a 50 x 30cm, trimming the edges so you have a neat rectangle.
  11. Cut the rectangle in half so you have two 25 x 30cm rectangles. Then cut triangles along the length of the strip, each with a 12cm base and 25cm from middle of the base to tip. This should give you 12 triangles in total.
  12. Take one of the triangles and pull the two points making up the base to stretch the dough. Then stretch the dough lengthways so it’s as long and wide as possible.
  13. Spoon about 2 tsp of mincemeat into the wide base of the dough. Then roll the croissants up from the base to the tip. To stop the dough from unravelling in the oven press the end into the croissant to stick it together. Then put the croissant onto the lined baking tray, curling the ends in slightly to get the classic shape. Repeat with the rest of the triangles.
  14. Lightly cover the croissants in cling film again and leave for another 2 hours to rise and double in size.
  15. Heat the oven to 180˚C. Beat the egg with a fork and then lightly brush the croissants to glaze. Put in the oven for 15-20 minutes until risen and golden brown. Take out the oven and leave to cool on a cooling rack.
  16. Whilst cooling make the icing. Put the icing sugar into a bowl and add just enough water to make an icing which is just pourable – be careful not to make it too loose. Pour this into a piping bag with a small round nozzle.
  17. Once cool drizzle the croissants with the icing and serve!

Thanks for reading! Another Christmas treat coming on Wednesday…

Emma x