Tag: Vegan

Vegan Chocolate Cake

Vegan Chocolate Cake

It’s 2019. Everything’s squeaky fresh and everything’s vegan! (For this month at least). I have 9 delish vegan recipes coming your way and then depending on how I like the whole vegan thing I might carry on with it or go back to being a chill veggie. That said, it’s only been 1.5 days and I’ve been hungry and staring at every non vegan thing in my kitchen for most of that time. But it’s gonna be great. I’ve got hummus, I’ve got aubergines, and I’ve got some sweet wonders like this chocolate cake to keep me going!

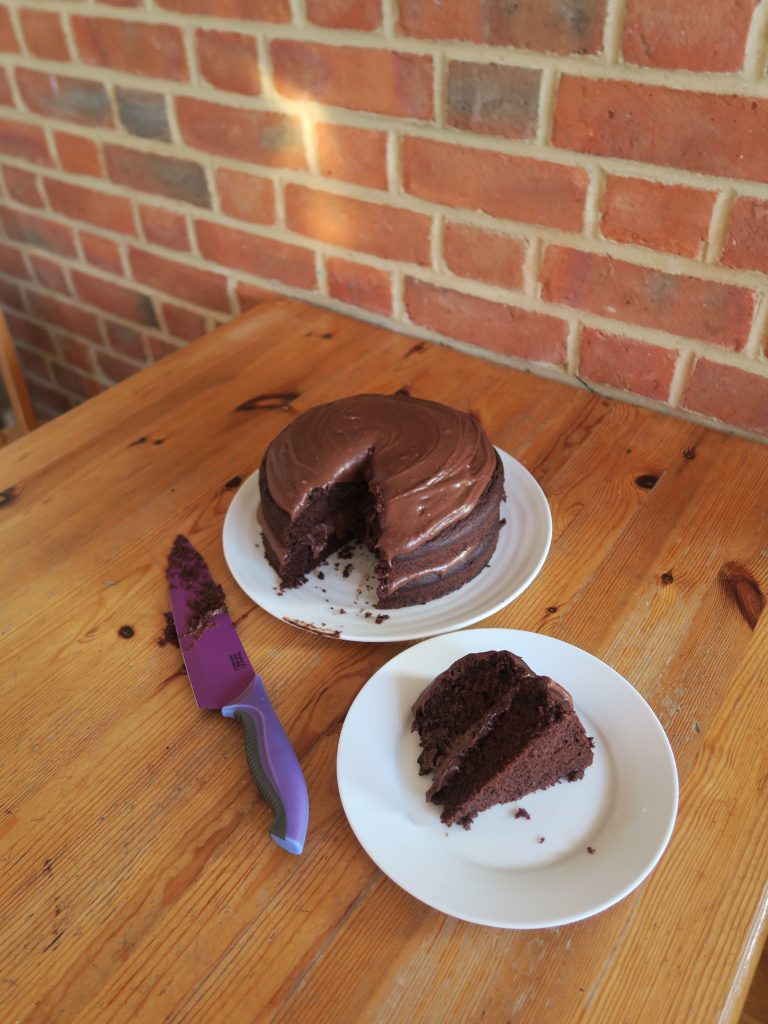
I actually first came across this way of making a cake a couple of years ago before I even considered going vegan, and it was so good that I didn’t realise it had no milk, eggs etc in it. It also doesn’t require lots of random hard-to-find ingredients like lots of vegan foods do, all you need is just a couple of avocados and you’re good to go! I also cannot stress enough that this is a hella good cake in it’s own right – this has actually become my go-to chocolate cake because it tastes so insanely good. So if the first thing you think of when someone says vegan is a bowl full of bland vegetables try whipping up one of these!

Recipe

Serves 10-12

Time: 2 hours

Ingredients

For the cake

  • Dairy free spread for greasing
  • 2 Small avocados (about 150g)
  • 300g Caster sugar
  • 350g Plain flour
  • 60g Cocoa powder
  • 1 tsp Bicarbonate of soda
  • 2 tsp Baking powder
  • 400ml Soya milk
  • 150ml Vegetable oil
  • 2 tsp Vanilla extract

For the icing

  • 70g Ripe avocado
  • 100g Dairy free spread
  • 200g Dark chocolate (dairy free)
  • 125ml Soya milk
  • 25g Cocoa powder
  • 200g Icing sugar
  • 1 tsp Vanilla extract

Method

  1. Pre-heat the oven to 170˚C. Line two 20cm sandwich tins with dairy free spread and baking paper.
  2. Put the avocado flesh into a bowl and puree it with a hand blender. Then put the avocado through a sieve into another big bowl.
  3. Add the sugar, flour, cocoa powder, bicarb, baking powder, milk, oil, vanilla and a pinch of salt to the avocado and whisk together until smooth and velvety.
  4. Pour the mixture into the two tins and bake for 20-25 minutes until risen and springy. (A skewer inserted into the middle should come out clean). Leave to cool for a few minutes and then turn the cakes out onto a wire rack.
  5. Now make the icing. Put the avocado and sunflower spread into a large bowl and beat until smooth. Pass the mixture through a sieve and then set aside for now.
  6. Melt the chocolate in a bowl over a pan of simmering water and then leave to cool for a couple of minutes.
  7. Put the dairy-free milk into a pan and bring to a simmer. Put the cocoa powder into a bowl and pour over the milk, whisking until a smooth mixture forms.
  8. Add the avocado, icing sugar, melted chocolate and vanilla and beat again until the mixture is thick, smooth and shiny.
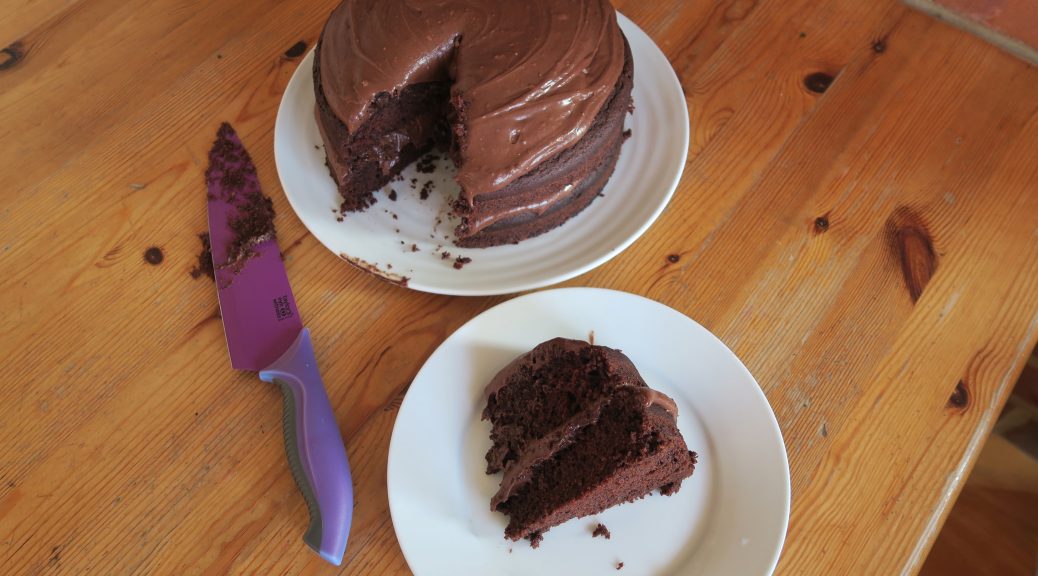
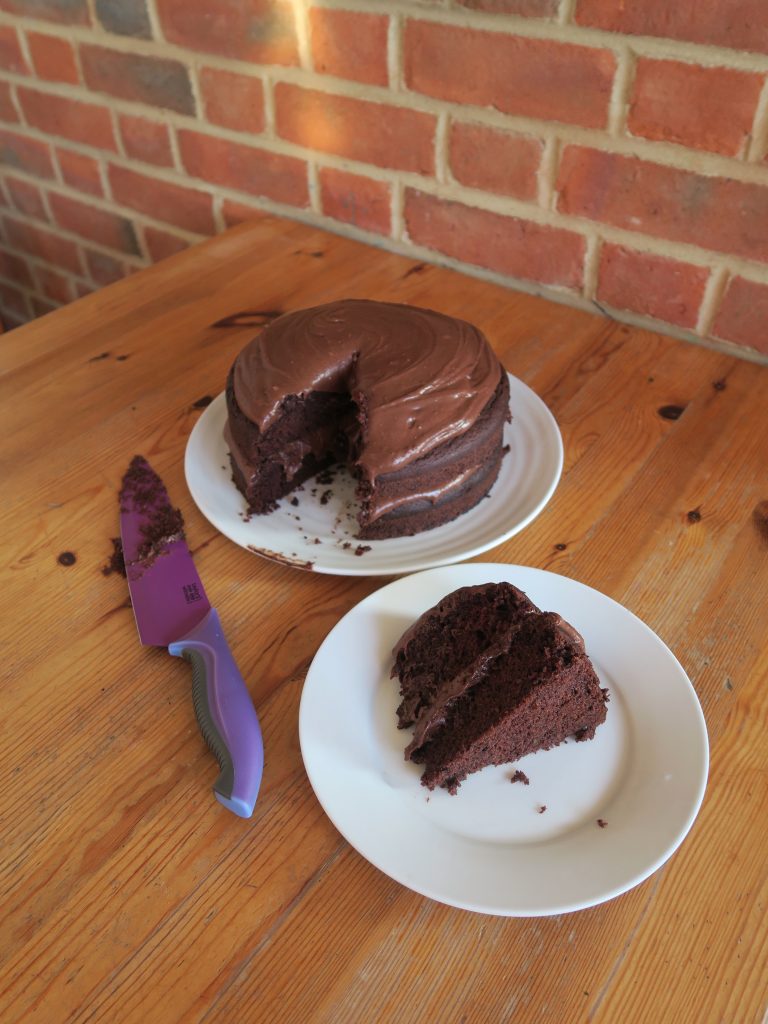
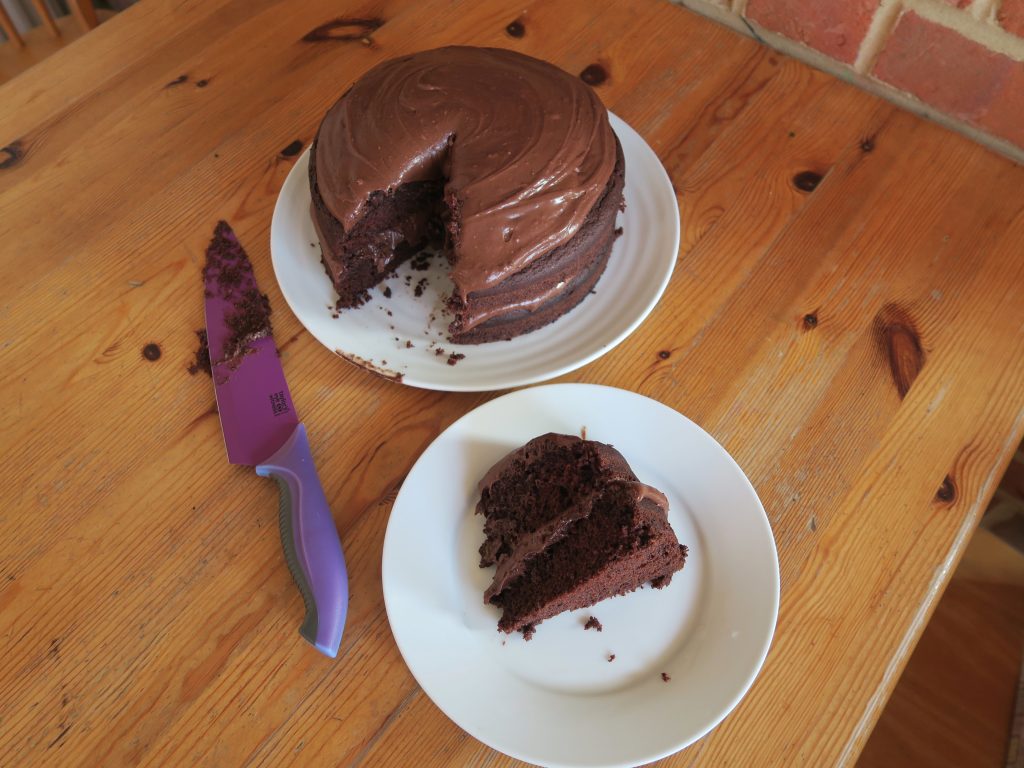
  9. Put one of the cooled cakes onto a plate. Spread over half the icing, then top with the other sponge and the rest of the icing. Serve!

Thanks for reading!

Emma x

Peanut Butter and Chocolate Pinwheel Cookies (Vegan)

Peanut Butter and Chocolate Pinwheel Cookies (Vegan)

With term almost over it’s time to head back to the land of stocked fridge and rolling fields. Whilst I’m looking forward to having a (bit) of a break, this has been the most amazing 8 weeks. From the people I’ve met to the things I’ve learnt, it’s been a total blast and I can’t wait to come back and so it all over again (after a long rest that is!). Some of the best times I’ve had this term have been our group baking sessions in our college kitchen. Trying to fit more people than can physically fit into a lil’ kitchen, jumping over people to get from the sink to the oven and then everyone eating whatever’s made in minutes.

Of course the down side of cooking at uni is the lack of equipment, ingredients and space. For example these were made with only half the ingredients we probably needed and when freezing the pinwheel log before cutting it into slices I had to wedge it into the jam-packed freezer, hence the slightly squashed shape. However, even with the set backs these turned out super tasty and were so fun to make, so I guess the main thing I’ve learnt from student cooking so far is just to make use of what you’ve got to hand and it’ll most likely turn out fine!

You can also play around with the two flavours in these as much as you like which is fun. I went for chocolate and peanut butter as they’re relatively cheap and taste hella good together. But you could try other combos like chocolate and vanilla, lemon and strawberry, or orange and almond. The key to get these looking good is to make sure that the two doughs have different enough colours to stand out against each other and to make sure you get a tight roll when you roll the wheels up. After that all you’ve got to worry about is getting them to the tin before everyone eats them.

Ingredients

For peanut butter dough

  • 125g Caster sugar
  • 113g Smooth peanut butter
  • A large pinch of Salt
  • 1 tbsp Water
  • 215g Plain flour

For the chocolate dough

  • 125g Caster sugar
  • 113g Smooth peanut butter
  • A large pinch of salt
  • 1 tbsp Water
  • 170g Plain flour
  • 45g Cocoa powder

Method

  1. First make the peanut dough. Put the peanut butter and sugar into a large bowl with the vanilla and a pinch of salt and beat with a wooden spoon until smooth and creamy.
  2. Add the water to the mixture and beat in to loosen the mixture a little. Then add the flour and mix everything together until a smooth dough forms.
  3. Use your hands to make the dough into a ball and then wrap it in cling film and leave it in the fridge until needed.
  4. Now make the chocolate dough. Repeat step 1 with the butter, sugar and so on.
  5. Add the water to the mix and beat to loosen the mixture as you did before. Then add the flour and the cocoa powder to the bowl and mix everything together until a smooth dough forms.
  6. Again, form the dough into a ball and wrap in clingfilm. Leave the two doughs in the fridge for 1-2 hours to harden up slightly.
  7. When ready take the peanut dough out of the fridge. Lay down a sheet of cling film on the work top and then place the dough on top. Lay out another sheet of cling film over the dough. Then take a rolling pin and roll the dough out into a oblong about 20cm x 40cm.
  8. Repeat with the chocolate dough so you have two rectangles of a similar shape.
  9. Take the top layer of the clingfilm off the two doughs. Then turn the chocolate dough over onto the peanut dough and take off the clingfilm sheet which will now be on the top.
  10. Carefully roll the sheet up into a pinwheel, working from short edge to short edge. It can help here to roll over a 1cm bit at the start to begin your spiral and then work from there.
  11. Wrap the log in clingfilm and then freeze for 1-2 hours to make it easier to cut later.
  12. Pre-heat the oven to 180˚C. Line two baking trays with baking paper.
  13. Take the pinwheel log out of the freezer and place it on a chopping board. Take a sharp knife and cut the log into 1cm discs. Place each cookie on the lined baking trays.
  14. Bake the biscuits for 15-20 minutes until slightly golden brown and crispy. Leave to cool before eating!

Thanks for reading!

Emma x

Mediterranean Lunch Bowl

Mediterranean Lunch Bowl

There’s this big vegan food trend at the moment in the food-sphere which is big bowls full of bits and bobs, making up a delish lunch. I think the key idea is that they create a balanced, interesting, healthy bowl of goodness which will also fill you up. As I’ve got really into Mediterranean cooking recently I thought I’d do a bowl full of med veg and bites! As with most things, all the items in here are easily mixed and matched, so anything you like/don’t like you can substitute in/out. In this one I’ve got some spicy couscous, aromatic roast aubergine, crispy kale, and hummus, all served with pita bread and salad to mix with everything. Portion wise this does make a hearty lunch for one, but you could always add in some more salad and it’d easily do a good lunch for two.

Recipe

Serves 1

Time: 20 minutes

Ingredients

  • 1 Aubergine
  • 2 tbsp Olive oil
  • 1/2 tsp Zaartar spice blend
  • 30g Couscous
  • 1/2 tsp Rasel Hanout spice blend
  • A handful of curly kale
  • 1/2 tsp sugar
  • A large pinch of salt
  • 1 Pita bread (or other flatbread)
  • 1/2 Red pepper
  • 2cm Cucumber
  • 3 Cherry tomatoes
  • A handful of salad leaves
  • 5g Feta cheese
  • 2 tbsp Hummus
  • A pinch of Smoked paprika

Method

  1. Pre-heat the oven to 180˚C.
  2. Slice the ends off the aubergine, then halve it and chop it into slices.
  3. Put the aubergine into a roasting tin, drizzle over 1 tbsp of the oil, sprinkle with the zaatar spices and season with a little salt. Then roast in the oven for 20-25 minutes until soft.
  4. Meanwhile prep the couscous. Put the couscous into a bowl with the rasel hanout spices and pour over boiling water according to the packet’s instructions. Leave to soak and then break up with a fork, season with salt, and set to one side.
  5. Now prep the kale. Put the kale into a roasting tin. Drizzle over the 1 tbsp of the oil, then sprinkle over the salt and sugar.
  6. Mix everything together and then put the kale into the oven to cook for 10-15 minutes until crispy. The kale will go from crisp to burnt really quickly so keep a close eye on it.
  7. Put the flatbread onto a tray and put it into the oven to warm up.
  8. Whilst waiting for everything to cook/warm up, prep the salad.
  9. Begin by de-seeding the pepper and then chop it into strips. Then halve and quarter the cucumber lengthways before chopping it into chunks. Then chop the tomatoes into quarters.
  10. Put the salad leaves, tomatoes, cucumber and feta into a bowl and mix together.
  11. Take the bread out of the oven and use kitchen scissors to chop it up into strips.
  12. When everything’s ready start to plate. Begin by spooning the couscous onto the bowl/plate in a mound. Then work clockwise round the bowl, piling up the salad leaves, bread strips, kale, aubergine and then the red pepper strips. Finish off with a dollop of the hummus in the centre and then sprinkle a little paprika over the hummus to add some extra heat. Serve and enjoy!

Thanks for reading!

Emma x

Vegetable Curry

Vegetable Curry

I love a good authentic curry as much as the next person, but when you go to make your own at home it can often end up  bland and lacking in flavour – nothing like the ones you get in restaurants or at take-outs. A good way of avoiding this is to make your own paste for the sauce, but who honestly has the time in the middle of the week to spend ages grinding spices in a pestle and mortar?? I’ve found that the best way of getting a flavoursome curry with as little elbow grease as possible is to cook the spices a little before using them in the sauce. This will unlock the aromas and give the curry more oomph. The best way of doing this is to add the spice mix to the onions once they’ve just started to caramelise, and then fry it all together for another 2-3 minuteness before adding the wet ingredients to make the sauce.

I chose to make a vegetable curry for this post as I had a lot of vegetables floating around my kitchen which I wanted to use up, but a homemade curry is also a really good way of using up cooked meat. For example leftover roast chicken or turkey can be shreded up and then added to the sauce with some vegetables and voila, you have a delish meat curry ready to go!


Recipe

Serves 8

Time: 1 hour (including cooking time)

Ingredients

  • 1 Large potato
  • 1 Sweet potato
  • 1 Aubergine
  • 1 Red pepper
  • 1 Corguette
  • 2 tbsp Vegetable oil
  • 6 tbsp Medium Curry Powder
  • 1 Red onion
  • 430g Tomato Passata
  • 400g Coconut milk
  • Salt and pepper to season

Method

  1. Preheat the oven to 200˚C.
  2. Now prep the veg. Peel the potato and sweet potato and chop into chunks. Chop the aubergine into similar sized pieces. De-seed the pepper and chop it into small chunks, slightly smaller than you chopped the potatoes and aubergine. Then slice the corguette down the middle and then chop it into bits of a similar size.
  3. Put the chopped vegetables into a large roasting tin and drizzle with 1 tbsp of the oil. Sprinkle over 2 tbsp of the curry powder and stir around the tin to coat evenly. Put into the oven to roast for 30-35 minutes, stirring half way through, until the veg are soft and just starting to crisp.
  4. Meanwhile peel and dice the onion. Put the rest of the oil into a large saucepan and put over a medium heat. Add the onion and fry, stirring occasionally, until it begins to caramelise and go brown.
  5. Add the other 4 tbsp of curry powder and stir to coat the onions in it. Fry for another 2-3 minutes to slightly cook the powder and then add the passata and coconut milk. Stir to combine and then leave on a gentle simmer for 10 minutes.
  6. When the vegetables in the oven are ready take them out of the oven and add them to the sauce. Leave everything to simmer for another 5-10 minutes until all the veg are cooked through and infused with the spices in the sauce.
  7. Season the curry with salt and pepper to taste and then serve with rice and/or naan bread!

Thanks for reading!

Emma x

Vegan Woodland Pie

Vegan Woodland Pie

A couple of years ago I was a vegetarian, and although I liked it most of the time, when it came to Christmas, with all the turkey and trimmings on the table, I started to miss meat. Whilst at the time I had a great vegetarian substitute, it didn’t quite match up, and I just wanted something as good as the meat I couldn’t eat.  I’m no longer a veggie, but when I was I developed this pie recipe which is so insanely good you don’t even realise it’s vegan, let alone vegetarian.

Full of beans and veg, this is surprisingly healthy for a pie – especially if you eat it without the crust. It’s stuffed with cranberries and chestnuts, so it’s prefect for a veggie main course at Christmas – you could even make individual pies instead of one large one, so you can cook up the exact number you need. The filling is also so good I’d recommend using it as stuffing, or as an accompaniment to your Christmas meat.  Just make it up as instructed, but rather than putting it into a pie crust, roll it into balls and bake in the oven for 5-10 minutes to firm up and heat through.

You also don’t have to decorate it how I have. In all honesty I wasn’t going to decorate it at all apart from crimping the edge, but I was experimenting with a new pastry for this one and it dried out quicker than expected and cracked when I put the top on. As I wanted it to look nice for the blog I used the leftover pastry to make roses to cover up the cracks, and then I wanted to make enough to make a ring so that it looked uniform. But if you do want to jazz it up a bit you can use the rest of the pastry to make roses or leaves for the top.

Recipe

Serves 6

Time 1 hour (plus cooking time)

Ingredients

For the filling

  • 1 tbsp Sunflower oil
  • 1 White onion, finely chopped
  • 1 Red onion, finely chopped
  • 2 Medium leeks, finely chopped
  • 2 Cloves garlic, crushed
  • 225g Chestnut mushrooms, sliced
  • 25g Dried cranberries
  • 340g Tin of butter beans, roughly chopped
  • 225g Ready-to-eat chestnuts, roughly chopped
  • 50g Hazelnuts, chopped
  • 5 Sprigs fresh thyme, chopped finely
  • Salt and pepper to taste
  • 3 tbsp Cranberry Sauce

For the pastry

  • 280ml Water
  • 115g Vegetable suet
  • 500g Plain flour
  • 1 tsp Salt to season
  • 20ml Soya milk to glaze

Method

  1. Put the oil into a large sauce pan over a medium-high heat. Add the onions, leeks, and garlic and gently fry for 5 minutes until soft and starting to caramelise.
  2. Add the mushrooms, cranberries, beans, chestnuts and hazelnuts and cook on a medium heat until soft and dry – this will take about 10 minutes.
  3. Add the thyme to the mix, season with salt and pepper and then set to one side whilst you make the pastry.
  4. Pre-heat the oven to 180˚C. Take a deep loose-bottomed 23cm pie tin and grease with butter (you can also use individual moulds if you want to make individual pies).
  5. Put the water in a medium saucepan and bring to the boil over a medium-high heat.
  6. Once boiling add the suet and stir to melt and combine.
  7. Put the flour and salt into a bowl and pour over the melted water-suet mix. Using a round bladed knife mix everything into a dough and then turn out onto a work surface and knead for 3 minutes until smooth.
  8. Take ¼ of the pastry and set aside for now. Roll out the other ¾ of the pastry into a large circle, about the thickness of a pound coin. Unlike shortcrust you want this pastry relatively thick to that it doesn’t break.
  9. Gently fold the circle of pastry in half and in half again so you have a quarter of a circle in front of you. Put the point of the quarter into the centre of the lined tin and then unfold the circle and push the dough into the corners and up the sides of the mould. You want a little bit of overhang.
  10. Spoon 1 ½ tbsp of the cranberry sauce into the base of the pie. Spoon ½ of the filling on top, then spoon the rest of the cranberry sauce over the filling. Top with the rest of the filling. Don’t worry if the mixture goes over the top of the tin, as this will make a nice dome when covered in pastry.
  11. Roll out the other ¼ of pastry into a circle of the same thickness as before. Put the circle on top of the pie and trim the excess by slicing with a knife at a 45˚ angle to the tin.
  12. Using your thumbs and index finger crimp around the edge of the pie to seal everything together. Take the milk and brush lightly over the top of the pie to glaze.
  13. Put the pie in the oven for 45-55 minutes until the pastry is golden brown. Take out of the oven and serve immediately with gravy and vegetables.

Thanks for reading!

Emma x