Tag: Main Course

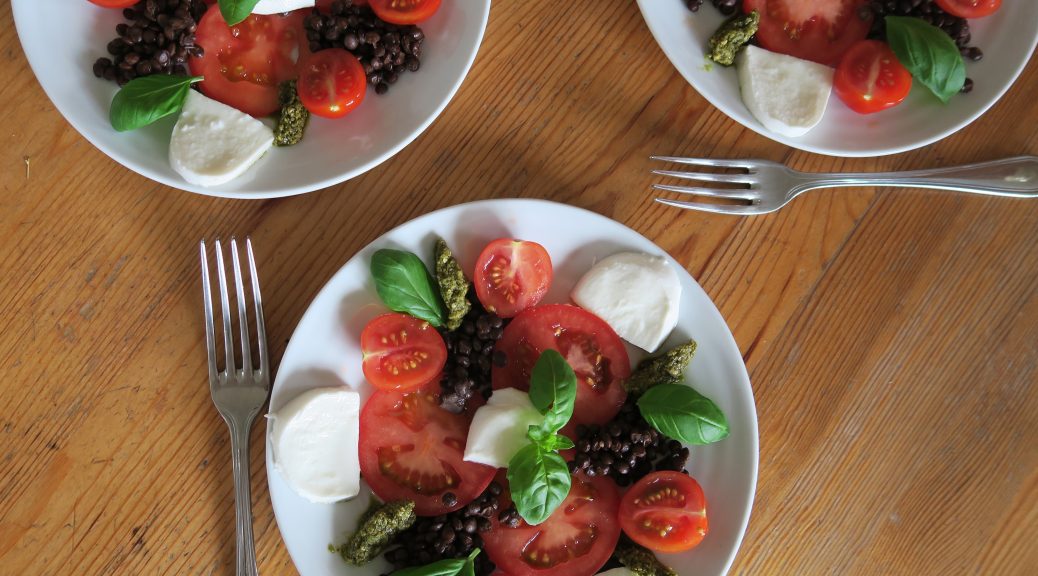
Tomato, Basil and Puy Lentil Salad

Tomato, Basil and Puy Lentil Salad

As promised here’s the starter dish I made for my friend Emma’s 18th Dinner Party the other day. Basil, tomato and mozerella is a match made in heaven, so it’s no wonder that when put on a plate all together it tastes insanely good! It’s also surprisingly simple and healthy for one of my dishes. With the puy lentils and mozerella there’s plenty of protein and all the tomatoes load up the plate with vitamins and fruity/vegetably goodness. These portions are fairly small as I was making them as a starter, but if you want to make this into a hearty meal you can just double all the quantities.

Recipe

Serves 4

Time: 10 minutes

Ingredients

  • 200g Puy Lentils
  • 8 Golden Cherry Tomatoes
  • 8 Cherry tomatoes
  • 2 Beef Tomatoes
  • 1 Ball of Mozzarella
  • 3 tsp Pesto
  • A few Basil leaves

Method

  1. Cook the puy lentils according to the packet instructions. Then spoon the puy lentils onto your plates.
  2. Slice the beef tomatoes into thin slices and then half the others and arrange them around the puy lentils.
  3. Tear the mozzarella into pieces and place on the plates.
  4. Spoon the pesto over the salad and finish with a drizzle of the pesto oil and garnish with the basil.

Thanks for reading!

Emma x

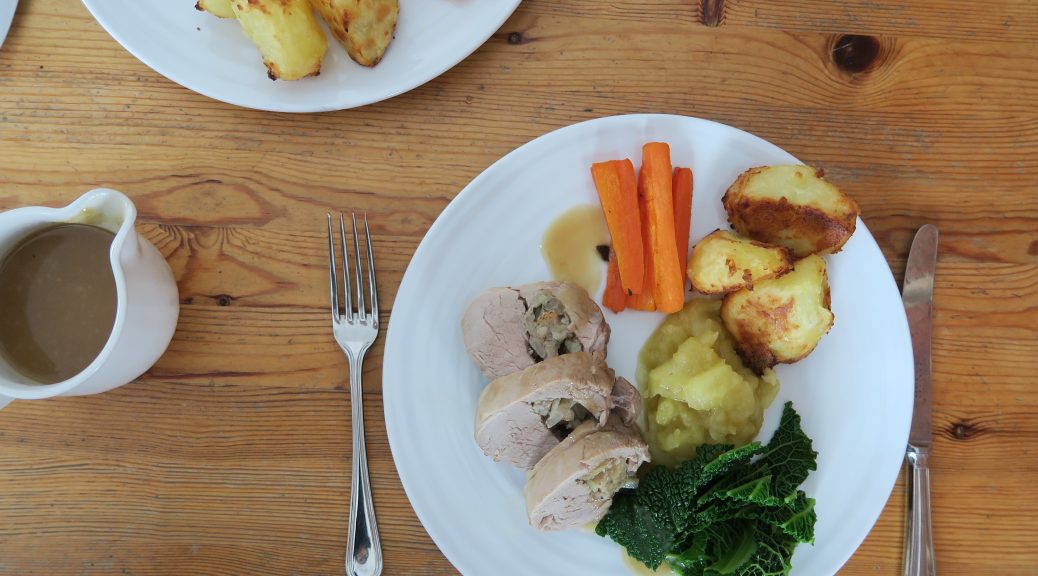
Stuffed Roast Loin of Pork with Apple Sauce, Roast Potatoes, Savoy Cabbage and Honey Glazed Carrots

Stuffed Roast Loin of Pork with Apple Sauce, Roast Potatoes, Savoy Cabbage and Honey Glazed Carrots

For several years now I’ve catered for dinner parties and yesterday I did another, this time for a close family friend’s 18th birthday. The menu consisted of:

Starter – Mixed Tomato and Puy Lentil Salad with Mozerella and Basil

Main course – Stuffed Roasted Pork with Apple Sauce, Roast Potatoes, Savoy Cabbage, and Honey Glazed Carrots

Dessert – Chocolate Fondants with Vanilla Ice Cream and Fresh Berries

I’ve already done a post on the fondants back in September (which you can find in the recipe index), and the next post is going to be on the tomato and puy lentil salad so keep an eye out for that! But yeah, this was the main course, and if I say so myself, it’s a darn good one. All the classical elements of a good roast pork dinner are there with a few fancy touches added in to make it super special and tasty. This one’s great all year round, for special occasions, large gatherings or cosy Sunday lunches.

Recipe

Serves 4

Time: 2 hours

Ingredients

For the Pork

  • 1 tbsp Vegetable oil
  • 1 White onion, finely chopped
  • 3 Sage leaves, finely chopped
  • 25g Fresh breadcrumbs
  • 4 Thick herb pork sausages
  • 2 Pork loins (about 0.5kg each)

For the Roast potatoes

  • 3 Large Baking potatoes
  • 2 tbsp Vegetable oil

For the Cabbage

  • 1 Savoy cabbage
  • 25g Butter

For the Carrots

  • 4 Large Carrots, cut into batons
  • 25g Butter
  • 1 tbsp Honey
  • 2 Thyme sprigs

For the Apple sauce

  • 3 Large Bramley apples
  • 45g Brown sugar
  • 30g Butter

For the Gravy

  • 2 tbsp Plain flour
  • 400ml Beef stock
  • 100ml Cider

Method

  1. Heat the oil in a saucepan and add the onions. Fry whilst stirring occasionally until the onions begin to caramelise. Transfer to a bowl to cool.
  2. Mix the onions with the sage, breadcrumbs, sausage and seasoning to make the stuffing.
  3. Put the pork onto a chopping board and cut it in half lengthways, making sure not to cut all the way through the meat.
  4. Using a spoon or your hands stuff the stuffing into the tenderloin. Close the loin back up to make it into it’s original shape. Tie the pork up with string in four places along the loin to keep it in place. Then put the pork onto some clingfilm and wrap it tightly. Leave to chill in the fridge for at least an hour before using.
  5. Now prep the roast potatoes. Pre-heat the oven to 200˚C. Bring a large pan of water to the boil. Peel the potatoes and chop them into halves or quarters depending on the size of the potatoes. Tip the potatoes into the water and leave to boil until they start to flake.
  6. Drain the potatoes and then put them back into the pan, add the oil and season with salt and pepper. Cover with a lid and shake the pan to coat the potatoes in the oil and to bash them up a bit – these flakes on the surface of the potatoes will help the, to crisp up.
  7. Tip the potatoes into a roasting tin and roast in the oven for half an hour, flipping them over occasionally so they crisp up evenly. Leave them to keep cooking whilst you move back to the pork.
  8. Rub the meat with salt a pepper and then place in a roasting tin. Roast in the oven for about 40 minutes until cooked through, the juices should run clear.
  9. Whilst the pork is cooking prepare the cabbage. Put the water into a pan and bring to the boil. Peel the leaves off the cabbage and then bunch them together and chop finely to shred. Add these to the boiling water and then leave to boil for 5-10 minutes until tender.
  10. Sieve the cabbage to remove the water. Then in the same pan melt the butter and then toss the cabbage leaves in it. Cover with a lid to keep warm and set aside for later.
  11. Now glaze the carrots. Boil a pan of water and add the carrot batons. Boil them until they are tender and a knife goes into them easily. Put the butter, thyme and honey into a pan and add the carrots. Heat gently over a medium heat until the sauce bubbles and glazes the carrots. Tip the mixture into a roasting tin and leave in the oven for the last few minutes of roasting the potatoes and pork.
  12. Next make the apple sauce. Peel, core and roughly chop the apples. Then put these apple chunks, the butter and sugar into a pan and cook for about 15 minutes until the apples break down and it becomes a sauce. Keep warm until needed.
  13. Transfer the pork to a plate to rest and then make the gravy. Spoon the meat juices into a pan and then add the flour and cook until the flour has absorbed all the juice – I find using a whisk is a good way to remove the lumps.
  14. Slowly add the stock and the cider until you have a smooth sauce. Leave to boil for about 5 minutes, whisking occasionally, until the mixture starts to thicken. Strain the gravy into a jug and serve with the pork, apple sauce, potatoes, carrots and cabbage!

Thanks for reading, and if anyone needs a dinner party caterer just hmu!

Emma x
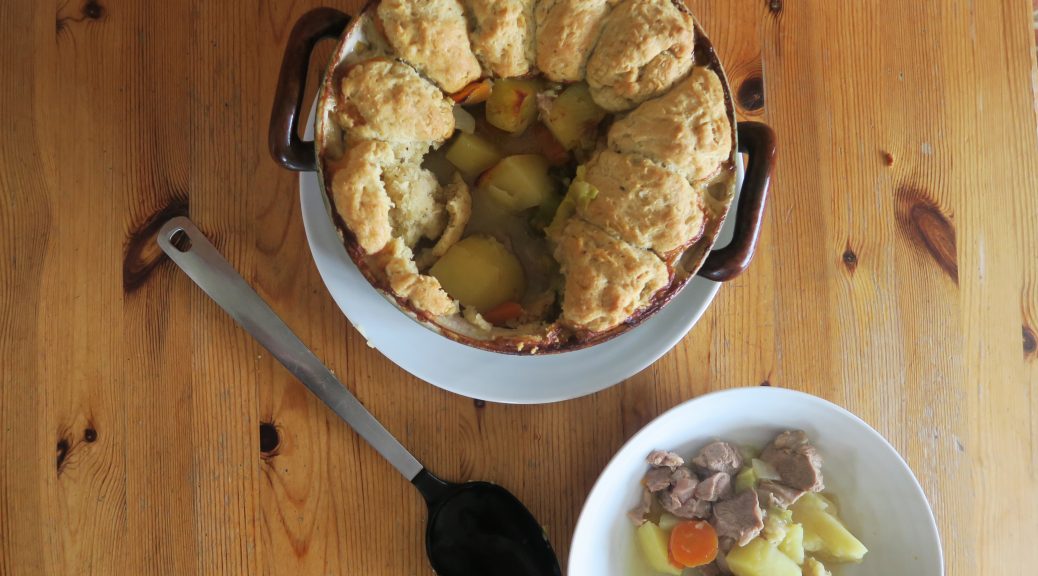
Irish Stew with Dumplings

Irish Stew with Dumplings

One day I’ll stop doing a themed dish for every post, but today’s not that day. Apparently it’s St Patrick’s day on Saturday so it’s time to start digging out the shamrocks and leprechauns to celebrate. Alongside that a good lamb and potato stew should definitely be on the menu. This one is full of nourishing veg and tender lamb shoulder, which goes really well with the light herby dumplings and warming broth to make a hearty meal all in one pot!

Stews also always taste better a few days after they’re made, so you can make this up to two days in advance without the dumplings, leave it in the fridge and then carry on the recipe from step 7 when you need it.

Recipe

Serves 6

Time: 30 minutes prep, 2 hours cooking

Ingredients

For the Stew

  • 2 tbsp Vegetable oil
  • 1 White onion, roughly chopped
  • 450g Lamb shoulder pieces
  • 2 Large baking potatoes, peeled and cut into quarters
  • 1 Leek, Finely sliced
  • 2 Large carrots, peeled an roughly chopped
  • 2 tbsp Plain flour
  • 750ml Beef stock
  • Salt and pepper to season

For the Dumplings

  • 150g Butter
  • 250g Self-raising flour
  • 2 tbsp Chopped mixed herbs

Method

  1. Pre-heat the oven to 180˚C.
  2. Put the oil into a large frying pan and put over a medium heat. Add the chopped onion and fry gently until it starts to caramelise. Tip this into an oven-proof casserole dish.
  3. Add the lamb pieces to the pan you cooked the onions in and fry until the pieces have browned all over. Season the meat and then add the lamb to the dish with the onions.
  4. Cover the lamb and onions with the chopped potatoes, leeks and carrots, and then mix it all together.
  5. Add the flour to the pan you cooked the lamb in and cook it on a gentle heat for about 3 minutes so it soaks up all the juices. Then slowly add the beef stock whilst stirring until you have a smooth, lump-free sauce.
  6. Pour this sauce over the meat and vegetables. Cover the casserole with a lid and then put it into the oven to cook for 90 minutes. Check on this several times to make sure the sauce hasn’t reduced too much, if the meat or vegetables are exposed cover with more water.
  7. Now make the dumplings. Put the butter and flour into a large bowl. Using a knife cut the butter into little pieces in the flour, and then go in with you fingers and rub the butter into the flours to make a mixture like breadcrumbs.
  8. Stir in the herbs, salt and pepper to season. Pour in 150ml water and stir with a round bladed knife to form a dough. Flour your hands and roll the dough into small balls.
  9. Put the dumplings around the edge of the stew and put back into the oven uncovered to bake for another 25-30 minutes.
  10. Serve!

Thanks for reading!

Emma x

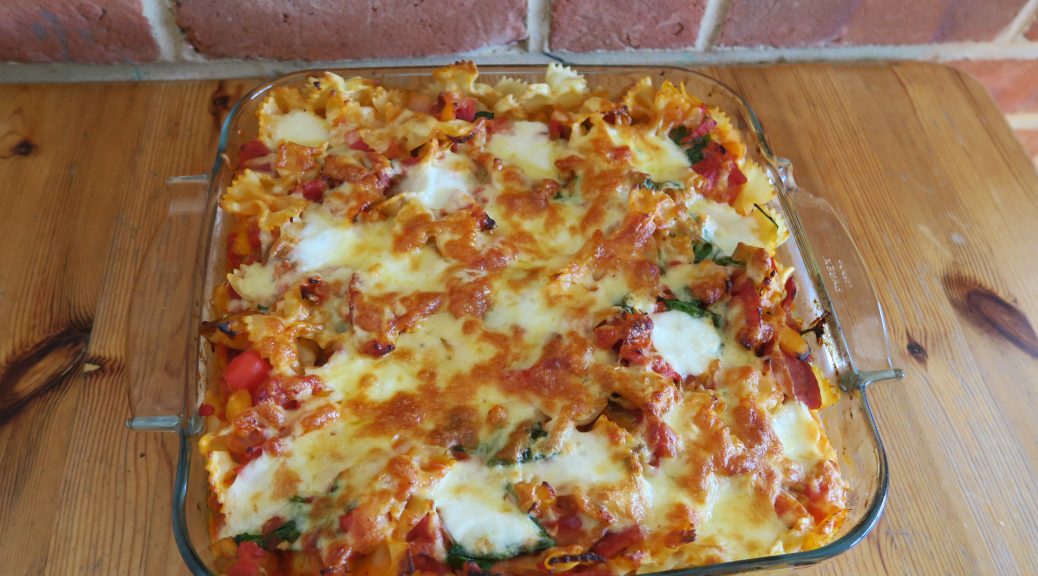
Chicken and Bacon Pasta Bake

Chicken and Bacon Pasta Bake

I’m heading towards the end of another term at art school and this one has just flown by. Having the time this year to paint, draw and bake as and when I want is a great experience and it’s sad to think I only have a few more months of it left, not to mention the incredible people I’m going to be leaving behind. Next year I’m going on to Uni and the proper student ‘living on a budget and working in a tiny kitchen’ experience that comes with it. When I get there I won’t have the money, time, or equipment to be knocking up a four tiered celebration cake each week (unfortunately) so I thought I’d start developing some quick, student-friendly meals to get me into the spirit of it all.

From what my friends have been telling me pasta is the main staple food for most students, and so a pasta bake was the first thing that came to mind when I thought of student cooking. Stuffed with cheap vegetables and meat, this pasta bake is a really easy, nutritionally sound meal to indulge on. It’s also easily adaptable for any dietary requirements, and can be frozen, so if you make too much just whop the rest in the freezer for another day. I find that a big bowl of cheesy pasta is sometimes all I need to get through a horrible essay, and this will defo do the job!

Recipe

Serves 6

Time: 45 minutes

Ingredients

  • 350g Pasta
  • 1 tbsp Vegetable oil
  • 3 Chicken thigh fillets
  • 8 Bacon rashers
  • 1 White onion
  • 1 Yellow pepper
  • 1 Red pepper
  • 2 Garlic cloves
  • 1 tbsp Tomato puree
  • 1/2 tsp Mixed herbs
  • 800g Chopped tomatoes
  • 100ml Single cream
  • 2 Handfuls of baby spinach
  • 150g Grated cheddar
  • 1 Ball of mozerella
  • 1 Handful fo Basil

Method

  1. Pre-heat the oven to 180˚C.
  2. Boil a pan of water over a high heat. Add the pasta and boil until it’s just cooked, but still has a bite. Leave to sit in the water until needed.
  3. Next pour the oil into a large saucepan and put over a medium heat. Cut the chicken into chunks with kitchen scissors and fry in the oil until it’s cooked on all sides. Take the chicken out of the pan and leave on a plate for now.
  4. Then put the grill on full heat and cook the bacon under it. Cook the bacon until it’s nice and crispy, turning it over half way through cooking.
  5. Peel and finely chop the onion and then add it to the pan you cooked the chicken in. Fry the onion until it begins to caramelise.
  6. Meanwhile deseed and chop the pepper, and then chop the garlic. Add these two the pan with the onion and fry for another 2-3 minutes.
  7. Add the tomato puree, herbs, chopped tomatoes, and the cooked chicken to the pan and leave to simmer for 10 minutes until the sauce starts to reduce.
  8. Add the cream and spinach to the pan, mix to combine, and then set to one side. Drain the pasta from the water and then add the pasta to the pan with the tomatoes. Stir everything together and then tip it all into a large oven proof dish.
  9. Sprinkle over the grated cheddar. Then tear the mozzarella into chunks and place this over the top of the pasta bake.
  10. Put the dish in the oven and bake for 15-20 minutes, until the cheese is melted and then serve with garlic bread and a side salad!

Thanks for reading!

Emma x

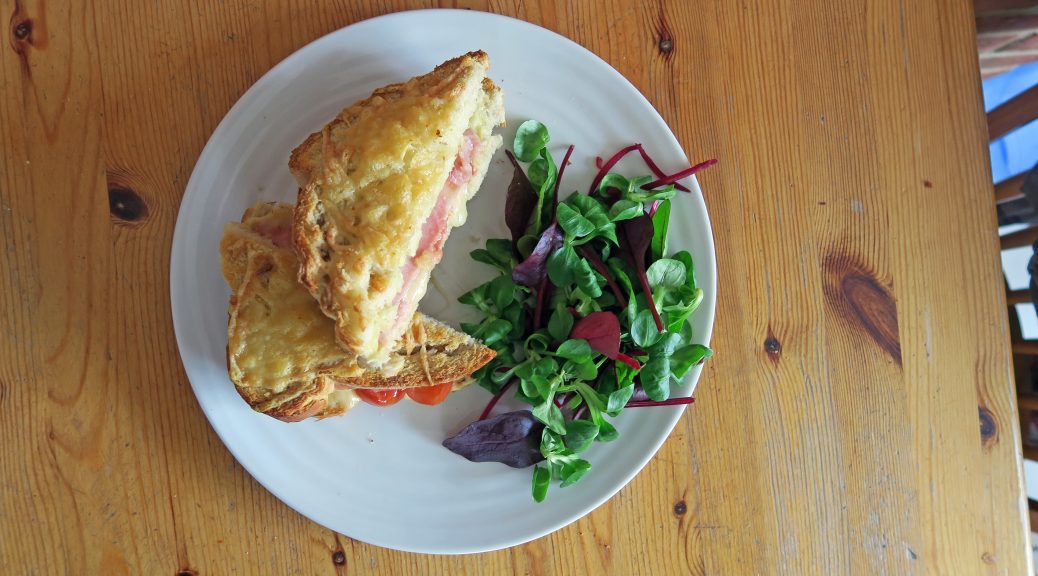
Croque Monsieur

Croque Monsieur

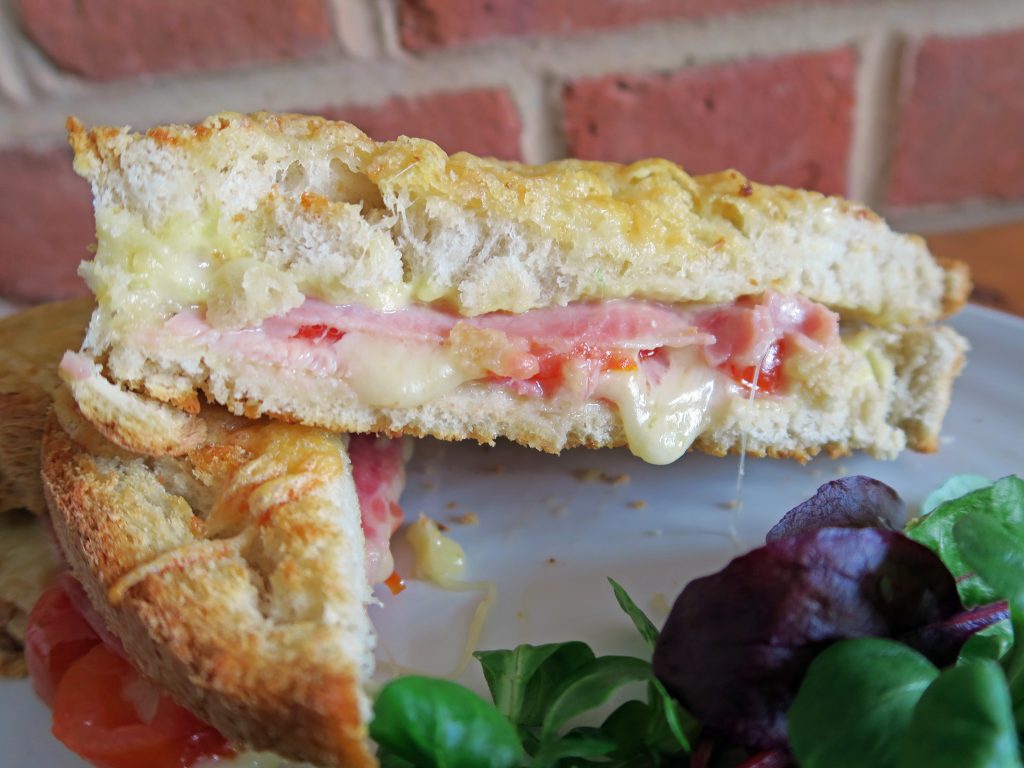
I’m not gonna lie to you, this is essentially a glorified cheese and ham toastie – but man is it a good cheese and ham toastie! It’s a ‘I think I just heard the hallelujah chorus when I took a bite’ kinda good if you hear me.

Unlike most toasties this one is a) French and b) has a cool cheese sauce in it which makes it incredibly tasty. It may seem like a bit of an efffort to take out a pan and make a sauce for a sandwhich, but trust me, it’s 100% worth it. You’ll also probably have some of this sauce left over, in which case keep it – it’s great on leeks, cauliflower, or with pasta and will keep in the fridge for 2-3 days!

I should point out that it’s not strictly traditional to put tomatoes in a croque monsieur, but hey, this is a blog and I like a bit of a fruity/sharp tang in the middle of my toastie. But it’s totally optional, so if you’re not a fan of tomatoes don’t let it put you off.


Recipe

Serves 1

Time: 15 minutes

Ingredients

For the Cheese sauce

  • 13g Unsalted butter
  • 13g Plain flour
  • 125ml Milk
  • 1/2 tsp English mustard
  • 35g Strong cheddar cheese, grated

For everything else

  • 2 Thick slices of white bread
  • 2 Slices of honey smoked ham
  • 2 Cherry tomatoes, sliced thinly
  • 100g Gruyere Cheese, grated

Method

  1. Begin by making the cheese sauce. Put the butter into a small saucepan and melt over a medium heat.
  2. Add the flour and stir to form a paste. Cook this paste in the pan for 1-2 minutes.
  3. Slowly add the milk to the paste, stirring in between each addition to make a really smooth sauce. I find using a whisk really helpful here as it helps to break up the lumps, and make sure you pour the milk in slowly as otherwise your sauce will be lumpy.
  4. When all the milk in incorporated, continue to whisk over a medium heat until the sauce thickens enough to hold its shape a little. Then add the mustard and grated cheddar cheese and whisk until the cheese is melted and all combined. Set aside for later.
  5. Pre-heat the oven to 180C. Take your bread, butter it lightly and then put it, butter side up, into the oven to crisp up. Once just starting to brown take it out.
  6. Turn the bread slices over so you’re working on the non-crispy sides. Spread the slices with the cheese sauce (about 1 tsp on each). Then put a ham slice on each bit of bread. Arrange the tomato slices on one of the pieces of bread and then sprinkle half of the grated Gruyere over them.
  7. Put the bread slice without tomatoes ontop of the one with tomatoes, crisp side out, to make a sandwich. Sprinkle the rest of the gruyere over the top and then bake in the oven for 5 minutes, until the cheese is bubbling and starting to brown.
  8. Take out of the oven and serve warm with a side salad!

Thanks for reading!

Emma x