Tag: Chocolate

Chocolate Cupcakes

Chocolate Cupcakes

When I was a lot younger I used to earn money by making and selling cupcakes at school fetes and bizarres. Most of my memories of these events are spending hours into the night before stressing out and piping onto hundreds of differently flavoured cakes. The picture below is of a very timid me at my first Christmas stall when I was 12. At this one I sold vanilla, lemon, coffee and walnut, ginger, chocolate, and caramel cakes.

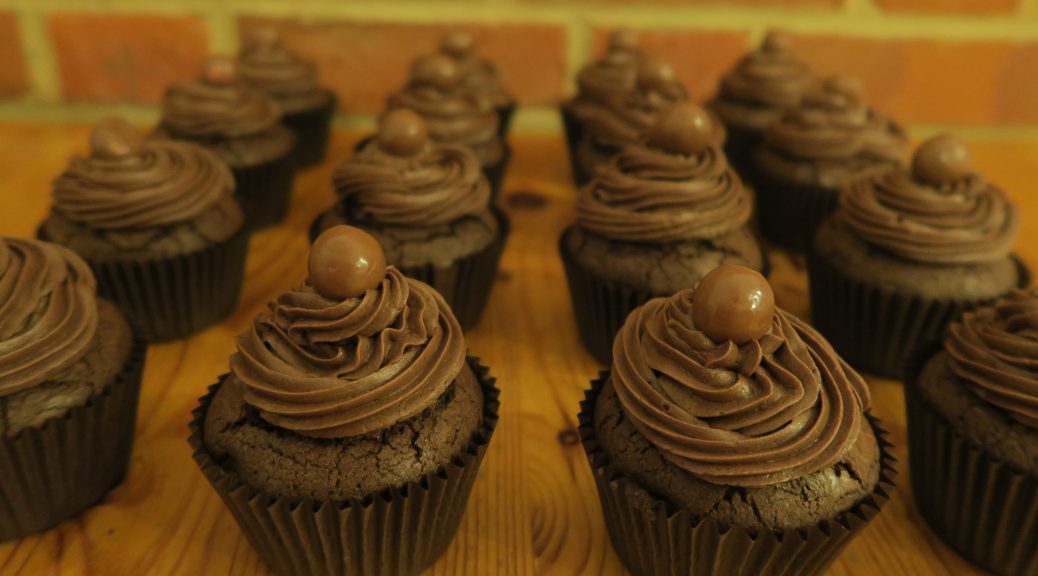
Without a doubt my best seller was my chocolate cupcakes topped with a Malteaser. I’d always have to make twice as many of them as any of my others as they’d sell out within the first half of the event.

Unfortunately, although I’ve made hundreds of these, I have no good photos of them. The two above photos are old ones from my cupcake selling days, before I learnt how to use a camera properly, and so they’re pretty blurry. Recently I made another batch (see below) for my Dad’s birthday, which inspired me to write a post on them. However, as I made them in the evening they have the unavoidable dark yellow tone that comes with artificial light. Nevertheless, they taste really good and by using a brownie-like mix they come out really squidgy and rich.

Recipe

Makes 12 Cupcakes

Time: 1 hour

Ingredients

  • 210ml Vegetable oil
  • 320g Light brown sugar
  • 1 tsp Vanilla extract
  • 4 Medium eggs
  • 80g Cocoa powder (not drinking chocolate, as it has added sugar and less cocoa, and so has much less flavour)
  • 130g Plain flour
  • 12 Malteasers

For the icing

  • 300g Unsalted butter
  • 265g Icing sugar
  • 50g Cocoa powder

Method

  1. Preheat the oven to 170˚C. Put 12 muffin cases into a muffin tin.
  2. In a large bowl whisk together the oil, sugar and vanilla. Add the eggs and whisk until fully combined. Add the cocoa and whisk again (go slowly here as the cocoa will go everywhere if whisked too fast). Add the flour and then whisk until fully mixed.
  3. Distribute the mixture between the cases using two table spoons, (I find about 1 1/2 tbsp for each cake works well). Put the cupcakes in the oven and bake for 20 minutes. Then reduce the oven temperature 150˚C and continue to bake until a skewer comes out clean when inserted into the middle of the cupcake (about 15 minutes more).
  4. Take the cakes out of the tins and leave to cool completely on wire racks.
  5. Meanwhile make the icing. Put the butter and icing sugar into a bowl and beat with a wooden spoon until smooth. Add the cocoa powder and continue to mix until it’s all combined.
  6. Put the icing into a piping bag fitted with a star shaped nozzle. Pipe the icing onto the cooled cakes in a spiral shape.
  7. Top each cake with a Malteser and serve!

Thanks for reading! Check out my social media pages (links on the side bar), and like/follow to stay updated.

Emma x

Orange, Balsamic, and Salted Caramel Chocolates with Honeycomb and Hazelnuts

Orange, Balsamic, and Salted Caramel Chocolates with Honeycomb and Hazelnuts

This is one of those rare occasions when my cooking coincides with my art practise. I’ve recently been inspired by multi-sensory art and the general stimulating of the other senses to enhance our perception of visual art. For this I made some photograms in response to a trip to Bristol I went on the other day. I then analysed these photograms and developed a chocolate to reflect them. WARNING: things are about to get seriously pretentious!

I decided to go for a dark chocolate shell to represent the deep dark tones in the image. I then filled it with a orange balsamic salted caramel – bitter, sharp, sweet and salty tastes to reflect the structural and mechanical elements of the photos, whilst being smooth and soft in texture to reflect the softer marks captured on the paper. Finally, honeycomb and hazelnuts to give some texture, as the images are also highly textured, and to provide a roasted, caramelised flavour. It sounds weird, but it kinda made sense when I was working through it. I then got my friends to eat the chocolates in front of the photograms (as demonstrated by the lovely Lisa above) and voila – multi-sensory art!

As with all good chocolate work, this does require some techy stuff to make it, so here’s a quick heads up of what you’ll need:

  • A plastic mould to construct the chocolates in – I’d recommend plastic over silicon. It’s harder to get them out but you’ll get a more defined shape and your chocolates will have a greater chance of keeping their shine if they’re made in a plastic mould.
  • A good digital thermometer. This is essential for properly tempered chocolate which will result in chocolates that are shiny and crisp to bite into. It will also prevent the chocolates from getting a ‘bloom’ which is when the chocolate sets with a white chalky finish, so if you want a professional finish tempering’s the way to go.
  • You should also use a chocolate with high cocoa solids (higher than about 75% is good). You can find this out by looking at the back of the packaging. A higher cocoa content means that the chocolate is higher quality and will therefore temper better.

Recipe

Makes 21

Time: 2 hours

Ingredients

  • 400g Dark chocolate
  • 100g Roasted, chopped hazelnuts

For the Honeycomb

  • 100g Caster sugar
  • 40g Golden syrup
  • 1 tsp Bicarb

For the Caramel

  • 125ml Orange juice
  • 45ml Whipping cream
  • 1/2 tbsp Vanilla bean paste
  • 150g Caster sugar
  • 20g Liquid glucose
  • 100g Salted butter
  • 7 ml Balsamic vinegar

Method

  1. Begin by tempering the chocolate. Finely chop the chocolate with a serrated knife. Then put 300g of this chocolate into a heatproof bowl and place over a pan of gently simmering water (aka a bain marie), making sure that the bottom of the bowl doesn’t touch the water.
  2. Melt the chocolate until it reaches 55-58°C on an electric thermometer and then take the chocolate off the heat. Put 100g of the melted chocolate into another heatproof bowl and put back over the bain marie to keep it warm.
  3. Meanwhile add the other 100g of chopped chocolate you set aside earlier to the remaining 200g of melted chocolate and stir constantly until the temperature decreases to 28-29°C.
  4. Pour the melted chocolate you’ve been keeping warm back into the main bowl of chocolate and combine to raise the temperature to 31°C. Your chocolate’s now ready to use!
  5. Pour the chocolate over your mould so every hole is fully filled to the top. Tap the mould on your worktop to get rid of any bubbles and then turn the mould 180° over a container and let the excess chocolate drip out.
  6. Once the chocolate has mostly stopped dripping you should have the mould coated with a thin layering of chocolate. Take a chocolate scraper or palette knife and move the blade over the top of the mould at a 45° angle to take all the excess chocolate off the surface. Keep the excess chocolate for later and leave the mould to set completely.
  7. Now move onto the fillings. To make the honeycomb begin by putting the sugar and golden syrup into a pan. Put over a medium heat and cook, whilst stirring until the sugar has dissolved. Then stop stirring and leave the mixture to boil until it reaches a deep amber colour.
  8. Take the mixture off the heat and quickly tip in the bicarb. Stir quickly with a wooden spoon and then turn it out onto a baking sheet and leave to set completely.
  9. Next make the caramel. Put the orange juice into a pan with the vanilla and gently simmer over a medium heat until it’s reduced by half.
  10. Meanwhile put the cream in another pan over a low heat and start to warm through.
  11. Then put the sugar and glucose into another pan and heat gently whilst stirring until the sugar crystals dissolve. Then leave the mixture to boil until it becomes a deep amber caramel.
  12. Take the caramel off the heat and add the warmed cream, stand well back when you do this as the mixture will spit a LOT. Mix the cream in and then do the same with the reduced orange juice.
  13. Cut the butter into cubes and then stir them into the caramel, a few chunks at a time. Then leave the mixture to cool before stirring in the vinegar. Transfer the caramel to a plastic piping bag and leave in the fridge for 2 hours to set a little.
  14. Once everything is ready you can start to fill your chocolates. Put the leftover chocolate from earlier back over a bain marie to re-melt gently.
  15. Cut a small bit off the end of the piping bag filled with caramel and pipe a little bit of caramel into each chocolate shell – you want about half the shell to be filled with the caramel.
  16. Break your honeycomb up into very small pieces and put one or two chunks into the chocolates, pushing them down into the caramel. Sprinkle over the roasted hazelnuts and then leave them to sit for a couple of minutes so the nuts sink into the caramel.
  17. Take your re-melted chocolate and like you did before pour it over the mould. Shake the mould to make sure the chocolate has no bubbles. Then take your palette knife or scraper and drag the blade along the top of the mould at a 45° angle to remove any excess chocolate from the top of the mould. You should now have 21 chocolates filled with your fillings and topped off with a layer of chocolate.
  18. Leave the chocolates to set at room temperature. It’s important not to put them into the fridge when they’re setting as this could cause the chocolate to ‘bloom’ and get a white sheen. Then, once they’re completely set, put them into the freezer for 10 minutes (this will make it a lot easier to de-mould them).
  19. Turn the mould over and bash it on a work top to get the chocolates out (if you have a silicon mould you can just pop them out).
  20. Share and enjoy!

Thanks for reading,

Emma x

Ultimate Hot Chocolate

Ultimate Hot Chocolate

Most people who know me know that I’m not a hot drinks person. Offer me a tea or coffee and I’m the one who goes  ‘have you got water?’ But I have to admit that a good hot chocolate at the right time is a great thing. This week I’ve been invidulating an art exhibition in an edgy, rustic, barn kind of a place. Whilst it’s great for the art, it’s major downside is that it’s FREEZING. Luckily a flask of this hot chocolate has been there to stop me from turning into an ice cube. When it’s made with milk, cream and chocolate, not just water and powder, it becomes a thick, sweet and nourishing, which is really needed for the current weather!

I love making confectionary and so I’ve included a recipe for marshmallows here. It does take a little time to do, and I’d recommend making them at least 2 hours before you use them, so if that’s too much to ask you can easily use shop-bought ones. I will say though that these little marshmallow blobs are really good in this, and making them is really worth it!

Recipe

Serves 2

Time: 10 minutes for the hot chocolate, 30 minutes plus setting time for the marshmallows

Ingredients

For the marshmallow

  • 150g Granulated sugar
  • 5g Liquid glucose
  • 1 Large egg white
  • 3 Gelatine sheets

For the hot chocolate

  • 450ml Whole milk
  • 50g Dark chocolate
  • 70g Milk chocolate
  • 80ml Single cream
  • 1/4 tsp Cinnamon
  • Pinch of salt
  • A few chilli flakes (optional)

To decorate

  • 100ml Double cream, whisked to soft peaks
  • Some chopped hazelnuts and raspberries (optional)

Method

  1. Begin by making the marshmallow. Put the sugar and 150ml water into a medium sized saucepan. Bring to the boil whilst stirring over a medium heat.
  2. Once the mixture starts to boil stop stirring and leave it until it reaches 127˚C. Whilst waiting for this to happen leave the gelatine to soak in 50ml water.
  3. Put the egg whites into a very clean metal or glass bowl and whisk up to firm peaks (a stand alone mixer is really useful for this as in a bit you’re going to have to whisk for a long time in a bit, but if you don’t have one (like me) an electric hand whisk will also work).
  4. When the sugar reaches the right temperature add the gelatine and the water it’s soaking in and stir to dissolve.
  5. Continue whisking the eggs and simultaneously pour the syrup into them in a slow stream until it’s all whisked in.
  6. Continue to whisk for another 15-20 minutes until the mix is thick and holds it’s shape – the mixture should also have mostly cooled to room temperature by then.
  7. Line a baking tray with clingfilm, and then sift a little cornflour and icing sugar in an even layer over it. Transfer the marshmallow mix into a piping bag with a round nozzle and pipe blobs of marshmallow onto the lined tray. (Alternatively you can line a small tin with clingfilm, icing sugar and cornflour and pour the mixture into it to set). Leave for at least an hour (or better over night) to set completely.
  8. When your marshmallows are ready it’s time to make the hot chocolate.
  9. Put the milk and chocolates into a medium sized saucepan and heat whilst whisking until the chocolate is completely melted.
  10. Then pour in the cream and add the cinnamon, salt and chilli flakes and whisk to combine. Continue to heat until it just reaches the boil and then serve…
  11. Pour this hot chocolate into a mug and serve with freshly whipped cream, raspberries, hazelnuts and your perfect marshmallow blobs!

Thanks for reading!

Emma x

Blackforest Daquoise Gateau

Blackforest Daquoise Gateau

One of the most stunning retro desserts out there is the black forest gateau – and it has three of my favourite things: chocolate, cherries and a woodland association. Over the years I’ve become a bit addicted to taking these delicious flavours and have put them into almost anything and everything – but nothing beats a classic cake based gateau.

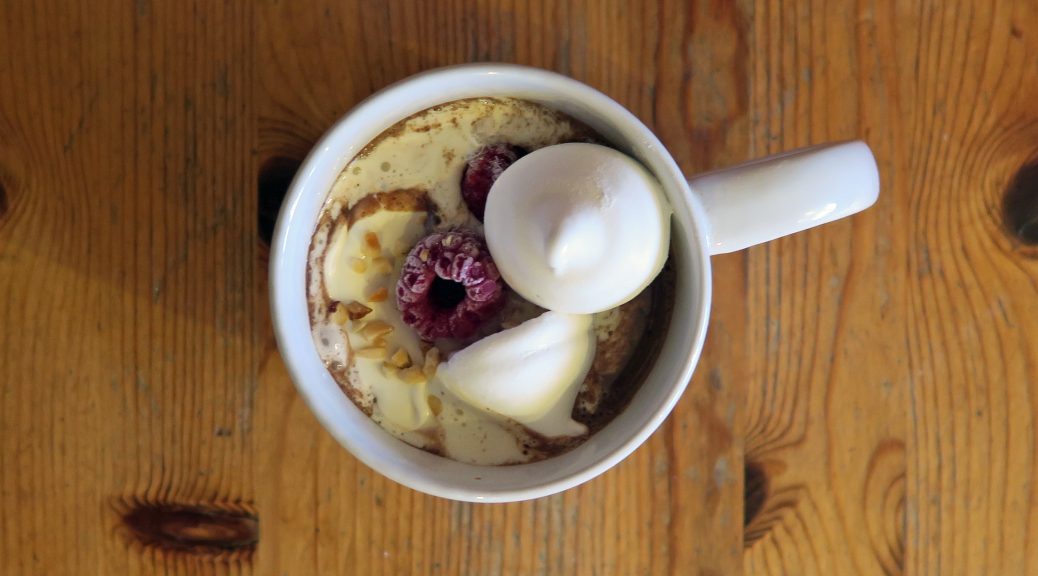
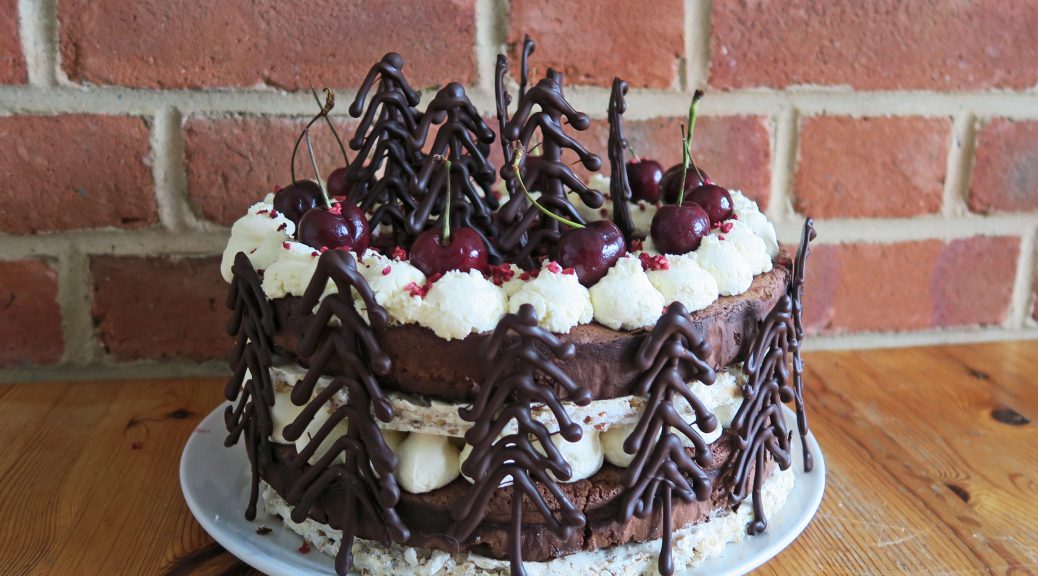
That said I have adapted this slightly by adding a daquoise, aka a nutty meringue, which adds a bit of texture and brings some sweetness to contrast the rich chocolate cake and creamy filling. Whilst I think this is as good as it gets, if you’re short on time or want to go for a more traditional gateau you could leave out the meringue layers and you’d still end up with something delicious. On the other hand, you could leave out the cake and then you’d end up with a derlish layered, hazelnut and cherry pavalova!

(Note: before starting make sure you have 2 cakes tins 21cm in diameter, and an electric or stand-free mixer!)

Recipe

Serves 12

Time: 2 1/2 hours

Ingredients

For the Daquoise

  • 170g Chopped hazelnuts
  • 200g Caster sugar
  • 18g Cornflour
  • 4 Large egg whites
  • Pinch salt

For the Chocolate cake

  • Butter for greasing
  • 200g Golden caster sugar
  • 7 Large eggs, separated
  • 3tbsp Cocoa powder
  • 2 tbsp Morello cherries (with juice)
  • 200g Dark chocolate

For the Filling

  • 600ml Double cream
  • 1 tbsp Vanilla bean paste
  • 4 tbsp Kirsch
  • 200g Morello cherries

To Decorate

  • 200g Dark chocolate
  • 2 tsp Dried raspberries
  • A handful of fresh Cherries

Method

  1. Pre-heat the oven to 180˚C.
  2. Begin by making the daquoise. Put the hazelnuts into a small roasting tin and roast in the oven for 5-10 minutes, until just starting to colour. (This is an important step as it’ll massively increase the flavour of the nuts).
  3. Leave to cool and then mix with 75g of the sugar and the cornflour. Set to one side for later.
  4. Lower the oven temperature to 150˚C for the meringues. Line 2 baking trays with baking paper. Take a 21cm diameter tin and draw round it onto the sheets of baking paper to act as a guide for pipping later. Turn these sheets over so that the pencil line is on the other side of the paper to that which you’ll pipe on.
  5. Take a super clean metal or glass bowl and put the egg whites into it.
  6. Add the salt and then whisk with an electric hand whisk (or a stand-free mixer) until it forms soft peaks (can just hold it’s shape).
  7. Continue whisking and add the other 125g caster sugar, one 1 tbsp at a time until it’s all incorporated.
  8. Keep whisking until the mixture becomes glossy and forms a stiff peak.
  9. Then take a large, stiff spatula and gently fold the hazelnuts into the meringue. From here you’ll need to work quickly as the oils in the nuts will start to deflate the meringue.
  10. Take a pipping bag with a round nozzle and fill it with the meringue. Then pipe onto the lined baking trays in a spiral, starting from the edge of the circles you drew to the centre.
  11. Bake in the oven for about 40 minutes, until crisp to the touch. Then turn the oven off and leave the meringues to cool in the ovens.
  12. When completely cool take out of the oven and set to one side for later.
  13. Now move onto the chocolate sponge. Increase the oven temperature to 180˚C. Line two cake tins, the same ones you used to draw round rings for meringue, with butter and baking paper.
  14. Put the sugar and egg yolks into a bowl and whisk until pale, fluffy and thick. You can test if it’s ready by taking the whisk out of the mixture, and if the trail it leaves is visible for 3 seconds or more it’s thick enough. Add the cocoa powder and cherries and then whisk to combine.
  15. Put the chocolate into a heatproof bowl over a pan of simmering water. Leave to melt and then fold into the sugar mixture.
  16. In metal or glass bowl whisk the egg whites to soft peaks.
  17. Add 1/3 of the egg whites to the chocolate mixture and mix in. Then fold in the rest of the egg whites with a large spatual until the batter is uniform in colour, with no flecks.
  18. Pour the batter into the two tins, making sure each has the same amount of mix. Spread the mixture around the tins so it’s an even thickness and then bake for 12-14 minutes, until risen, and just firm to the touch.
  19. Take out of the tins and leave on wire racks to cool completely.
  20. Whilst waiting for the cakes to cool move onto the fillings and decorations. Pour the cream into a bowl and add the vanilla. Then whisk it up until soft peaks start to form – be careful not to over whisk or it won’t pipe smoothly. Transfer this cream to a piping bag with a round nozzle and leave in the fridge until needed.
  21. Then take the chocolate and melt it in a heatproof bowl over a pan of simmering water. Take a piping bag with a small round nozzle and pour the melted chocolate into it.
  22. Line a baking tray with greaseproof paper. Take a pencil and draw some trees about 10cm maximum in height. Turn the paper over and then pipe over your designs with the chocolate. It’s worth piping more than you think you’ll need in case some break. Leave these to set at room temperature. When completely set, transfer them to the freezer to make them easier to work with when it comes to decorating the gateau.
  23. When all the elements are ready you can start assembling the gateau. Put one of the meringue layers on the plate or board you want to display it on. Top with one of the chocolate sponges, and brush the sponge with ½ of the kirsch. Scatter the cherries over the sponge and then pipe blobs of the cream over the cherries. Then put the second meringue layer onto the cream and repeat the layering of the cake, cherries and cream, although this time only pipe two rings of cream on the top of the cake.
  24. Take a sharp knife and make small incisions in the top of the gateau where you want to position your chocolate trees. Gently peel the trees off the baking paper (a palette knife is useful for this) and stick them into the top of the gateau in the gaps you just made. Decorate with the fresh cherries and freeze-dried raspberries, and then finish with a dusting of cocoa powder!

Thanks for reading! Any comments, requests or queries don’t hesitate to ask…

Emma x


Chocolate, Orange and Thyme Pancakes

Chocolate, Orange and Thyme Pancakes

As the title of this blog is Cocoa and Thyme I thought it was about time I make a recipe to show these two ingredients at their best. Whilst it’s not yet an every-day flavour pairing, chocolate and thyme is a contemporary flavour combo that’s becoming very popular in fine dinning restaurants. Since pancake day is on Tuesday I’ve decided to incorporate it into a delicious pancake dish!

It’s a bit of an acquired flavour combo so I understand that it probably won’t be for everyone, but if you like being a bit adventurous it’s a worthwhile experiment. However, these pancakes are also insanely fluffy and delicious, so even if you’re not up for wacky flavours I’d recommend making them and topping them with whatever topping you tend to go for. In my case that’s lemon juice and sugar, but nutella, banana, golden syrup, bacon, strawberries, or anything else that takes your fancy will also go really well with these.

Recipe

Serves 4

Time: 45 minutes

Ingredients

For the Orange syrup

  • 190g Sugar
  • 110ml Water
  • 190ml Orange juice
  • 1 tbsp Cornflour
  • 2 tbsp Butter

For the Chocolate sauce

  • 50g Dark chocolate
  • 25g Butter
  • 125ml Double cream
  • 1 tbsp Caster sugar
  • Thyme leaves, chopped

For the Pancakes

  • 300g Self-raising flour
  • 1 ½ tbsp Baking powder
  • 60g Caster sugar
  • 2 Large eggs
  • 200ml Milk
  • Vegetable oil for greasing

Method

  1. Begin by making the orange syrup. Whisk together the sugar and water in a pan over a medium heat until the sugar is dissolved. Bring the mixture to the boil.
  2. Then, in another bowl whisk the orange juice and cornflour. Pour this mixture into the sugar and water pan and simmer whilst whisking constantly, until the mixture thickens. Stir in the butter until melted and then leave covered, to keep warm, until needed.
  3. Then make the chocolate thyme sauce. Put the chocolate into a heatproof bowl over a pan of simmering water and leave to melt. In another pan put the butter, sugar and cream and heat gently until melted together.
  4. Pour the chocolate into the cream mix and add the chopped thyme leaves. Stir until smooth. Pour into a jug and set aside until later.
  5. Now make the pancakes. Put the flour, baking powder and caster sugar into a bowl. Mix to combine and then make a well in the centre. Add the egg and milk in the well and then whisk until combined and smooth.
  6. Put a large frying pan with 1 tbsp of vegetable over a medium heat. Using a ladle pour a neat circle of batter into the middle of the pan. Leave to cook for 1-2 minutes, until bubbles start to form on top, and then turn over and cook on the other side.
  7. Once cooked on both sides, (when brown spots start to form on the surface you know they’re done) transfer them onto a large plate.
  8. Repeat with the rest of the batter, creating a stack of pancakes. In between each pancake pour a little of the orange syrup to keep the pancakes moist. Once all the batter is used pour the chocolate sauce over the stack. Serve with fresh orange segments, thyme leaves and the rest of the orange syrup and chocolate sauce.

Thanks for reading, and happy pancake day!

Emma x