Tag: Book Theme

Chocolate Ginger Biscuit Shards

Chocolate Ginger Biscuit Shards

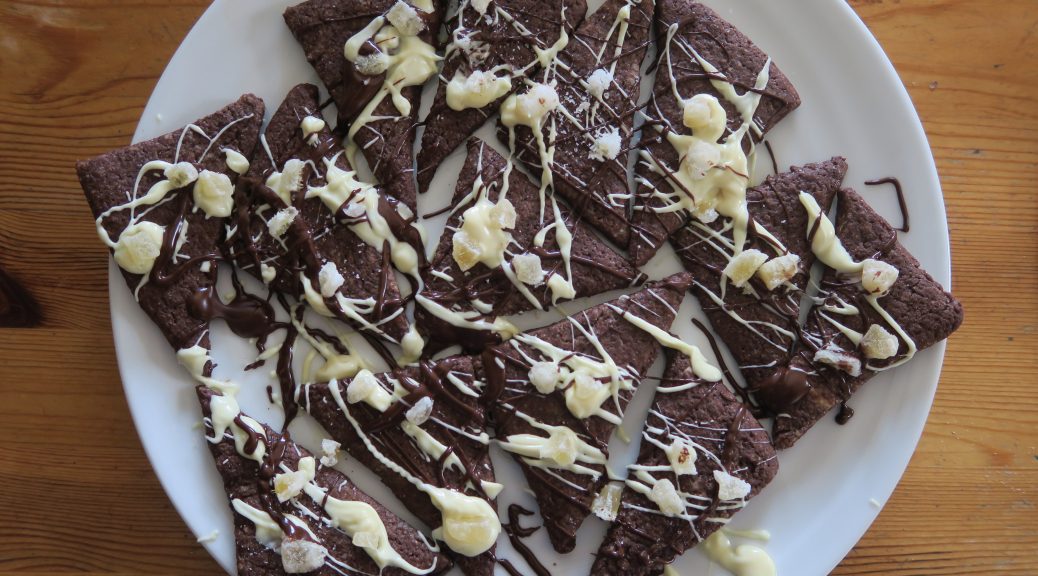
The final addition to our afternoon tea stack are these little chocolate ginger biscuit shards. These are so easy and fun to make so they’re perfect for baking with small children, and you can easily leave out the ginger if it’s not your cup of tea. As with most biscuits you can also get really creative with the decoration! I’ve just gone from a drizzle of chocolate and some crystallised ginger, but these are also a great biscuit base for icing and so on.

Recipe

Makes 20 biscuits

Time: 30 minutes

Ingredients

  • 200g Unsalted butter
  • 330g Plain flour
  • 50g Cocoa powder
  • 3 tsp Ground ginger
  • 200g Caster sugar
  • 1 Medium egg
  • 50g Dark chocolate
  • 50g White chocolate
  • A little Seasalt
  • Crystallised ginger to decorate

Method

  1. Put the butter and flour into a bowl and cut the butter up into small pieces using a round bladed knife. When you can’t cut the butter up any further go in with your finger and rub the butter into the flour until the mixture resembles breadcrumbs.
  2. Stir the cocoa powder, ginger and sugar into the mixture. Then add the egg and mix together until a dough forms. Wrap the dough in clingfilm and then chill it for at least 20-30 minutes.
  3. Pre-heat the oven to 180˚C and line 2 baking trays with baking paper.
  4. Roll the dough out between two sheets of clingfilm and then use a knife to cut the dough into triangles (or any other shapes you want). Transfer the biscuits to your lined baking trays and then bake in the oven for 12-15 minutes until starting to firm (the biscuits will firm up a lot more once cooled down).
  5. Leave the biscuits to cool for a few minutes and then move them onto a wire rack to cool completely.
  6. Now prep the decoration. Put the dark and white chocolate into separate bowls over pans of simmering water and leave to melt.
  7. Cover a surface in baking paper and arrange the biscuits over it. Then drizzle the biscuits with the two chocolates (you can either use a pipping bag or a teaspoon). Scatter the biscuits with the crystallised ginger and a little seasalt.
  8. Leave the chocolate to set and then serve! These will keep in an airtight container for 3-4 days.

Thanks for reading!

Emma x
Passion Fruit and Chocolate Profiteroles

Passion Fruit and Chocolate Profiteroles

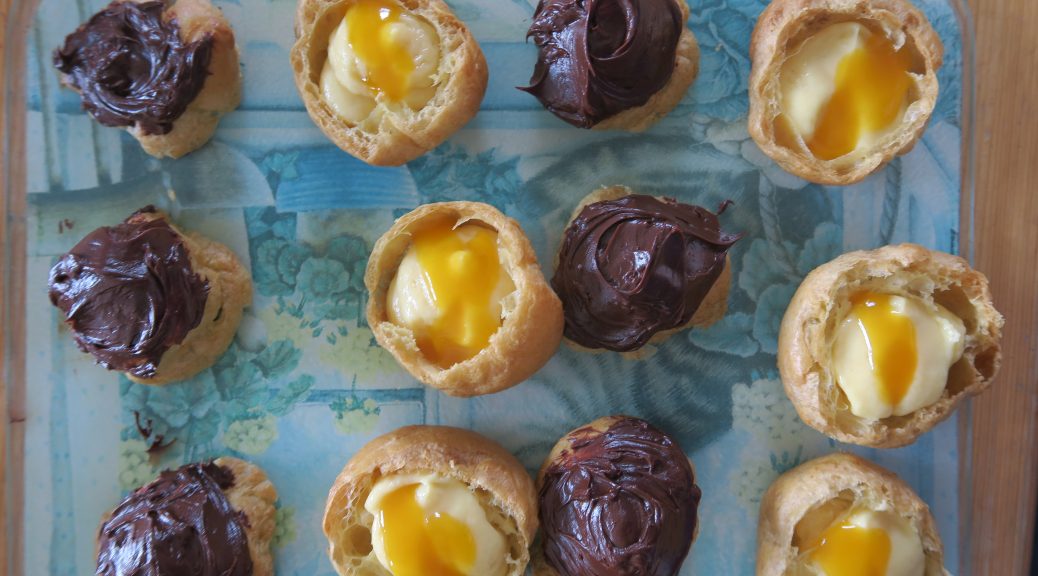
Every afternoon tea stack needs some choux pastry, and who doesn’t love profiteroles? These ones are stuffed with a passion fruit creme patisserie which gives a great tang to marry with the rich chocolate ganache on top. If you’re not a fan of passion fruit these also work really well with orange zest  or even just as plain vanilla creme pat.  If you’re not keen on making creme pat you could even go super traditional and just fill the profiteroles with whipped cream!

Recipe

Makes 25

Time: 2 hours

Ingredients

For the choux pastry

  • 110g Unsalted butter
  • 120g Plain flour
  • 3 Medium eggs

For the filling

  • 250ml Whole milk
  • 1 tbsp Vanilla bean paste
  • 50g Caster sugar
  • 3 Egg yolks
  • 10g Cocoa powder
  • 10g Cornflour
  • 25ml Passion fruit curd (or coulis – preferably with no seeds)

To decorate

  • 100ml Double cream
  • 100g Dark chocolate

Method

  1. Begin by making the choux pastry. Put the butter and 450ml water into a large saucepan. Bring to the boil and wait until the butter has melted.
  2. Tip in the flour and mix really quickly with a wooden spoon until the mixture has formed a ball and is lump-free. Tip the dough into a bowl and spread it out as much as possible to help it cool down. Leave until cool (about half an hour).
  3. Meanwhile pre-heat the oven to 180˚C. Then line 2 baking trays with baking paper. Draw 10-15 circles, about 4cm in diameter, with a pencil  on each baking sheet (it can be useful to use a lid or cookie cutter as a stencil to help!) Then turn the paper over so that the lines are on the other side.
  4. Now add the eggs to the dough, one by one, beating well in between each addition. You might not need all the eggs so between each addition test the consistency. You want the mixture to be thick and to hold it’s shape but to be pourable, if you pick up a bit of the pastry with a spatula and then shake it once you should get a ‘V’ shape of dough hanging off the end of the spatula.
  5. Transfer the pastry to a piping bag with a 1cm round nozzle. Pipe blobs of pastry onto your lined baking trays, using the circles you drew earlier as a guide. Then dip your finger in some water and dab down on any peaks or mis-shaped bits of the mounds.
  6. Bake the profteroles in the oven for 30-40 minutes until golden brown and risen. Then take the profiteroles out of the oven, quickly prick each one in the side with a knife and then put them back in the oven for 5-10 minutes to dry out even more (this will stop the profiteroles from collapsing once out of the oven). Then leave the profiteroles to cool completely on wire racks.
  7. Now make the crème patisserie filling. Put the milk and vanilla into a saucepan and bring to the boil.
  8. In another bowel mix the sugar, egg yolks and two flours until fully combined. Once the milk is heated, remove the pan from the heat and gently pour the milk into the egg mixture, whisking constantly.
  9. Once combined pour the mixture back into the pan and put the pan back over a heat. Whisk on a medium heat until the mixture boils and thickens.
  10. Take the mixture off the heat and stir in half the passionfruit curd. Pour the custard into a jug and cover with cling-film to prevent a skin from forming. Set aside for later.
  11. Now make the ganache. Chop the chocolate up finely and then put it into a bowl.
  12. Pour the cream into a small saucepan and bring just up to the boil. Then pour the hot cream over the chopped chocolate and whisk until the chocolate has melted and the mixture is smooth.
  13. When the profiterole shells have cooled down slice one in half with a sharp knife and place the ‘tops’ next to the ‘bottoms’.
  14.  Pipe a blob of the creme patisserie into the base of each of the bottom shells. Then spoon a little of the passionfruit curd over the top of the creme pat.
  15. Next take one of the top profiterole halves and dip it into the ganache. Run your thumb along the side to stop drips and then repeat with the rest of the tops.
  16. Finally put the tops of the profiteroles onto the bottoms and serve!

Thanks for reading!

Emma x


Bakewell Tartlets

Bakewell Tartlets

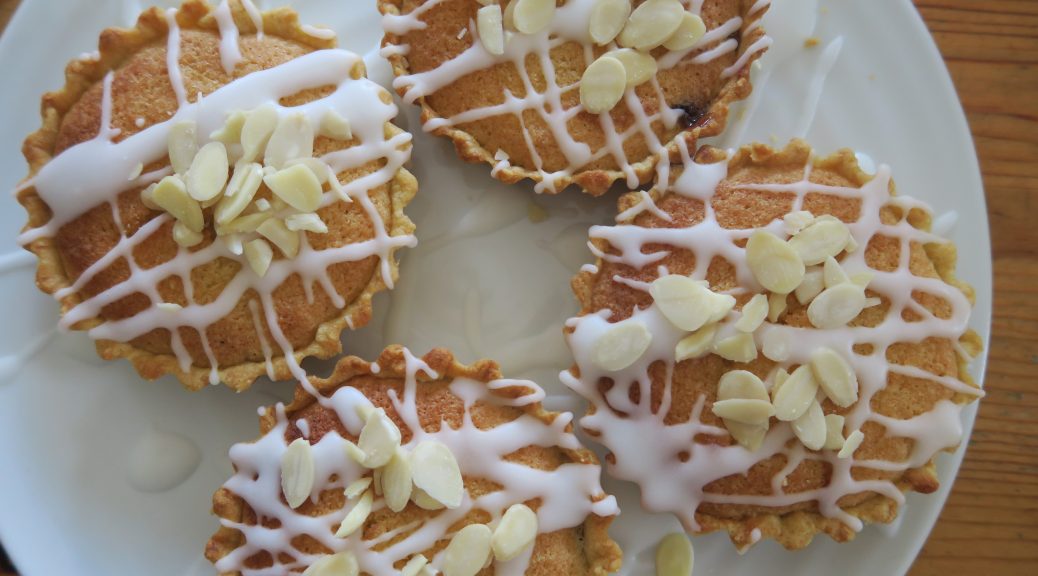
As the summer is coming to an end we’re starting to hit peak jam making time where any fresh fruit left over from the summer is being stewed into lots of jam. Down the bottom of our lane we have tonnes of apple and damson trees which are currently laden with fruit ripe for the picking. These can be used to make amazing jams and compotes which work really well in desserts like these delicious bakewell tartlets.

These are by far my favourite tart to make as they don’t require blind baking (baking the pastry before adding the filling) as the filling is baked with the pastry. This makes them so much easier to make and a lot less hassle than most other tarts, so they’re my go-to pastry. The main components of a bakewell tart are pastry, jam, frangipane (an almond cake mix) and icing. Beyond that the whole concept of bakewell tarts are pretty flexible and easy to play with.  I’ve made bakewell tartlets for this as they can be cut into quarters which make great bite-sized treats for an afternoon tea stack! You could also just make these as one big tart which is fab for cake sales and sharing.

Recipe

Makes 4

Time: 90 minutes, plus chilling time

Ingredients

For the pastry

  • 175g Plain flour
  • A pinch of Salt
  • 2 tbsp Caster sugar
  • 115g Unsalted butter
  • 1 medium Egg yolk
  • 2 tbsp cold Water

For the filling

  • 60g Unsalted butter
  • 60g Caster sugar
  • 1 Medium egg
  • 30g Self raising flour
  • ½ tsp Baking powder
  • 50g Ground almonds
  • A few drops of Almond essence
  • 2 tbsp Raspberry jam

To decorate

  • 100g Icing sugar
  • 1 tbsp Lemon juice
  • A few flaked almonds (optional)

Method

  1. Begin by making the pastry. Put the flour, salt and sugar into a bowl and mix together with a round bladed knife to combine. Add the butter and then use the knife to cut the butter up into small chunks. When you can’t cut the butter up any further, go in with your hands and rub the butter into the flour until the mixture resembles fine breadcrumbs.
  2. Add the egg yolk and water to the mixture and stir again with a round bladed knife until the mixture comes together to form a dough. Wrap the dough in cling film and then chill in the fridge for at least 30 minutes.
  3. Meanwhile make the filling. Put the butter, sugar, egg, flour, baking powder, ground almonds and almond essence into a bowl and mix together until smooth.
  4. Pre-heat the oven to 180˚C. Take your pastry out of the fridge and divided it into 4. Roll each portion out on a floured surface into a thin disc and then line a tarlet tin with each of them. I find the best way to do this is to carefully lay the pastry over the tin and then to ease into the shape, before pressing into the flutes of the tin. Then take a rolling pin and roll over the top of the tarlet tins to remove the excess pastry.
  5. Spread a little jam over the base of each of the tartlets. Then portion out the frangipane and spread it so that it covers the jam and is even.
  6. Put the tartlets onto a baking tray and bake them in the oven for 15-20 minutes until the frangipane and pastry is golden brown. Set to one side to cool.
  7. To prepare the decoration put the icing sugar and lemon juice into a bowl and mix together until smooth.
  8. When the tartlets have cooled drizzle them with this icing. Then Sprinkle the tartlets with flakes almonds (optional) and serve!

Thanks for reading!

Emma x

Banana, Cinnamon and Rum Friands

Banana, Cinnamon and Rum Friands

The first time I had a friand was in NYC on an Art trip a couple of years ago . My friends and I found this amazing patisserie shop near where we were staying and consequentially had delicious viennoisserie and patisserie for breakfast every morning. One day I had a raspberry friand – which is basically a chewy but very light cake, and it was so insanely good! I can still remember sitting on a bench in central park, everything turning orange and red because it was on the cusp of autumn, and biting into this moist fruity cake with a delicious chew on it. Since then whenever I’ve made friands they’ve reminded me of my amazing trip and so I thought it was about time I make some and write up a recipe of my own for them.

I’ve always loved the flavour combination of cinnamon and banana, so I thought this in a  friand would be cool. I’ve topped these with  rum icing which is optional but is also very delicious so I’d really recommend trying it out. This icing also goes really well with any sponge cake, crumble or generally warm pudding, so if you make too much just keep it in a pot in the fridge for when you need it! Traditionally these are made in little oval tins, but as I didn’t have a specific financier tin I just used a well-greased muffin tin which seemed to do the trick.

Recipe

Makes 12 Friands

Time: 20 minutes, plus cooking time

Ingredients

For the Friand

  • 55g Ground almonds
  • 110g Caster sugar
  • 30g Plain flour
  • ½ tsp Ground cinnamon
  • A large pinch of Salt
  • 50g Butter, melted
  • 3 large Egg whites
  • 2 large Bananas

For the rum caramel icing

  • 60g Butter
  • 75g Light brown sugar
  • 3 tbsp Whole milk
  • 1 tbsp Rum
  • 100g Icing sugar

Method

  1. Pre-heat the oven to 180˚C and then grease a 12 hole muffin tin with butter.
  2. Now make the cake mixture. Put the ground almonds, sugar, flour, cinnamon and salt into a bowl and whisk together. Add the melted butter and egg whites to the mix and whisk until smooth.
  3. Take one of the bananas and mash it in a bowl with a fork. Then add it to the mix and whisk it in.
  4. Then take the other banana and slice it into slices the thickness of a £1 coin. Put one of these slices into the bottom of each of the muffin holes. Top with an ice cream scoop of the cake mixture and then bake the firands in the oven for 20 minutes until golden brown on top and cooked all the way through (a knife or skewer inserted into the centre will come out clean).
  5. Take a knife and run it round the edge of the cakes to loosen them from the tin and then turn the cakes out onto a wire rack and leave to cool completely.
  6. Now make the icing. Put the butter into small pan and melt gently. Then add the sugar and heat whilst stirring until the sugar dissolves.
  7. Add the milk and bring to the boil. Then remove from the heat and add the rum. Stir and then leave to cool to room temperature.
  8. Once cooled add the icing sugar to the mixture and stir to make a smooth icing. Pour the icing into a pipping bag with a small nozzle and then drizzle over the friands.  Serve!

Thanks for reading!

Emma x

Scones

Scones

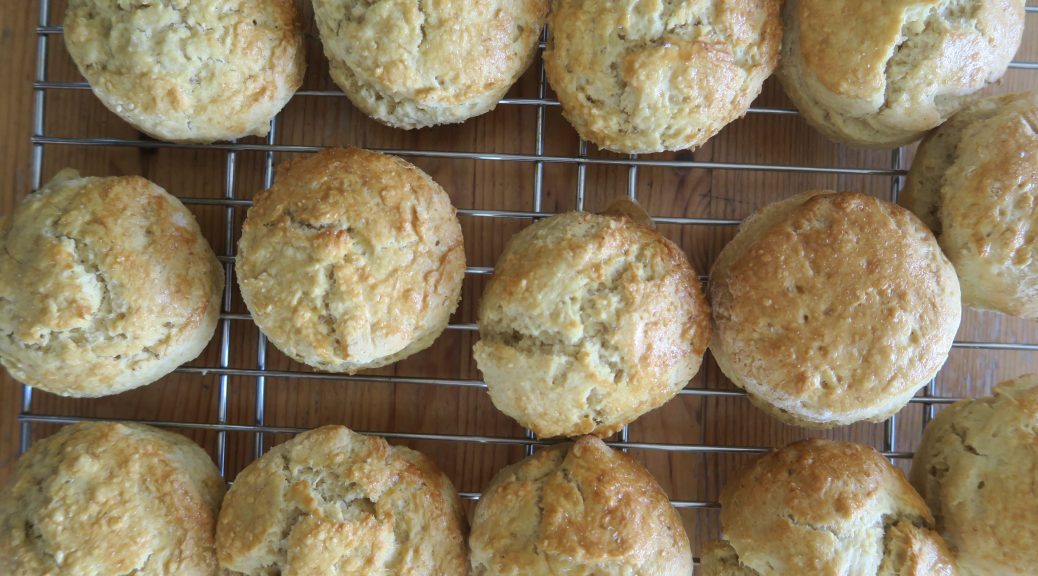
The next layer in out afternoon tea extravaganza is the classic scone! However you pronounce it, or whichever order you put the cream and jam on, these are to afternoon tea what meat is to chilli con carne. We have these all the time at home on lazy afternoons and as they are so easy and simple to put together they can be made at a moments notice. Scones are so versatile, and whilst these ones are very simple and plain you can customise them so much. I’ve written a few alternations you can try out at the bottom of the post if you want to jazz your afternoon tea up a bit more.

Recipe

Makes 14 Scones

Time: 20 minutes, plus cooking time

Ingredients

  • 100g Unsalted butter
  • 465g Self raising flour, plus extra for dusting
  • 3 tbsp Caster sugar, plus extra for the topping
  • A pinch of salt
  • 220ml Milk
  • 1 Egg for glazing

Method

  1. Pre-heat the oven to 180˚C and line two baking trays with baking paper.
  2. Put the butter and flour into a bowl and use a round-bladed knife to chop the butter into small chunks. When you can’t cut the butter up any more go in with your fingers and rub the butter into the flour to get a mixture with the texture of breadcrumbs.
  3. Add the sugar and salt to the mixture and stir it in with a round-bladed knife.
  4. Now slowly add the milk in a steady stream, mixing continuously with a round-bladed knife until the mixture comes together into a dough.
  5. Lightly flour a surface and turn the dough out onto it. Roll the dough out to about 3cm in thickness. Then take a round pastry cutter and stamp out as many scones as you can, placing them onto the lined baking trays as you do. For the best results push the cutter straight down into the dough, don’t twist as this will make the scones rise unevenly. Knead together any leftover dough and repeat.
  6. Crack the egg into a bowl and whisk it up with a fork. Then brush the egg onto the top of the scones to glaze.
  7. Bake the scones in the oven for 10-15 minutes until risen and golden brown. Then transfer them to wire racks to cool and then serve with jam and clotted cream!

Why not try…

  • Sprinkling a little caster sugar onto the top of the scones before baking them – this will give them a delicious crunchy sugar topping!
  • Adding 40g of raisins to the mix to get fruity scones.
  • Add the zest of 1 lemon to the mixture when you add the milk to get citrus scones. Then serve them with lemon curd and clotted cream.
  • Mixing 50g of grated cheddar cheese into the flour, before adding the milk, to get cheesy scones.

Thanks for reading!

Emma x