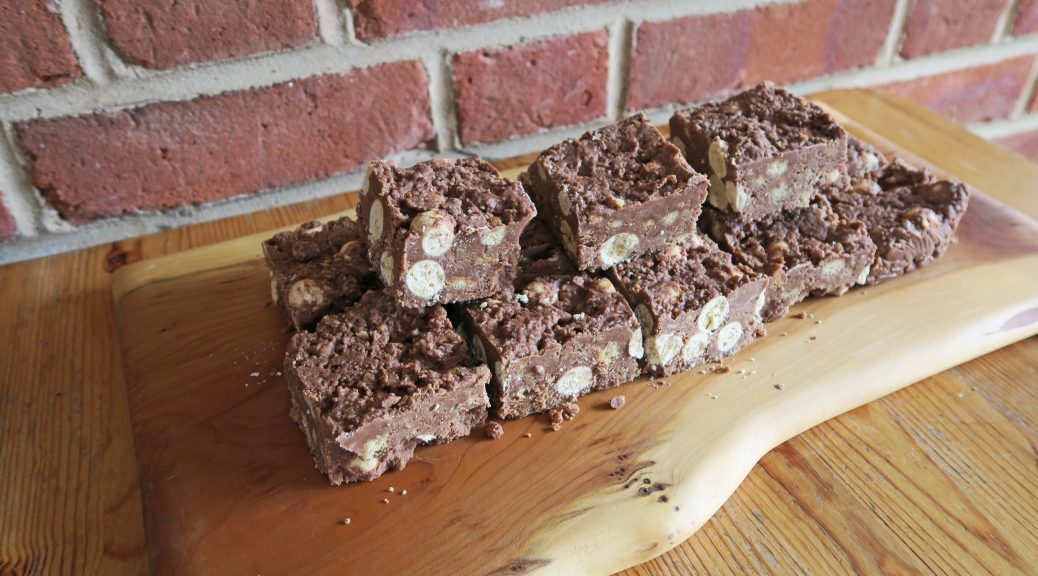
Chocolate Malteaser Fridge-Cake
I’ve got to the point now where I’m cooking more than twice a week, so I have a fast growing store of recipes I’m waiting to post. This one, for example, I made way back at the start of March when I was craving a slice of this Malteaser fridge-cake bliss. It won’t do much for anyone on the nutritional front, but it’s a definite mood-booster. I feel everyone has that one thing that they make which is a hit from the first time they make it. For me this is one of those – it’s impossible to get wrong, tastes incredible, and is perfect for sharing, what’s not to like?

As it takes barely any time to make, and doesn’t need to be cooked, I often whip this up late at night when I’ve realised I’m meant to be taking some food to something the next day. I can whop everything together, bung it in the fridge and then it’s ready to be cut it into slices in the morning!

Recipe
Makes 12 squares
Time: 15 minutes, plus chilling
Ingredients
- 150g Butter, plus extra for greasing
- 300g Milk chocolate
- 80g Golden syrup
- 330g Digestive biscuits
- 350g Malteasers
Method
- Put the butter, chocolate and syrup into a heatproof bowl over a pan of gently simmering water. Leave to melt, stirring occasionally to combine.
- Whilst waiting for the mixture to melt put the biscuits into a bowl and crush with the back of a rolling pin. You want it to be mostly crushed but if there’s a few lumps here and there that’s fine.
- Put the malteasers onto a chopping board and chop them roughly. Add them to the digestives.
- Pour the melted chocolate onto the biscuits and malteasers and mix until all combined.
- Line a small square tin with butter and cling film. Then pour the mixture into the tin and level out with the back of a spoon.
- Put the mix into the fridge to set for at least an hour, or better overnight.
- Once set chop the malteaser fridge cake into squares and then serve!

Thanks for reading!
Emma x