Category: Baking

Chocolate Ginger Chequerboard Cake

Chocolate Ginger Chequerboard Cake

Here comes the return of the chequerboard cake. I know I made one of these a while ago, but trust me, this one’s even better! The other day it was my godmother’s birthday so I made her this for the occasion – a four layer, chocolate and ginger chequerboard cake. Making really big, elegant cakes is one of my favourite things, but as they’re often for special occasions you want them to look perfect, and over the years I’ve found that these are really one of those things that you just need to practise in order to make really well. As a result I’ve constantly straddled the line between having slightly messy cakes and having way too much cake in my life. Therefore when the occasion comes round to make cakes for other people I leap at the opportunity, as it’s great practise and also a great way of showing someone how much they mean to you!
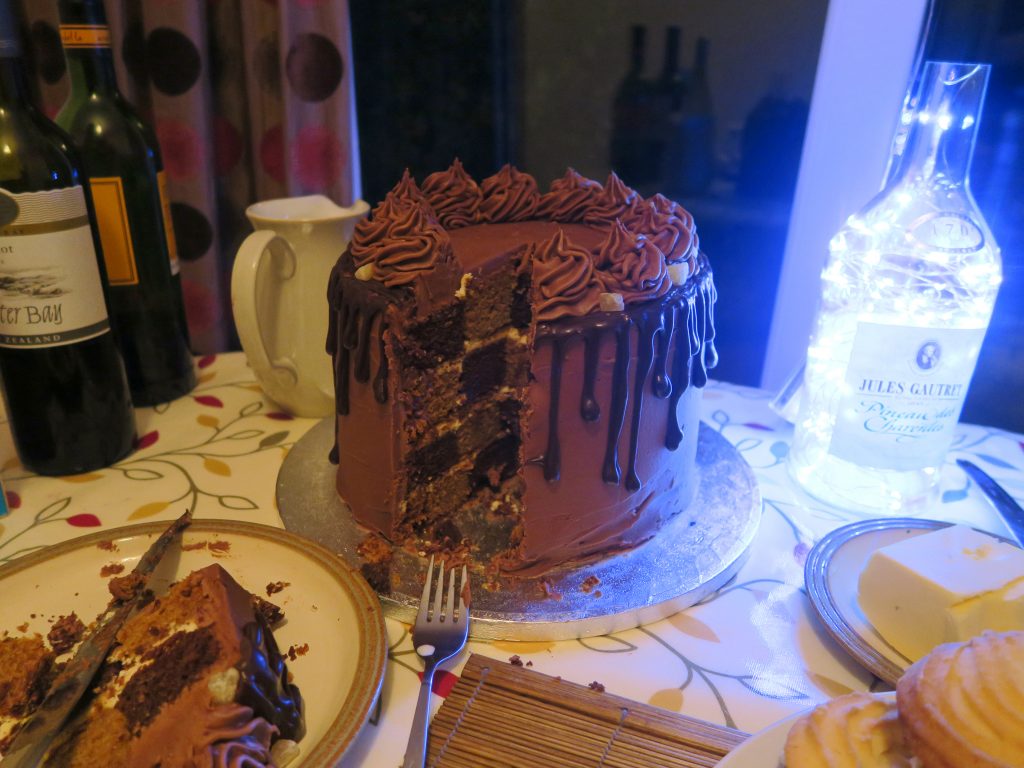
Most of the photos I have of the chequerboard inside this one are pretty dark and weirdly lit from this light-filled bottle next to it, but it still shows a little of what it’d look like when it’s cut into. A great thing about these kinda cakes is that they look really impressive as they are, and then when they’re cut into they have this surprise pattern inside, so you’ll get a lot of ooos and ahhhhhs! This one is also the first cake I’ve ever managed to get with really smooth icing. I’ve finally developed a good icing recipe which is the perfect consistency and will set really well. This means that with two layers of icing, a crumb coat and a finish coat, you can get a really professional finish!

The two cakes in this are also so insanely moist that they practically melt in the mouth and are packed full of flavour. Chocolate and ginger are two of my favourite cake flavours, so for me when they’re slotted in together the result is insane! Chequerboard cakes can be made with pretty much any combo of flavours though, as long as they go well together and have contrasting enough colours to make the pattern stand out. If chocolate and ginger isn’t your thing I’d recommend chocolate and vanilla, almond and raspberry, mint and chocolate, or anything else that takes your fancy.

Recipe

Serves 15

Time: 3 hours, plus chilling and baking time

Ingredients

For the chocolate cake

  • 180g Unsalted butter
  • 100g Dark chocolate
  • 240g Plain flour
  • 280g Caster sugar
  • 3 tbsp Cocoa powder
  • 1 tsp Bicarb
  • 2 Large eggs
  • 142ml Greek yoghurt
  • 142ml Milk

For the ginger cake

  • 140g Butter
  • 300g Self Raising Flour
  • 1 tsp Bicarb
  • 5 tsp Ground ginger
  • 2 tsp Mixed spice
  • 140g Light brown sugar
  • 290g Golden syrup
  • 300ml Milk
  • 1 Large egg

For the chocolate ginger icing

  • 300g Unsalted butter
  • 600g Icing sugar
  • 150g Dark chocolate, melted and cooled
  • ½ tsp Ground ginger

For the filling

  • 300ml Double cream
  • 25g Icing sugar
  • ½ tbsp Vanilla bean paste

For the chocolate drip

  • 100g Dark chocolate
  • 75ml Double cream

To Decorate

  • Crystallised ginger
  • Anything else you like (biscuits, sparklers, candles, chocolates etc.)

Method

  1. Preheat the oven to 180˚C. Grease and line four 7.5 inch cake tins.
  2. First make the chocolate cake. Melt the butter and chocolate together in a heat-proof bowl over a pan of simmering water.
  3. In a bowl mix the flour, sugar, bicarb and cocoa together.
  4. In another bowl whisk together the egg and yoghurt. Add this mixture and the chocolate mixture to the flour mixture, along with 100ml boiling water. Whisk quickly until combined and then pour this into two of the lined tins.
  5. Bake in the oven for 25-30 minutes, or until a skewer comes out clean once inserted. Leave the cakes to cool for 15 minutes before turning them out onto wire racks and leaving to cool.
  6. Now make the ginger cake. Put the butter, flour, bicarb and spices into a large bowl. Cut the butter up into the flour with a round-bladed knife. When you can’t cut the chunks of butter any smaller go in with your hands and rub the butter into the flour with your fingertips. Shake the bowl from side to side every so often to get the bigger lumps of butter coming to the top, and rub these in until the whole mixture is like breadcrumbs.
  7. Then put the sugar, syrup and milk into a small pan and heat whilst stirring until the sugar has dissolved. Then stop stirring and bring the mixture up to the boil.
  8. Crack the egg into the flour mix. Then pour the syrup into the flour mix, a little at a time, whisking in between additions.
  9. When fully combined pour the mix into the lined tins and bake for 45-50 minutes until a skewer inserted into the middle comes out clean. Take out of the tin and leave to cool on wire racks.
  10. Whilst the cakes are cooling, make the buttercream icing. Beat the butter and icing sugar until smooth. Then add the melted dark chocolate and ground ginger, and mix until fully combined. Spoon the icing into a piping bag, fitted with a round nozzle.
  11. To prepare the filling put the cream, icing sugar and vanilla into a bowl and gently whisk until it just holds it’s shape. Then spoon it into a piping bag fitted with a small round nozzle and leave in the fridge until needed.
  12. Now start assembling. Lay your cakes out on a board and compare the heights of them. They should all be the same, but if they’re not use a serrated knife to level them so they’re all the same thickness. This will mean that the rings will be the same height as they cakes they’re put into in the next step.
  13. Take a 5 and 2.5 inch smooth, round cookie cutter. Then in all four cakes cut out a circle from the centre with the 5 inch cutter, and then take the 2.5 inch cutter and cut a circle out of the 5 inch piece.
  14. Take the middle ring out of each cake and swap it into a cake of the other type (so the chocolate rings will go into the ginger cakes and visa versa).
  15. Take your icing and put a little on the cake board or plate you’re going to be presenting on, this will stop the cake from sliding around. Then put one of the cakes that has two rings of chocolate and one of ginger and put it in the centre of the cake. Pipe 1/3 of the cream in the pipping bag over the top and smooth it over with a palette knife.
  16. Then put one of the cakes which has two ginger rings and one chocolate on top and repeat with the cream and the other layers of cake, but with the final layer of cake don’t top with cream.
  17. Now make the crumb coat of icing. This is the first layer which aims to trap the crumbs and stop them from getting into your final icing finish. Take your chocolate icing and spoon 1/2 of it over the top of the cake. Then use a palette knife to gently work the icing around the sides of the cake. Smooth the icing as best you can so that it’s even, but don’t worry about it looking too finished at this stage. Then put it in the fridge to set for at least 2 hours.
  18. When set, take the cake out again and repeat with the icing, this time making sure that the finish is super smooth and glossy. (A palette knife and turn table is really helpful for this!) Keep any excess icing for later and leave the cake in the fridge until needed.
  19. Now make the chocolate drip icing. Chop the chocolate finely and put it into a bowl. Then put the cream into a pan and heat gently. When the cream just starts to boil take it off the heat and pour it over the chocolate. Stir to combine and to help melt the chocolate. Then leave it for a couple of minutes so that it thickens up enough to be pourable but not runny.
  20. Pour the drip icing into a piping bag with a small round nozzle. Then gently pipe around the top edge of the cake, letting uneven drips roll down the cake.
  21. Take the excess icing from earlier and put it into a piping bag with a star shaped nozzle. Pipe rosettes around the edge of the cake so that the join of the chocolate drips to the icing is hidden.
  22. Top with the crystallised ginger and any other decorations you want (e.g ginger biscuits, candles or sparklers). Enjoy!
Thanks for reading!

Emma x
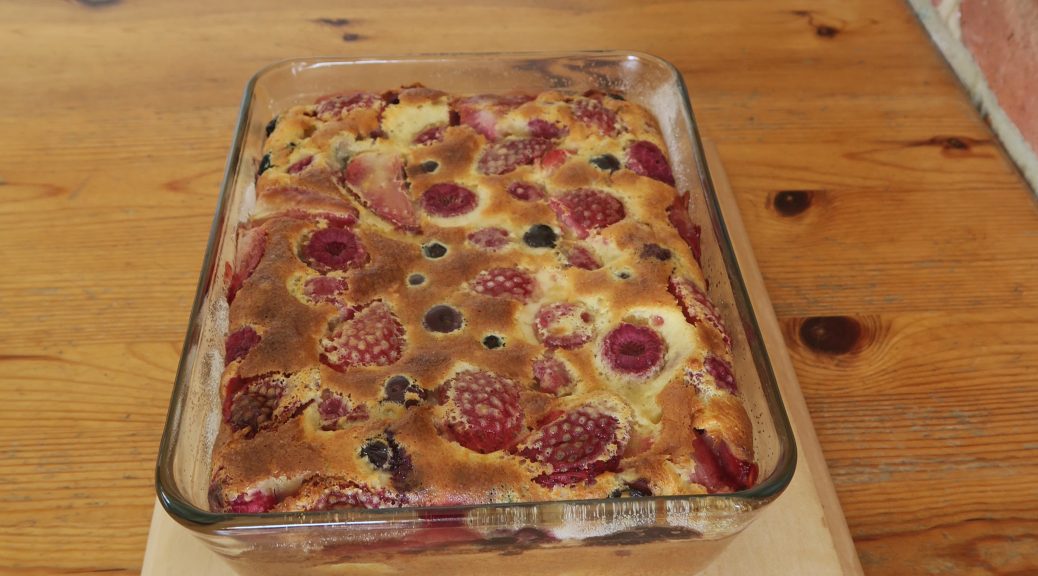
Mixed Berry Clafoutis

Mixed Berry Clafoutis

When I was in Canada over the summer we were lucky enough to spend a day with a couple of my Mum’s friends at their lake-side house in depths of British Columbia. It was a stunning place – really hot, gorgeously sunny and beautifully peaceful.

Image may contain: sky, outdoor and nature

For dinner that evening we had a really good blueberry clafoutis for dessert. The end result was a really interesting texture, kinda unlike anything I’ve eaten before. It’s a cross between a set custard and a light sponge cake, so it’s creamy, sweet and fluffy all at the same time – but it somehow really works! I’d heard of clafoutis as a thing but I’d never eaten one, which is really odd as they’re so easy and quick to make! As the ingredients are very basic and are also really easy to substitute for, even in the depths of Canada, a boat ride away from the nearest town, something as tasty as this could be rustled up.

Here I’ve used fresh summer fruit as it’s that time of year when it tastes really good and is readily available, but you can use pretty much any fruit for this. It’s an especially good thing to whip up if you have any soft fruit that needs eating up (e.g plums, peaches, berries and so on). Just bung them in the dish, pour over the all-in-one batter mix and voila!

Recipe

Serves 6

Time: 10 minutes prep, 25-30 minutes cooking

Ingredients

  • 80g Plain flour
  • ½ tsp Baking powder
  • 100g Golden caster sugar, plus extra for sprinkling
  • 2 Large eggs
  • 2 Large egg yolks
  • 260ml Double cream
  • 1 tbsp Vanilla bean paste
  • Butter for greasing
  • A handful each of strawberries, blueberries and raspberries (or any other soft fruit you like)

Method

  1. Pre-heat the oven to 180˚C.
  2. Put the flour, baking powder, sugar, eggs, egg yolks, cream and vanilla into a bowl and whisk until fully combined.
  3. Take a medium sized oven-proof dish and grease it with a little butter. Then sprinkle over some sugar to line the dish.
  4. Hull and quarter the strawberries. Then scatter these strawberries, along with the blueberries and raspberries into the greased dish.
  5. Pour over the batter mix and then bake in the oven for 25-30 minutes, until golden brown and slightly puffed up.
  6. Serve slightly warm with icecream!

Thanks for reading!

Emma x

Sticky Toffee Puddings

Sticky Toffee Puddings

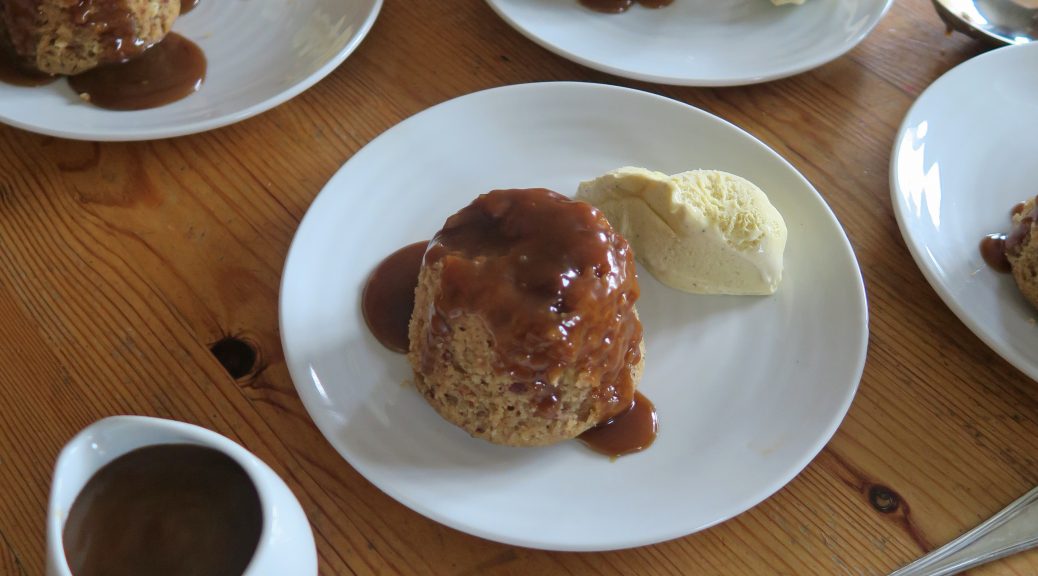
Generally speaking I love complicated, fancy food. I love how weird and wacky it can sound on paper, or look on the plate, and yet how incredibly tasty it can be. But I have to admit that nothing beats the classics – I mean they’re classics for a reason. In this case I don’t think I’ve ever had a sticky toffee pudding I haven’t liked. Whatever the texture, whatever the ingredients, as long as it’s true to the name and is sweet and sticky you’re on to a winner!

These ones are particularly light a fluffy as they’re made with a classic sponge mix and are then steamed, but the date puree in the mix also makes them really squidgy and sweet. The toffee sauce put on the top then adds even more sticky moistness, with a bit of a bitter flavour to really complement the sponge! They’re also really good with ball of fresh vanilla ice cream and  this will cut through the sweetness and also provides a great temperature balance to the warm sponge!

Recipe

Serves 8

Time: 1 hour

Ingredients

  • 130g Chopped dried dates
  • 130ml Water
  • 130g Unsalted butter, plus extra for greasing
  • 125g Caster sugar
  • 3 Large eggs
  • 180g Self raising flour
  • 1 tsp Baking powder

For the toffee sauce

  • 300ml Double cream
  • 125g Light brown sugar
  • 50g Unsalted butter

Method

  1. Pre-heat the oven to 180˚C. Then grease 8 small pudding basins with butter.
  2. Put the dates and water into a small saucepan and leave to gently simmer over a medium heat until soft (about 5 minutes). Blend the mix to a puree and set to one side.
  3. Put the butter and sugar into a bowl and beat until smooth. Add the eggs and whisk together. Then add the flour, baking powder, and date puree until smooth.
  4. Distribute the mixture between the basins and put them into a deep roasting tin. Fill the tin with boiling water so it comes half way up the side of the basins. Cover the tin with foil and then put in the oven to bake/steam for 40 minutes.
  5. Meanwhile make the toffee sauce. Put half the cream, the sugar and the butter into a small saucepan and bring to the boil whilst stirring. Once the sugar is dissolved and the butter has melted, leave the mixture to boil gently until it becomes a deep amber colour.
  6. Then take the caramel off the heat and add the rest of the cream. Stir together and then keep warm until needed.
  7. When the puddings are ready (a skewer will come out clean when inserted into the middle), turn them out of their moulds onto plates. Serve with the toffee sauce and ice cream!

Thanks for reading!

Emma x

Mini Hazelnut, Cherry, and Chocolate Pavlovas

Mini Hazelnut, Cherry, and Chocolate Pavlovas

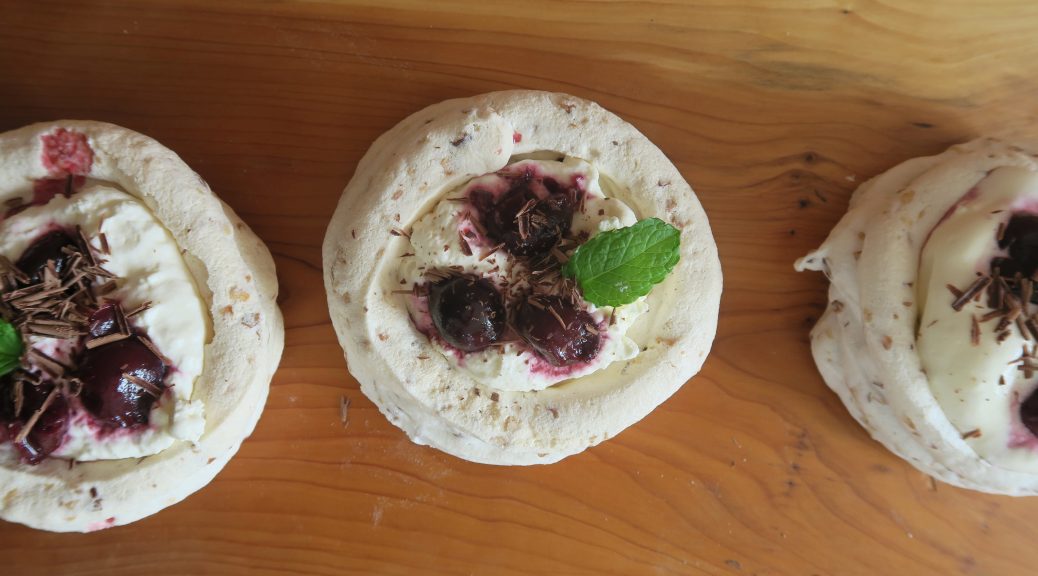
My main issue with cooking, besides the endless washing up, is that I constantly have leftovers in pots around the kitchen. Consequentially, what I cook next is often influenced by what’s leftover, which doesn’t make for very interesting blog posts. In particular I always seem to end up with spare egg whites floating around which I feel compelled to do something with on the same day they’re separated, before they go off or become too runny. When I was making the ice cream for my hazelnut cake post (I made these a long time ago, I haven’t kept the egg whites in m’ fridge for all this time!) I had some egg whites leftover so I decided to whip them up into some hazelnut meringue nests to work with.

Luckily meringues last for a good while in a solid air-tight tin, so once I’d made them I could tuck them away until I’d worked out what to do with them. So when I realised we had some whipped cream and poached cherries in the fridge I had my answer – mini hazelnut, cherry and chocolate pavalovas. These are perfect little desserts which can be prepped well in advance, and then put together at the last minute. You can also switch in any kind of soft fruit you like to fit the seasonal fruits available.

(Meringues are kinda my default go-to for leftover egg whites, but I’ve got a list of other ways to use them up at the end of my chocolate fondants post if you’re interested!)

Recipe

Serves 6

Time: 1 hour, plus baking

Ingredients

For the Daquoise

  • 100g Chopped hazelnuts
  • 100g Caster sugar
  • 9g Cornflour
  • 2 Large egg whites
  • Pinch salt

For the Cherries

  • 200g Frozen cherries
  • 4 tbsp Kirsch
  • 1 tbsp Caster sugar
  • 2 tsp Ground cinnamon

For the Filling

  • 300ml Whipping cream
  • 1 tbsp Vanilla bean paste

To Decorate

  • 100g Dark chocolate
  • A few sprigs of mint

Method

  1. Pre-heat the oven to 180˚C.
  2. Begin by making the daquoise. Put the hazelnuts into a small roasting tin and roast in the oven for 5-10 minutes, until just starting to colour. (This is an important step as it’ll massively increase the flavour of the nuts).
  3. Leave to cool and then mix with 75g of the sugar and the cornflour. Set to one side for later.
  4. Lower the oven temperature to 150˚C for the meringues. Line 2 baking trays with baking paper. Take a round object with a diameter of roughly 5cm and draw round it onto the sheets of baking paper to act as a guide for piping later. You should get about 3 onto each sheet. Turn these sheets over so that the pencil line is on the other side of the paper to that which you’ll pipe on.
  5. Take a super clean metal or glass bowl and put the egg whites into it.
  6. Add the salt and then whisk with an electric hand whisk (or a stand-free mixer) until it forms soft peaks (can just hold it’s shape).
  7. Continue whisking and add the other 125g caster sugar, one 1 tbsp at a time until it’s all incorporated.
  8. Keep whisking until the mixture becomes glossy and forms a stiff peak.
  9. Then take a large, stiff spatula and gently fold the hazelnuts into the meringue. From here you’ll need to work quickly as the oils in the nuts will start to deflate the meringue.
  10. Take a piping bag with a round nozzle and fill it with the meringue. Then pipe onto the lined baking trays. Start at the middle of one of your circles and when you get to the edge pipe upwards in a circle round the edge to build the meringues into little nests. Do the same for each circle.
  11. Bake in the oven for about 40 minutes, until crisp to the touch but not starting to brown. Then turn the oven off and leave the meringues to cool in the ovens.
  12. Now prep the filling. Put the cherries into a pan and heat gently until they simmer in their juice and are soft. Then add the kirsch, sugar and cinnamon. Stir to combine and then leave to simmer for 10 minutes.  Remove the cherries from the heat and leave to cool in the juices.
  13. Then take 3/4 of the chocolate and melt it in a heatproof bowl over a pan of simmering water. Take a pastry/paintbrush and paint the inside of the meringues with it. This will add some flavour and will also stop the cream from making the meringue soggy. Leave to set.
  14. Meanwhile make the cream filling. Put the whipping cream and vanilla into a bowl and whisk until it just holds its shape.
  15. When the chocolate is set spoon the cream into the meringues. Take the cherries and scoop them out of the juice – save this juice for later! Dry the cherries slightly on some kitchen roll and then distribute them between the meringues, about 3 on each.
  16. Take a vegetable peeler and run it along the edge of the rest of the chocolate over the meringues to get little sprinkles on them. Garnish with fresh mint and serve with the rest of the cherry juice!

Thanks for reading!

Emma x
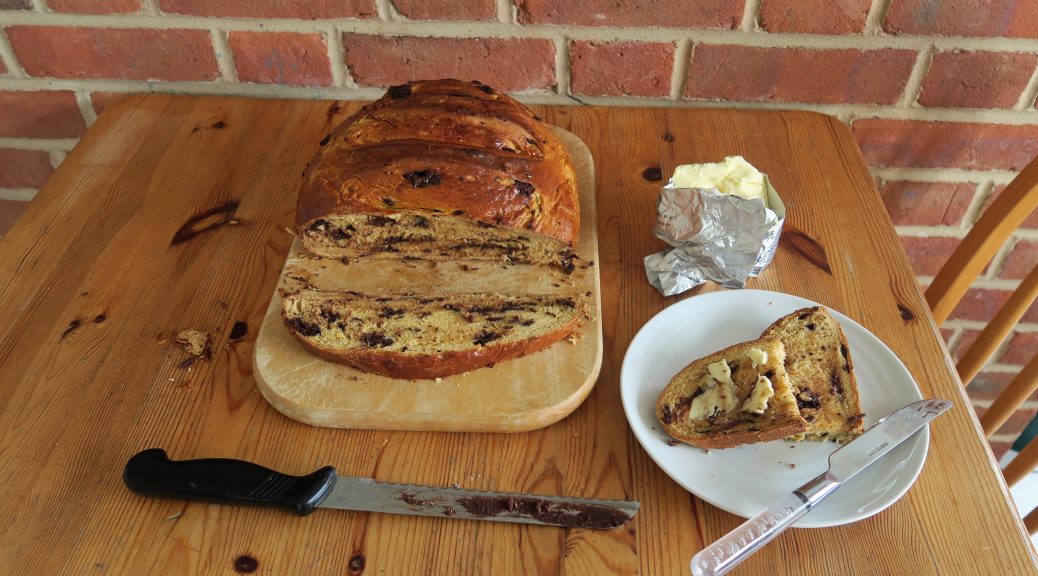
Chocolate, Orange, and Chilli Bread

Chocolate, Orange, and Chilli Bread

 I haven’t made bread in waaay too long so I thought that it was time I entered back into that world again – and since it’s chocolate month, it’s chocolate bread! Though rather than a ‘chocolate, orange and chilli bread’,  as I’ve called it, it’s probably better to think of this as an orange bread with chocolate chips and a gentle wave of chilli heat after it’s eaten. I love a bit of heat in the background of any bake, but I’m not a fan of blow-your-head-off heat, so the amount of paprika in this is just enough to prickle the tongue. But of course if you like your food really hot you can increase the quantity of paprika going in, put in 3 tsp for a moderate warmth, and 4 1/2 tsp for a strong heat!

By using really rich, dark chocolate it also means that the loaf, whilst sweet and enriched, feels as though it borders the line between sweet and savoury. This makes the whole thing really moreish, and with a bit of butter it goes down really well with a good cup of coffee.

Recipe

Makes 1

Time: 45 minutes, plus proving and baking time

Ingredients

  • 350ml Milk
  • 80g Sugar
  • 16g Yeast
  • 12g Salt
  • 700g Strong white bread flour
  • 1 ½ tsp Paprika
  • 2 Large eggs
  • 100g Butter
  • 3 Oranges, zest only
  • 200g Dark chocolate, chopped

Method

  1. Put the milk into a saucepan and bring to the boil.
  2. Meanwhile put the sugar, yeast, salt, flour, and paprika into a large bowl and mix together.
  3. Add one of the eggs, butter, zest and ¾ of milk to the dry ingredients. Mix everything together and then slowly add the rest of the milk until you get a sticky dough.
  4. Turn the dough out onto a lightly floured surface. Knead for about 10 minutes until smooth and elastic. Add the chopped chocolate knead for another few minutes to incorporate it.
  5. Lightly oil a bowl and tip the dough into it. Cover with clingfilm and leave to rise for about 2 hours, until doubled in size.
  6. Turn the dough out onto a lightly floured surface. Knead for a few seconds to get rid of the air bubbles. Then tuck the dough under itself to make a loaf-shape with a tight surface. Place onto a lined baking tray, cover loosely with clingfilm and leave to rise for another hour.
  7. Pre-heat the oven to 180˚C. Take a sharp knife and score the top of the loaf with three confident slices. This will help shape the bread as it rises.
  8. Take the other egg, crack it into a bowl and beat it with a fork. Then take this beaten egg and brush the top of the loaf with it to glaze. Then put the bread into the oven to bake for about 40 minutes, until it sounds hollow when lightly tapped on the bottom. Serve!

Thanks for reading!

Emma x