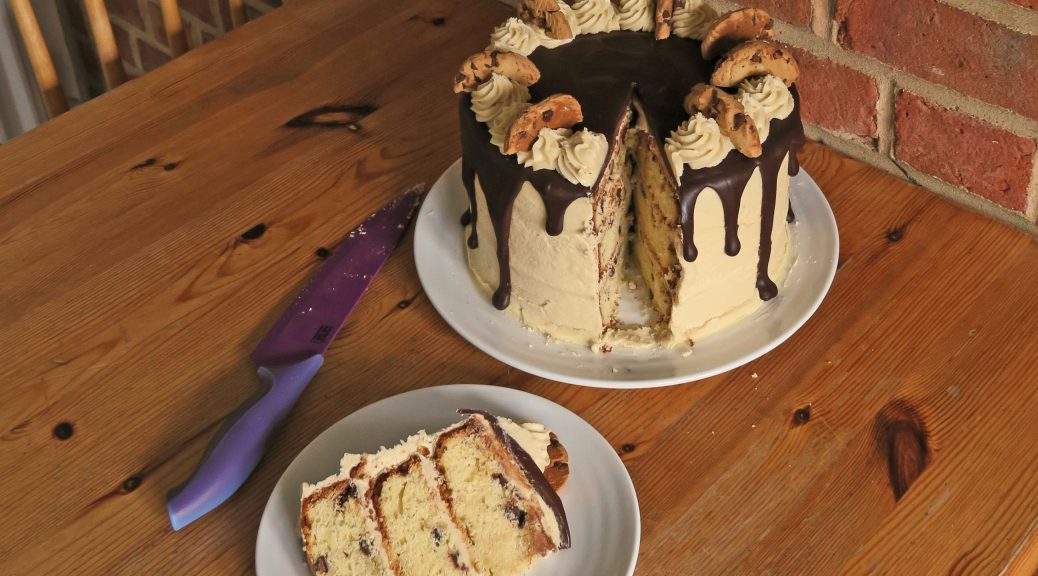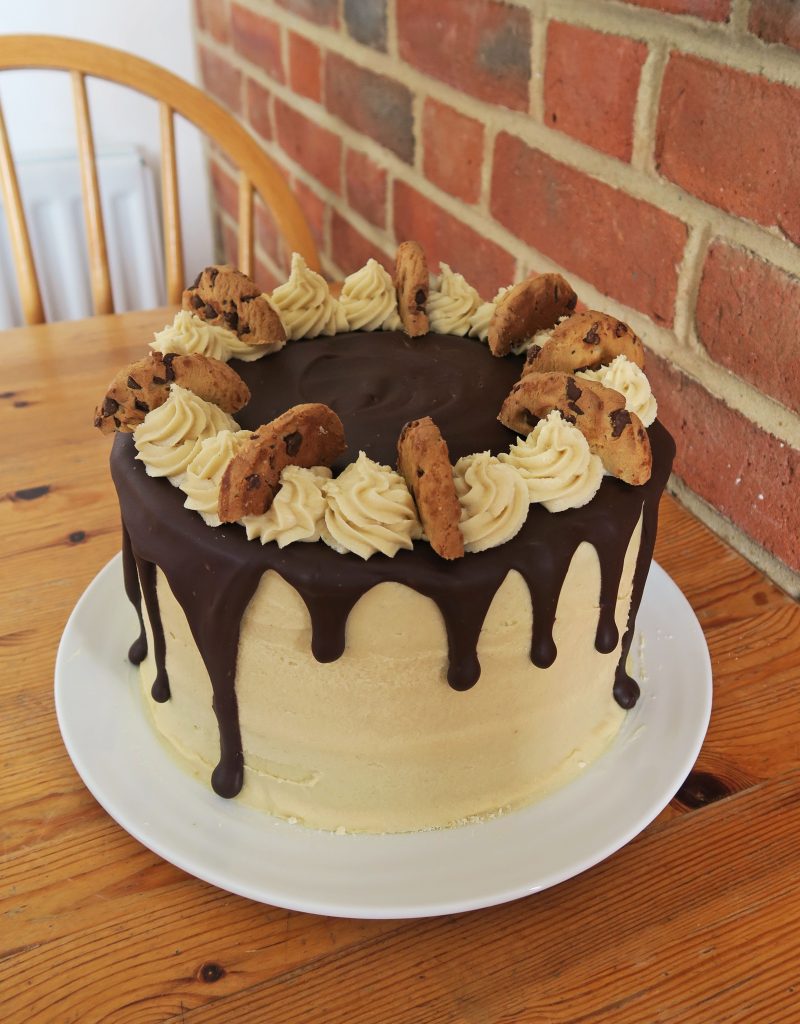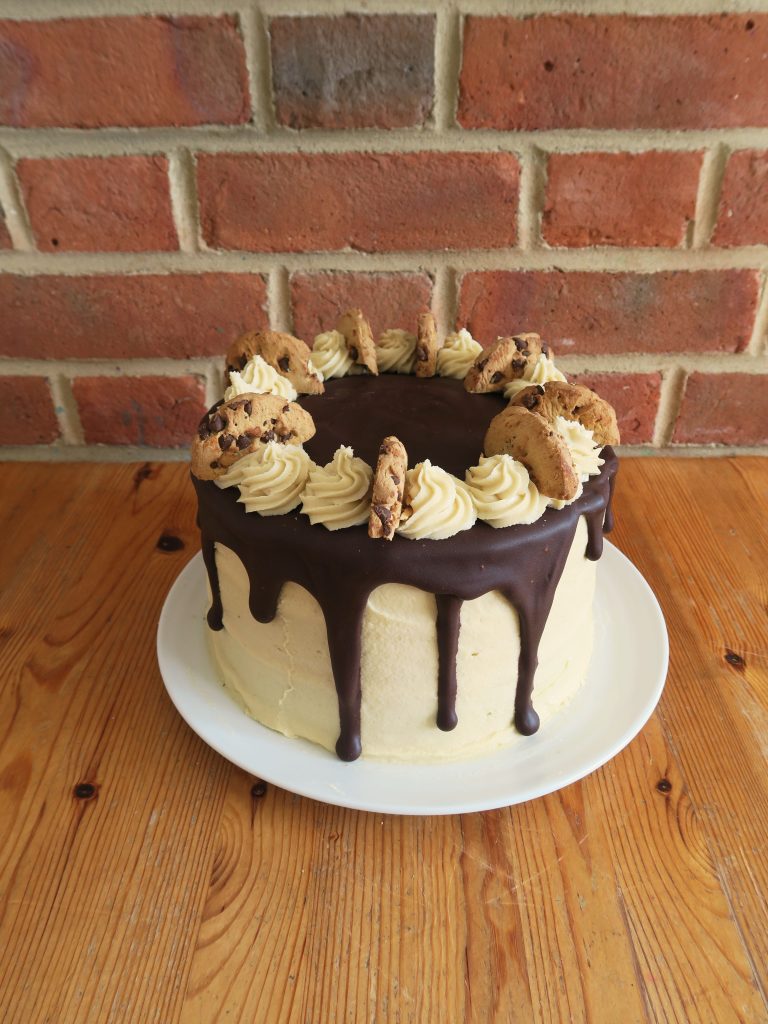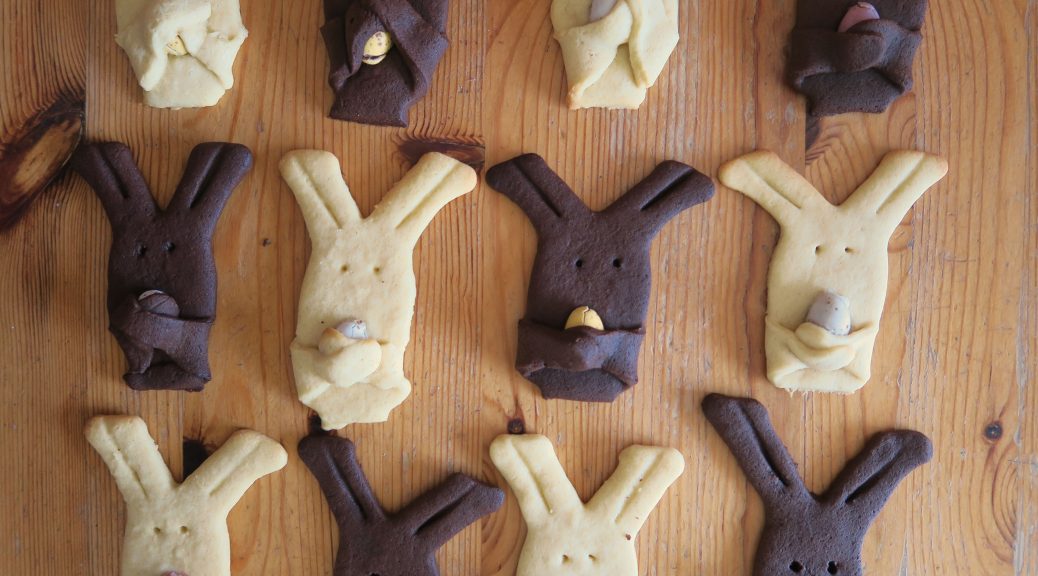
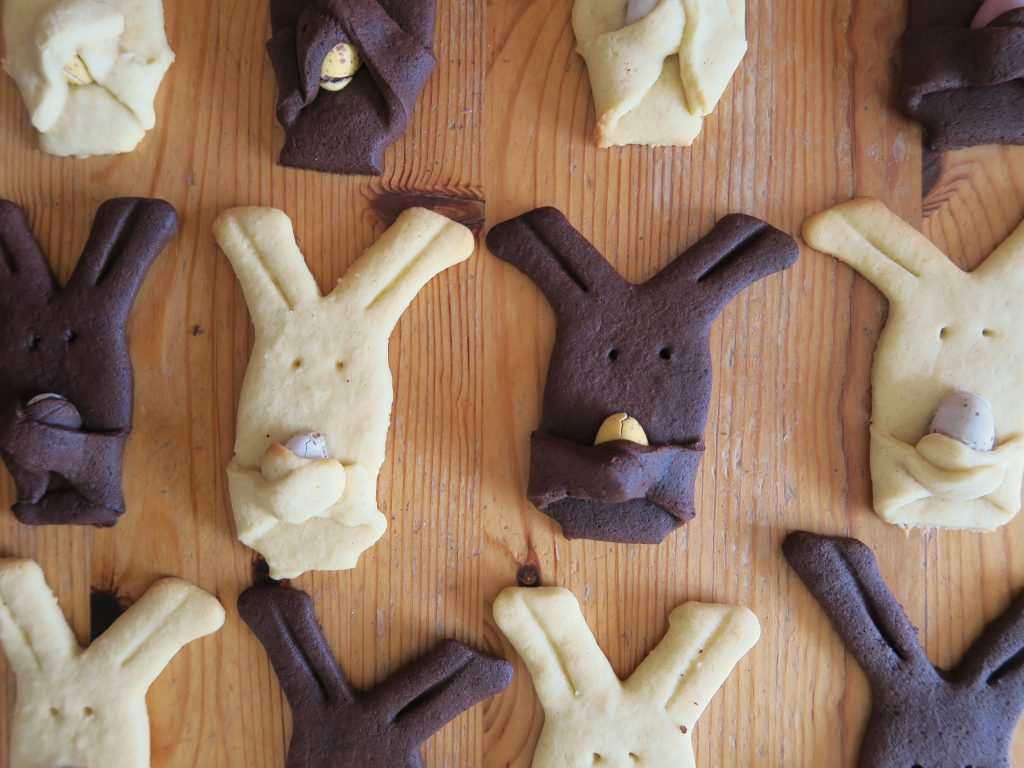
Chocolate and Vanilla Rabbit Cookies
Happy Easter! It might seem a little late to have a Easter-themed recipe, but if like me your whole family’s getting together today and you need a baking activity to keep little people occupied (and use up some of the vast quantities of mini eggs floating around) then look no further. I came across this way of shaping cookies online and it looked so cute that I thought I’d give it a try. Granted mine look a little more quirky than the ones I saw on Pinterest and whilst I quite like the variation in my herd I’m gonna blame this on my gingerbread man cutter. The idea is that you make gingerbread men, then fold the arms over a mini egg in the middle, turn them upside down and poke some eyes in and hey presto you’ve got yourself a rabbit holding an Easter egg! Unfortunately my gingerbread man cutter was very human shaped so the bodies were longer than they should have been and as a result I’ve de-capitated the men to get my rabbits, but hey ho I think it worked.
The best way to make this much easier is to make sure the dough is super super cold. I put mine the freezer before and half way through rolling as it made it easier to get the rabbits from the table to the baking trays – otherwise you end up with some very all-shapes-and-sizes kinda rabbits, which is sweet and endearing in it’s own way, but might not be what you’re looking for. You can also mix up the flavours in anyway you want when you’ve got the hang of the shaping. You could add spices or chocolate chips to the dough and/or dip the rabbits in melted chocolate and 100s + 1000s to jazz them up a bit!

Recipe
Makes 16
Time: 1 hour
Ingredients
- 200g Butter
- 200g Caster sugar
- 1 Egg
- 500g Plain flour
- 25g Cocoa powder
- 1 small bag of Mini eggs (around 16 eggs total)
Method
- Pre-heat the oven to 180C and line two baking trays with baking paper or Teflon sheets.
- Cream together the butter and the sugar in a large bowl with a wooden spoon until pale and creamy. Then add the egg and beat it in.
- Equally divide the mixture between two bowls (roughly 220g in each, but I’d recommend measuring the weight of all your dough then dividing it in 2). Add half the flour to each bowl and then add the cocoa powder to one. Mix everything in each bowl together until you have 2 smooth doughs.
- Wrap each dough in cling film and leave in the fridge for at least 30 minutes and then transfer it to a freezer 30 minutes before rolling.
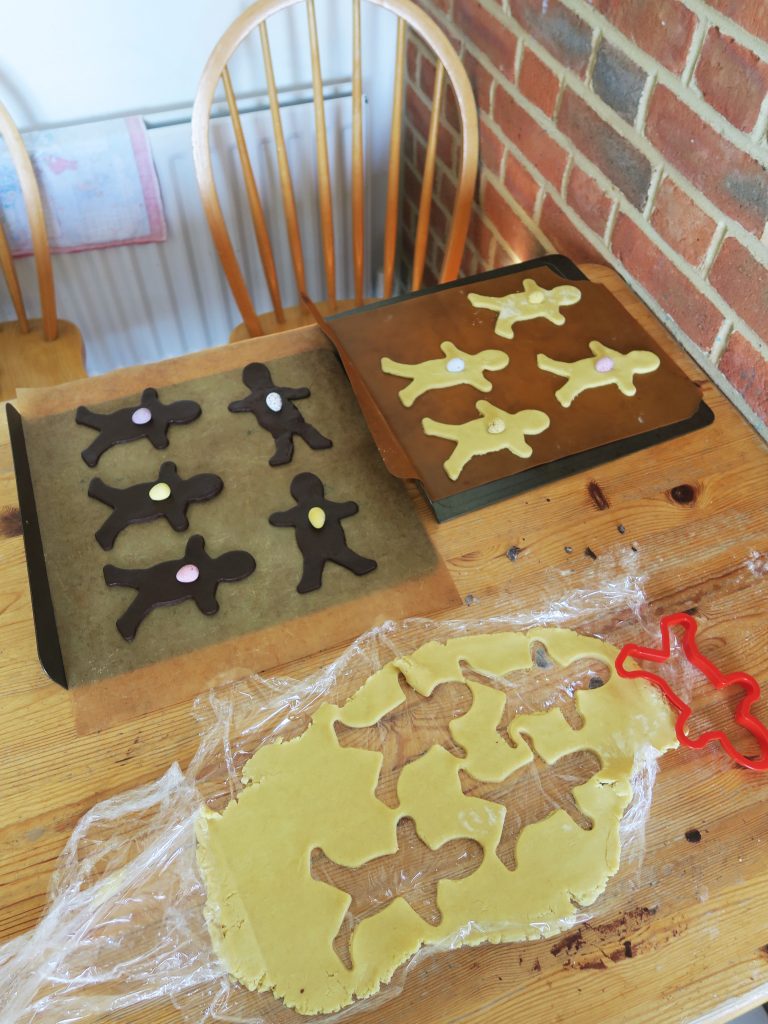
- Roll one of the doughs out between two sheets of cling film to make a sheet roughly half the thickness of a pound coin. Then cut out as many gingerbread men as you can. Transfer these to your lined baking trays, fold the remaining dough back into a ball and re-roll. Repeat until you’ve used the dough as much as possible. Then do this for your other flavoured dough.
- Once you have all your gingerbread men place a mini egg in the ‘belly’ of each with the pointy end facing downwards (towards where the ears will be).
- Turn your gingerbread men upside down and from now on think of them as rabbits. Take the two arms and fold them up over the egg to secure it in place. Then take a cocktail stick and if needed chop off the heads of the ex-gingerbread men and place to one side (you can bake these ‘heads’ alongside the rabbits to make bite-sized biscuits).
- Using the same cocktail stick poke two eyes in the top of each rabbit to make some eyes and then press the flat of it into each ear to make indents.
- Bake in the oven for 10-15 minutes until just starting to go solid and brown a little. They’ll firm up a lot when out of the oven so don’t worry if they’re not crisp. Leave to cool and then enjoy!
Thanks for reading!
Emma x