Category: Easy

For the times when you want something super simple to make.

Banana, Peanut Butter and Chocolate Loaf Cake

Banana, Peanut Butter and Chocolate Loaf Cake

In every family there’s always a scale of culinary abilities. There’s the Delia Smith – the one who does the majority of the cooking, the ‘I cook to survive’ one who could make pasta and boil an egg if needed, and the one who could burn water and would die trying to find their way to the kitchen. Whilst in my family we have a kinda scale like this, everyone of us has, admittedly, a pretty good knack in the kitchen, and we all have our signature dishes. For me it’s my chocolate fondants, for my Mum it’s her chicken and leek pie, my Dad’s is his ultimate apricot tiffin, and my sister makes a mean chocolate banana cake.

However, since my sister left home we haven’t had many of her incredible banana cakes around, so I thought I’d make one of my own. This one’s just like hers – packed with banana and chocolate chips which melt into delicious puddles when served warm! I’ve also added some peanut butter though as I love a good PB and chocolate combo. This one is also really easy and fun to make, but when served fresh from the oven it’s everything you could want from a cake.

Recipe

Makes 1 loaf

Time: 45 minutes

Ingredients

  • 50g Unsalted butter
  • 75g Peanut butter
  • 250g Caster sugar
  • 2 Medium eggs
  • 250g Plain flour
  • 2 tsp Baking powder
  • 2 Ripe bananas
  • 200g Dark chocolate

Method

  1. Pre-heat the oven to 180˚C.
  2. Put the butter, peanut butter and sugar into a bowl and beat with a wooden spoon until smooth.
  3. Add the eggs and then whisk until combined. Then sift the flour and baking powder into the mixture and fold in to make a smooth batter.
  4. Mash the bananas in another bowl with a fork until they’re a pulp. Then roughly chop the chocolate. Add the bananas and 150g of the chocolate to the batter and stir until fully combined.
  5. Line a 1L loaf tin with butter and baking paper. Pour in the mixture and then bake in the oven for about 1 hour until a skewer comes out clean when inserted into the middle. If the top starts to brown too much cover it loosely with kitchen foil to protect it.
  6. When ready take the cake out of the oven and leave to cool for a few minutes before turning it out of the tin. Leave to cool on a wire wrack.
  7. Meanwhile put the rest of the chopped chocolate into a heatproof bowl and melt over a pan of gently simmering water. Pour this chocolate into a pipping bag with a small round nozzle and drizzle over the cake. Then serve!

Thanks for reading!

Emma x

Chocolate Malteaser Fridge-Cake

Chocolate Malteaser Fridge-Cake

I’ve got to the point now where I’m cooking more than twice a week, so I have a fast growing store of recipes I’m waiting to post. This one, for example, I made way back at the start of March when I was craving a slice of this Malteaser fridge-cake bliss. It won’t do much for anyone on the nutritional front, but it’s a definite mood-booster. I feel everyone has that one thing that they make which is a hit from the first time they make it. For me this is one of those – it’s impossible to get wrong, tastes incredible, and is perfect for sharing, what’s not to like?

As it takes barely any time to make, and doesn’t need to be cooked, I often whip this up late at night when I’ve realised I’m meant to be taking some food to something the next day. I can whop everything together, bung it in the fridge and then it’s ready to be cut it into slices in the morning!

Recipe

Makes 12 squares

Time: 15 minutes, plus chilling

Ingredients

  • 150g Butter, plus extra for greasing
  • 300g Milk chocolate
  • 80g Golden syrup
  • 330g Digestive biscuits
  • 350g Malteasers

Method

  1. Put the butter, chocolate and syrup into a heatproof bowl over a pan of gently simmering water. Leave to melt, stirring occasionally to combine.
  2. Whilst waiting for the mixture to melt put the biscuits into a bowl and crush with the back of a rolling pin. You want it to be mostly crushed but if there’s a few lumps here and there that’s fine.
  3. Put the malteasers onto a chopping board and chop them roughly. Add them to the digestives.
  4. Pour the melted chocolate onto the biscuits and malteasers and mix until all combined.
  5. Line a small square tin with butter and cling film. Then pour the mixture into the tin and level out with the back of a spoon.
  6. Put the mix into the fridge to set for at least an hour, or better overnight.
  7. Once set chop the malteaser fridge cake into squares and then serve!

Thanks for reading!

Emma x

Stuffed Aubergines with Feta and Pomegranate

Stuffed Aubergines with Feta and Pomegranate

Inspiration for my recipes comes from loads of different places – books, websites, social media, tv shows, and everything in between. The other day I was watching the new TV series with Nigel Slater about his trip around the middle east – a very good watch if you come across it by the way. I’ve never done much middle eastern cooking but I’ve always wanted to as I love those kind of flavours, so when I saw his stuffed aubergine dish on the show I knew I wanted to do a little variation of my own.

This is the first time I’ve worked with roasted garlic and I’m definitely going to use more of it in the future. By roasting the cloves the pungent garlic flavour is muted and instead a caramelised, nutty flavour is created, which in this case goes really well with the earthy aubergine. I’ve also used coriander here as it adds some bright colour and a bitter herbal element which works really well in the dish. However, I’m not a big fan of coriander, and I’ll admit that I picked the leaves out of my portion when it came to eating it, so if you’re like me and the mere thought of coriander makes you recoil don’t worry, it’s not essential to the recipe.


Recipe

Serves 4

Time: 20 minutes, plus cooking time

Ingredients

  • 2 Aubergines
  • 4 Garlic cloves, unpeeled
  • 4 tbsp Olive oil
  • 1/2 Pomegranate
  • 100g Feta
  • 35g Runny honey
  • 4 tbsp Corriander (optional)
  • Salt and Pepper to season

Method

  1. Pre-heat the oven to 180˚C.
  2. Cut each aubergine in half and then score the flesh into a criss-cross pattern, being careful not to pierce the skin.
  3. Put the aubergines, skin side up, and the garlic cloves into a roasting tin. Drizzle over the oil and sprinkle with the salt. Rub this into the flesh and then bake for 30 minutes, or utill soft.
  4. Take a spoon and scoop out the flesh from the aubergines, being careful not to tear the skin.
  5. Take the skin off the garlic. Then put this roasted garlic into a bowl with the aubergine and crush it all into a pulp. Then fold in 2/3 of the pomegranate seeds, the honey and 1/2 of the feta. Season to taste with more salt and pepper.
  6. Spoon this mixture back into the aubergine skins. Crumble over the rest of the feta and then garnish with the rest of the pomegranate seeds and coriander leaves. Serve!

Thanks for reading!

Emma x

Tomato, Basil and Puy Lentil Salad

Tomato, Basil and Puy Lentil Salad

As promised here’s the starter dish I made for my friend Emma’s 18th Dinner Party the other day. Basil, tomato and mozerella is a match made in heaven, so it’s no wonder that when put on a plate all together it tastes insanely good! It’s also surprisingly simple and healthy for one of my dishes. With the puy lentils and mozerella there’s plenty of protein and all the tomatoes load up the plate with vitamins and fruity/vegetably goodness. These portions are fairly small as I was making them as a starter, but if you want to make this into a hearty meal you can just double all the quantities.

Recipe

Serves 4

Time: 10 minutes

Ingredients

  • 200g Puy Lentils
  • 8 Golden Cherry Tomatoes
  • 8 Cherry tomatoes
  • 2 Beef Tomatoes
  • 1 Ball of Mozzarella
  • 3 tsp Pesto
  • A few Basil leaves

Method

  1. Cook the puy lentils according to the packet instructions. Then spoon the puy lentils onto your plates.
  2. Slice the beef tomatoes into thin slices and then half the others and arrange them around the puy lentils.
  3. Tear the mozzarella into pieces and place on the plates.
  4. Spoon the pesto over the salad and finish with a drizzle of the pesto oil and garnish with the basil.

Thanks for reading!

Emma x

Irish Stew with Dumplings

Irish Stew with Dumplings

One day I’ll stop doing a themed dish for every post, but today’s not that day. Apparently it’s St Patrick’s day on Saturday so it’s time to start digging out the shamrocks and leprechauns to celebrate. Alongside that a good lamb and potato stew should definitely be on the menu. This one is full of nourishing veg and tender lamb shoulder, which goes really well with the light herby dumplings and warming broth to make a hearty meal all in one pot!

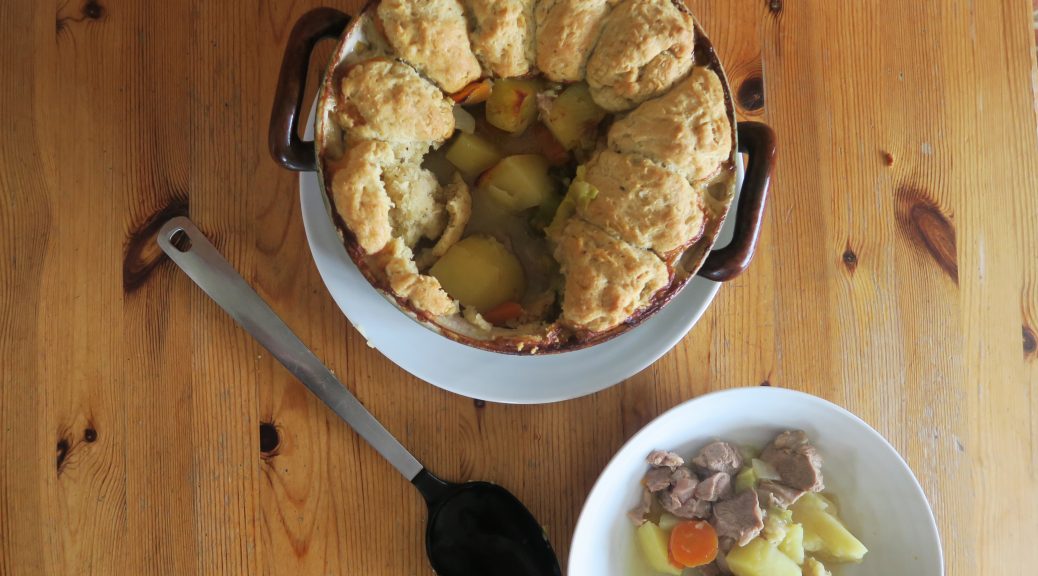
Stews also always taste better a few days after they’re made, so you can make this up to two days in advance without the dumplings, leave it in the fridge and then carry on the recipe from step 7 when you need it.

Recipe

Serves 6

Time: 30 minutes prep, 2 hours cooking

Ingredients

For the Stew

  • 2 tbsp Vegetable oil
  • 1 White onion, roughly chopped
  • 450g Lamb shoulder pieces
  • 2 Large baking potatoes, peeled and cut into quarters
  • 1 Leek, Finely sliced
  • 2 Large carrots, peeled an roughly chopped
  • 2 tbsp Plain flour
  • 750ml Beef stock
  • Salt and pepper to season

For the Dumplings

  • 150g Butter
  • 250g Self-raising flour
  • 2 tbsp Chopped mixed herbs

Method

  1. Pre-heat the oven to 180˚C.
  2. Put the oil into a large frying pan and put over a medium heat. Add the chopped onion and fry gently until it starts to caramelise. Tip this into an oven-proof casserole dish.
  3. Add the lamb pieces to the pan you cooked the onions in and fry until the pieces have browned all over. Season the meat and then add the lamb to the dish with the onions.
  4. Cover the lamb and onions with the chopped potatoes, leeks and carrots, and then mix it all together.
  5. Add the flour to the pan you cooked the lamb in and cook it on a gentle heat for about 3 minutes so it soaks up all the juices. Then slowly add the beef stock whilst stirring until you have a smooth, lump-free sauce.
  6. Pour this sauce over the meat and vegetables. Cover the casserole with a lid and then put it into the oven to cook for 90 minutes. Check on this several times to make sure the sauce hasn’t reduced too much, if the meat or vegetables are exposed cover with more water.
  7. Now make the dumplings. Put the butter and flour into a large bowl. Using a knife cut the butter into little pieces in the flour, and then go in with you fingers and rub the butter into the flours to make a mixture like breadcrumbs.
  8. Stir in the herbs, salt and pepper to season. Pour in 150ml water and stir with a round bladed knife to form a dough. Flour your hands and roll the dough into small balls.
  9. Put the dumplings around the edge of the stew and put back into the oven uncovered to bake for another 25-30 minutes.
  10. Serve!

Thanks for reading!

Emma x