Author: Emma Hawkins

Lemon and Coconut Madeleines

Lemon and Coconut Madeleines


Recipe

Makes 12

Time: 1 hour

Ingredients

  • 50g coconut oil
  • 50g plain flour
  • 50g caster sugar
  • 1 egg
  • ¼ tsp baking powder
  • ½ lemon, zest and rind

For the decoration

  • 3 tbsp Lemon curd
  • 50g Desiccated coconut

Method

  1. Put the coconut oil into a small pan and melt over a low heat.
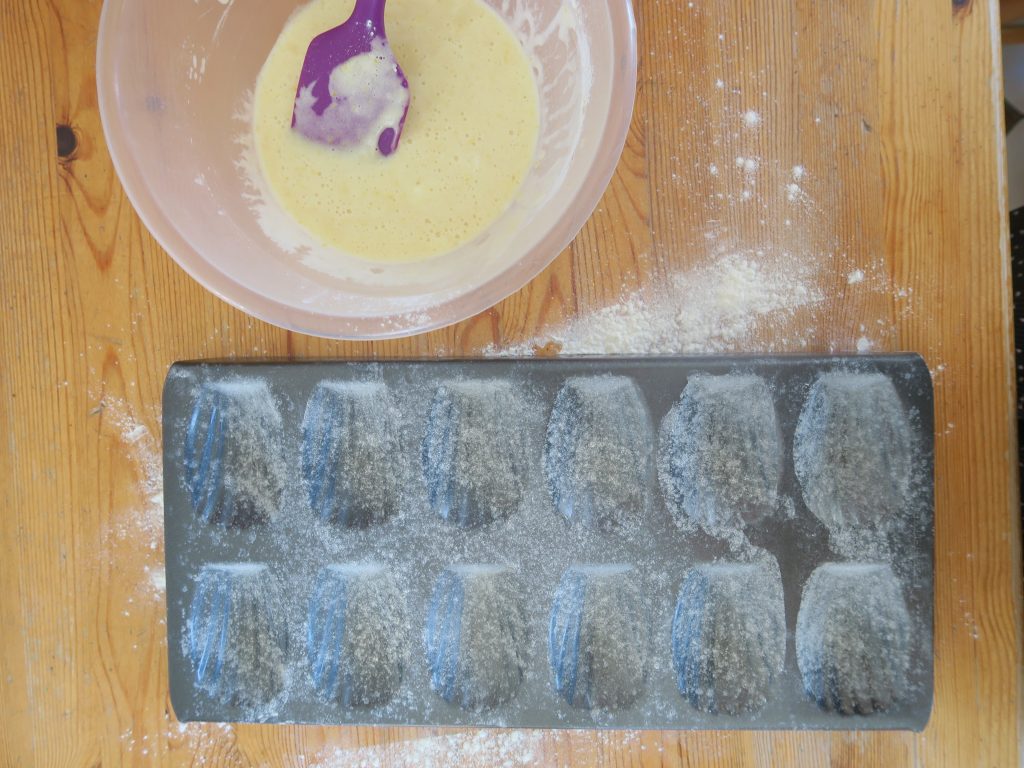
  2. Pre-heat the oven to 180C. Brush a 12-hole madeleine tin (or a muffin tin) with a little coconut oil to grease. Sprinkle a little flower over the tin to coat the moulds, then turn the mould upside down to tap out the excess flour.
  3. Put the sugar and egg into a bowl and beat with an electric whisk until pale and fluffy.
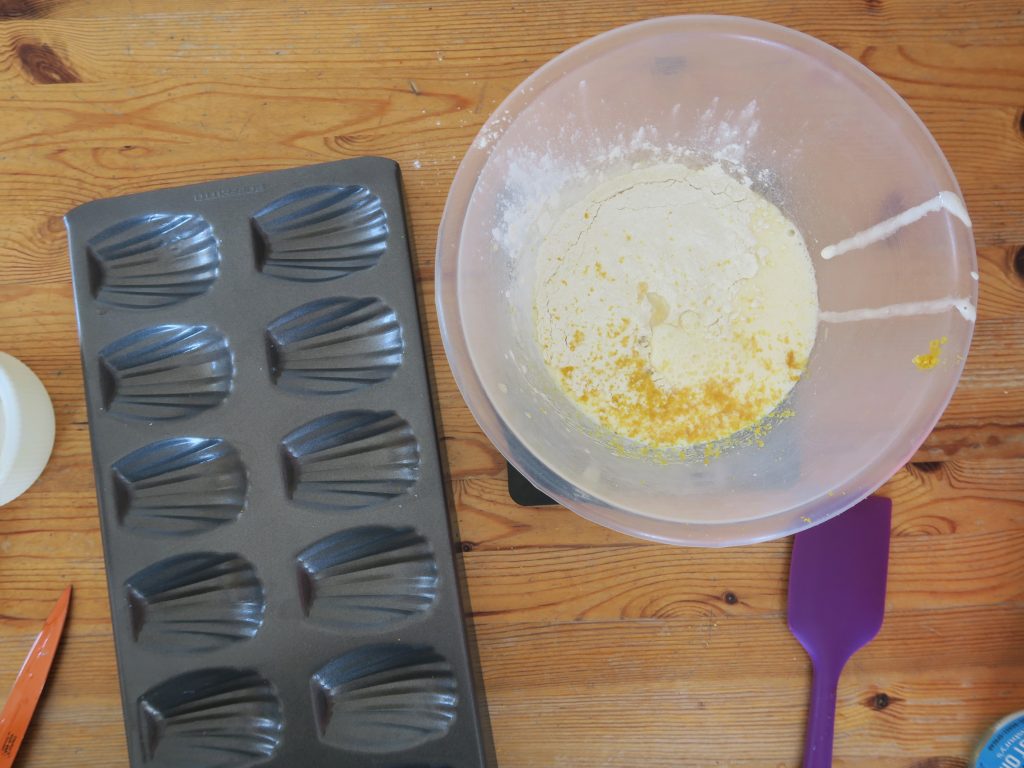
  4. Add the baking powder, lemon zest, lemon juice, flour and melted coconut oil. Fold everything together with a spatula until smooth and then leave to rest for 20 minutes.
  5. Carefully pour the mixture into the prepared tin. (If using a madeleine tin you’ll want to fill it up to jus below the top of the mould). Then put the madeleines in the fridge to rest for 1 hour.
  6. Bake the madeleines in the oven for 8-10 minutes until golden brown. Leave them to cool in the tins for 2 minutes and then turn them out onto a wire rack.
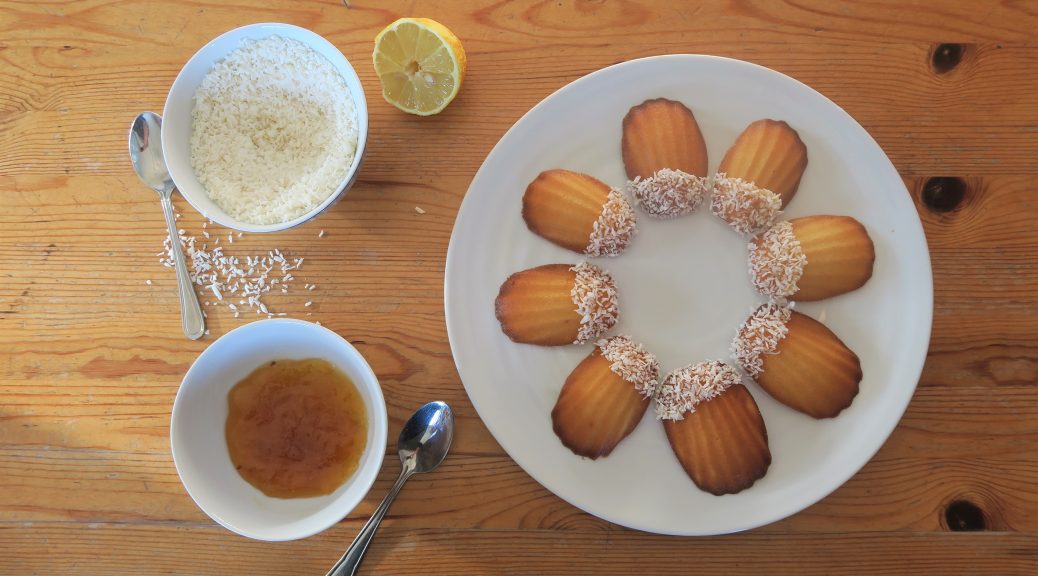
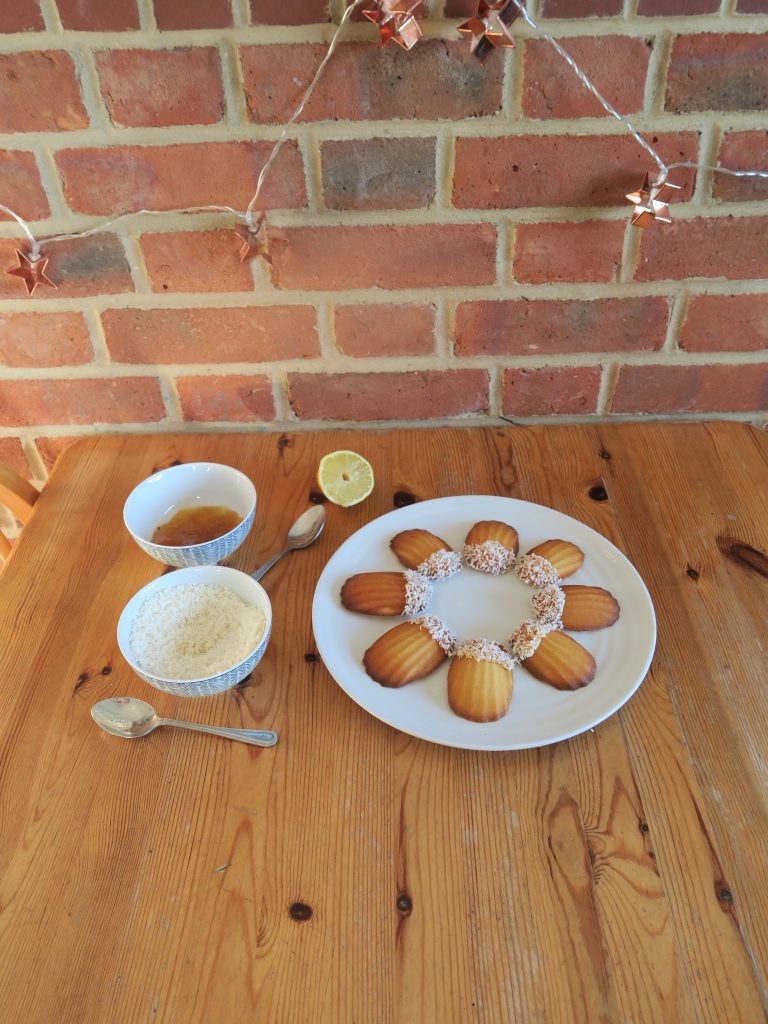
  7. Whilst the madeleines cool prepare the topping. Put the lemon curd into a small pan and heat gently to loosen. Pour the lemon curd into a small bowl. Put the desiccated coconut into another small bowl.
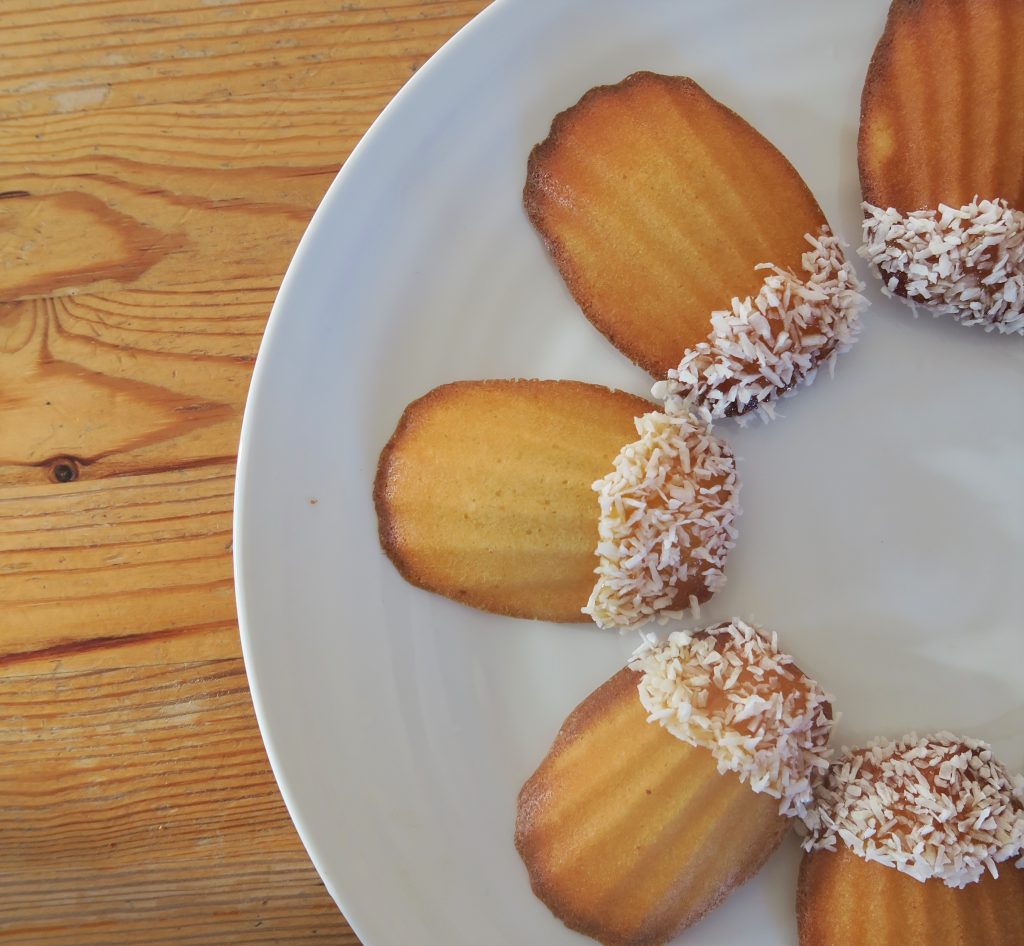
  8. Pick up one of the madeleines and dip the base in the lemon curd and then in the desiccated coconut. Repeat with the rest of the madeleines. Enjoy!

Thanks for reading!

Emma x

Mocha Hazelnut Madeleines

Mocha Hazelnut Madeleines


Recipe

Makes 12

Time: 1 hour

Ingredients

  • 50g butter
  • 40g plain flour, plus extra for dusting
  • 1 tbsp coffee granules
  • 1 egg
  • 50g caster sugar
  • 8g cocoa powder
  • 1 tsp honey

To Decorate

  • 25g milk chocolate
  • 50g chopped hazelnuts

Method

  1. Preheat the oven to 180C. Butter and then lightly flour 12 hole madeleine tin (or a muffin tin if you don’t have one). Turn the tin upside down to tap out the excess flour and then place to one side.
  2. Put the butter into a pan and leave to melt over a low heat. Take the butter off the heat and add the coffee granules, stir to dissolve. Leave to cool to one side until needed.
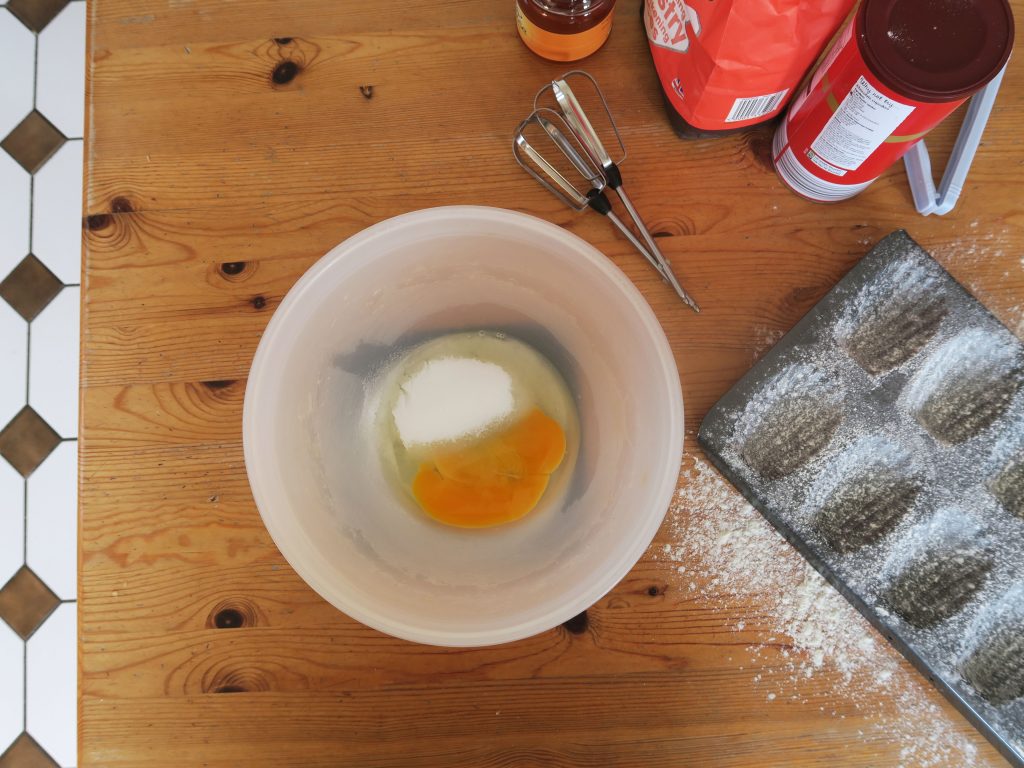
  3. Put the egg and sugar into a bowl and whisk until pale and thick (an electric whisk will save a lot of elbow grease here!).
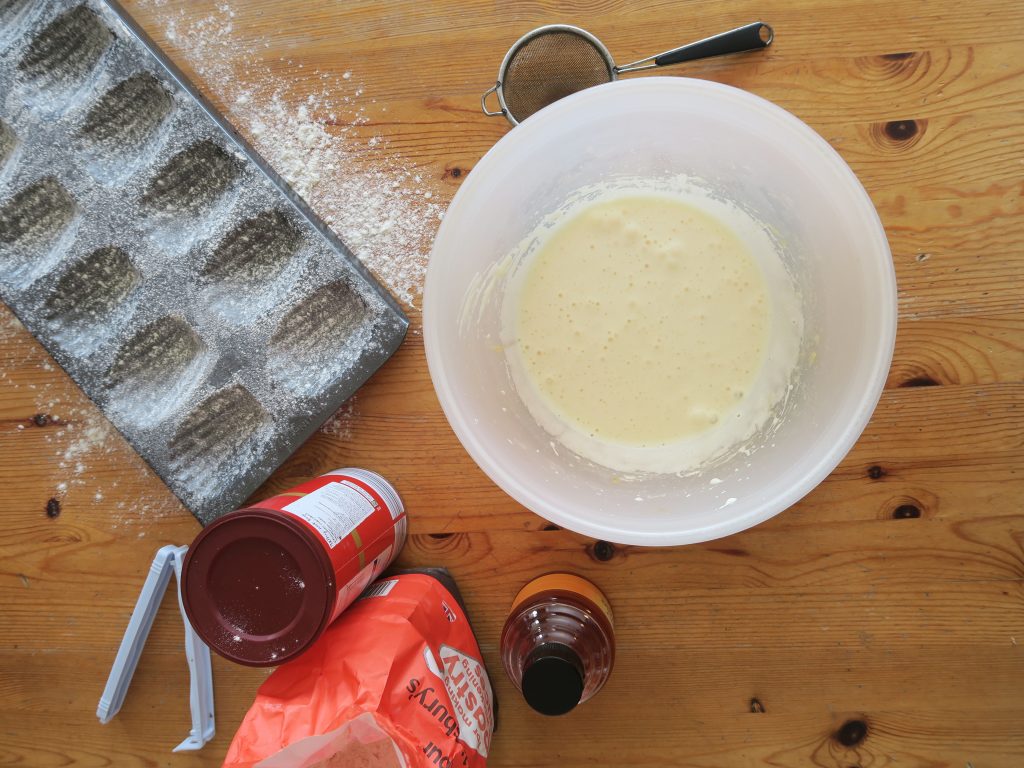
  4. Sieve the flour and cocoa into the whisked egg mixture. Then add the honey and the melted coffee butter. Fold everything togetehr with a spatula to get a smooth batter, being careful to keep as much air in the mixture as possible.
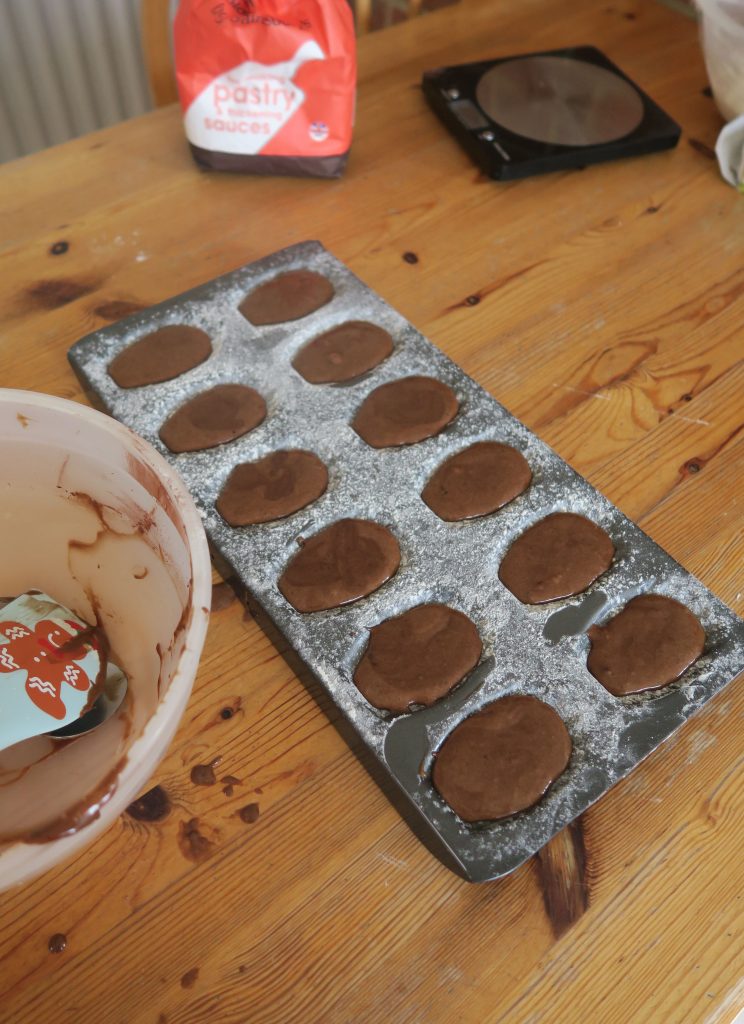
  5. Spoon the mixture into the prepared tin, filling each hole to just below the rim (1-2 tbsp tends to work). Chill in the fridge for 1 hour.
  6. Bake the madeleines in the oven for around 10 minutes, until soft and risen. Leave to cool in the tin.
  7. Melt the chocolate in a glass or metal bowl over a pan of gently simmering water. Whilst waiting for the chocolate to melt put the hazelnuts into a small roasting tin and put into the oven for 5 minutes to brown a little.
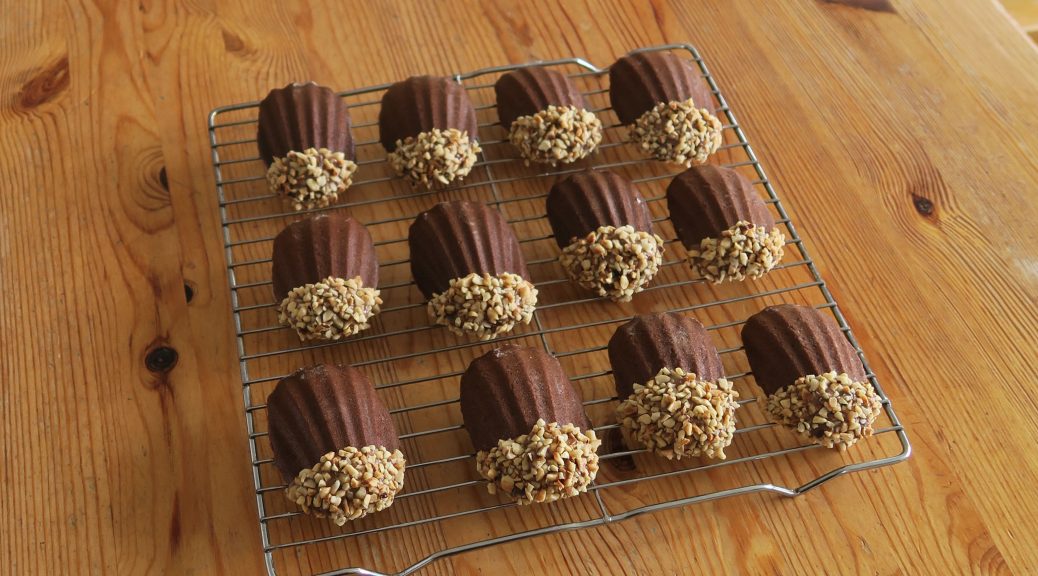
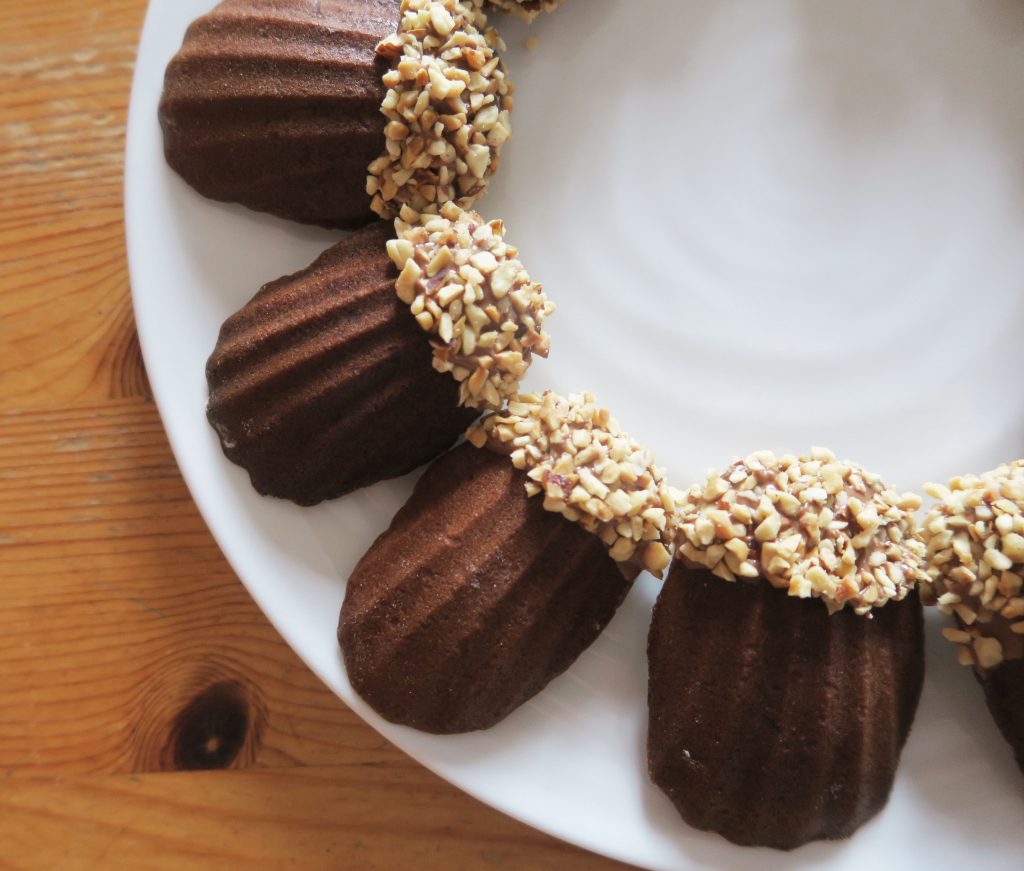
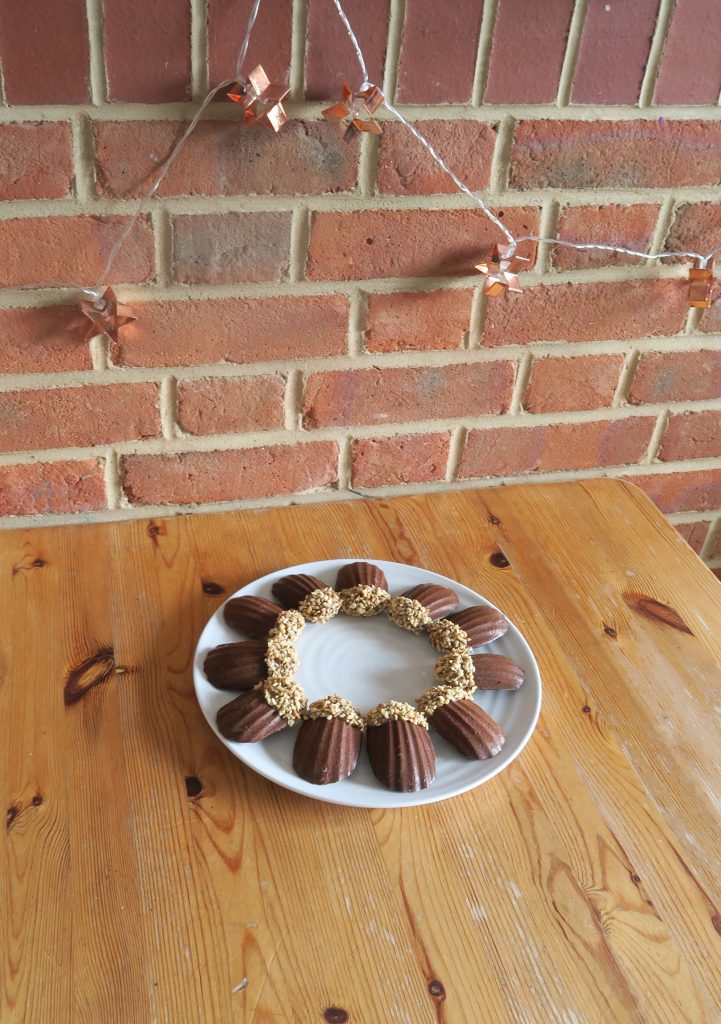
  8. Dip the bottom 1/3 of each madeleine into the chocolate and then into the roasted hazelnuts. Leave on a sheet of baking paper to set and then enjoy!

Thanks for reading!

Emma x

Chocolate Koala Cake

Chocolate Koala Cake

Recipe

Serves 8-10

Time: 2 1/2 hours

Ingredients

For the chocolate cakes

  • 200g dark chocolate
  • 200g butter
  • 125g self raising flour
  • 125g plain flour
  • 25g cocoa powder
  • 200g light brown sugar
  • 200g caster sugar
  • 3 eggs
  • 75ml crème fraiche
  • 100ml water

For the coffee buttercream

  • 300g icing sugar
  • 100g butter
  • 1 ½ tbsp coffee granules
  • 1 tbsp milk

For the grey buttercream

  • 675g icing sugar
  • 300g butter
  • A few drops of black food colouting

To decorate

  • 200g white chocolate
  • Black and pink food colouring
  • 200g Fondant icing
  • 100g Icing sugar

Method

  1. Start by making the cakes. Pre-heat the oven to 170C. Grease and line two 17.5cm cake tins.
  2. Melt the chocolate and butter together in a sauce pan over a low heat, stirring occasionally until smooth. Set aside to cool.
  3. Next put the flours, cocoa powder, and sugars into a bowl and mix together.
  4. In another bowl whisk together the eggs, crème fraiche and water. Then add the cooled melted chocolate mixture and whisk to combine.
  5. Add the flour to the mixture and fold with a spatula to incorporate.
  6. Pour the cake batter into the two tins, making sure an equal amount goes into each. Then bake the cakes for 35-40 minutes, until the top is springy and a skewer inserted into the middle comes out clean.
  7. Leave the cakes to cool for 10 minutes, then take them out of their tins and leave to cool on wire racks until room temperature.
  8. Meanwhile make the icings. To make the coffee icing, put the icing sugar and butter into a bowl and mix until smooth. Put the coffee granules into the milk and stir until dissolved. Then add the milk to the icing and stir until it reaches an even colour.
  9. Spoon the icing into a piping bag and leave in the fridge until needed.
  10. To make the grey icing beat the icing sugar and butter together like you did for the coffee icing. Add in a little black food colouring and mix again. (It’s best to add the food colouring in very small amounts – a drop or two at the most each time – as it’s very easy to over-colour). You want the icing to be a nice grey colour.
  11. Cover the bowl of grey icing with clingfilm and leave in the fridge until needed.
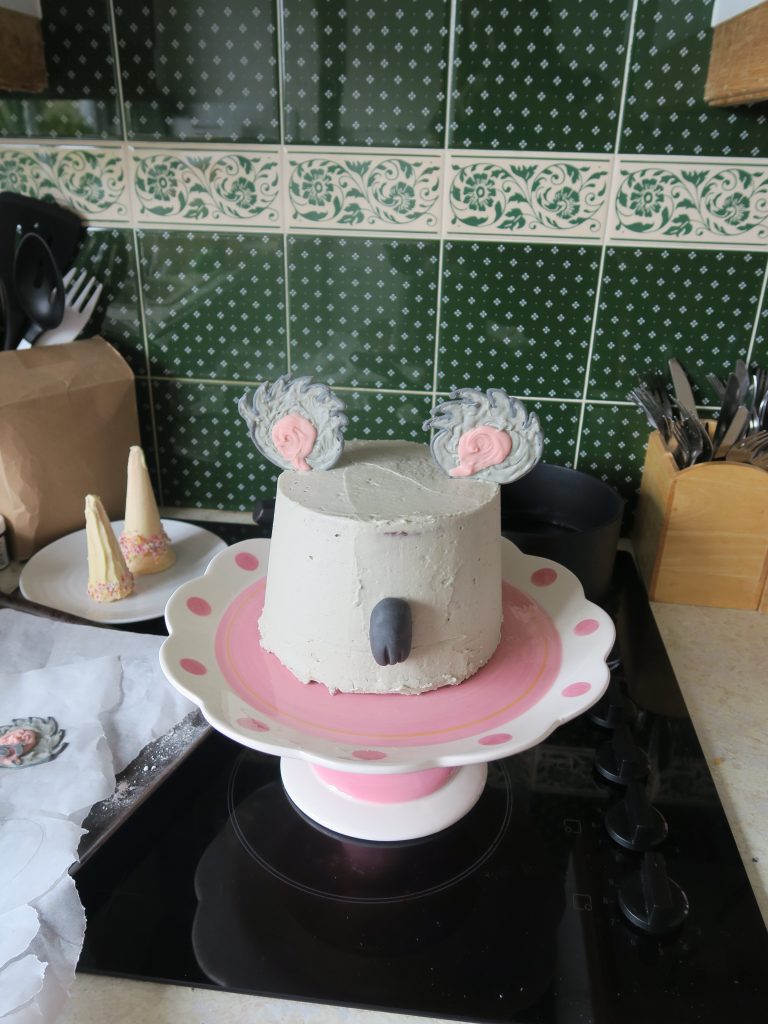
  12. Now make the decorations for the top of the cake.  To make the ears begin by melting the white chocolate in a glass or metal bowl over a pan of gently simmering water.
  13. Split the chocolate into three bowls. Colour one lot pink, one lot dark grey and the last one light grey. Spoon each lot of chocolate into it’s own piping bag.
  14. At this point it might be helpful to draw your design for the ears onto some greaseproof paper with a pencil so you can use it as an outline. I like to make 5 or 6 ears so if they break you have back ups. You also need to make sure that for every design you draw, you also have another drawn flipped into the mirror image so the ears match when on the cake. Once you’ve done this, turn the greaseproof over, so the pencil marks are on the other side, and place it on a baking tray.
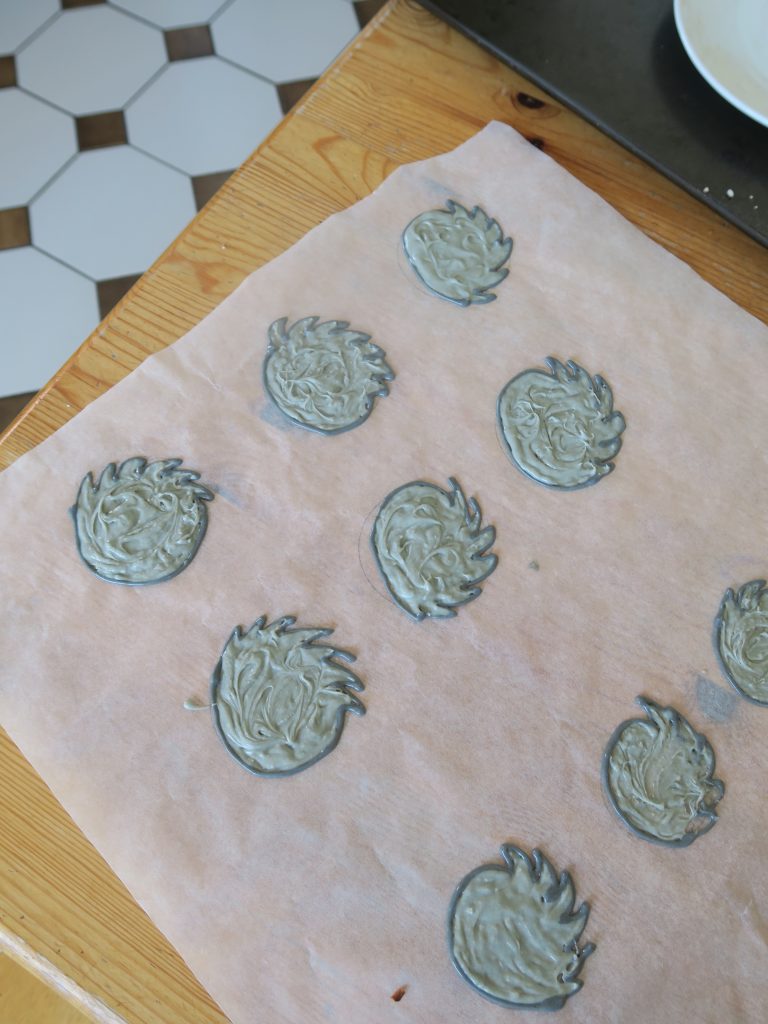
  15. Pipe with the dark grey chocolate first to make an outline of the koala ears, tracing the lines you made earlier. Fill in the middle of this outline with the light grey chocolate. Then pipe a small circle of pink chocolate in the middle of each ear.
  16. Take a cocktail stick and, whilst the chocolate is still warm, drag it through the layers of chocolate, from the middle to just before the outline, to merge the colours a little and give them some texture. Leave the ears to dry at room temperature.
  17. Now make the nose. Add a few drops of the black food colouring into the fondant icing and then knead the icing to mix it all together. You want the nose to be as black as possible so you might need to do this several times, adding a few drops each time, to get the right colour.
  18. Roll the fondant into a chunky oval, making it as smooth as possible. Then take a cocktail stick and make two little nostrils in the base. Set aside to dry out at room temperature.
  19. Finally make the black icing that you’ll use to pipe the eyes and mouth. Put the icing sugar into a bowl with 1 tbsp of water and a few drops of black food colouring. Mix to make a smooth, fairly stiff icing. (You want it to be runny enough to pipe, but not runny enough to drip off a spoon).
  20. Pour the black icing into a piping bag with a small round nozzle and leave to one side until needed.
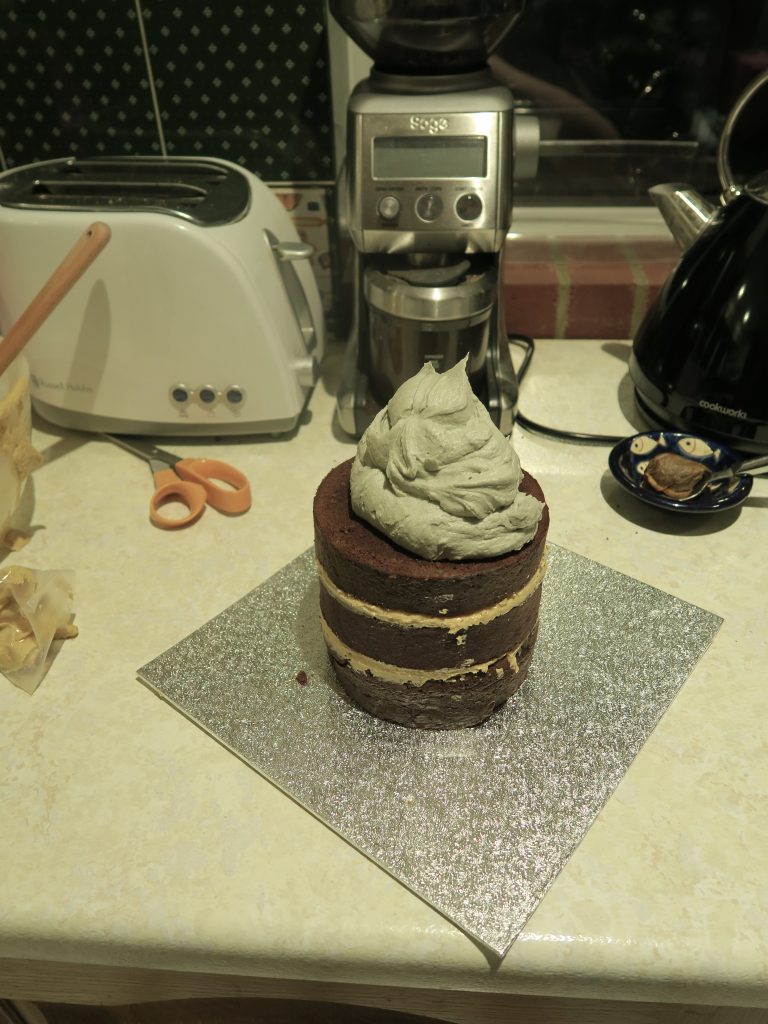
  21. Now start to ice the cake (only do this when the cakes are completely cool!). Pipe a little bit off coffee icing onto a presentation board and then put one of the cakes on top (this will stop it sliding around). Pipe an even layer of coffee butter cream over the cake (I like pipping around the edge into the middle in a spiral). Use a palette knife to smooth it over a little and then top with the other coffee sponge.
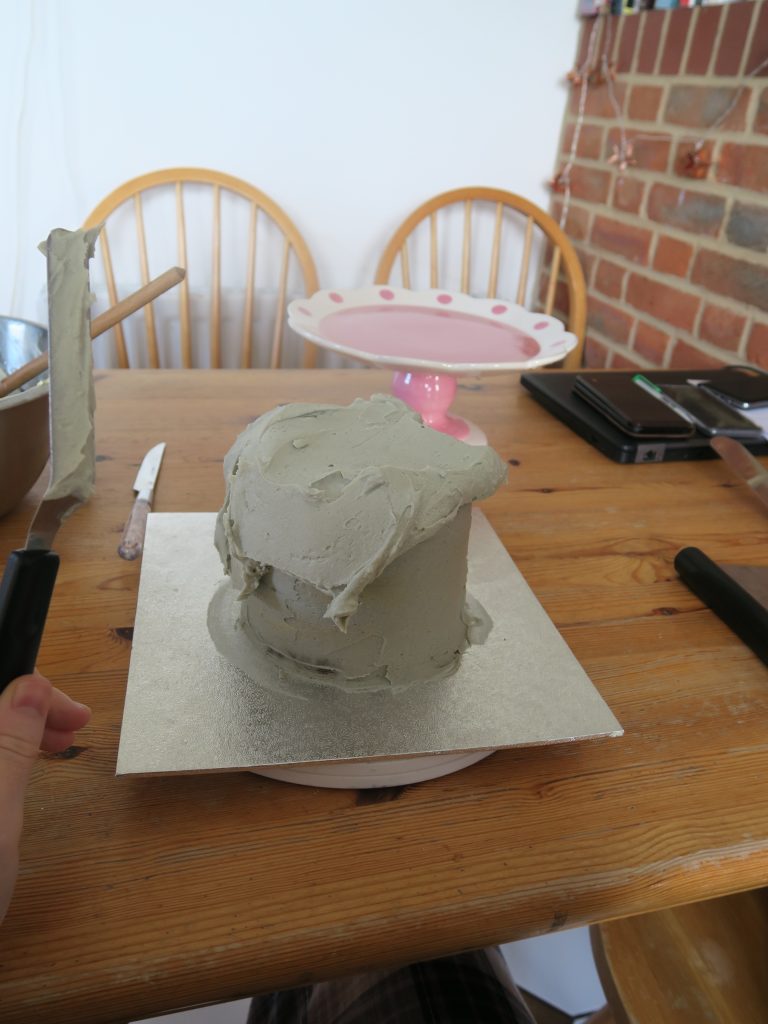
  22. Take the grey icing and put a huge dollop on the top of the cake. Use a palette knife to work it round the sides of the cake into an even layer. This is the crumb coat so what you want to do is fill any gaps and make sure there is an even coating across the whole cake. Don’t worry at this point about it looking neat or if there’s bits where the cake is poking through.
  23. Put the cake to chill in the fridge for 2-3 hours to allow the icing to set.
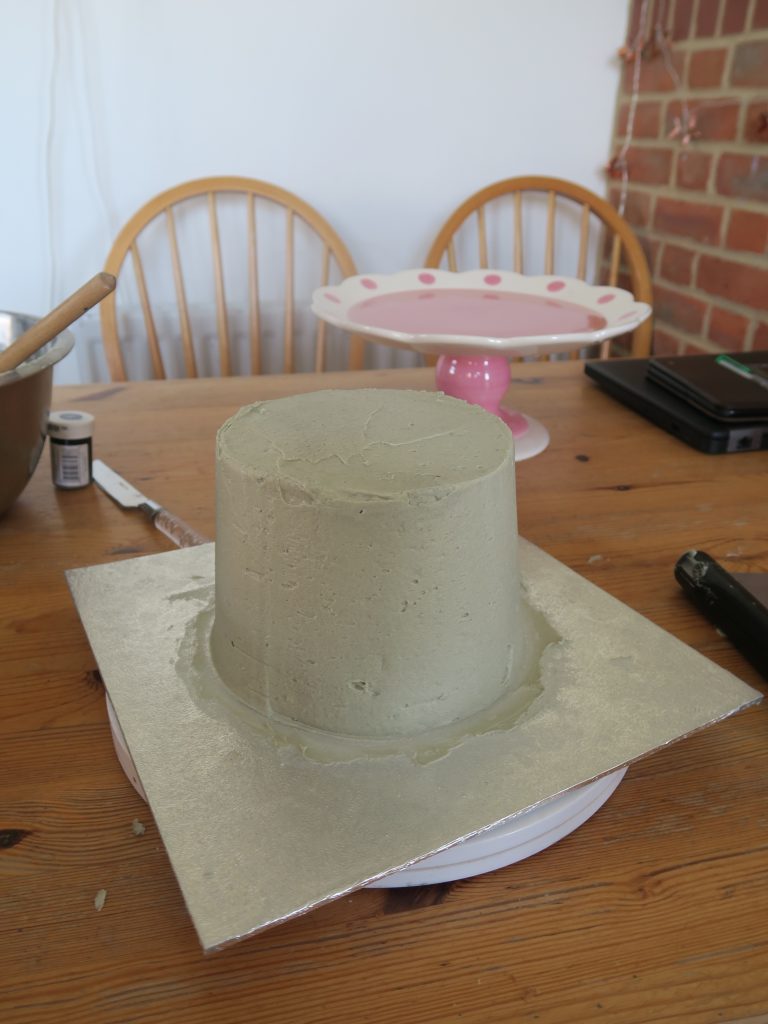
  24. Once the icing is set (you can check this by touching it lightly and feeling if it’s hard) take the cake out of the fridge. Plonk another blob of grey icing on the top and, again, work it round the cake with a palette knife.
  25. When there’s a good layer of icing surrounding the cake take your palette knife, hold it parallel to the sides of the cake and then pull it round the sides of the cake to smooth it out. Wipe the excess icing you’re taking off on the side of an empty bowl as you go. Then tidy up the top of the cake by pulling the palette knife (this time parallel to the top of the cake) in confident strokes, from the edge of the cake into the centre.
  26. Leave the cake in the fridge for another couple of hours to set again.
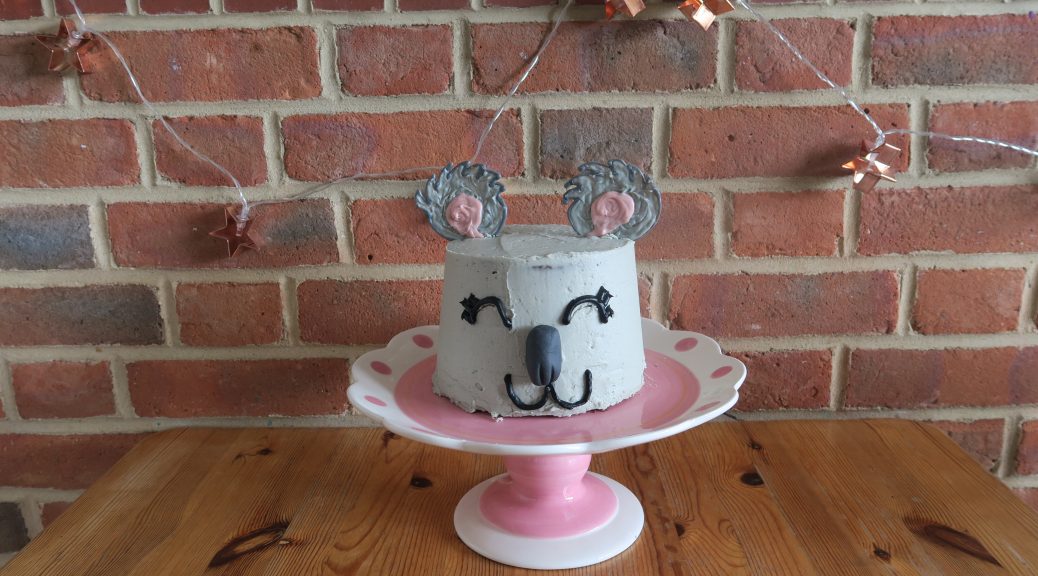
  27. Now is time to build your koala! Begin by attaching the nose. Snap a cocktail stick in half and press it into the underside of the nose. Then press it into position in the cake.
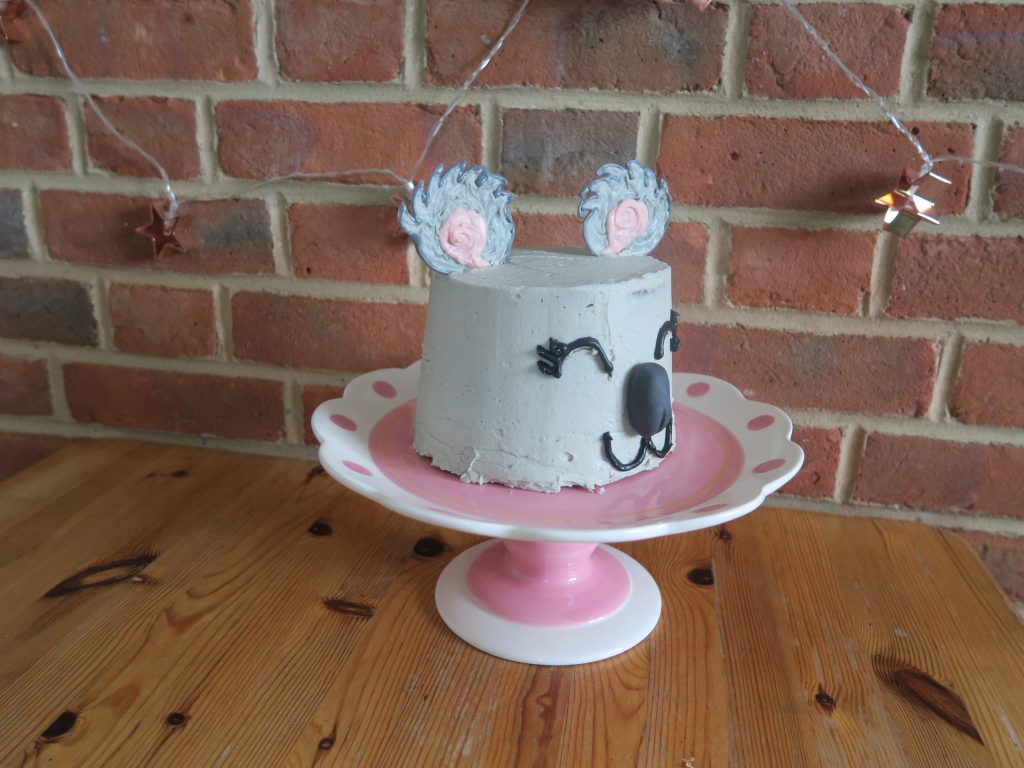
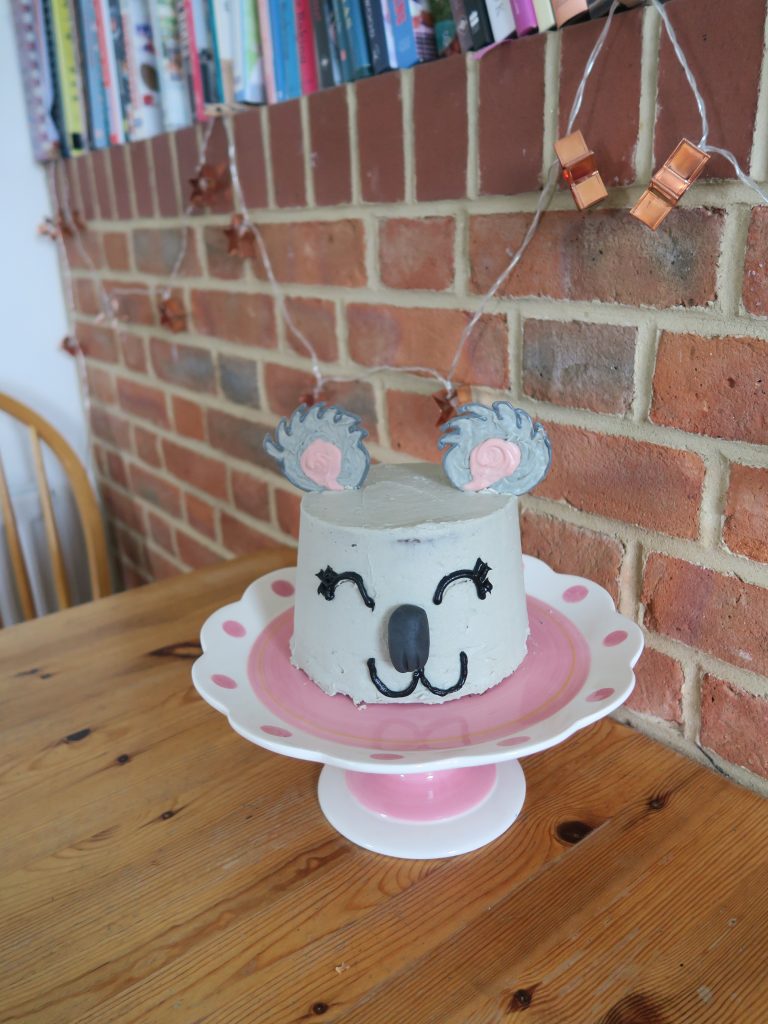
  28. Next pipe the mouth and eyes. You can either do this free hand or score your design into the icing before you pipe, with a knife. Pipe two downfacing hemispheres for eyes, either side of the nose, and add some eye lashes. Then pipe two larger upfacing hemispheres from under the nose, and a little chin underneath that.
  29. Finally, carefully peel the chocolate ears off the baking paper and place them upright on either side of the cake. (You may need to score little holes into the cake to put them into or add a little butter cream to hold them in place). Enjoy!

Thanks for reading!

Emma x

Herb Swirl Bread

Herb Swirl Bread


Recipe

Makes 1 loaf

Time: 2 hours

Ingredients

  • 500g strong white bread flour
  • 8g salt
  • 7g fast action dried yeast
  • 350ml water
  • 4 tbsp butter
  • 2 garlic cloves, peeled and crushed
  • A large pinch of paprika
  • 3 handfuls of fresh basil, finely chopped
  • 100g parmesan, grated
  • 1 tbsp fresh rosemary, finely chopped
  • 1 tbsp fresh sage, finely chopped
  • 50g feta cheese
  • 25g pine nuts

Method

  1. Put the flour, salt, and yeast into a bowl and mix to combine. (Make sure not to put the salt on top of the yeast as it may deactivate it).
  2. Add the water and mix to make a smooth dough. Turn the dough out onto a work top and knead for 5-10 minutes until smooth and stretchy.
  3. Lightly grease a bowl with a little oil. Put the dough in the greased bowl, cover with cling film and leave to rise for about an hour, until doubled in size.
  4. Meanwhile make the filling. Put the butter, crushed garlic, parika, basil, parmesan, rosemary, and sage into a bowl and beat with a spoon until smooth.
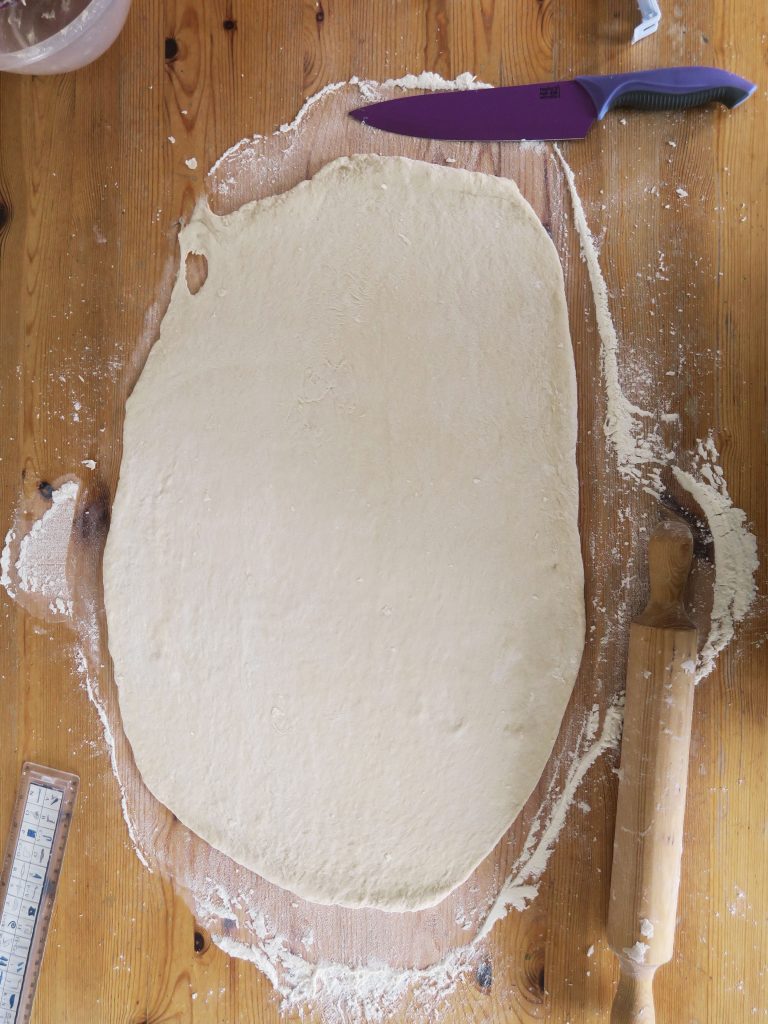
  5. Punch the risen dough down in the bowl to knock out the extra air. Then turn the dough out onto a lightly floured worktop and roll it out to a rectangle about 12×18”.
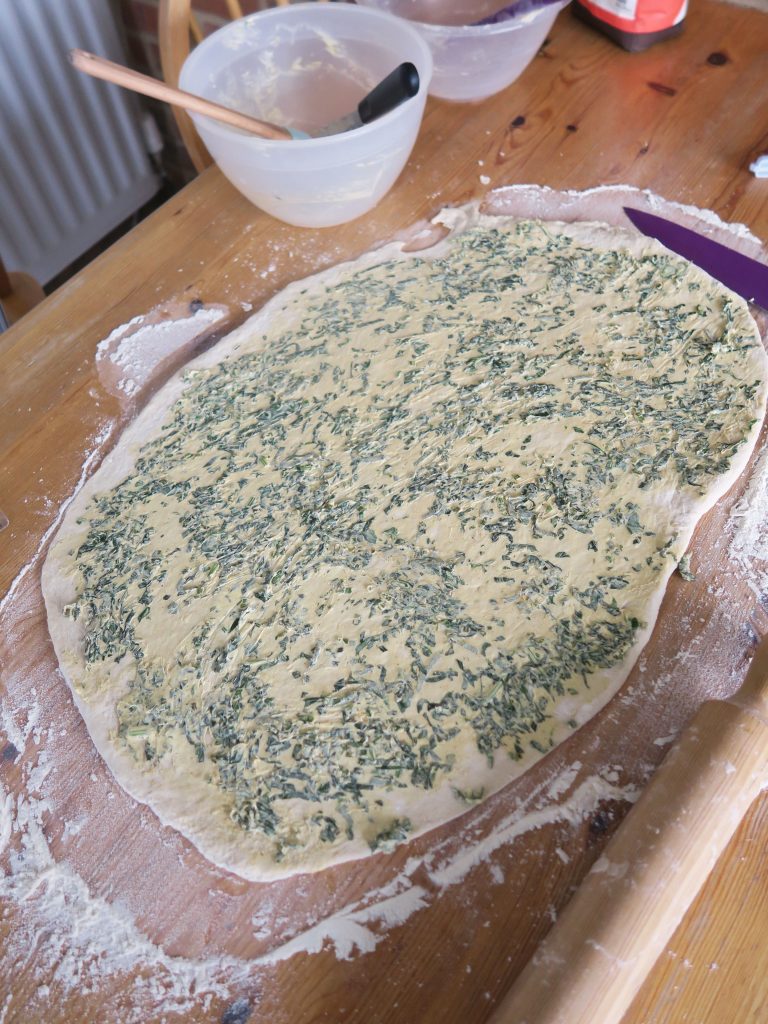
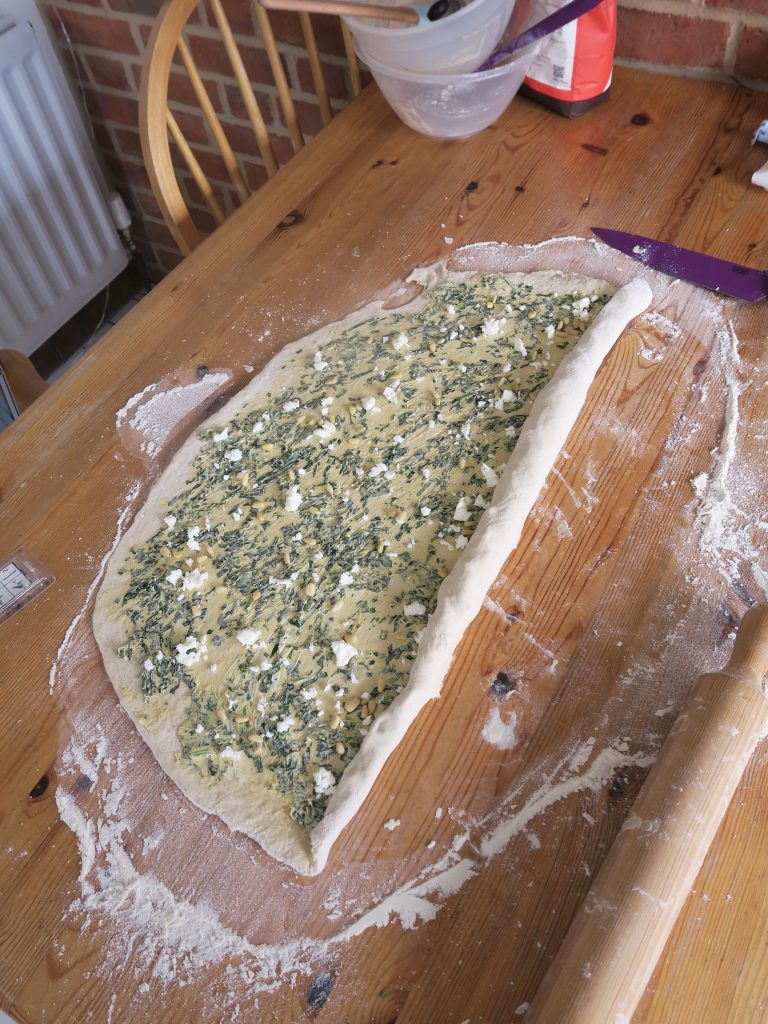
  6. Spread the herb butter in an even layer over the dough, using a spatula or palette knife. Then crumble over the feta and sprinkle over the pine nuts in an even layer.
  7. Roll the dough up, long-edge to long-edge to make a tight roll. Pinch along the joining edge to seal.
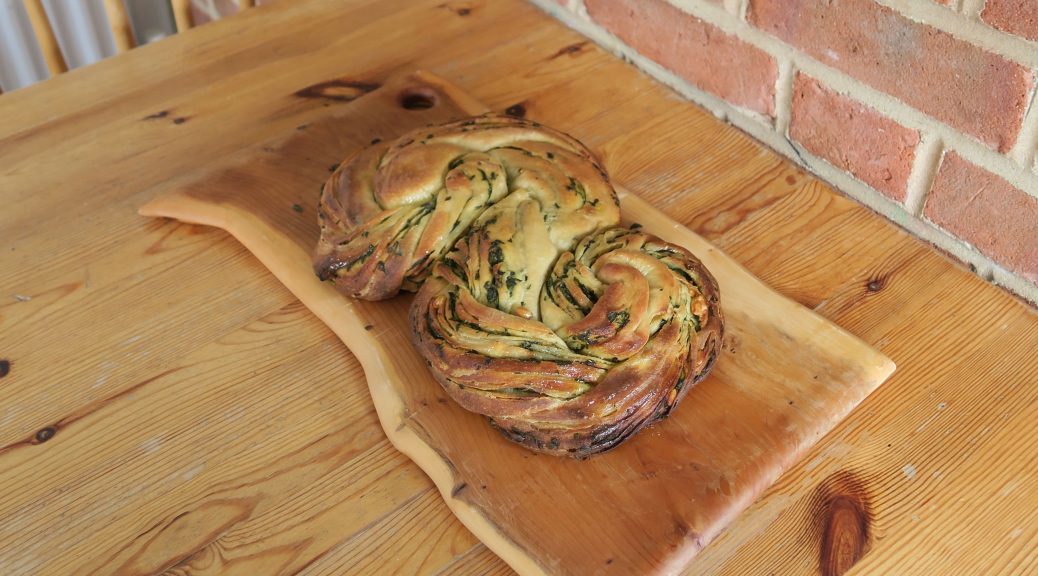
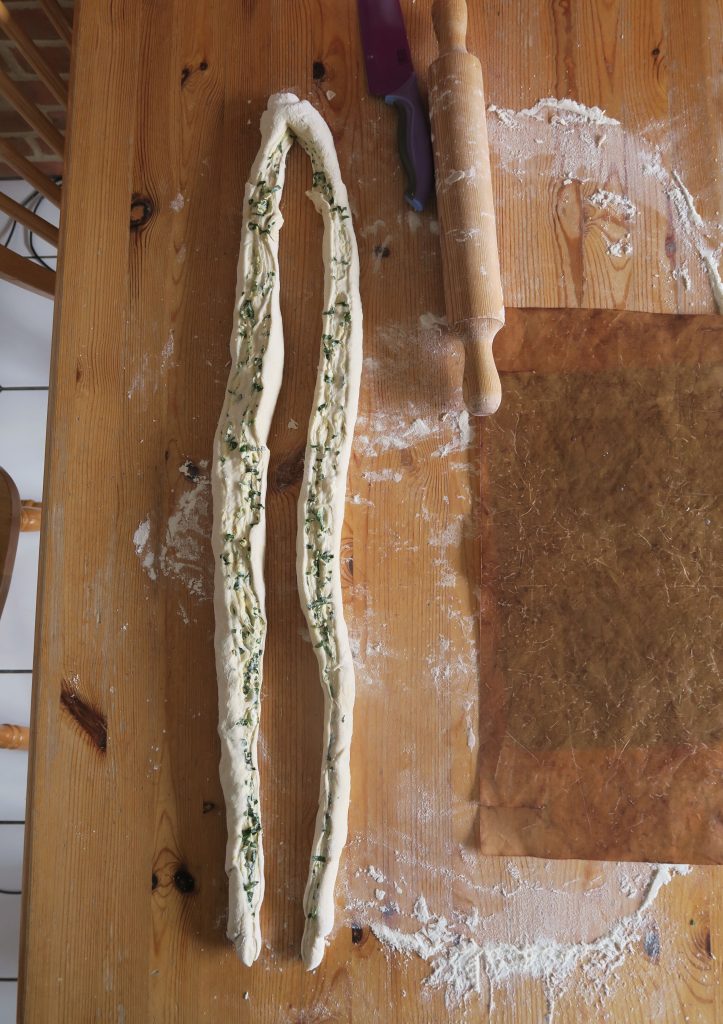
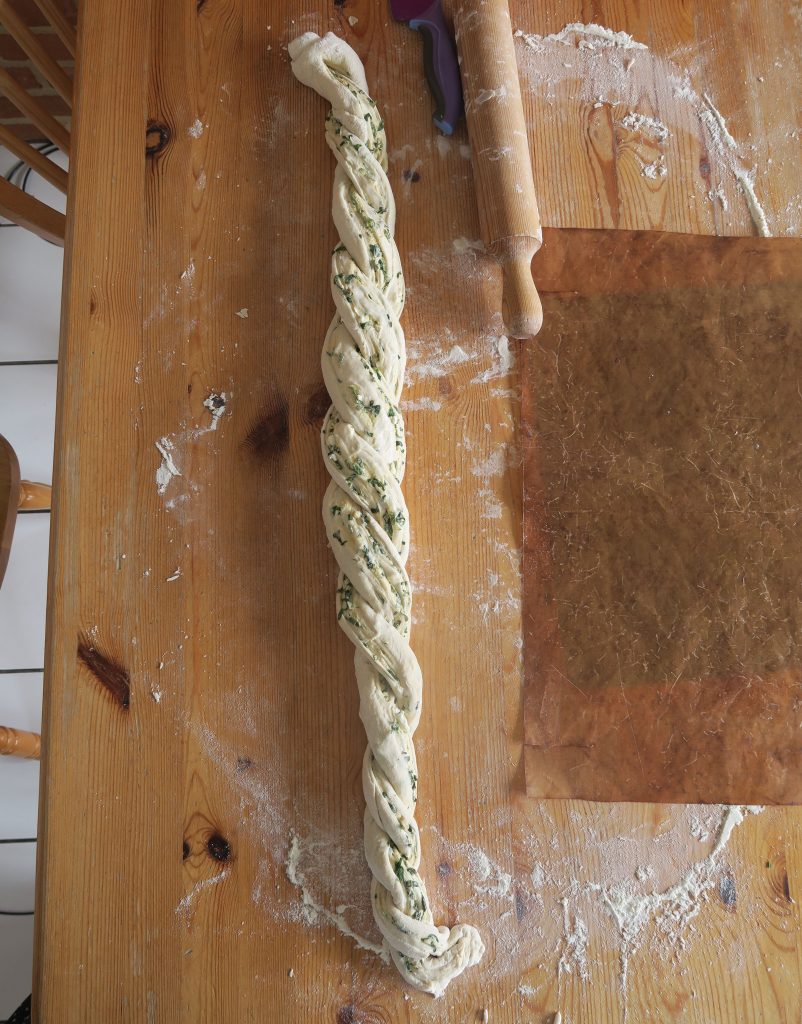
  8. Take a sharp knife and cut down the middle of the roll to make two strands, leaving a little at the top of one end still joined. Then twist the strands over eachother to get a long twist, trying to keep the filling facing upwards as much as possible.
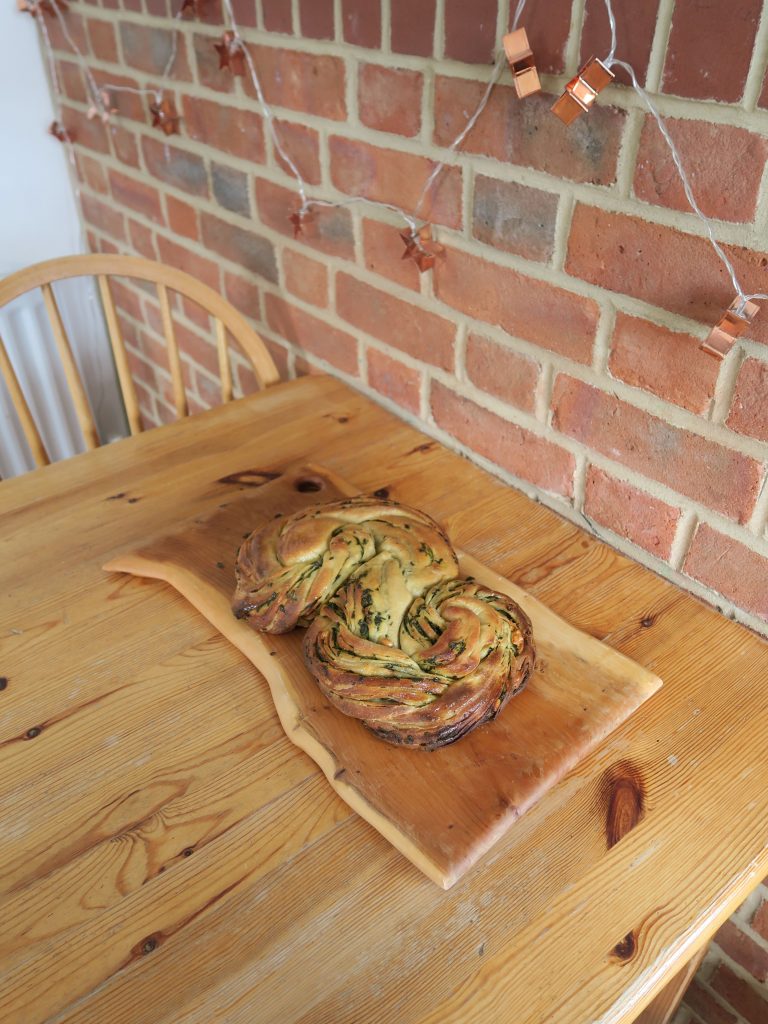
  9. Coil the dough into a circle (like a snake) up to half way down the chain. Then coil the other half the other way to make a sort of ‘S’ shape.
  10. Transfer the loaf to a lined baking tray. Cover and leave to rise for another 45 minutes – 1 hour, until doubled in size.
  11. Pre-heat the oven to 180C. Bake the loaf in the oven for around 40 minutes until golden brown and risen (it should also sound hollow when tapped on the base). Leave to cool and then enjoy!

Thanks for reading!

Emma x

Kanelbullar (Swedish Cinnamon Buns)

Kanelbullar (Swedish Cinnamon Buns)

Hello! I hope you’re all ok and coping with the isolation. The next few months are gonna be full of people finding out how to spend the time in a way that suites them. I’ve found that for me baking has been a really good way of practising some mindfulness, being in the present moment and lifting the spirits.
In Scandinavia they have something called Fika, which means coffee/cake break and is something that takes place once or twice every day, giving everyone a chance to have a break and a chat over some treats. They also have something called Hygge which essentially means home comforts. This way of life aims to embrace the wholesomeness and comfort of family and home and to focus on the little sweet things in life. In the current day I think Fika and Hygge are really positive things to be thinking about and aiming for.
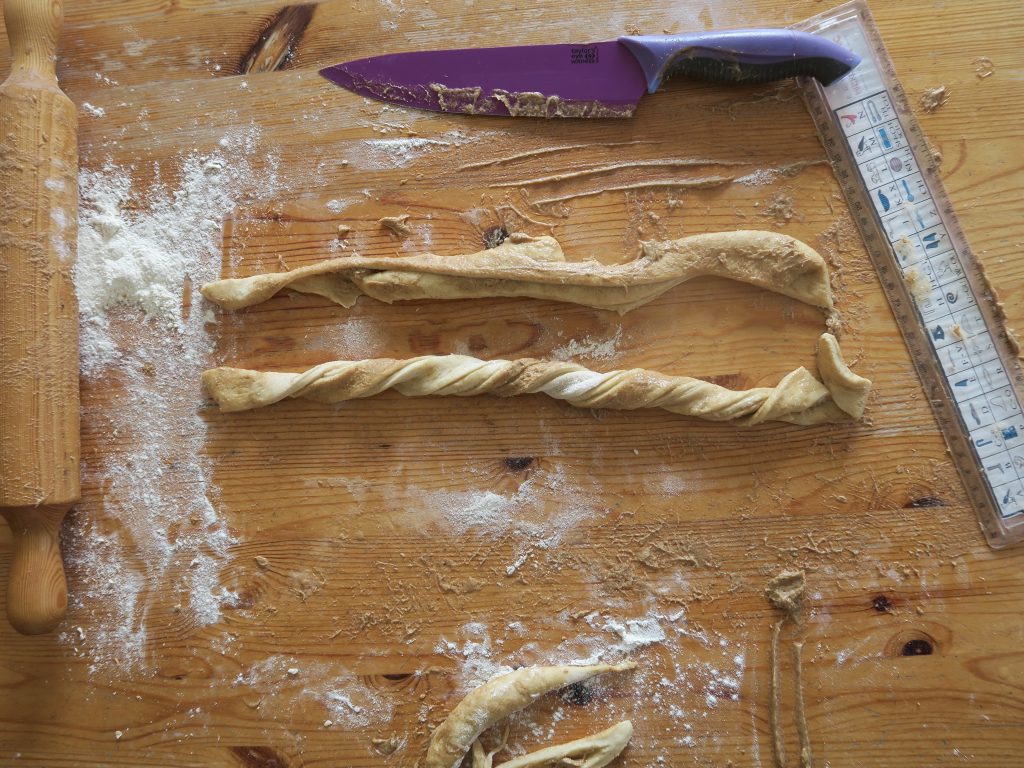
These Kanelbullar, for me, are a perfect start to this. With all this extra time I think bread is a really good way to break up a day as you can come back to it every few hours to do the next step. These cinnamon buns are super fun to make, easy to share and are a little bundle of comforting goodness. I could also see them being a really fun thing to make with kids (especially when it comes to the shaping) so if you have any children who are getting a bit fidgety being stuck in doors all day, these might be the ticket!
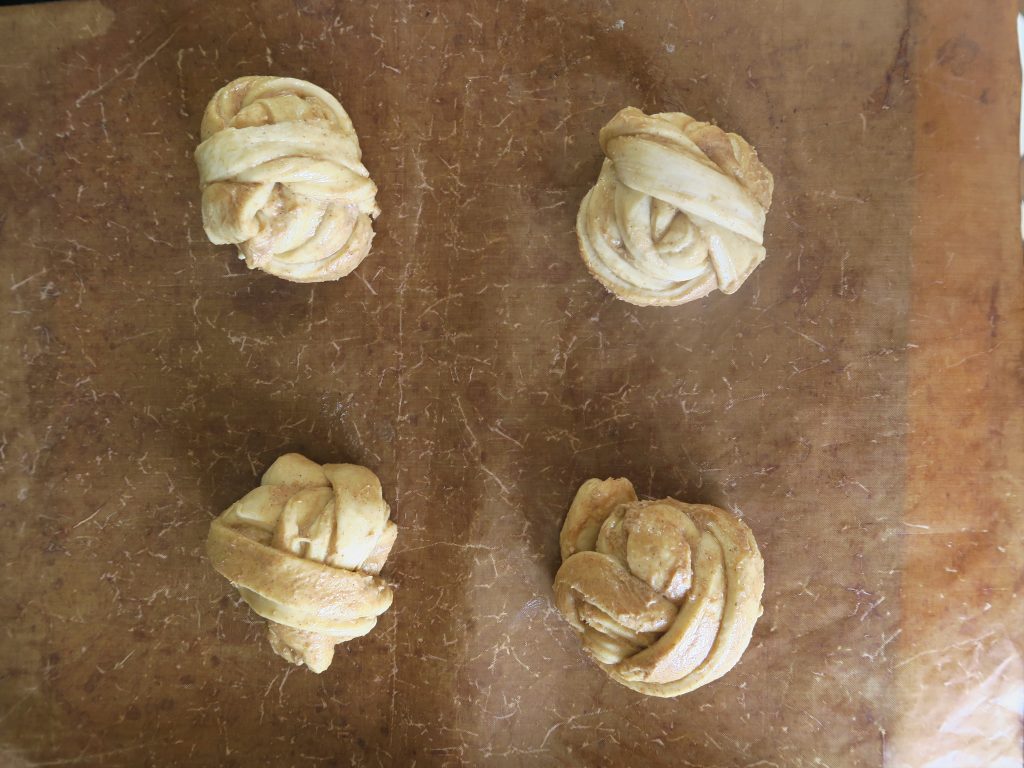
Traditonally, kanelbullar are cardamom buns and are therefore flavoured (in the dough) with ground cardamom. However, because I don’t really like cardamom and therefore I don’t have it at home I’ve decided to use mixed spice instead. (Apologies to any Scandinavians out there whose traidtional bake I’ve just changed!) So if you’re looking to make the classic kanelbullar swap the mixed spice for some ground cardamom!
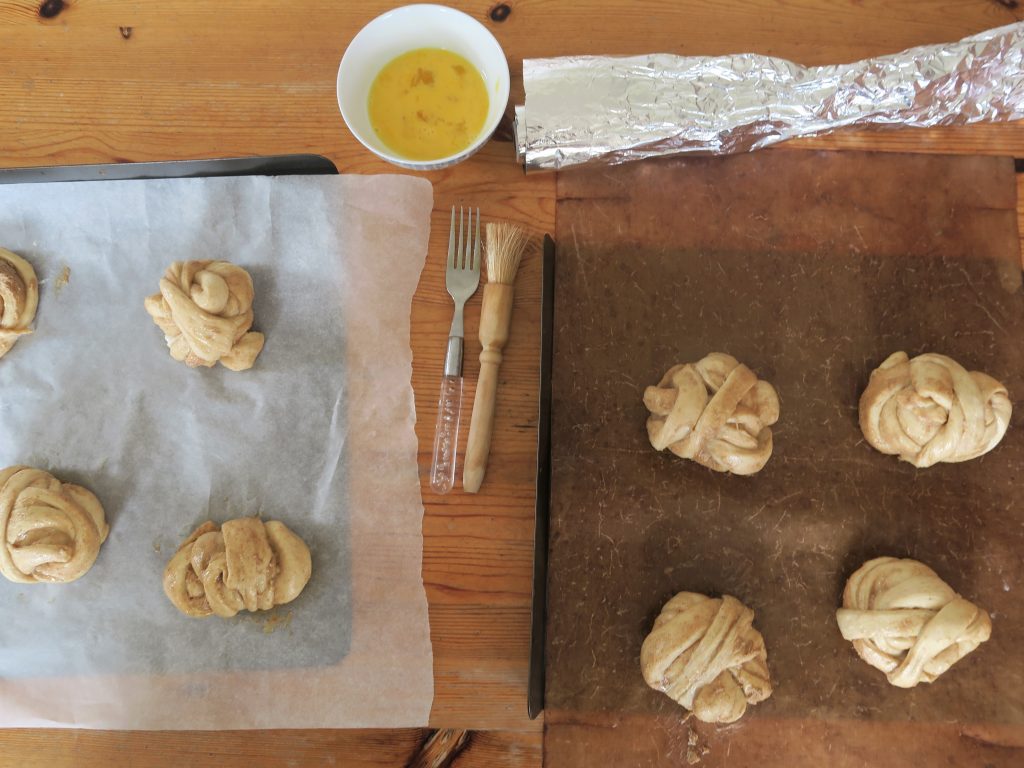
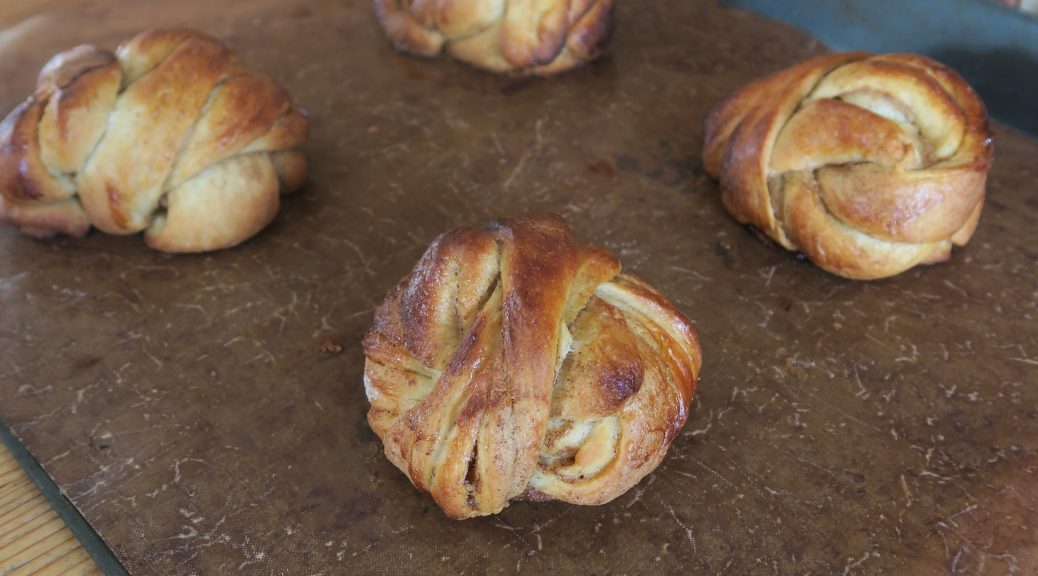
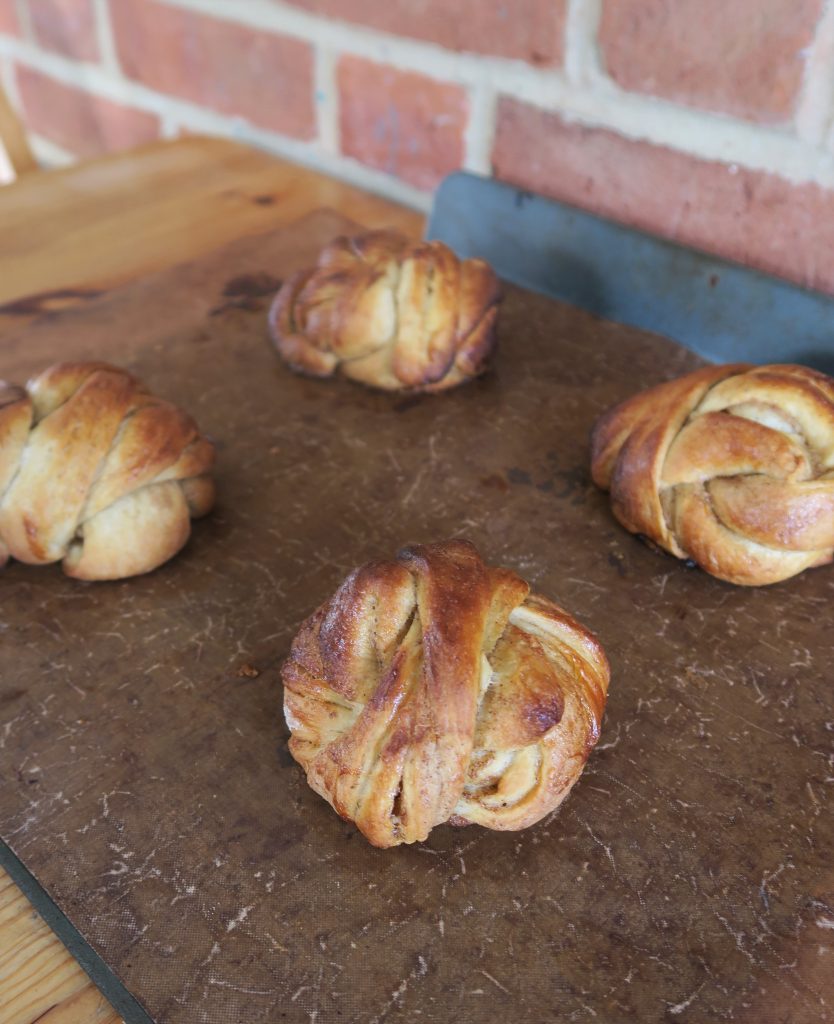
I also found that when shaping these the cinnamon sugar/butter mix that you spread over the dough kinda went everywhere and made them super slippery and fiddly to work with. If that happens don’t worry, keep going. The main thing with the shaping is to get a twisted, coiled knot with one strand pulled tightly over the top, so as long as you have that you’ve done it right. That said, if the filling does splurge out a bit I’d really recommend baking the buns with a layer of tin foil loosely over the top (not too tight or it’ll stick to the top of the buns). With the exposed sugar on the outside of the kanelbullar they might end up burning before the buns can fully cook, so covering them with foil will given allow them to reach a soft texture with a nice golden colour.
Recipe

Makes 8 buns

Time: 2 hours, plus proving and baking time

Ingredients

  • 400g strong white bread flour
  • 50g caster sugar
  • 7g salt
  • 1 tsp mixed spice (or ground cardamom)
  • 7g instant yeast
  • 240ml milk
  • 50g unsalted butter

For the filling

  • 80g unsalted butter
  • 70g light brown sugar
  • 1 tbsp ground cinnamon
  • 1 egg, to glaze (or a little melted butter if you’re struggling to find eggs right now!)

Method

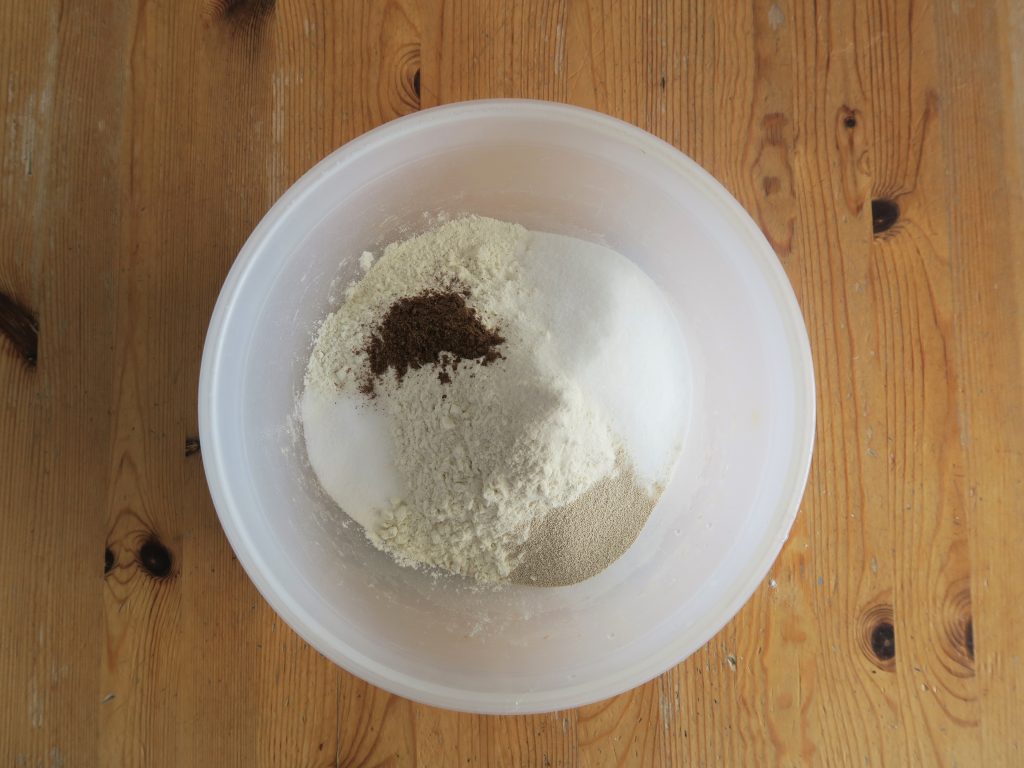
  1. Put the flour, sugar, salt, mixed spice and yeast into a bowl and stir to combine.
  2. Put the butter and milk into a pan and heat through gently until the butter is melted (but not boiling).
  3. Pour the warm milk mixture over the flour and stir the dough with a round bladed knife to bring the mixture together into a ball.
  4. Turn the dough out onto a lightly floured worktop and knead for 5-10 minutes until smooth and stretchy.
  5. Place the dough into a lightly oiled bowl, cover with cling film and leave to rise until doubled in size (1-2 hours should do it, depending on the temperature of the room).
  6. Whilst waiting for the dough to rise make the filling. Put the butter, sugar and cinnamon into a small bowl and beat with a wooden spoon until smooth.
  7. Turn the risen bread dough onto a lightly floured surface and knead it for 5-10 seconds to knock the excess air out.
  8. Roll the dough out into a 35x35cm square (it’s really important this is as square-shaped as you can make it!). Spread the filling over the entire surface to make a thin layer, leaving a small border around the edge.
  9. Fold the bottom third of the dough up onto the middle third, and then fold the top third down over the other two thirds (as though you were folding a letter). Then roll this rectangle out to roughly 35x20cm.
  10. Have the long edge facing towards you and cut 2cm wide, 20cm long strips from the dough. Twist each strip several times, stretching it a little as you do. Then grab the end of the twisted strip, coil it round your first and second finger a few times, then loop the strand over the top and tuck it in tight underneath.
  11. Place each bun on a lined baking sheet with a good amount of space between them. Cover them loosely in cling film again and leave to rise for 40-60 minutes until doubled in size
  12. Pre-heat the oven to 180C. Crack the egg into a bowl and beat with a fork until the yolk and white are mixed.
  13. Brush the risen buns with the egg glaze and then bake in the oven for 20-25 minutes until golden brown. (If the filling splurged out when rolling and is now covering the outside of the buns you might want to cover the buns in a layer of tin foil when baking as this will prevent the tops from burning before the middle gets a chance to bake).
  14. Leave the buns to cool to room temperature and then enjoy!

Thanks for reading!

Emma x