Author: Emma Hawkins

Fruit Tartlets

Fruit Tartlets

As you can probably tell,  there’s nothing I like more than some classic French patisserie, so here’s another one. This is a fairly generic combination, but once you try it you can see why it’s stuck around for so long – a simple sweet shortcrust pastry, with vanilla infused crème patisserie and lots of fresh fruit on top. We’re coming to the end of the season where fresh red berries are around, but I find frozen can also work well, and if that fails you can always go for blackberries and damsons which are at their best now.

These are really light and that’s partly down to this delicate crème patisserie. For anyone who doesn’t know, crème patisserie is basically the stylish cousin of the powdered custard, and it pairs beautifully with this selection of fruit. This recipe is pretty simple, and once you’ve tried it you’ll never want to back to a ready-mix custard ever again.

I’ve kept this recipe simple and classical, but as you may have seen by now, I love giving variations to try. For this one I’d recommend adding 1 tbsp of cocoa powder to the crème pat – hey presto chocolate crème patisserie! You can also top the tartlets with some chopped nuts, caramel or marshmallows to make them even more special. So stretch your creativity and go crazy, or stick to the classic and indulge in French pastry perfection. Either way you won’t regret making this.

Recipe

Serves 8

Time: 2 hours

Ingredients

For the pastry

  • 175g Plain flour
  • 2 tbsp Caster sugar
  • Pinch of salt
  • 115g Butter
  • 1 Egg, separated
  • 2 tbsp Cold water

For the crème patisserie

  • 500ml Whole milk
  • 2 tbsp Vanilla bean paste
  • 100g Caster sugar
  • 6 Egg yolks
  • 20g Plain flour
  • 20g Cornflour

For the topping

  • Any berries you like (I went for raspberries, strawberries, cherries, and blueberries)
  • 50g Dark chocolate

Method

  1. Preheat the oven to 180˚C. To make the pastry put the flour, caster sugar and salt into a bowl and mix with a round bladed knife. Add the butter to the bowl and cut the butter up into small pieces with the knife. Once the butter is in small chunks put the knife to one side and go in with your fingers. Rub the butter into the flour to create a breadcrumb texture mix.
  2. Mix the egg yolk with 2 tbsp of cold water. Slowly add the egg yolk mixture to the flour mixture and bring together with a round bladed knife until a dough forms. Use your hands to make the dough into a ball and then wrap the dough in cling film and chill for at least 1 hour.
  3. Remove the pastry from the fridge and separate it into 8 equally sized balls. Roll them out onto a floured surface to make 8 thin circles. Compare the size of the circles to the size of the tins by putting one of the tins your using onto the circles. You want the pastry a couple of cm wider than the tart tins so that the pastry will go up the edges and have a little overhang.
  4. Line the tins, pressing the pastry into the flutes in the tin. Let the pastry hang over the edge, then use a rolling pin to trim off the excess by rolling over the edge of the tarts. Chill the pastry-lined tins in the fridge for another 45 minutes.
  5. Line the tartlets with greaseproof paper and baking beans (or dry rice if you don’t have any). Put them into the oven to bake for 10 minutes, or until you can see them start to crisp up round the edges.
  6. Remove the baking parchment and the baking beans (careful, they’ll be very hot). Brush the pastry with the beaten egg white to coat lightly and then return them to the oven for 5-10 minutes, until golden brown and crisp. Take out of the oven and leave to cool.
  7. Next make the crème patisserie. Put the milk and vanilla into a saucepan and bring to the boil. Meanwhile, mix the sugar, egg yolks and flours until fully combined.
  8. Once the milk is heated, remove the pan from the heat and mix 1/3 of the milk into the egg mixture. Whisk the mixture quickly and then pour the egg mixture back into the milk.
  9. Put the pan back over a heat and whisk gently on a medium heat until the mixture thickens and boils.
  10. Remove the pan from the heat and let the mixture cool slightly. Put 2-3 tbsp of the crème patisserie into each of the pastry cases and smooth out with the back of a spoon so that it’s evenly spread.
  11. Top the tartlets with fresh fruit so that the patisserie is fully covered.
  12. Put the chocolate into a heatproof bowl and put over a pan of simmering water. Once the chocolate is melted, put it into a pipping bag with a small round nozzle and drizzle over the tartlets.
  13. Leave the chocolate to set. Serve! (- with clotted cream if you want).

Thanks for reading! I’ve got another one coming out on Sunday so look out for it.

Emma x


Chocolate Tiffin

Chocolate Tiffin

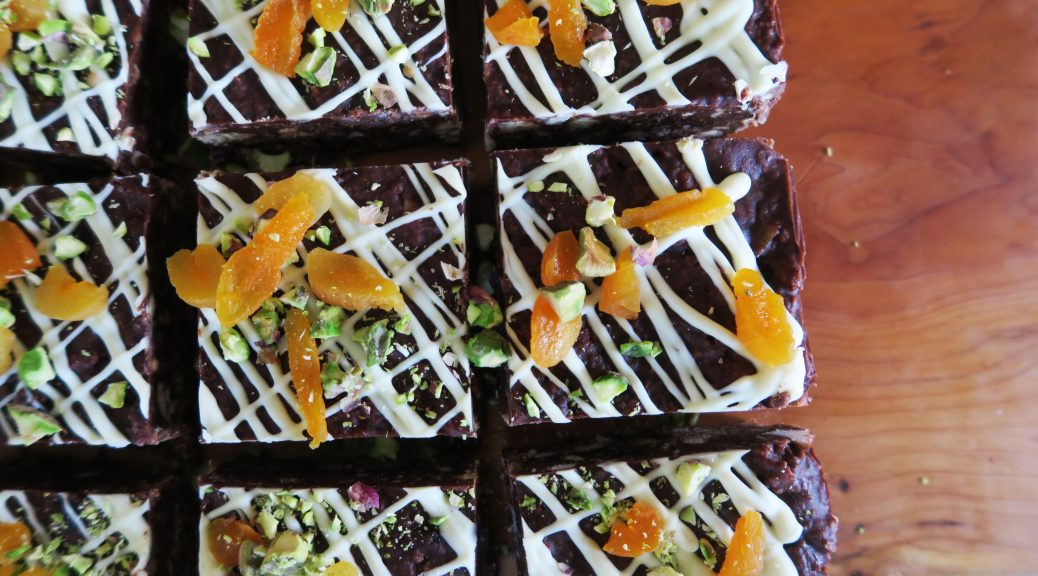
It’s tiffin time! This little treat is a favourite in my family and is also my Dad’s speciality. Whenever we see piles of chocolate and digestive biscuits in the kitchen, we know a tray of this is on the way. What essentially amounts to a collection of digestives, nuts, dried fruit all encased in a chocolate block is surprisingly tasty, and whilst it’s not great for anyone on a diet, it’s perfect as an any-time treat.

As this is fundamentally a tray bake, it also works really well for cake sales and sharing, as it’s easily transportable and can be cut into as many pieces as you want. This is also really easy and quick to make, so even if you’re not a whizz in the kitchen you can give this one a go. It’s also a great one to make with kids as it’s hands on but not too complicated.

Whilst I’d recommend sticking to the quantities of chocolate, syrup and butter in the main mixture (as this gives the ideal soft set mixture you want in tiffin), you can from there customise these however you want. I’ve included a list of variations you can try at the end of this post, but you can go as crazy with additions as you want.

Recipe

Makes 12 squares

Time: 30 minutes, with extra time for chilling

Ingredients

  • 250g Digestive biscuits
  • 150g Milk chocolate
  • 150g Dark chocolate
  • 100g Unsalted butter
  • 150g Golden syrup
  • 50g Pistachios, chopped roughly
  • 100g Dried apricots
  • 75g Dates, chopped
  • 50g Raisins
  • 50g Pecans, chopped roughly
  • 50g White chocolate to decorate

Method

  1. Put the biscuits into a large bowl and crush by smashing them with the end of a rolling pin.
  2. Put the two chocolates, butter and golden syrup into a large heatproof bowl and melt slowly over a pan of simmering water. Stir to combine.
  3. Whilst waiting for the chocolate mixture to melt, line a square tin with cling film. If you’re having trouble with this, lightly greasing the tin with butter can help as the cling film will stick to it.
  4. Remove the chocolate mixture from the heat and stir in the biscuits, dried fruit and nuts until it’s all coated in the chocolate.
  5. Spoon the mixture into the lined tin and smooth out with the back of a spoon until all the same thickness.
  6. Put the tin into the fridge to set for at least 1 hour, until hard enough to slice.
  7. Melt the white chocolate in a heatproof bowl over a pan of simmering water. Drizzle the chocolate over the tiffin, top with any more fruit and nuts you want, and then leave to set.
  8. Take the tiffin out of the tin, remove the cling film and slice into 12 pieces.

Variations

As I said above, this recipe is really yours to change and make your own. I’ve given 5 other variations which are also great to try. All these run on the basis that you use the same amount of chocolate, butter and syrup as above and then add to the melted mixture the following ingredients…

  1. Cranberry and Pistachio – 250g crushed digestive biscuits, 75g dried cranberries, 100g raisins, 100g chopped pistachios, 150g white chocolate Maltesers.
  2. Black Forest – 250g crushed dark chocolate digestives, 100g dried cherries, 50g glace cherries, 75g quartered mini chocolate brownies.
  3. Cookies and Cream – 250g crushed Oreos instead of digestives.
  4. Chocolate Heaven – 250g crushed chocolate digestives, any chocolates or sweets you like chopped into bite size pieces (e.g Twirls, Maltesers, Crunchies, Double Deckers, KitKats, Popping candy, Jelly babies, Smarties…).
  5. Rocky Road – 250g digestive biscuits, 100g mini marshmallows, 75g raisins.

Thanks for reading! If you haven’t already, check out my Instagram and Facebook to stay updated (links on the side bar). New post coming out on Wednesday…

Emma x


Butterscotch Pear Tart with Blackberry Sauce

Butterscotch Pear Tart with Blackberry Sauce

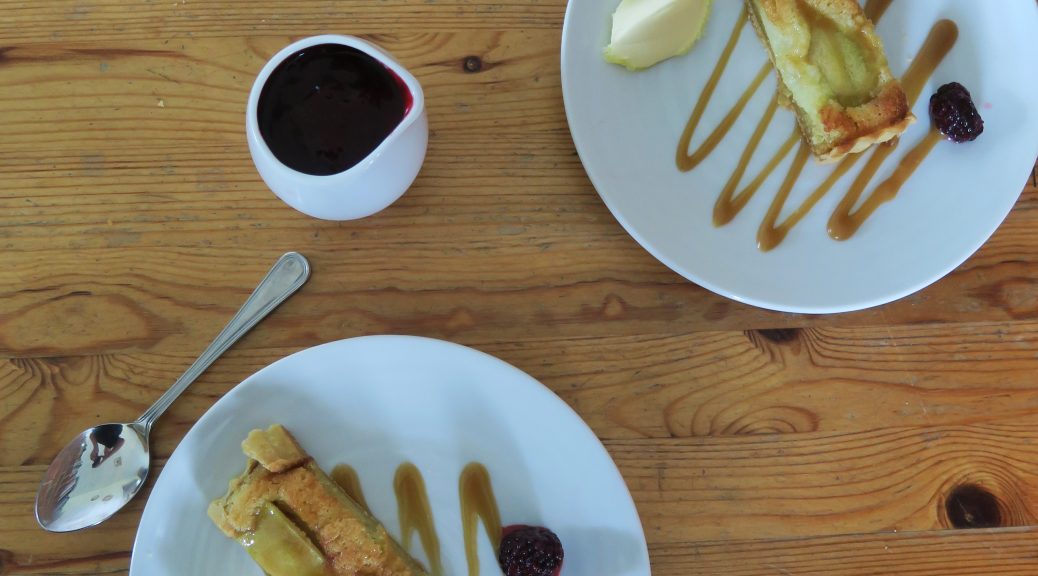
In a few weeks’ time hedgerows across the UK will start to drip with plump blackberries, ripe for the picking. As most hedgerows are free-for-all it’s easy to go on a walk with some boxes and to come back with mountains of free berries. If you want to preserve them they make great jams, ice creams and curds, but I find they also work really well as a sauce for this little butterscotch pear tart recipe.

You can use any type of pears in this tart. I went for conference as they’re an attractive shape and a nice flavour against the frangipane. I’d recommend using ripe pears, as under-ripe and they don’t soften enough in the oven, and if they’re over-ripe and they become a mush once cooked. I’d also strongly recommend making the butterscotch sauce yourself. You can buy it in shops, but it doesn’t taste anywhere near as good, and it only takes 5 minutes to put together, so it’s worth giving it a go.

One last thing – I first made this dessert in Cornwall and I found that serving it with a good scoop of clotted cream is a great way to make it truly decadent. The thick cream with the sweet, sharp, juicyness of the other components just works really well, so I’d recommend giving that a go. Right, now on with the recipe…

Ingredients

Serves 8 (Makes one large tart)

Time – 90 minutes, plus time to chill the pastry

For the pastry

  • 175g Plain flour
  • 2 tbsp Caster sugar
  • Pinch of salt
  • 115g Butter
  • 1 Egg yolk, beaten
  • 2 tbsp Cold water
  • 1 Egg white, slightly beaten

For the butterscotch sauce

  • 100g Butter
  • 100g Light muscovado
  • 4 tbsp Golden syrup
  • 8 tbsp Double cream

For the tart filling

  • 100g Ground almonds
  • 100g Caster sugar
  • 100g Butter
  • 2 Eggs
  • A few drops of almond essence
  • 2 Ripe pears, peeled, cored and quartered

For the Blackberry sauce

  • 350g Blackberries (if they’re not in season when you make this, frozen ones also work)
  • 30g Sugar
  • 1 tsp Cinnamon
  • 1 tsp Ginger

Serve with more fresh blackberries and clotted cream

Method

  1. Preheat the oven to 180˚C. To make the pastry put the flour, caster sugar and salt into a bowl and mix with a round bladed knife. Add the butter to the bowl and cut it up into small pieces with the knife, coating in the flour as you do.
  2. Once the butter is in small chunks put the knife to one side and go in with your fingers. Rub the butter into the flour to create a mixture with the texture of breadcrumbs. Shake the bowl from side to side a couple of times to bring the large lumps to the top, make sure these are rubbed into the flour.
  3. Mix the egg yolk with the cold water. Slowly add the egg yolk mixture to the flour/butter mixture and bring it all together with a round bladed knife until a dough forms. Use your hands to make the dough into a ball and then wrap the dough in cling film and chill for at least 1 hour.
  4. To make the butterscotch sauce, put the butter, sugar and syrup into a pan and bring slowly to the boil whilst stirring. Then stop stirring, reduce the heat, and leave to simmer for 3 minutes until the mixture has thickened and begins to hold its shape. Stir in the cream, remove from the heat, and leave to cool.
  5. Remove the pastry from the fridge and roll it out on a floured surface into the shape of your tin. You want it to be as thin as possible (no thicker than a pound coin). Make sure you move the pastry round frequently to stop it sticking to the table. Compare the size pastry sheet to the size of your tin. You want the pastry a couple of cm wider than the tin so that the pastry will go up the sides and have a little overhang.
  6. To easily get the large pastry sheet into the tin, put the rolling pin at the half-way point of the pastry. Then flip the pastry in half, over the rolling pin. You can then pick the rolling pin up and drag the pastry over the tin. Press the pastry into the flutes in the tin, sometimes using a piece of pastry to do this can be easier than using your fingers. Let the pastry hang over the edge, then use a rolling pin to trim off the excess by rolling over the edge of the tart. Chill the base in the fridge for another hour.
  7.  Line the tart with baking paper and baking beans (or dry rice if you don’t have any) and put into the oven to bake for 10 minutes.
  8. Remove the baking parchment and the baking beans (careful, they’ll be very hot). Lightly brush the pastry with the beaten egg white and then return them to the oven for 5-10 minutes, until golden brown and crisp. Take out of the oven and leave to cool completely.
  9. To make the frangipane, mix the ground almonds, sugar, butter, egg and extract together until smooth. Spoon 2 tbsp of the butterscotch sauce into the case and smooth out with the back of a spoon to cover the base. Pour the rest of the sauce into a jug for serving. Spoon some of the frangipane into the case and smooth out over the sauce. Create a slight well in the centre by pushing more of the mixture up the sides of the case.
  10. Take the pear quarters and arrange on top of the frangipane so that the smooth outside of the pear is facing up. Press the pears down slightly, into the frangipane as you do this. Bake in the oven for around 15 minutes, until both the pear and frangipane are cooked.
  11. Whilst the tart bakes make the blackberry sauce. Put the blackberries into a medium size saucepan with 60ml water, the sugar and the spices. Stir to combine and then leave to simmer until the blackberries have become a mush. Use a hand blender to puree the mixture and then sieve to remove the seeds. Pour the sauce into another jug to serve.
  12. Once the tart is out of the oven leave it to cool slightly. Then take it out of the tin and place on a board. Serve with the blackebrry sauce, the leftover butterscotch sauce, fresh blackberries and plenty of clotted cream. Relax and enjoy!

Thanks for reading, I hope you enjoyed this one! New post is coming out on Sunday. Until then, any comments or questions just let me know.

Emma x

Roast Beef with Roasted Veg Salad and Onion Gravy

Roast Beef with Roasted Veg Salad and Onion Gravy

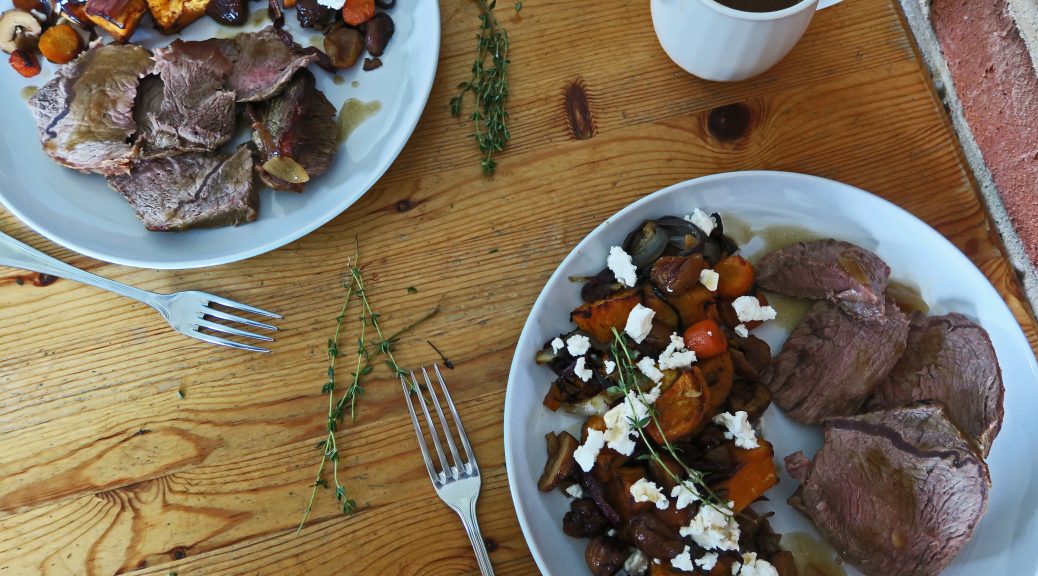
Autumn is here. It’s cold, the holidays are over and the days are shortening so it’s time for some good old comfort food. Roast beef is one of the best British Sunday lunches out there, and I find that this is a nice twist on the classic, as it doesn’t stray too far from the meal everyone knows and loves, but it’s different enough to be an ‘every day of the week’ dish.

You can make this with any type of beef. I went for a top-rump roasting steak as it’s a tender cut with a good amount of fat, which will base the meat when roasted. You can also use almost any other root vegetable in this dish – and there’s loads to choose from at this time of year. I’ve gone for onions, carrots and sweet potatoes as they work particularly well together and are the classic veggies we have in our Sunday roasts at home.

I’ve suggested adding feta cheese to the veg when serving. This is an unusual addition to a roast, but I think it works really well as an addition to a ‘roast veg salad’. If you do want to go more traditional though you can easily ditch the feta and add some delicious Yorkshire puddings and roast potatoes to pull it back to the classic we love. I’ve also included an onion gravy recipe which tastes great with the beef, but if you want to make the meal quickly and with little effort you can miss it out and it’ll still taste good.

Recipe

Serves 2

Time: 90 minutes

Ingredients:

  • 1 Top-rump beef joint (about 0.5kg)
  • 3 tbsp Olive oil
  • 3 sprigs of Thyme
  • Salt and Pepper to season
  • 1 Sweet potato, peeled and diced
  • 2 Carrots, peeled and sliced into rounds
  • 1 Red onion, peeled and sliced
  • 100g Chestnuts (ready to eat), roughly chopped
  • 50g Feta (optional)
  • A pinch of Chilli flakes

For the onion gravy:

  • 1 tbsp Vegetable oil
  • 1 tbsp Unsalted butter
  • 1 White onion
  • ½ tsp Sugar
  • ½ tsp Balsamic vinegar
  • 375ml Beef stock
  • 2 tsp Cornflour
  • 2 tsp Cold water
  • Salt and pepper to season

Method

  1. Pre-heat the oven to 200˚C. Brush the steak with 1tbsp of the oil and then rub the thyme into the meat. Season the beef with a good pinch of salt and pepper.
  2. Put the chopped sweet potato, carrots, onion and chestnuts into a roasting dish and add 2 tbsp of the oil. Season well with salt and pepper and then mix the veg around in the tin so everything’s covered in oil and the pieces are well spread out. Nestle the beef in the middle of the tin and roast in the oven for 45 minutes to 1 hour, depending on the size of beef you have.
  3. Stir the pan occasionally so that the vegetables crisp up all over. To test if the beef is done insert a skewer into the thickest part of the meat. If the juices run red then you’ll have rare meat, pink juices for medium and clear for well-done. Once you have the beef cooked how you prefer it, take it out of the oven and place it onto a board. The vegetables may take a little longer to cook than the beef, especially if your joint is small, so you can always put them back into the oven to crisp up more whilst the meat is resting. Cover the beef with tin foil and leave for at least 15 minutes before slicing.
  4. Whilst the vegetables are in the oven and the meat is resting make the gravy. Begin by melting the butter in a pan with the oil.
  5. Slice the onion thinly and add to the pan. Stir the mixture to coat the onions in the fats and then cover with a lid and cook on a medium-low heat until the onions have softened and become translucent.
  6. Add the sugar and balsamic to the onions, mix and then cover again and leave to cook for another 5 minutes.
  7. Make up the beef stock by adding 2 beef stock cubes to 375ml of boiling water. Mix with a fork until the cubes are completely dissolved. Add the stock to the onions and stir. Leave uncovered on a medium heat to boil for 5 minutes.
  8. Mix the cornflour with the cold water until you have a lump-free mixture. Pour a couple of tbsp of the gravy onto the cornflour mixture and stir until combined.
  9. Pour the cornflour mix back into the main gravy pan and boil on a high heat for 10 minutes so that the mixture reduces and begins to thicken. Season with salt and pepper to taste and then cover with a lid to keep warm until serving.
  10. Slice the rested beef into strips and arrange on the plates. Add spoonfuls of the roasted vegetables around the meat. Tear off chunks of the feta and crumble it over the vegetables. Top by spooning a little of the gravy onto the beef and putting the rest in a jug to serve. Garnish with chilli flakes and extra thyme!

Keep a look out for my next recipe coming on Wednesday! Any requests or comments don’t hesitate to ask.

Emma x

Chocolate Fondants

Chocolate Fondants

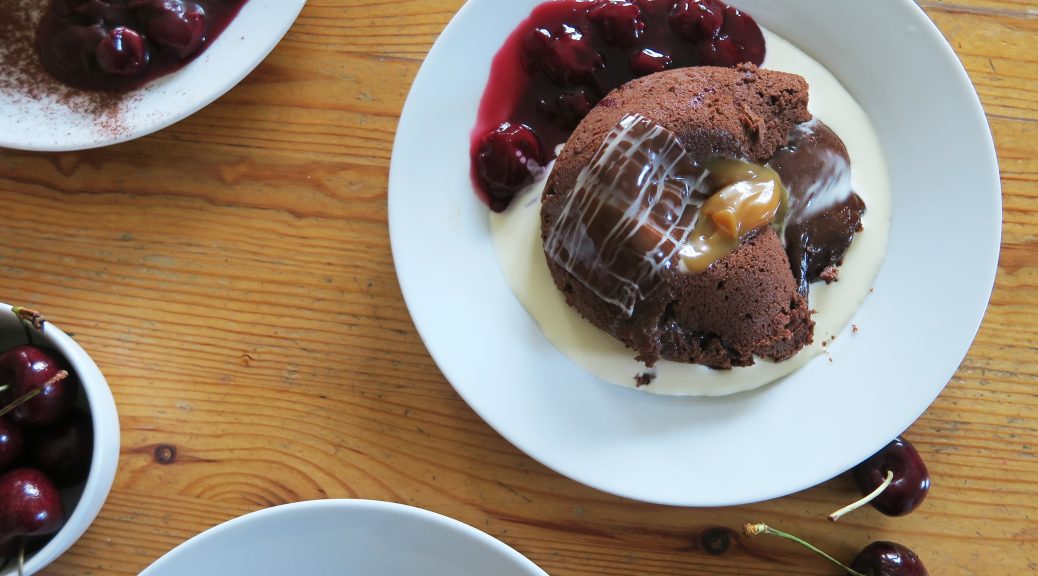
Be ready for a long post – these are amazing and I have a lot to say about them! I first made these fondants for a cookery competition 6 years ago, and I’ve been regularly making them ever since. There’s something highly addictive about the taste-texture combination of these little puddings which will have you making them again and again.

They take a little bit of time to master due to the precision needed in the cooking time, and as ovens vary so much you really have to find the perfect time for your particular oven. Cook them for too long and there will be no fondant, too short and there’s no sponge. Instead of using a skewer, like you would for a cake, you have to go on instinct of what the surface texture should look like, in order to know when to take them out the oven.  But apart from the baking bit, they’re really easy to make so I’d recommend giving them a go. Even if they’re under or over baked (and believe me, mine have been both many times) they taste good, so you can’t really lose.

This dessert also looks and sounds impressive, so I’ve found that it works really well as a dinner party dessert. You can make the mixture, and put it into the moulds, up to 48 hours before the party. Chill them in the fridge, then bring them out at least an hour before they go in the oven, to bring them back up to room temperature. This doesn’t affect the quality of the finished dessert and it will give you more time on the day to make everything else. It’s also really easy to make these dairy-free. Simply use soya margarine instead of butter, and make sure the dark chocolate you use has no milk in it. They taste identical to the normal versions, so if you have anyone dairy-free to cook for, instead of making a different or altered dessert for them, you can make these for everyone and no one will notice the difference.

Fondants I made for a dinner party (above)

That said, whilst these are good for parties and for sharing, my favourite time to make them is for a good night in. There’s something truly comforting about a quick-to-make cake which has a soft exterior and then a puddle of velvety sauce in the middle. So, if you’ve been looking for a quick dessert which exudes chocolately gooeyness, and is perfect for a quiet evening, you’ve just found it.

Recipe

Serves 4

Time – 45 minutes

Ingredients

  • 100g Unsalted butter
  • 150g Dark chocolate, chopped roughly
  • 2 Eggs
  • 2 Egg yolks (see below for what to do with the egg whites)
  • 120g Sugar
  • 100g Plain flour
  • A pinch of salt (this really brings out the chocolate flavour)

Method

  1. Pre-heat the oven to 180˚C. Grease four small pudding basins with butter and put onto a baking tray.
  2. In a heat-proof bowl put the butter and the chocolate. Place over a pan of gently simmering water and leave to melt, stirring occasionally.
  3. In a separate bowl whisk the eggs, egg yolks and sugar together until pale a fluffy. An electric whisk is quicker and easier, but a hand whisk also works.
  4. Slowly pour the chocolate mixture into the egg mixture, whisking continuously until smooth.
  5. Add the flour and salt to the mixture and whisk again until fully combined.
  6. Pour the mixture into the four pudding moulds. At this point you can cover the moulds in cling film and chill in the fridge for up to two days, just make sure they return to room temperature before cooking.
  7. Put the fondants into the oven and bake for 8-10 minutes. This time works for me, but as all ovens can vary I’d recommend going on the texture rather than a specific time. You want the surface of the fondants to be just skinning over, so that the edges are cooked but the middle is very soft. If anything bring them out a little too early than too late. If they are too liquid when tipped out, you can quickly microwave them for 20 seconds to cook more of the batter.
  8. Take the fondants out of the oven and use a knife to loosen them from the edge of the moulds. Carefully turn them out onto plates and serve immediately. Enjoy!


These are really good with…

  • Fruit sorbet (raspberry and mango are particularly good ones to try)
  • Any flavour ice cream
  • Salted caramel sauce
  • Fresh fruit (e.g raspberries or strawberries)
  • Clotted, double or squirty cream
  • Fruit sauce (e.g coulis)
  • Chocolate chips or chocolate decorations


How to use up leftover egg whites…

This recipe, like so many others I come across, results in leftover egg whites. You separate the eggs, put the yolks into the batter and are left with two perfectly good, unused whites. They keep in the fridge for up to two days, and can be used for so many things, so rather than throwing them away, here’s some ways of using them up….

  1. Meringues – about 80% of the time I have left over egg whites I turn them into meringues. A simple combo of caster sugar and egg white, meringues are surprisingly simple to make and can be used in so many ways (such as daquoise, pavalova, or meringue kisses – made by pipping the meringue into peaks on a baking tray). If you are going to make meringues though, or any of the following which involve a meringue base (they have a * next to them) it’s better to use the egg whites on the same day as you separate the eggs, as you’ll get a stiffer peak from the mixture, resulting in a better meringue.
  2. Lining pastry – When making pastry brush the whites onto the pastry after taking the beans out for a blind bake. Put the pastry back in the oven for a further 5 minutes after brushing to firm up the base even more. This will act as a barrier between the pastry and the filling, keeping the base crisp.
  3. Marshmallows* – these start off as swiss meringue, and then use gelatin to give that incredible pillowy texture. Like meringues, these can be customised with fruit, nuts and chocolate to make them even more special, and they last for up to two weeks.
  4. They’re still eggs– the eggs may have lost their yolks, but they can still be cooked in the ways you would normally cook an egg. You can fry, scramble or poach the whites as you would  normally.
  5. Mousse* – whilst many mousse recipes require the whole egg, some are egg whites only, and thus can be a good thing to make when left over whites are hanging around. Whilst these don’t technically have a meringue base, it’s still important to use the egg whites fresh, as it will allow more air to be trapped, and so will result in a better mixture.
  6. Icing – egg whites can be used to make royal icing for anything in need of some icing, including Christmas cakes, so if you happen to have one lying around that you need to ice…
  7. Macaroons* – another meringue based delight. Add almonds and a bit of flourish and you’ve got these great little biscuits.
  8. Bread glazes – if you’re into bread making you can use the whites to glaze bagels, buns and loaves. Brush them over with the whites after their second prove, or just before putting them into the oven. If you want a golden crust you’ll be better off using egg yolks, but the whites can still give a beautiful shine.
  9. Cakes – Some cakes, such as angel food cake, use only egg whites, so why not make a lighter-than air cake with some of the leftover egg whites?
  10. Soufflés – These are really fun to make! You can make them in almost any flavours and they taste amazing. They maybe aren’t so great to make on the same day as cooking the fondants, as they’re best with fresh egg whites, and need to be baked and eaten immediately after being made. However, if you’re chilling your fondant mixture for another day, these are great for a decadent dinner dessert.

I hope you enjoyed this post! More coming soon so keep a look out. Any requests, comments or questions don’t hesitate to ask.

Emma x