Author: Emma Hawkins

Roast Pumpkin Soup

Roast Pumpkin Soup

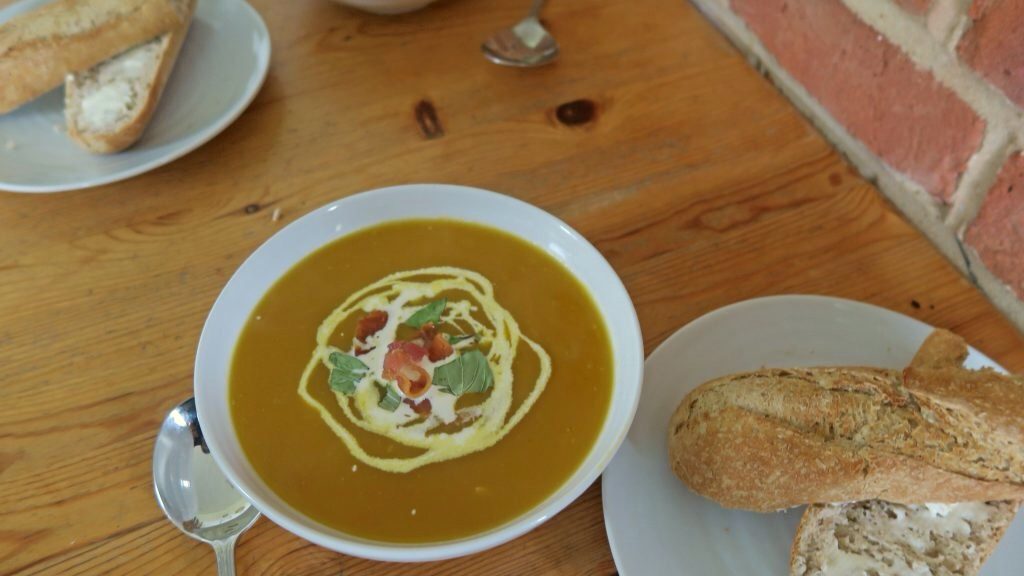
Halloween’s coming up and that means it’s pumpkin time! In the world of carved pumpkins, the inner flesh is useless, but there’s no reason to discard all this delicious vegetable. So here’s something you can do with the leftover pumpkin sitting on your kitchen counter. Warming, smooth and healthy – this is a really quick and tasty lunch. Soup is also really good for freezing – so if you have more pumpkin soup than you can deal with in one go, pop it into a pot and bung it in the freezer until you fancy some more.

Here I’ve suggested roasting the pumpkin first as this will make it soft enough to get out of the skins, but if you’re using flesh from a carved pumpkin – meaning that it’s already out of the skin, you can use it just like that. This also works really well with butternut squash, so if you’re not a pumpkin family you can give that a go instead. My Mum’s really into gardening, and at the moment we have several squash plants taking over the garden, so soup is a great way of turning all this luscious veg into a meal that can be stored away and saved for a later day.

Recipe

Serves 4

Time: 45 minutes

Ingredients

  • 1 tbsp Vegetable oil
  • 1 Small red onion, roughly chopped
  • 1 Small white onion, roughly chopped
  • 2 Small pumpkins (about 1.5kg)
  • 1 Large carrot, peeled
  • 2 Medium baking potatoes, peeled
  • 2 Chicken stock cubes dissolved in 4 cups of boiling water
  • Salt and pepper to season
  • 125ml Single cream
  • 4 Rashers streaky bacon
  • 1/2 tsp dried chilli flakes
  • Fresh basil to serve

Method

  1. Pre-heat the oven to 180˚C. Halve the pumpkins and remove the seeds from the middle with a spoon. Drizzle with oil and then wrap each half in tin foil. Put them into roasting tins and then roast in the oven for 15-20 minutes, until softened. Set aside to cool.
  2. Meanwhile, put the oil into a large saucepan and add the chopped onion. Cook over a medium heat until the onions have begun to caramelise.
  3. Chop carrot and potatoes into chunks. Scoop the flesh out of the cooled, roasted pumpkins and add this, the chopped potatoes, and the chopped carrot to the onion. Pour in the chicken stock and bring to the boil. Leave to simmer for 15-20 minutes until the vegetables are tender.
  4. Meanwhile heat a grill. Put the bacon on a grill pan and heat under the grill for 5-10 minutes, turning over a few times, until crispy all over. Take out from under the grill and set aside for later.
  5. Puree the vegetables once ready with a hand blender, add the chilli flakes and season to taste with the salt and pepper.
  6. Pour in half the cream and stir to mix. Pour the soup into bowls and drizzle with the rest of the cream. Chop the bacon into strips with scissors and sprinkle over the soup. Garnish with fresh basil and serve with buttered bread.

Thanks for reading!

Emma x

Snicker Spiderweb Cheesecake

Snicker Spiderweb Cheesecake

With my art course in full swing now I’m constantly in need of quick snacks to keep me going, and for some reason I keep on turning to Snickers, (I think it’s due to the relatable adjectives now on the packaging – grouchy and sleepy in particular).  I’m also a big cheesecake fan, and so I thought it was about time that I made a Snicker cheesecake thing.

I’ve named this a ‘cheesecake’ as it’s technically classifiable as one, but I should say now that it’s not your classic cheesecake. As usual I’ve gone pretty OTT with this recipe, and so it’s evolved into more of a cheesecake, torte, puddingy block. We don’t just have some biscuits, cream cheese and icing sugar. We have a peanut base, a liquid salted peanut caramel centre, surrounded by a caramel cheesecake layer, topped with a chocolate torte mixture and finished with a chocolate mirror glaze and chocolate buttercream rosettes. But this is the time of year to go all out with indulgent foods, so why hold back?

If you do want to make a simpler version though, you can leave out the chocolate torte and buttercream, and rather than doing a caramel peanut centre, mix the peanuts into the caramel cheesecake instead. This way you have peanuts, caramel and chocolate (the essentials), but it’ll take half the time to make.

It can’t have escaped anyone’s notice that Halloween is creeping up on the horizon, and so I’ve decorated this with a spider’s web to get in the mood. If you’re making this when spiderwebs are out of season you can pipe the chocolate in spirals over the glaze, rather than in this pattern, to create a more multi-seasonal design that way.

Recipe

Serves 16

Time: 2 1/2 hours (plus lots more time for chilling)

Ingredients

For the base

  • 300g Peanut biscuits
  • 100g Digestive biscuits
  • 170g Butter

For the peanut caramel

  • 310g Caramel (I used Carnations)
  • 100g Peanuts (if salted don’t add the extra 1/2 tsp of salt)
  • ½ tsp Sea salt

For the caramel cheesecake layer

  • 125g Marscapone
  • 125g Philadelphia
  • ½ tsp Vanilla bean paste
  • 50g Icing sugar
  • 80g Caramel
  • 150ml Double cream

For the chocolate torte layer

  • 150g Good quality dark chocolate (at least 70% solids)
  • 300ml Double cream
  • 13g Icing sugar
  • 1tsp Vanilla extract

For the chocolate mirror glaze

  • 150ml Double cream
  • 135g Caster Sugar
  • 55g Cocoa powder
  • 3 ½ Leaves gelatine

To decorate

  • 100g White chocolate
  • 2 tbsp Double cream
  • 200g Butter
  • 100g Icing sugar
  • 75g Cocoa powder
  • 1 Bag Snicker bites

Method

  1. Line a deep round 20cm loose-bottom cake tin with butter and acetate (or baking paper), making sure that the strip around the sides comes above the top of the tin.
  2. Begin by making the biscuit layer. Put the two types of biscuits into a large bowl and break up into crumbs using the end of a rolling pin. Don’t worry if there’s chunks of peanuts because of the peanut biscuits, this’ll just create some texture.
  3. Melt the butter in a pan and then add this to the biscuits. Stir to combine, the biscuits should start to clump together slightly.
  4. Pour this mix into the lined tin and even out with the back of a spoon until an even thickness. Chill in the fridge for 20minutes until firm.
  5. Meanwhile prep the caramel. Put the caramel, peanuts and salt into a small bowl and mix to combine. Spoon this onto the prepare base, leaving a 1-2cm boarder around the edge , so that the caramel forms a smaller circle in the middle. Leave in the fridge to set for 20 minutes.
  6. Now make the caramel cheesecake layer. Using an electric whisk, whisk together the mascarpone, Philadelphia, vanilla, icing sugar and caramel until smooth. Then add the double cream and continue to whisk until smooth and the mixture is thick enough to hold it’s shape – this will only take 1-2 minutes so be careful not to overwhisk.
  7. Pour or pipe around the side of the cheesecake, to seal the peanut caramel in. Then spoon over the caramel, to completely cover it. Leave in the fridge to set for at least 2 hours.
  8. Once set you can move onto the chocolate layer. Put the chocolate into a heatproof bowl and gently melt over a pan of simmering water. Take off the heat and stir in the cream until the mixture is smooth and glossy. Sift and stir in the icing sugar, and then stir in the vanilla extract. Let the mixture cool for 10 minutes.
  9. Pour the chocolate on top of the caramel cheesecake and then put into the fridge to chill for at least 3 hours, until firm.
  10. Once the chocolate layer has set you can make the chocolate mirror glaze. Put the cream, sugar, cocoa, and 150ml water into a small pan. Heat whilst stirring until all the sugar is dissolved, I find using a whisk is a good way to get rid of lumps of cocoa.
  11. Bring to the boil and simmer for 2 minutes. Remove from the heat and leave to cool for another 2 minutes. Meanwhile take a bowl of water and soak the gelatine leaves until they’re squidgy. Take the gelatine out of the water and squeeze to remove excess water. Put into the chocolate mix and stir to dissolve.
  12. Leave the glaze to cool for 20 minutes. Pass through a sieve and then test with a thermometer to make sure it’s cooled down enough not to melt the chocolate layer in the cheesecake (below 38˚C should be enough).
  13. Pour the glaze over the cheesecake and leave to partially set in the fridge for 30 minutes. Meanwhile melt the white chocolate in a heat-proof bowl over a pan of simmering water. Add the double cream and stir to combine.
  14. Pour the white chocolate into a piping bag with a small nozzle and set aside until needed.
  15. When the glaze is just starting to firm up you can start to pipe. Pipe the white chocolate in 8 lines, each coming from the middle of the cheesecake. Then join the straight lines with curved lines to make a spider-web shape – I find having a picture of a spiderweb in front of me helps with this. Leave in the fridge for 2-3 hours to set completely.
  16. Now make the chocolate buttercream icing. Mix the butter, icing sugar and cocoa powder together until smooth and uniform in colour. Each butter varies in water content, and so will produce different consistencies of buttercream. If your mixture is too soft to hold its shape add 50g icing sugar and 25g cocoa and then mix to combine. Do this as many times as is needed until a thick mixture is reached. Spoon into a piping bag with a star nozzle.
  17. Once the mirror glaze is set, pipe rosettes of the icing round the edge of the cheesecake, before topping with halved snicker bite pieces. Leave in the fridge until ready to serve!

Thanks as always for reading! I hope you liked this one, any comments or questions just let me know.

Emma x
Apple and Blackberry Crumble

Apple and Blackberry Crumble

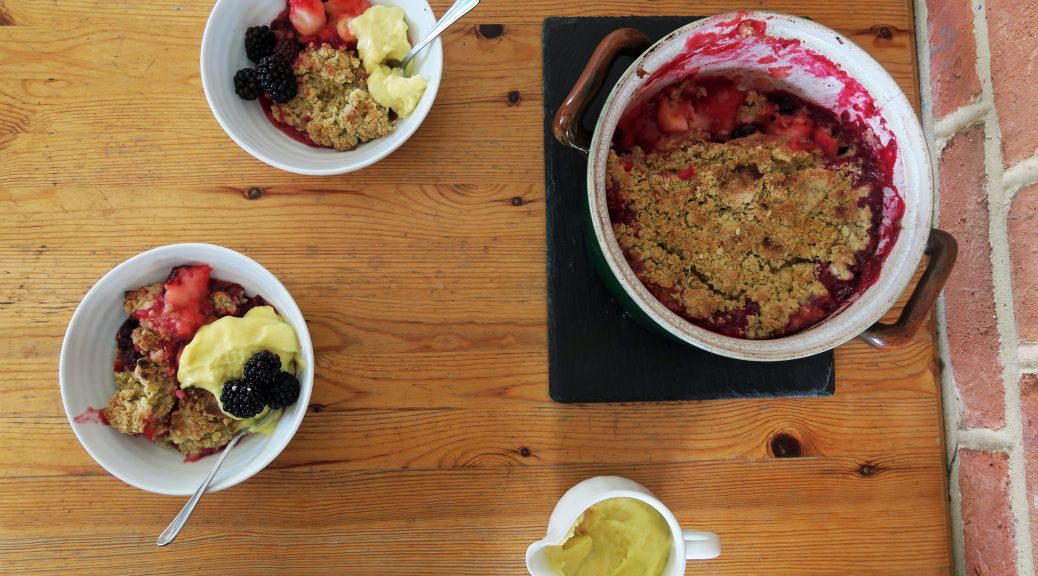
Being a country girl, pretty much every hedgerow and tree around where I live is covered in blackberries or apples at the moment, and it’s times like these – when fruit is literally falling onto your doorstep – that you need to make the most of it. The other day a big bag of cooking apples magically appeared on the kitchen table, which happens a lot now that my Mum has discovered foraging. But lucky for me I knew exactly what I wanted to do with them –  when life gives you apples, make apple crumbles.

Ever since I was small a big bowl of this with some custard would put a smile on my face, and it still does to this day. You can put almost any fruit into a crumble – rhubarb, berries or pears just to name a few other classics. Blackberries and apples are definitely my go-to couple though, as they carry a lot of flavour, and they’re the perfect combo of sweet and sharp.

I’d recommend serving this with a really good custard. You can either make this powdered, in which case follow the back of the packet’s instructions, or you could make an even better custard from scratch. For this I have a really good recipe which is on two of my other posts – Bakewell roly poly and French fruit tarts – the links to which are at the bottom of this post under ‘you may also like’ (if they’re not there, refresh the page and they’ll pop up or go to my recipe index).

Recipe

Serves 8

Time: 1 hour

Ingredients

  • 4 Bramley apples
  • 85g Brown sugar
  • 150g Blackberries
  • 150g Butter
  • 150g Caster sugar
  • 150g Plain flour
  • 150g Rolled oats
  • 1 tsp Ground cinnamon

Method

  1. Preheat the oven to 180˚C.
  2. Peel, core and chop the apples into chunks.
  3. Put the apples into a pan with the brown sugar and heat gently until they begin to break down and soften. At this point remove them from the heat, add the blackberries, and set aside for now.
  4. Now make the crumble topping. Put the butter and caster sugar into a bowl and beat with a wooden spoon until smooth and light. Add the flour and rub it into the butter mixture with your fingers. Work this until you get a bread-crumb texture, shaking the bowl from side to side every so often to bring the lumps to the top.
  5. Add the oats and cinnamon, and then mix with a round bladed knife to combine with the breadcrumb mixture. Don’t worry if clumps form, this will happen as the butter will have softened, it’ll taste good.
  6. Take a large oven-proof pot or dish and put the stewed apples and blackberries into it. Spoon the crumble over the top loosely, not pressing down as you want it to remain crumbly.
  7. Put the crumble into the oven for 25-35 minutes until the topping is golden brown and slightly crisp.
  8. Serve immediately with lots of custard, cream or ice cream.

Thanks so much for reading and happy national baking week! We’re getting halloweeeny on the next few posts so make sure you look out for them.

Emma x

Easy Sausage and Mushroom Pasta

Easy Sausage and Mushroom Pasta

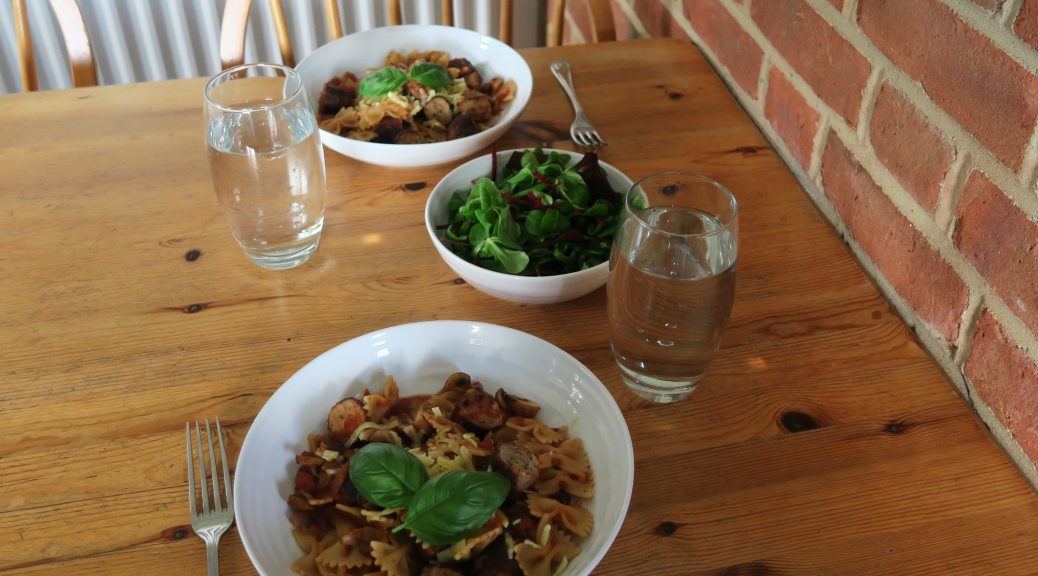
I’m waiting another year before heading off to Uni, but with most of my friends flying the nest I thought it was about time that I made a comforting, easy main course for all the first years out there. This one is simple to make, won’t break the bank and is really tasty, which I think is the basic criteria for most student cooking. Plus it’s relatively healthy, so you can be confident that this one will override weeks of Pizza and beer, and pump some nutrients into your body.

It may not be the most pretty dish in the world, but it’s a really good one to make when you’re tired, busy,  hungover or all three at once. If you want make it even healthier you can add fresh tomatoes, peppers or any other veg that takes your fancy, but I’ve stuck with what we’ve got here to keep it simple. The quantities for this serves two, so it’s kind of obvious, but if you’re only cooking for one you can either half the quantities, or put the rest in the fridge for a later date.

I’m going to leave the writing there for this one, as a simple recipe only needs a simple intro!

Recipe

Serves 2

Time: 20 minutes

Ingredients

  • 4 Sausages
  • 100g Pasta
  • 1 White onion
  • 1 Garlic clove
  • 1 tbsp Sunflower oil
  • 75g Mushrooms
  • 200g Chopped tomatoes (can or carton)
  • 100g Cheddar cheese (optional)
  • Fresh basil to serve (optional)

Method

  1. Pre-heat a grill on full heat. Put the sausages onto a grill pan and pierce slightly with a knife so that the skin is punctured. Put under the grill and leave to cook. Once they’ve browned on one side turn them over so that they cook evenly. This should take 5-10 minutes. (If you don’t have a grill, put 1tsp vegetable oil into a pan and gently fry the sausages until cooked).
  2. Fill a pan with water and bring to the boil. When boiling add the pasta, stir once to break the pasta up and then leave to boil according to packet instructions.
  3. Meanwhile, take the onion and garlic, remove the skins and then finely chop.
  4. Put the oil into a large pan and heat gently. Add the chopped onion and garlic and cook until just beginning to caramelise.
  5. Add the mushrooms and continue to fry until they begin to soften and the onions are caramelised. Pour in the chopped tomatoes and leave on a gentle simmer.
  6. Once the sausages are done (they won’t be pink in the middle anymore), remove them from the grill pan (or frying pan) and slice each one into four.
  7. Once the pasta is done, sieve to remove the water and then add the drained pasta to the tomato mixture.
  8. Add the chopped sausages and stir to combine. Season with salt and pepper to taste.
  9. Spoon into bowls, grate some cheese over and serve with fresh basil. Enjoy!

Thanks for reading! Look out for my next post on Wednesday – it’s going to be some good old comfort food.

Emma x

Pecan Praline Brownies

Pecan Praline Brownies

Finding the time to write a new post this week was a balancing act. I’ve just started a new job, my course requirements are growing, and drama rehearsals are kicking off, and yet I think this just shows how easy and quick these are to knock up. When looking for an old favourite to fall back on these were definitely the ones to go for. These are the things I make most often, and almost everyone who knows me will have, at some point, been offered one. They’re simple, satisfying, and great for sharing – so if you’re a uni fresher, or just starting somewhere new, these are perfect for making friends. I also use the base mix (without the praline topping) as my chocolate cupcake mix, as they produce chewy, indulgent cakes, with a lot more chocolate flavour than most other chocolate cake mixes. So if you prefer your cakes cupcake-style you can use this recipe for that as well.

The original recipe for this came from the back of a Hersey’s Cocoa Powder pot from when my parents lived in America. Since then it’s been memorised, prodded, and tweaked by my family until we’ve got to the one we see here. Slightly unusually I use oil instead of butter – but don’t let this put you off. In the original recipe it said take a cup of butter and melt it, so I just cut out the middle man and went straight to a liquid fat source. Somehow it works really well to make the brownies moist, and technically it’s healthier as it’s got a lot less saturated fat in it than butter (not that anyone eating these will be THAT calorie conscious, but every little helps). I’ve also slowed down the cooking time to make the finished texture gooey and delicious, which also has the benefit that it’s harder to overcook them.

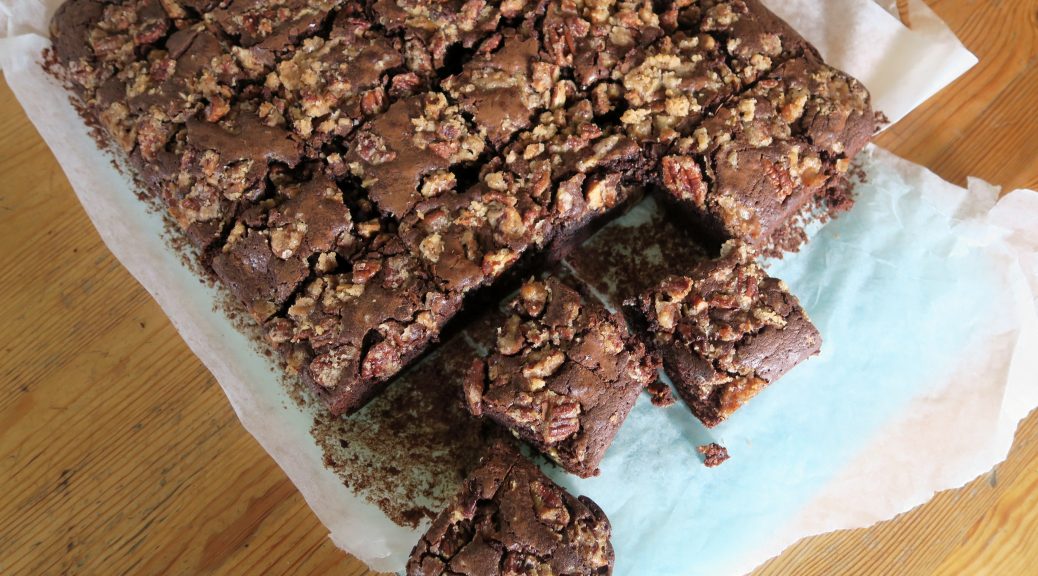
I usually make my brownies plain, without the praline top, but if you want to make them extra special you can go the extra mile and finish them with this crunchy nutty topping like I do here. The crunchy, nutty, sugar hit on the top just takes the whole thing one step further and makes them truly decadent.

Recipe

Makes 20 squares

Time: 1 hour

Ingredients

  • 420ml Vegetable oil
  • 640g Light brown sugar
  • 2 tsp Vanilla extract
  • 8 Medium eggs
  • 160g Cocoa powder (not drinking chocolate, as it has added sugar and less cocoa, and so has much less flavour)
  • 260g Plain flour
  • 75g White chocolate, chopped
  • 75g Milk chocolate, chopped

Topping:

  • 75g Butter
  • 150g Caster sugar
  • 225g Pecans, chopped

Method

  1. Preheat the oven to 170˚C. Line a large rectangular tin (mine was 30×25 cm ) with butter and baking paper.
  2. In a large bowl whisk together the oil, sugar and vanilla. Add the eggs and whisk until fully combined. Add the cocoa and whisk again (go slowly here as the cocoa will go everywhere if whisked too fast). Add the flour and the chopped chocolates and whisk until fully mixed.
  3. Pour the mixture into the lined tin and smooth out with a spatula.
  4. Now make the praline topping. In a pan melt the butter over a medium heat. Add the sugar and stir until the sugar has dissolved. Then bring the sugar mix to the boil, before adding the nuts. Stir to coat the nuts and then leave to boil until caramelized (around 3 minutes).
  5. Spoon the pecan mix over the brownies, making sure they’re evenly distributed over the whole tray, and bake in the oven for 25-35 minutes. Be careful not to over bake here, as you want brownies to be slightly gooey in the middle. If you’re used to baking cakes I’d say take them out 5 minutes before you’d think it’d be ready if you were making a cake.
  6. Cut into 20 squares and serve. (They’re really good with raspberries and double cream!).


Thanks so much for reading! Check out my social media pages (links on the side bar), and like/follow to stay updated.

Emma x