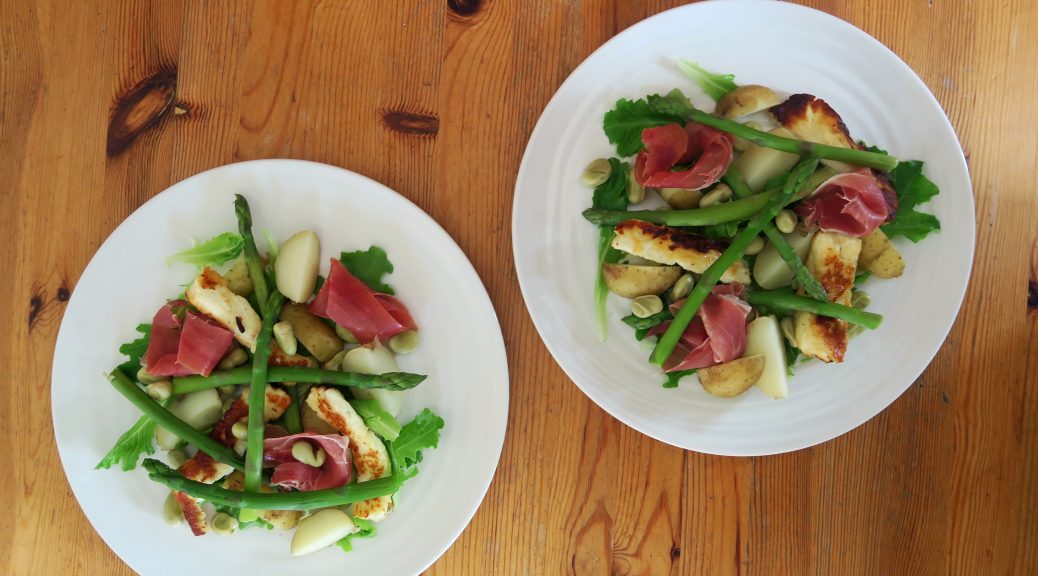
Asparagus, New Potato and Serrano Ham Salad
To counter all the insanely indulgent patisserie and sweet bakes that I’ve been making the past few weeks, I thought it was about time for a salad. Especially when it’s this hot all the time, no one really wants to be eating anything warm and so salads are kinda my go-to thing. This salad can be served either hot or cold, so it’s a good one to have up your sleeve for all seasons.

I think the key to a good salad is to have a mixture of cheese/meat, green veg and then something more carb-based. In this summery salad the saltiness of the ham and the halloumi works beautifully with the earthiness of the asparagus and the broad beans. If you haven’t had halloumi before, it’s this gorgeous cheese which is cooked to give a slightly crisp outside with a softer inside that squeaks as you eat it. It’s pretty salty, but in a salad like this it’s incredible! Because of the serano ham and asparagus this can be a bit of a pricey lunch to make, so if you’re working to a budget you can get the same effect by using normal ham and cooked courgette strips.

Recipe
Serves 2
Time: 20 minutes
Ingredients
- 6 New Potatoes
- 8 Spears of Asparagus
- A handful of Broad beans
- 1 tbsp Olive oil
- 1 Block of Halloumi (about 225g)
- A handful of Salad Leaves
- 3 Pieces of Serrano ham
- Black pepper to season
Method
- Put on a pan of water to boil. Then add the new potatoes and leave to boil for 10 minutes, until soft.
- Chop off the woody ends of the asparagus, about a thumbs length but this will vary depending on what kind you buy. Scoop the potatoes out of the water and then replace them with the asparagus, leaving them to boil for 5-8 minutes, until tender. Add the broad beans a few minutes before they asparagus is cooked to allow through to cook through.
- In another pan pop the oil and put over a medium heat. Slice the halloumi into pieces the thickness of a £1 coin. Then fry the halloumi for 2-3 minutes on each side so it goes golden brown.
- When ready start plating the salad. Scatter some of the salad leaves over the plate. Then cut the potatoes into wedges and scatter them around the plate. Then pop on the halloumi, asparagus and scatter over the broad beans. Finish with twirls of the Serrano ham, a drizzle of olive oil and a sprinkle of black pepper!

Thanks for reading!
Emma x