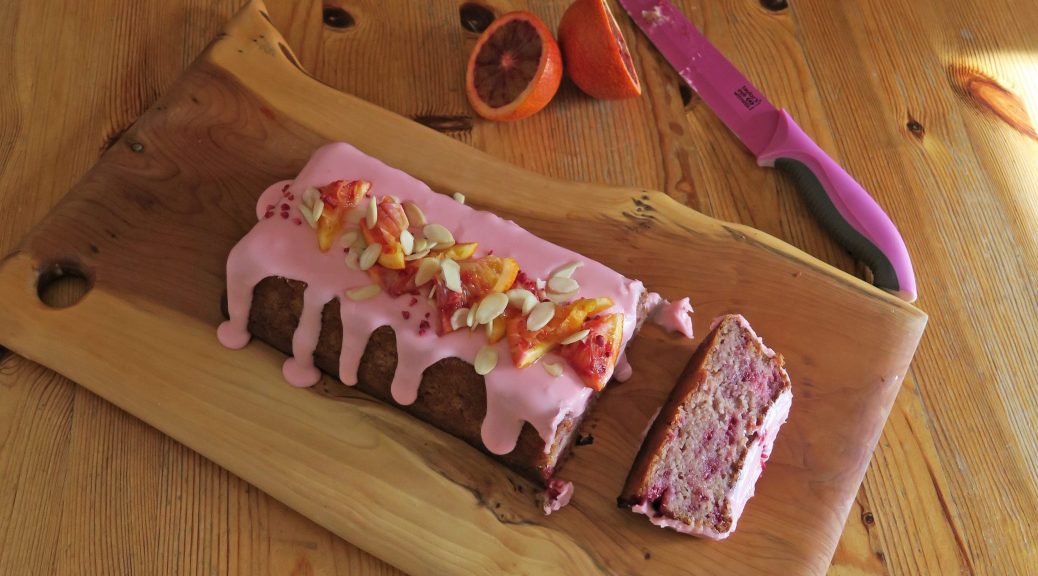
Almond, Blood Orange and Raspberry Cake
Blood oranges are the delicious ingredient that I think is about to flood the food world and hit the mainstream. They have a very unusual flavour – sort of the classic orange taste with a fruity kick similar to strawberries in the background. This makes it a perfect partner for almonds and raspberries, which when all mixed into a cake tastes delicious! They also have an incredible natural pink colour – this icing is just blood orange juice and icing sugar, no food colouring!

Depending on the size of orange you use the mixture has the potential to end up very wet. If this happens there’s a chance the cake could take too long to cook and end up burnt on the outside and raw in the middle. Therefore, if this happens, I’d recommend adding a couple more tbsp of flour to the mixture to thicken it up – it’s not really the done thing in the world of baking but it works for me. If you’re unsure if your mixture is too wet or not you can check it using the v test. Take a blob of mixture on the wooden spoon you’ve been mixing with and sharply shake the spoon once to drop the mixture off it. If the mixture hanging off the spoon is a v shape it’s ready!

Recipe
Makes 1 cake
Time: 1 hour
Ingredients
- 250g Butter
- 200g Caster sugar
- 60g Clear honey
- 4 Large eggs
- 140g Greek Yoghurt
- 1 tsp Almond extract
- 250g Self-raising flour
- 100g Ground Almonds
- 1tsp Baking powder
- 200g Frozen raspberries
- Zest of 3 Bood oranges
- Juice of 2 Blood oranges
To decorate:
- 1 Blood orange
- 200g Icing sugar
- A sprinkle of Freeze dried raspberries
- 25g Flaked almonds
Method
- Pre-heat the oven to 180˚C. Take a rectangular pound cake tin and line with butter and baking paper.
- Put the butter and sugar into a large bowl and beat with a wooden spoon until smooth and creamy. Add the honey, eggs, yoghurt, and almond extract and whisk together to combine.
- Sift in the flour, ground almonds, and baking powder and whisk into the mixture until smooth.
- Add the orange juice, zest and the raspberries into the mixture and fold with a spatula to combine.
- Pour the batter into the lined tin and bake in the pre-heated oven for around 55 minutes, until it’s risen, starting to brown, and a skewer inserted into the centre comes out clean. Take the cake out of the tin and leave to cool completely.
- Meanwhile make the icing. Cut the blood orange in half and juice one of the halves, setting the other to one side for later.
- Put the icing sugar into a bowl and pour in the juice. Stir to make a smooth icing.
- When the cake is completely cooled drizzle the icing over the cake. Slice the remaining 1/2 orange into chunks and arrange then on top of the cake. Finish with a sprinkle with the freeze dried raspberries and flaked almonds. Serve!

Thanks for reading!
Emma x


 (Note: If you don’t have a blowtorch you can caramelise the sugar under the grill. Be careful with this though as it can burn very easily (as I’ve done a bit in these ones))