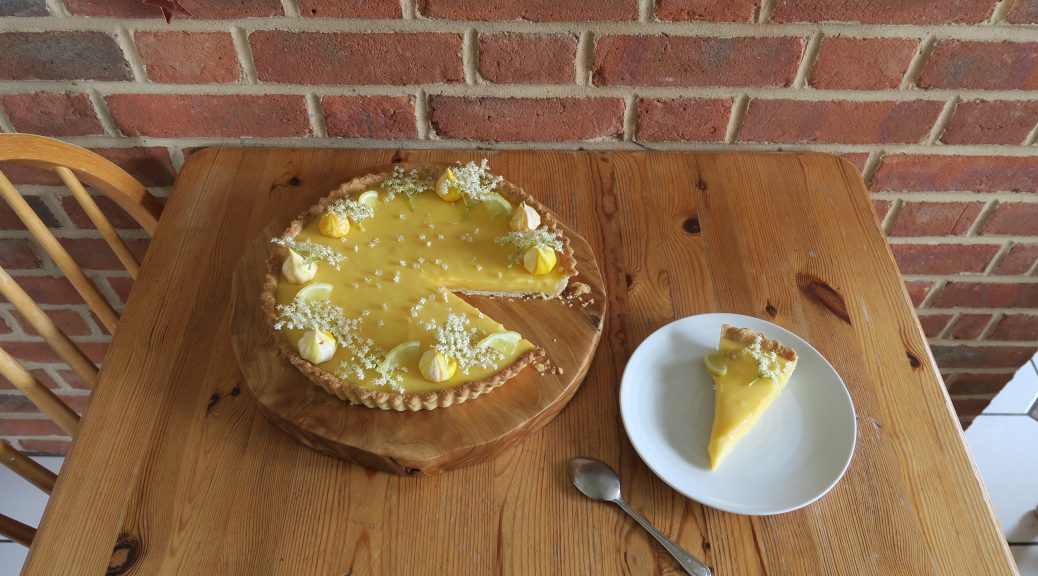
Lemon and Elderflower Tart
Summer has arrived and I don’t think much says summer more than a slice of this lemon and elderflower tart! Since lockdown began I’ve become really interested in foraging in my local area, and this year I noticed how much elderflower there is where I go for walks! I now can’t step outside my front door without getting a whiff of some gorgeous elderflower on the wind. I’ve used the flowers to decorate the top of this tart, but the flavour of elderflower in the filling comes from elderflower cordial so you could make this all year round!

Recipe
Serves 12
Time: 2 hours, plus lots of chilling and baking time
Ingredients
For the pastry
- 265g plain flour
- A pinch of salt
- 3 tbsp caster sugar
- 170g unsalted butter
- 1 egg yolk
- 3 tbsp cold water
For the filling
- 4tbsp elderflower cordial
- 160ml lemon juice
- 2 large eggs
- 2 large egg yolks
- 225g caster sugar
- 338g unsalted butter
To decorate (optional)
- 2-3 elderflower heads
- A few meringue kisses
- 1 fresh lemon
- Fresh cream to serve
Method
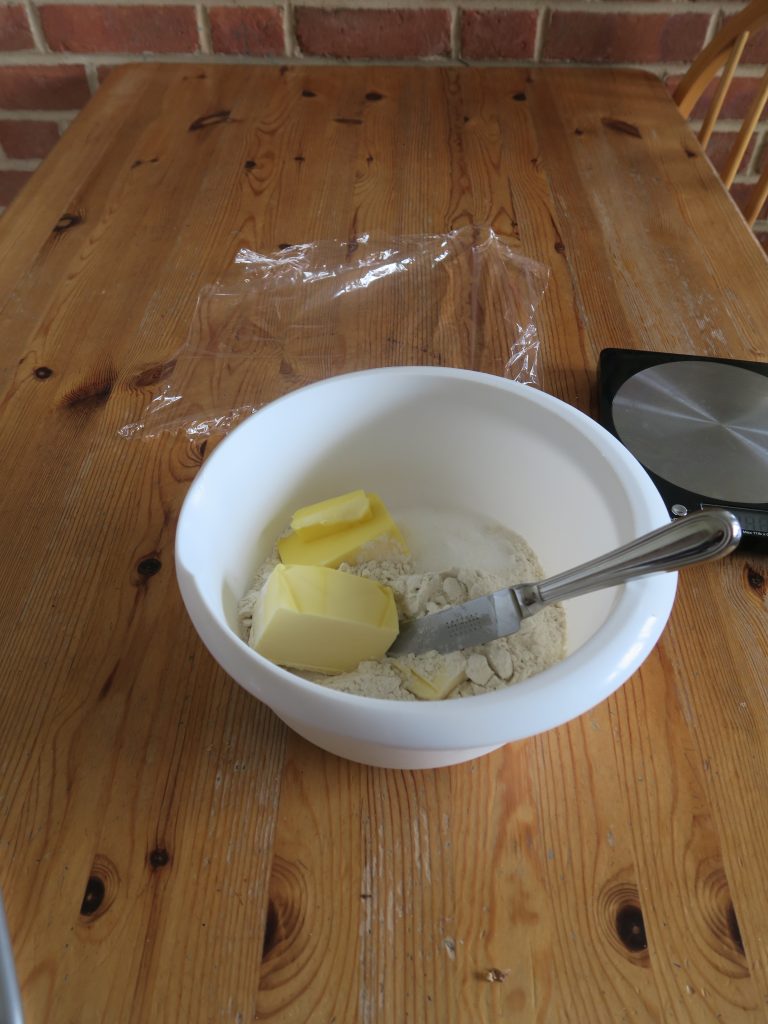
- Begin by making the pastry. Put the flour, salt and sugar into a bowl and mix together with a table knife. Add the butter and use the knife to cut it into small lumps. Then go in with your fingers and rub the butter into the flour until the mixture resembles fine breadcrumbs. (Shaking the bowl side to side every now and then can help bring the bigger lumps to the top).
- In a small bowl mix together the egg yolk and the water. Pour this into the breadcrumb mixture and stir until the mixture forms a smooth dough ball. Wrap the dough in clingfilm and leave in the fridge for at least 1 hour to chill.
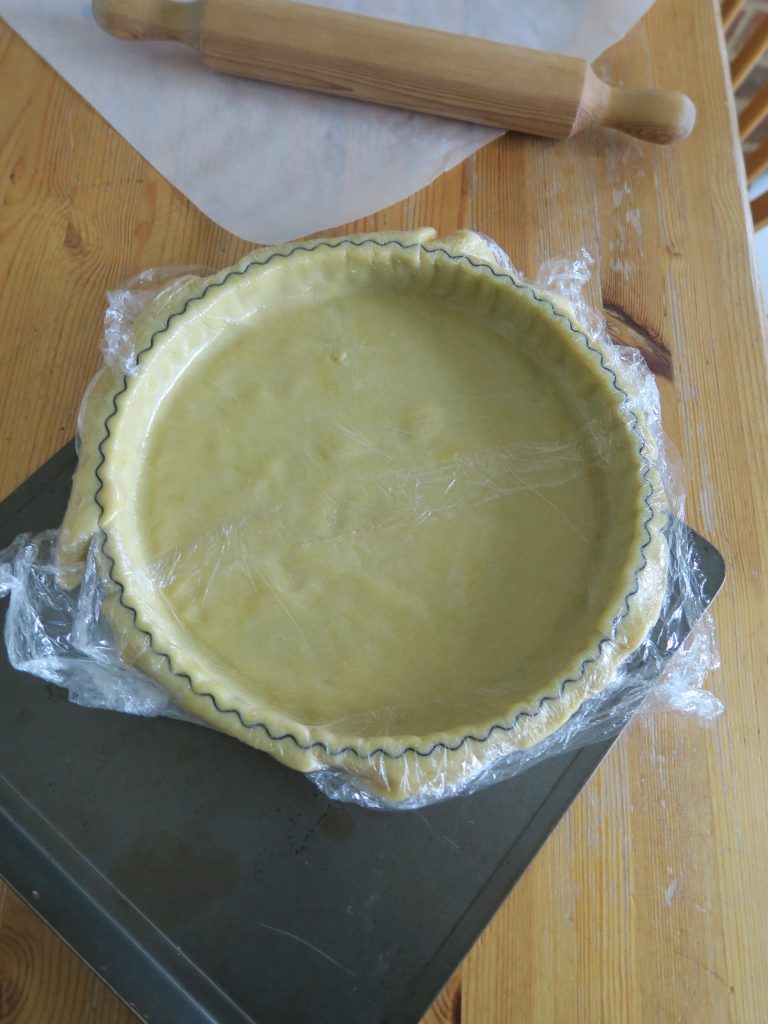
- Take the pastry out of the fridge and roll it out on a lightly floured work top so it’s about 2 cm wider than your tin all around.
- Carefully lift the pastry sheet up and fit it into the tin, making sure it fits snug into all the flutes. Leave the pastry in the fridge for at least 30 minutes to chill.
- Pre-heat the oven to 180C. Take the lined tart out of the fridge. Take a rolling pin and roll over the top edge of the tart to trim off the excess pastry.
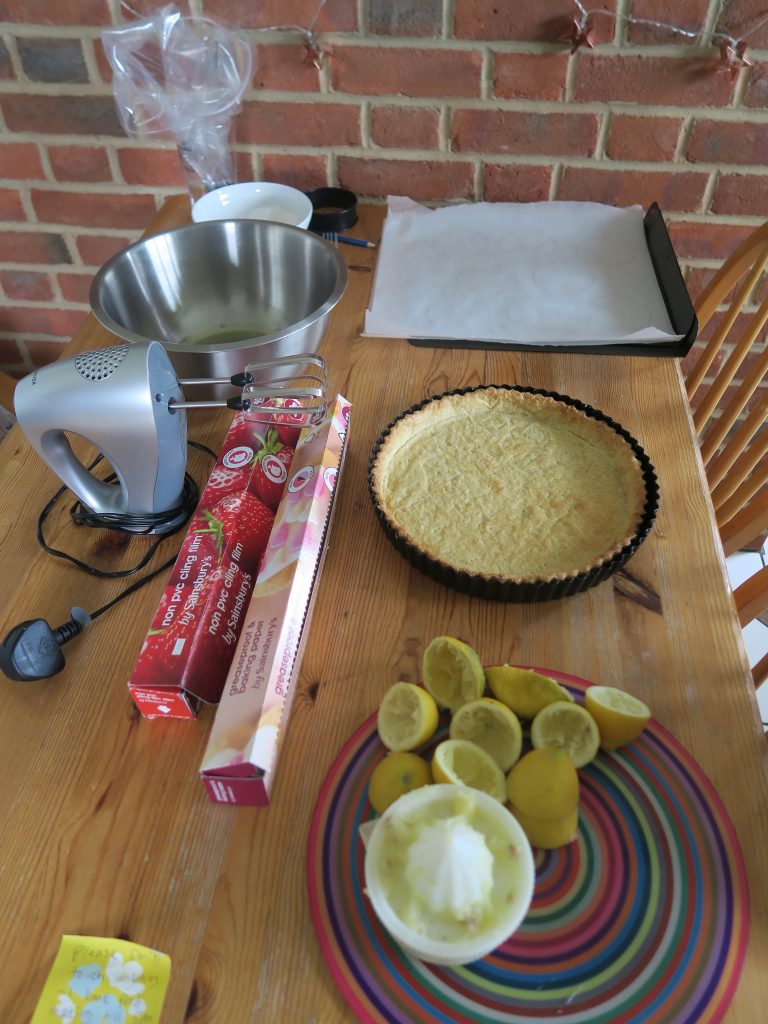
- Take a sheet of baking paper around the same size as your tart case and scrunch it up into a ball. Carefully un-crumple it and then fit it into the tart case, making sure there’s enough excess sticking out the top. Fill the pastry case with baking beans (or rice) and then bake it in the oven for 10 minutes until starting to look baked.
- Take the baking beans and the baking paper out of the tart case and put the tart back into the oven to bake until golden brown all over and crisp. Leave the tart case to cool completely in the tin.
- Now make the filling. Put the elderflower cordial, lemon juice, eggs, egg yolks, and sugar into a large pan and whisk over a medium heat until the mixture reaches 75C on a thermometer. (This will get the mixture up to the temperature to set, but any higher and the mixture will curdle).
- Sieve the mixture into a bowl and leave to cool for 5 minutes. Then, when the mixture is about lukewarm, add the butter into chunks and whisk until it’s melted and incorporated into the mixture.
- Cover the filling with clingfilm and leave in the fridge for at least 2 hours to chill.
- Whisk the filling mixture to break it up a little and then pour it into the cooled tart case. Smooth it out so it forms an even layer and then put it into the fridge to set completely overnight.
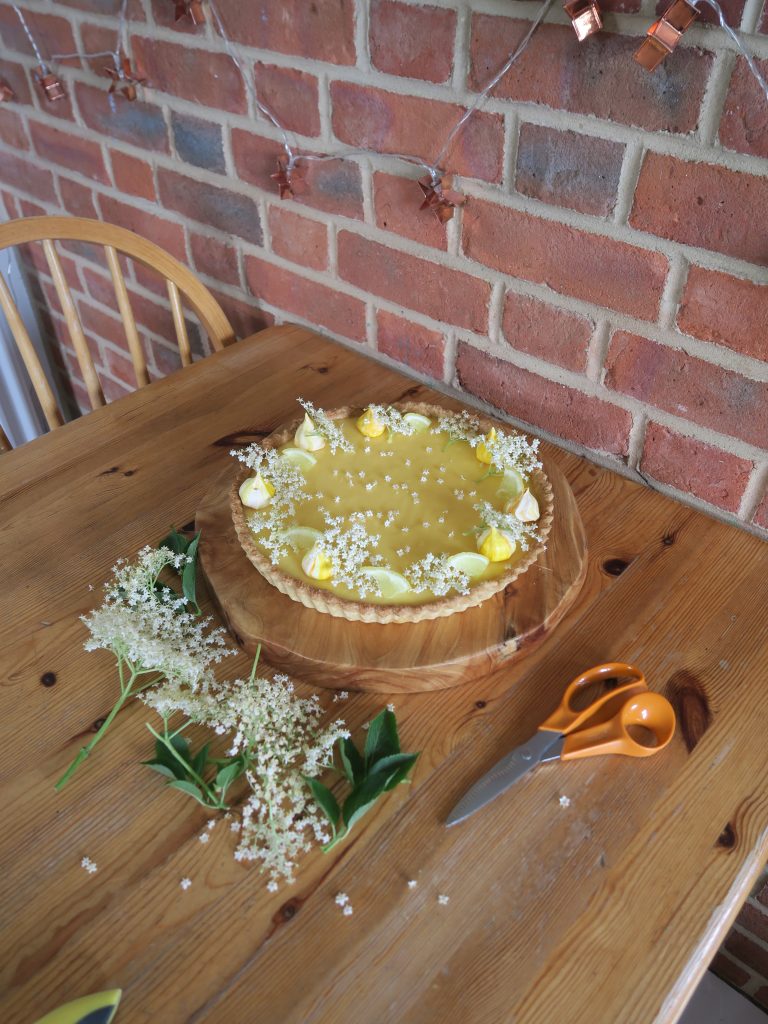
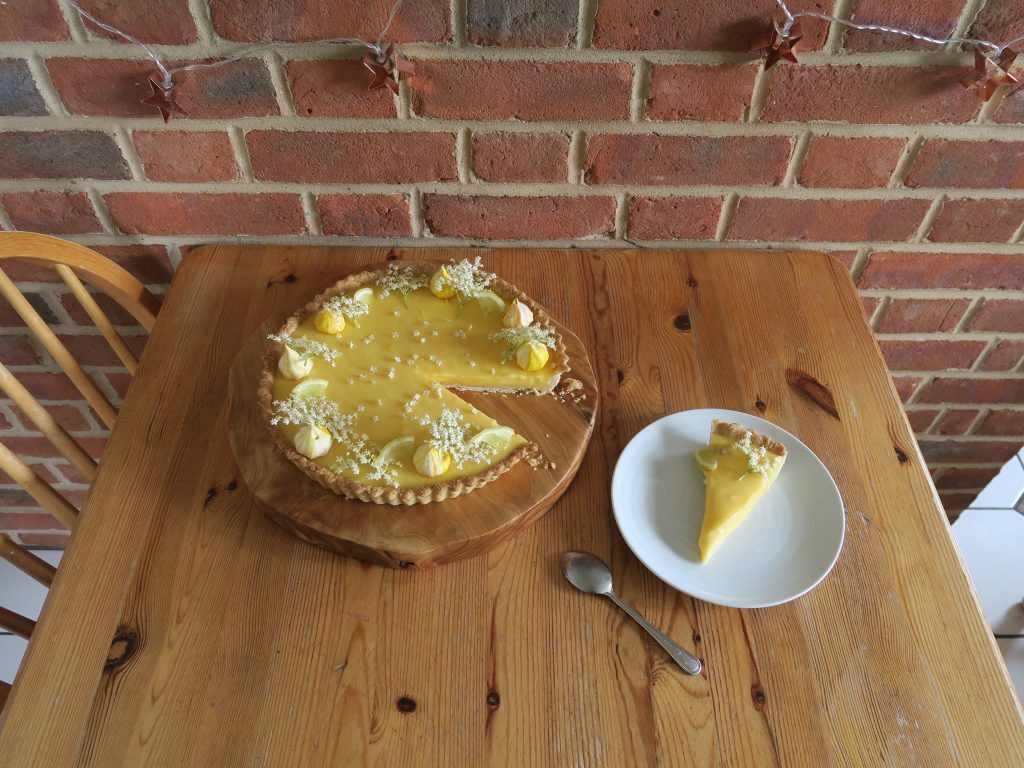
- The next day take the tart out of the fridge and take it out of the tart tin. Then, if you’d like, top the tart with elderflowers, meringue kisses and wedges of fresh lemon and serve with fresh cream!
Thanks for reading!
Emma x