How to Caramelize White Chocolate
There’s this new trend in the food-world that I’ve been itching to try for way too long that involves white chocolate getting a bit of a make over – so I thought I should give it a go! I feel like if you were to typecast chocolates, dark is the all-knowing friend who’s super healthy and idealistic; milk is the loving grandparent who’s always there to have a quick chat whatever the weather; whilst white is the super cute but annoying toddler who’s great in small doses and if you’re in the right mood. It’s nice, but a little too sweet and not much else. Well, here’s white chocolate’s chance to shine!
Caramelising chocolate is a really easy process in which you just bake the chocolate on a baking tray, stirring it every now and then until it turns all golden and beautiful. Doing this gives the chocolate a bitter caramel flavour which works really well with the sweetness of the white chocolate. You can then use the caramelised chocolate as you would a normal bar of white chocolate (cookies, ganache, mousse etc!). I’ve found that, whilst the technique is super easy, the type of chocolate you use will have a massive effect on the outcome of the process. If you use cheaper, more standard stuff it tends to come out dry and lumpy – great for cookies and cakes, not so good for mousses and ganache. Therefore if you do want a silky smooth end product you’ll need to use chocolate that has a cocoa content of over 30% (this info is on the back of most bars near the ingredients). I experimented with Sainsburys own brand, Lindt, Menier’s, and Green and Blacks and the Green and Blacks were the only type that came out smooth, so if you have any doubts that’s the one I’d recommend!
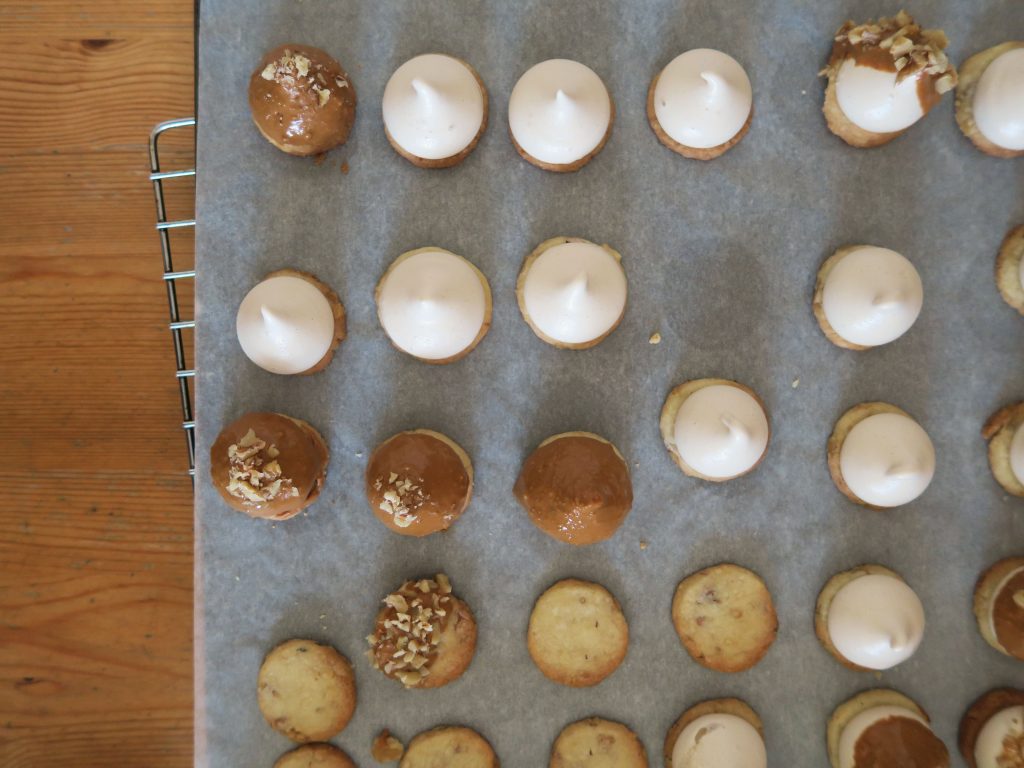
(^ this is an example of what you can use your caramelised white chocolate for – coffee walnut teacakes coated in caramelised white chocolate! Recipe going up soon!)
Recipe
Makes 200g caramelised white chocolate
Time: 1 hour
Ingredients
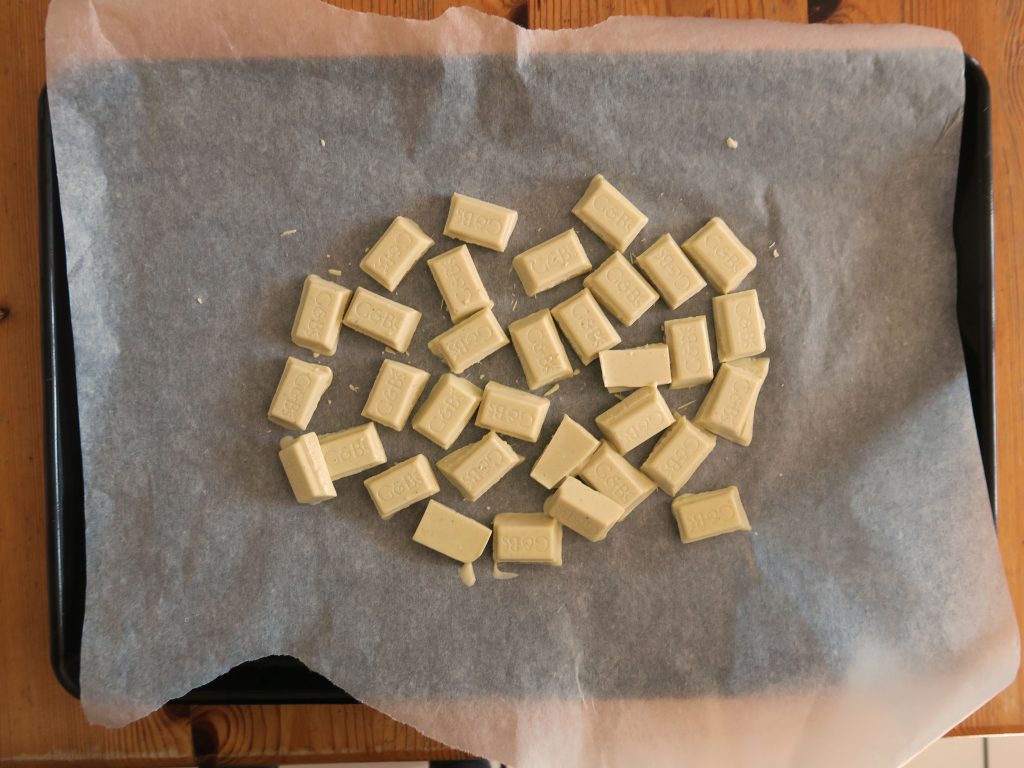
- 200g White chocolate (at least 30% cocoa butter), roughly chopped
Method
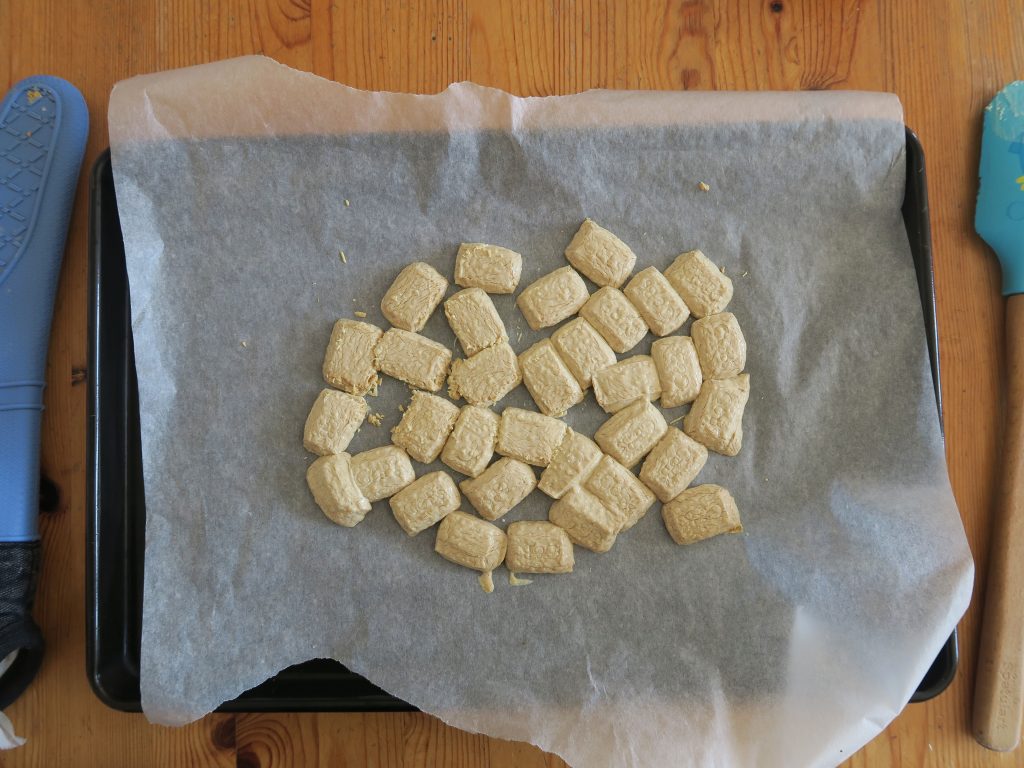
- Pre-heat the oven to 120˚C. Spread the roughly chopped white chocolate on a shallow baking tray lined with baking paper and put into the oven for around 10 minutes.
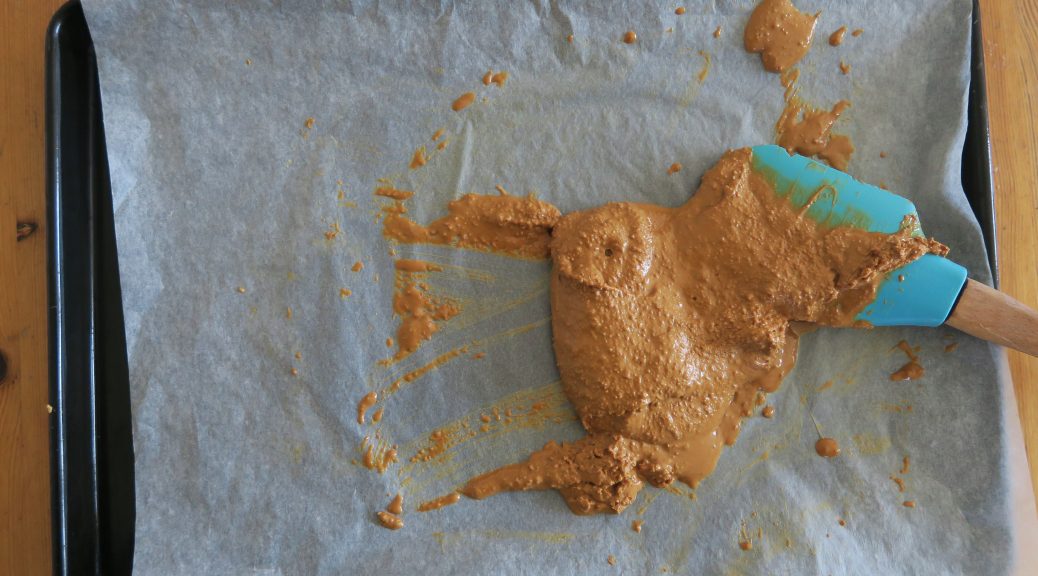
2. Take the tray out and give the white chocolate a good stir with a spatula until smooth. Then put back into the oven for another 10 minutes.
(^Chocolate after 10 minutes in the oven)
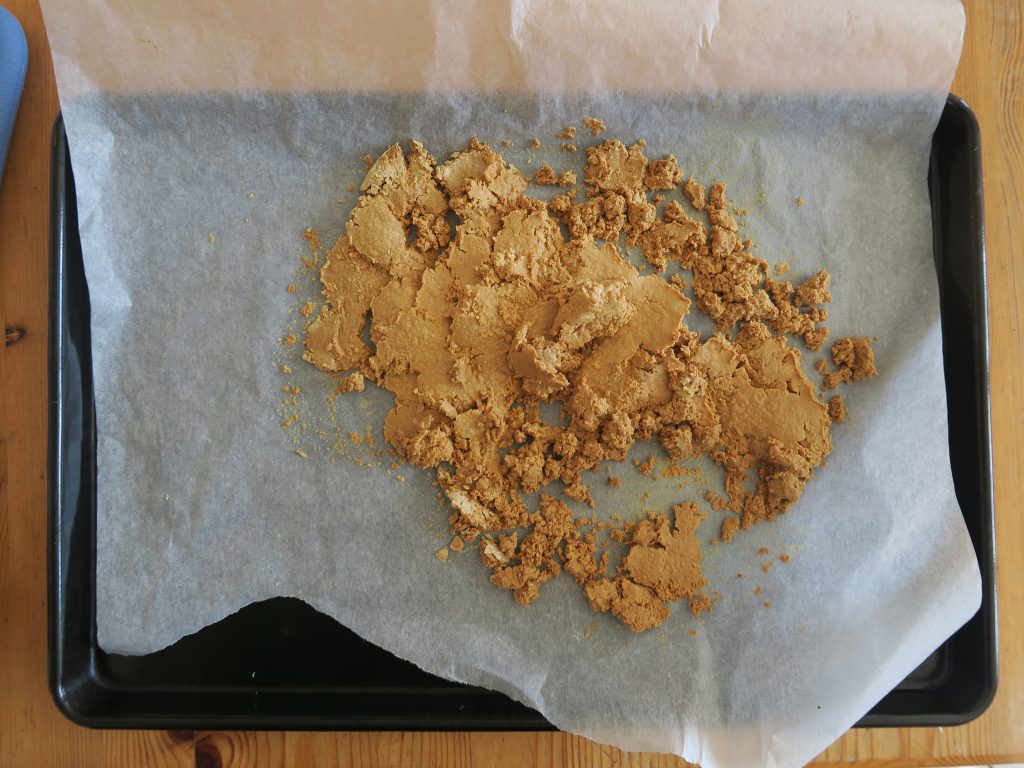
(^Chocolate after 10 minutes in the oven and a good mixing)
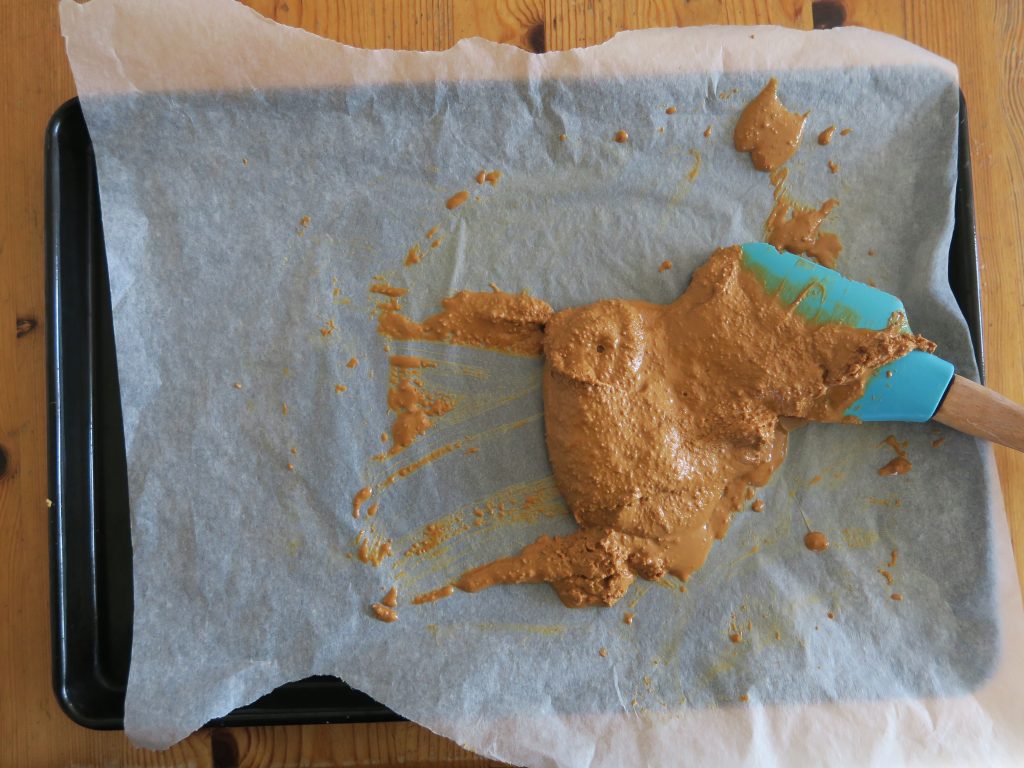
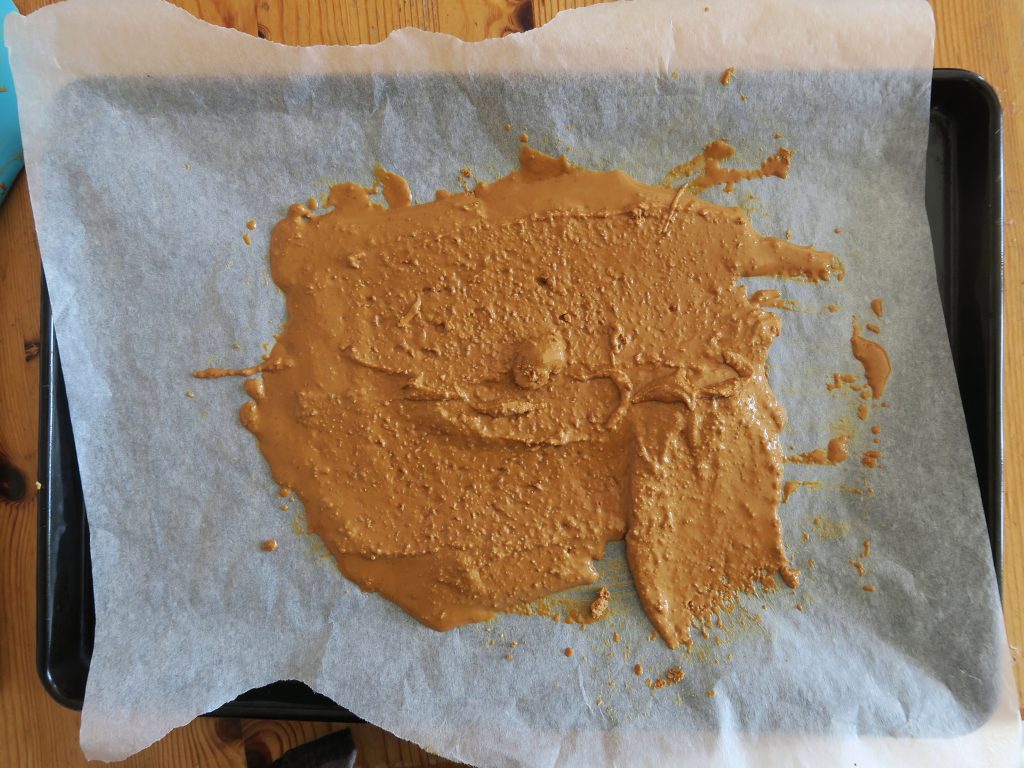
3. Repeat this mixing every 10 minutes for the next 30-50 minutes until golden and caramelised.
(^20 minutes in the oven)
(^30 minutes in the oven and ready to use)
3. The chocolate is now ready to use. If you want to store it for another day you can pour/spoon the caramelised chocolate into a jar or leave it to set hard and then wrap it in some grease proof paper to store it as a bar. It can be stored like this for up to 2 months.
Uses…
So far I’ve used this for two recipes – these delicious coffee and caramelised white chocolate cookies and the coffee walnut teacakes shown above (recipes coming soon!). As far as I can tell though, this will work really well in any recipe using chocolate! You can add it to your favourite cookie recipe like I’ve done here or why not try…
- Pouring over 200ml warm double cream to make a ganache?
- Sprinkling it over a cake or mixing it into some cake batter?
- Making it into some ice cream? (I’ve heard this one is especially good!)
![]()
Thanks for reading!
Emma x