Category: Student

Raspberry and White Chocolate Blondies

Raspberry and White Chocolate Blondies

Blondies are my go-to comfort bake and I think they’re never better than when you add a handful of raspberries to the mixture to give a gorgeous sharpness to pair with the fudgy white chocolate blondie!

Recipe

Makes 16 squares

Time: 45 minutes (including baking time)

Ingredients

  • 170g butter
  • 220g light brown sugar
  • 1 tsp vanilla bean paste (or extract)
  • 1 large egg
  • 210g plain flour
  • 150g white chocolate
  • 50g raspberries (I use frozen as it’s cheaper but you can use fresh if you prefer)

Method

  1. Pre-heat the oven to 180C. Grease and line a 9” square tin with butter and baking paper.
  2. Melt the butter in a large bowl by putting it in the microwave for 20 second bursts. Add the sugar and vanilla and whisk until combined.
  3. Add the egg and whisk again to combine. Then add the flour and whisk again to make a smooth batter.
  4. Take the white chocolate and chop it into rough chunks. Then add this chopped chocolate and the raspberries to the blondie mixture and stir it in.
  5. Pour the batter into the lined tin. Bake the blondies for 25-30 minutes, until golden brown and still a little fudgy in the middle. Leave to cool and then cut into 12 slices and enjoy!

Thanks for reading!

Emma x

Veggie Stack Burgers with Sweet Potato Fries

Veggie Stack Burgers with Sweet Potato Fries

Summer has hit and what screams summer more than a good BBQ? Normally I’d reach straight for the beef burgers when at a BBQ, but after these I don’t think I’d look for the meat again!

Recipe

Makes 4 burgers

Time:

Ingredients

  • 4 beetroot burger buns (see recipe below) or regular burger buns

For the Crispy Aubergine Steak

  • 1 aubergine
  • 100g breadcrumbs
  • 50g sesame seeds
  • 2 eggs
  • ¼ tsp salt
  • ¼ tsp pepper
  • ¼ tsp smoked paprika

For the Sweet Potato Fries

  • 1 large sweet potato (or 2 medium)
  • 2 tbsp sunflower or vegetable oil
  • ¼ tsp salt
  • ¼ tsp black pepper
  • ½ tsp smoked paprika

For the Filling

  • 1 garlic clove
  • 50ml mayonnaise
  • 2 balls of mozzarella
  • 2 beef tomatoes
  • A few handfuls of fresh basil
  • 4 tsp pesto

Method

  1. Begin by making the crispy aubergine steaks. Cut the aubergine into 1cm wide discs.
  2. Place the discs into a bowl, sprinkle with a little salt and leave for 30 minutes to rest.
  3. Wash and then dry the aubergine.
  4. In a wide bowl mix together the breadcrumbs and salt.
  5. In another bowl beat together the eggs, salt, pepper, and paprika with a fork.
  6. Take one of the aubergine discs, dip it into the egg mixture so it’s coated all over and then dip it into the crumb mixture so it’s covered all over with crumbs. Repeat with the rest of the aubergine.
  7. Fill a deep, wide frying pan with about ½ cm deep of oil and place over a medium high heat. (A good way to check the temperature it to take a leaf of a fresh herb or something equivalent and throw it into the oil, it should bubble and simmer like crazy. Remove the herb and then you’re ready to go!).
  8. Carefully place the aubergine steaks into the oil and deep-fry for about 2-3 minutes on each side, until golden brown.
  9. Take the aubergine out of the oil and place on a plate lined with kitchen roll to soak up the excess oil.
  10. Now make the sweet potato fries. Pre-heat the oven to 200C.
  11. Wash and then slice the sweet potato into batons. Place them into a bowl and add the oil, salt, pepper and paprika. Stir until evenly coated and then tip out into a large roasting tin.
  12. Spread the fries out so they are as spread out as possible and then roast in the oven for about 40 minutes, stirring them halfway through cooking so they crisp up evenly.
  13. Whilst waiting for the fries to cook move on to the rest of the fillings. Take the garlic and crush it into a bowl. Add the mayo and mix to combine. Set to one side until needed.
  14. Take the mozzarella and slice it into discs about ½ cm wide. Do the same for the beef tomato.
  15. Now assemble the burgers! Slice your burger buns in half. Spread 1 tsp of the pesto over the base bun and 1tsp of the garlic mayo over the top bun.
  16.  Place one of the aubergine steaks on top of the pesto. The layer up some of the spinach leaves, tomato, mozzarella and basil. Place the top bun on top and enjoy!

Thanks for reading!

Emma x


Classic Cinnamon Buns

Classic Cinnamon Buns


Recipe

Makes 12

Time: 2 hours

Ingredients

  • 75g soya margarine
  • 250ml soya milk
  • 14g fast action dried yeast
  • 1 tsp salt
  • 45g caster sugar
  • 450g strong white bread flour, plus extra for dusting

For the filling

  • 100g soya margarine
  •  50g caster sugar
  • 2 tbsp ground cinnamon
  • 1 small egg
  • 1 tbsp soya milk

Method

  1. Melt the butter in a small pan. Add the milk and warm through until body temperature (about 38C if you have a thermometer).
  2. Add the yeast to the milk, stir to mix through and then leave for 10 minutes to activate.
  3. Put the salt, sugar and flour into a bowl. Pour over the milk and stir to make a sticky dough.
  4. Turn the dough out onto a worktop and knead for 5-10 minutes, until the dough is stretchy, smooth and not quite as sticky.
  5. Lightly oil a bowl (I find pouring a little oil onto a piece of kitchen roll and rubbing that inside a bowl works well). Then tip the dough into the bowl, cover with cling film and leave for 1 hour to rise.
  6. When the dough has doubled in size turn it out onto a lightly floured worktop and knead it for 5 seconds to knock out the extra air.
  7. Shape the dough into a rectangle and roll it out so it’s roughly 60x40cm.
  8. Use a palette knife of spatula to spread the soft margarine (for the filling) over the dough in an even layer.
  9. Mix the sugar and cinnamon together in a bowl and then sprinkle it over the butter in another even layer.
  10. Roll the dough sheet up, long edge to long edge to get a long sausage. Use a ruler and a sharp knife to mark every 1.5 inches along the roll and then cut at these points.
  11. Line a deep roasting tin with butter and baking paper. Transfer each bun to the tin, in 4 rows of 3. (You might need to gently nudge the buns into more of a circle shape if they got squashed during cutting).
  12. Cover the tin with clingfilm and leave to rise for 30 minutes. Pre-heat the oven to 200C.
  13. Beat the egg in a small bowl until runny and smooth. Add the milk and whisk again to combine. Brush this mixture over the buns to glaze.
  14. Bake the buns in the oven for about 20 minutes, or until golden brown and risen.
  15. Leave to cool for 30 minutes and then enjoy!

Thanks for reading!

Emma x

Coffee and Caramelised White Chocolate Cookies

Coffee and Caramelised White Chocolate Cookies

So last week I did a post on how to make yourself some delicious caramelised white chocolate – now it’s time to know how to use this ingredient in your baking! These cookies are really easy to make and can be frozen as a dough, so you can make a huge batch and then just bake them as and when you want so you always have fresh cookies! (And who doesn’t always want fresh cookies?) If you’re a bit short on time you don’t have to use caramelised white chocolate, this also works really well with normal white chocolate. That said, I would recommend giving the caramelising process a go if you can because it brings a new flavour dynamic which is well worth the effort!

In other news I’ve just moved into my student house for the year which is really exciting because I now have a gorgeous kitchen to cook in all year round! It’s gonna take a little while to find my bearings and get everything sorted, but hopefully I’ll soon start getting out some content from there so keep an eye out for that – and as always any requests just throw them my way!

Recipe

Makes 12

Time: 2 hours (plus chilling time)

Ingredients

  • 170g White chocolate (30-32% cocoa solids), roughly chopped
  • 105g Unsalted butter
  • 1 ½ tbsp Instant coffee granules
  • 200g Plain flour
  • 1/2 tsp Salt
  • ½ tsp Baking powder
  • ¼ tsp Baking soda
  • 100g Light brown sugar
  • 75g Caster sugar
  • 1 Large egg
  • 1 Large egg yolk
  • 1 tsp Vanilla bean paste (or vanilla extract)
  • Flaked sea salt, for sprinkling

Method

  1. Begin by making the caramelised white chocolate. Pre-heat the oven to 120˚C. Spread the roughly chopped white chocolate on a shallow baking tray lined with baking paper and put it into the oven for around 10 minutes.
  2. Take the tray out, stir the white chocolate with a spatula until evenly mixed and then put it back into the oven. Repeat this mixing every 10 minutes for the next 30-50 minutes until golden and caramelised.
  3. Leave the caramelised chocolate to set on the baking paper. (It can then be wrapped in baking paper and stored like this for up to 2 months if you don’t want to use it straight away).
  4. Now start making the cookies. Put the butter into a small pan and melt it gently over a medium heat. Once melted add the coffee and stir until dissolved. Then leave this to one side until needed.
  5. Next mix the flour, salt, baking powder, and baking soda in a bowl.
  6. In a separate bowl whisk together the butter, sugars, egg, egg yolk and vanilla until fully combined. Add the flour mixture to these wet ingredients and stir with a wooden spoon until a smooth dough starts to form.
  7. Break the caramelised white chocolate into pieces and add it to the dough.  Then mix everything together until the dough is smooth and the chocolate is incorporated. Wrap the dough in cling film and then leave it to chill in the fridge for at least 4 hours.
  8. Pre-heat the oven to 180˚C and line a couple of baking trays with baking paper.
  9. Roll the dough into 60g balls and place them on the lined baking trays, making sure they’re spaced out by a couple of inches to prevent them from spreading into each other during baking.
  10. Sprinkle the cookies with a little sea salt and then bake in the oven for 15-18 minutes until golden brown and starting to crisp around the edges. Leave the cookies to cool for 10 minutes before transferring them to a wire rack to cool completely. These will keep in an air-tight container for up to 5 days. Enjoy!

Thanks for reading!

Emma x


Meatball Pasta Bake

Meatball Pasta Bake

The start of Uni is coming up and so it’s time to dig out those quick, comforting student-friendly recipes for term time! This one’s a really useful dish to have under your belt as it’s hearty, tasty and will also give you some really useful skills that you can use to make loads of other things. My mum always says that if you know how to cook a bit of meat, make a tomato sauce and make a white sauce you’re pretty much set. From the skills you learn from this you can also make a chilli con carne, bolognese, cauliflower cheese, fish pie and a number of other dishes!

This is also a really easy dish to play around with to suit whatever you need.  Want to make it vegetarian – use a meat substitute or vegetables (I like aubergine and sweet potato!). Want to feed a crowd? Just double your quantities! Don’t have the cash for/can’t find meatballs? Use some chopped up sausages instead! Don’t have the time to make this in one go? Make the tomato and white sauce in bulk and then all you need to do is re-heat them and add the meat and pasta! I’ve included some herbs and spices in this tomato sauce as it really does make it so much better than boring ones you get out of jars, however, if you’re a student and/or on a budget I wouldn’t expect you to have these so they’re not essential. That said I would really recommend taking some paprika to uni with you if you can – it might seem pretentious but it’ll add instant flavour and kick to any dish without making it blow-your-head-off spicy!

This year I’m living out of college so I’ll have my first taste of true student cooking which is gonna be interesting… That said, I did use our little kitchen in halls quite a bit last year and found out some things that are kinda useful to know:

3  Nuggets of knowledge to take with you to Uni…

  1.  Pasta is life! It’s so versatile, goes with everything, and is really quick/easy to cook. Make sure you take some pasta and maybe some pasta sauces with you when you go to uni. (If you don’t like pasta a staple carb like rice or noodles will also work!)
  2. In the hectic life of uni the fruit you buy can often end up being neglected and before you know it the beautiful morsels you bought are 4 weeks old, squishy and gross. You may be tempted to throw these in the bin (and if they’re mouldy then, yeah, do that!) but if they’re looking generally ok, they’re just too far gone to eat raw, use them in your cooking! I found topping some chopped up eating apples with a simple crumble topping and baking them for 20-30 minutes gave a really quick apple crumble. You can use pretty much any fruit you want to make a good crumble, but stone fruits (like plums, peaches and nectarines) work super well! You can also put old bananas in banana bread and citrus fruits in smoothies!
  3. ALWAYS TIDY UP AFTER YOURSELF! Ok, so maybe I’ve not had the best experience this year with dealing with other people’s mess in the kitchen – but trust me, people know who are the ones who leave their stuff in the kitchen and though they’ll never tell you it, they won’t like you for it. Just make sure you leave the kitchen as you found it (or better) – wash up your dishes, put them away, put food back in the fridge and wipe down the work tops. It’s common niceties for using a shared space and it’ll stop people forming judgements about you before they know you!

I also had no idea what kind of equipment I’d be needing in the kitchen last year, and no matter what you do take you always end up forgetting something. So if you’re wondering what to pack for your student kitchen I’d say make sure to pack the following…

  • A good non-stick sauce pan.
  • A large mixing bowl  – This’ll be useful for everything, from making a 3 tiered birthday cake to eating cereal when you can’t find your crockery!
  • A mug – If you don’t drink coffee or tea before you go to uni you will by the time you come home! (Also really good for mug cakes and for measuring!)
  • A spare fork – great as a whisk, pastry crimper, tub opener, cake prodder, pasta tester and pretty much anything you can think of. You will also always get to a point where the only piece of cutlery you can find is a broken table knife and a ladle, so spare forks are very valuable!
  • A spatula – As a student you don’t want to be wasting any food you’ve spent money and time on making just because you can’t scrape it out of the pan.
  • Tupperware boxes – If you’re as bad as portioning as I am you’ll often end up with a whole other portion of food you want to put in the fridge and keep for another day!
  • Glass dish with lid – Great for baking and cooking things in (like this pasta bake!) and for then storing leftovers in the fridge.
  • A bottle opener – everyone always needs one, no one ever has one!
  • A chef’s knife and a smaller prep knife.
  • A chopping board – self explanatory, but also great for carrying hot dishes back to your room to eat.
  • A tea towel – can double up as an oven glove and ensures you have no excuses to leave your pans out!

Of course there are lots of other useful bits of kit like a wooden spoon, extra pans, oven gloves, a tin opener, a sieve, and of course crockery, but these are the the main things I found I reached for when I was in the kitchen!

Recipe

Serves 2 – 4 (really depends on how hungry you are!)

Time: 45 minutes

Ingredients

  • 1 ½ mugs of Pasta
  • 1 tsp Sunflower oil
  • 12 Meatballs (or 4 sausages)
  • Fresh basil to serve (optional)

For the tomato sauce

  • 1 Small white onion
  • 2 Garlic cloves
  • 1 tbsp Sunflower oil
  • ½ tsp Smoked papirika
  • ¼ tsp Cayenne pepper (optional)
  • 400g Chopped tomatoes
  • 1 Beef (or vegetable) stock cube
  • 1 Bay leaf (optional)

For the white sauce

  • 50g Butter
  • 1 tbsp Plain flour
  • 450ml Milk
  • 75g Cheddar cheese, plus extra for the topping

Method

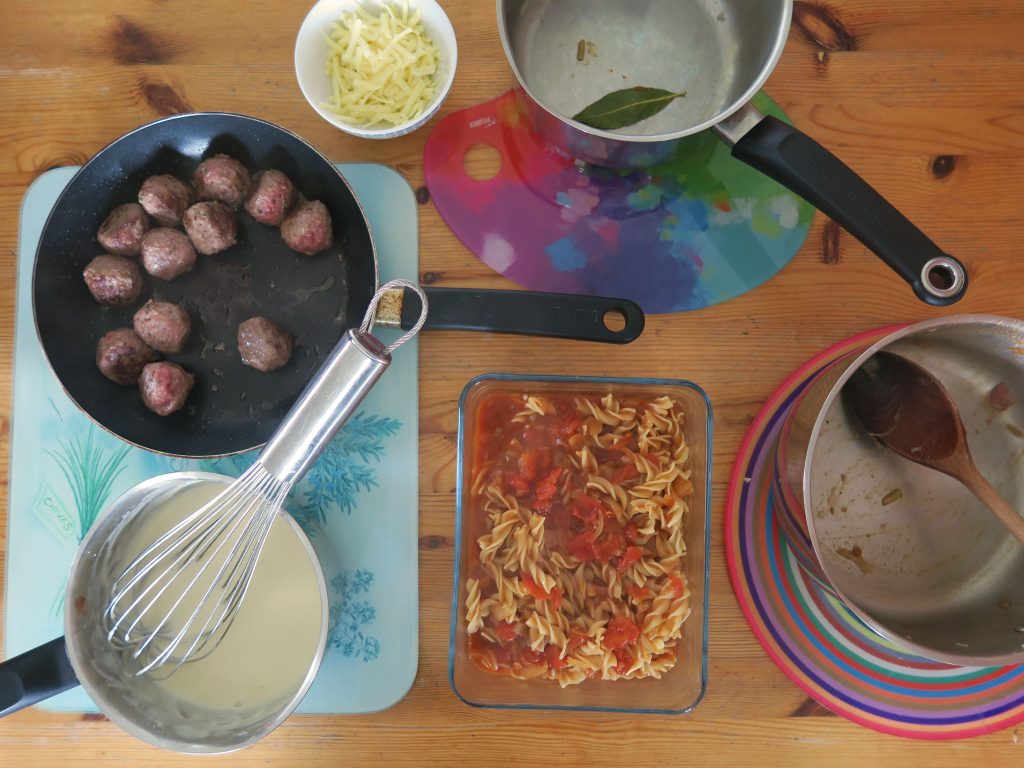
  1. Begin by making the tomato sauce. Peel and finely dice the onion and garlic. Put the oil into a large saucepan and fry the chopped onion until starting to caramelise and turn golden. Add the garlic, paprika and cayenne (if using). Stir and fry for another 1-2 minutes.
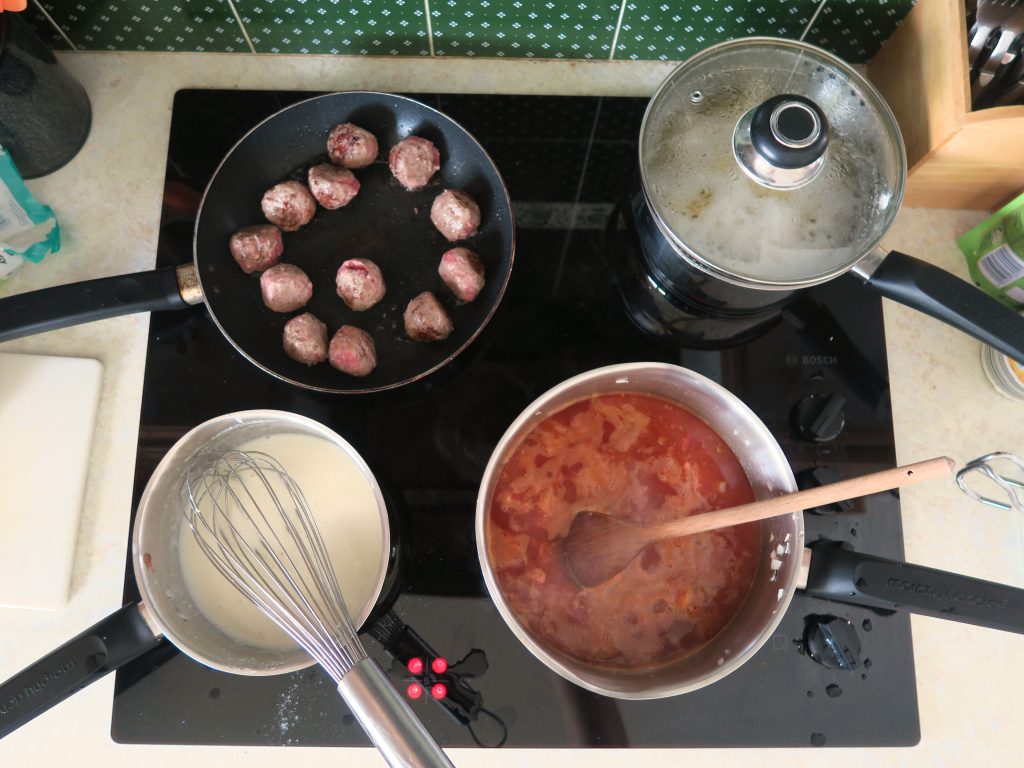
  2. Add the chopped tomatoes and beef stock cube to the pan, stir and bring it up to a boil. Fill the empty tomato tin/carton with water and pour this into the pan (it’ll rinse the remaining tomatoes out into the pan and will give you the liquid you need!). Add the bay leaf, stir the mixture again and then reduce the heat to a gentle simmer. Leave for 30-40 minutes until reduced and not too watery. Season to taste with salt and pepper and leave to cool until needed
  3. Meanwhile put a pan of water on to boil. Then cook the pasta to the packet’s instructions. When aldente take the pan off the heat and leave in the water until needed.
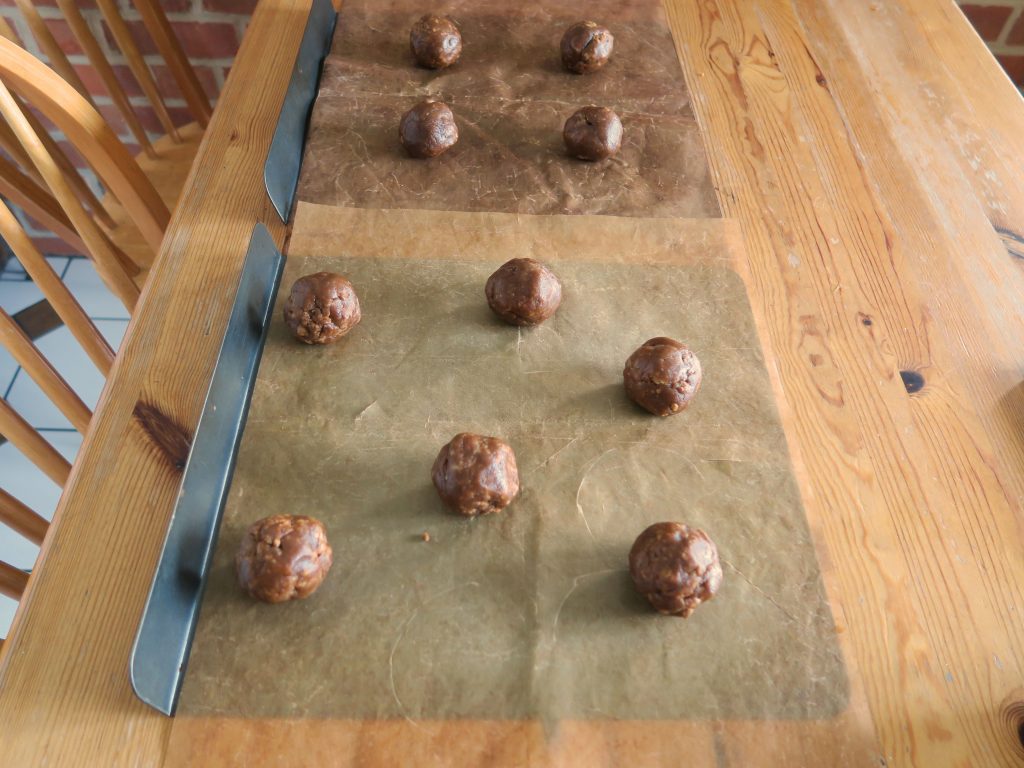
  4. Next prepare the meatballs. Put the oil into a frying pan and place over a medium heat. Add the meatballs and fry them for 1-2 minutes until browned on one side. Then turn them over and repeat the frying and turning until they’re brown all over. (If using sausages instead, pierce the skins 2-3 times with a sharp knife and pan-fry them in a similar way, before chopping them into chunks). Don’t worry if the meat isn’t cooked all the way through as it’ll continue to cook in the oven, you just want them browned all over on the surface. Leave to one side until needed.
  5. Meanwhile make the white sauce. Melt the butter in a pan and then add the flour. Mix the flour into the butter with a wooden spoon to make a paste. Beat it in the pan for around 1 minute to cook out the flour.
  6. Slowly add the milk to the pan, (around 3-4 tbsp at a time at first and then after 4-5 of these start to slowly pour it in), whisking constantly to slowly make a sauce. This is the most important step as if you add the milk all at once the mixture will become lumpy and won’t thicken. Once all the milk is added keep on whisking for 5-10 minutes until the mixture thickens and leaves a trail when the whisk is lifted out.
  7. Grate the cheddar into the sauce and whisk again until it’s melted and combined. Then taste the mixture and season with pepper and salt, if needed.
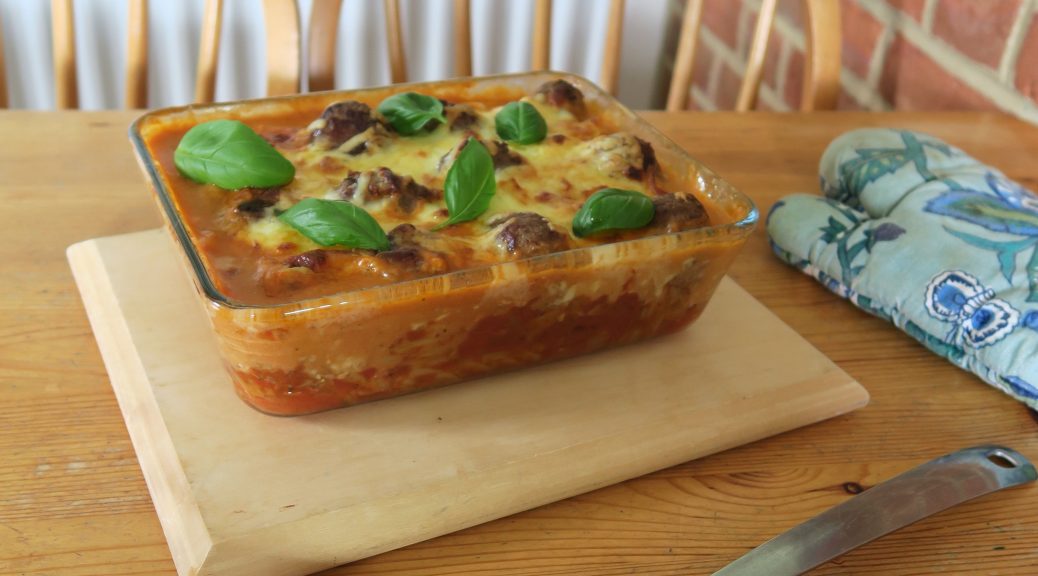
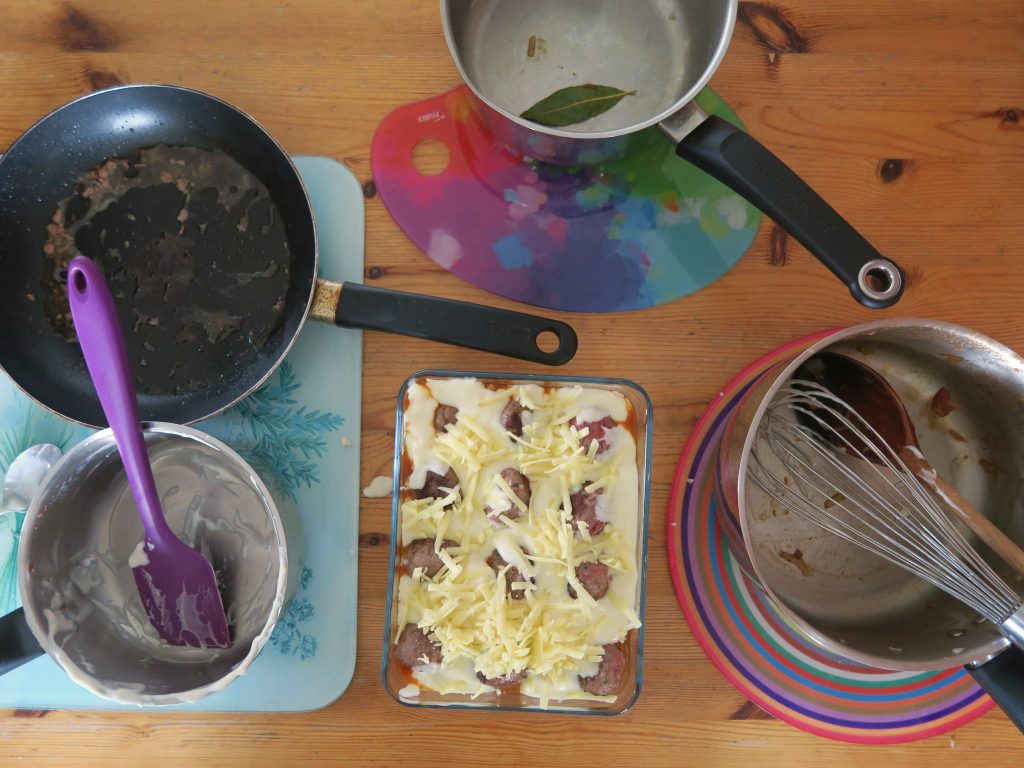
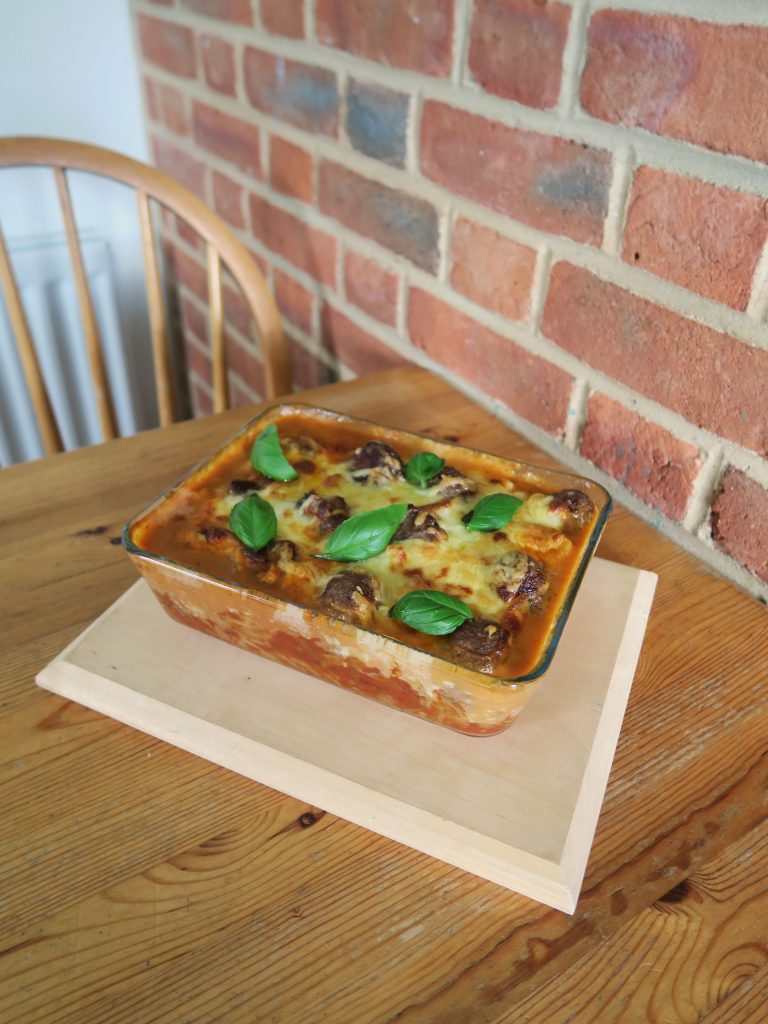
  8. When all the elements are ready start assembling. Drain the pasta and mix it into the tomato sauce. Then pour it out into a glass/oven-proof dish. Top with the meatballs and then spoon the white sauce in between the meatballs. Top with some extra grated cheese and then bake the dish in the oven for around 10-15 minutes, until the top is golden brown and the sauce is bubbling.
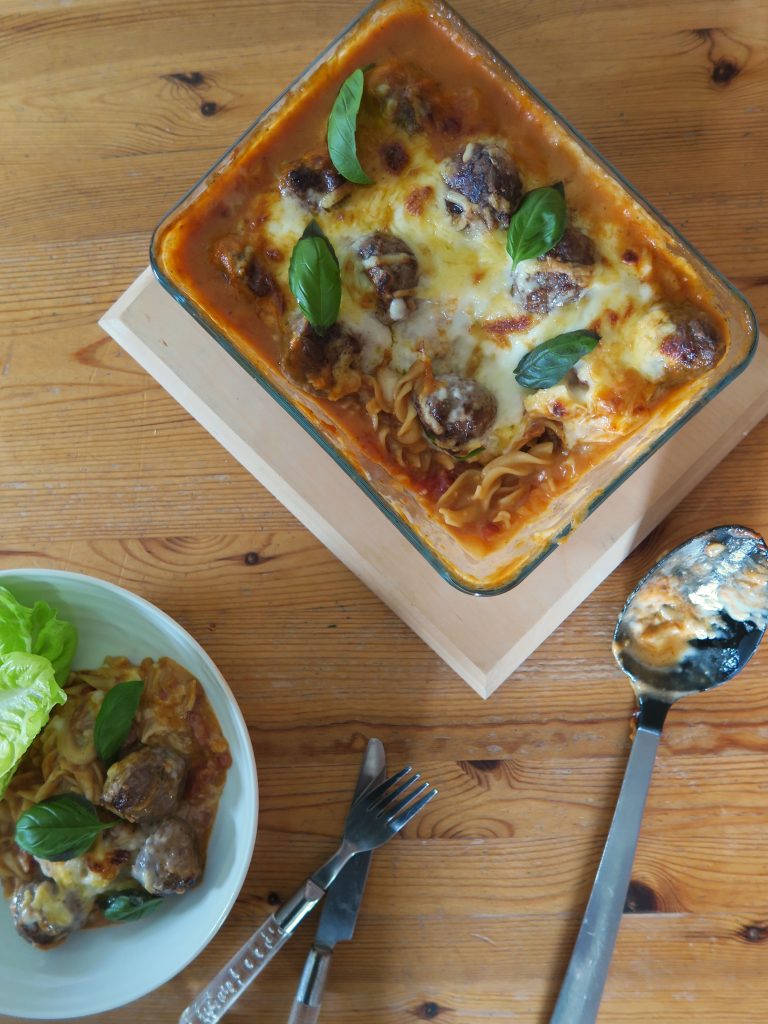
  9. Serve with a side salad and basil (if you want!). This will keep in a covered contained in the fridge for up to 3 days.

Thanks for reading!

Emma x