Category: Snack

Peach Crumble Slices

Peach Crumble Slices

Is it too ott to say that my favourite thing about autumn are the crumbles? I mean yeah the leaves and the wooly jumpers are great, but there’s something so intrinsically comforting and autumnal about a crumble. It’s like an edible hug that makes use of all the beautifully plump fruit getting ripe at this time of year, and at the same time warms you up at the end of a long day when you went outside dressed in shorts and a strapy top because it was sunny and you forgot that as of 1st September the world is cold. I normally make apple crumbles because I’m English and apples are everywhere at this time of year, however this year the peaches have been so plump and delicious that I’ve turned to making peach crumbles.

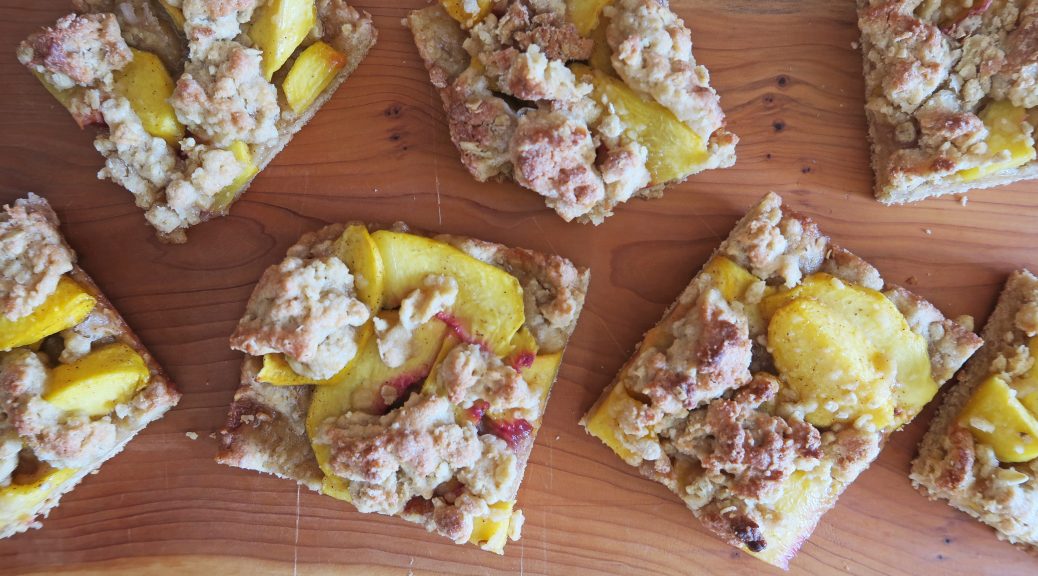
The one thing, in my opinion, that crumbles lack is the ability to be eaten on the move. They’re amazing but they can’t really be sliced up, popped into a pot and eaten with your packed lunch. That’s why these little crumble bars are a bit of a hallelujah moment! They’re easy to make, just as tasty as a regular crumble, and they can be cut into squares and taken anywhere. You can even spread some custard over the base before topping with the peaches and the crumble if you want the full shebang in a bar to go.

Recipes

Makes 9-12 Squares

Time: 30 minutes

Ingredients

For the crumble

  • 115g Unsalted butter
  • 225g Plain flour
  • 90g Rolled oats
  • 100g Caster sugar
  • 50g Light brown sugar
  • A pinch of salt
  • 1 Egg

For the filling

  • 2 Large peaches
  • 65g Caster sugar
  • 8g Cornflour
  • ¼ tsp Ground cinnamon

Method

  1. Pre-heat the oven to 180˚C and then line a 20x20cm tin with butter and baking paper.
  2. Put the butter into a small pan and melt gently, then set to one side to cool.
  3. Put the flour, oats, sugars and salt into a bowl and mix together.
  4. Pour the butter into the dry ingredients, followed by the egg, and mix everything together until a crumbly dough forms.
  5. Put 2/3 of the dough into the lined tin and then press it down to make an even layer covering the bottom of the tin. Bake this layer in the oven for 10 minutes, until starting to harden.
  6. Meanwhile de-stone and peel the peaches. Then cut the peaches into thin slices.
  7. Put the peach slices, sugar, cornflour and cinnamon into a large bowl and mix together until fully combined.
  8. When the base has cooked, spread the peach mix out all over the base so that they form a layer. Then take the rest of the crumble mix and crumble it over the peaches so it covers as much as possible.
  9. Bake the slices in the oven for 15-20 minutes, until the top is golden brown and the peaches are soft.
  10. Leave the traybake to cool a little before slicing it into 9 squares or 12 rectangles.

Thanks for reading!

Emma x

Maneesh Bread with Hummus and Lamb

Maneesh Bread with Hummus and Lamb

Ok so, for those of you who were frequent Cocoa and Thyme visitors thank you for following me over to this new site and for those of you who are new, hello and welcome! As you’ve probably worked out by now I’ve changed the name and direction of m’ blog to be more centred around mental health awareness and support through food, (if you’re lost see my previous blog post or my ‘about’ page for more info). I’m still going to be the one behind each post so the style and general inspiration behind each recipe will be staying pretty much the same, but I will now be opening up more about my own mental health and will be aiming what I’m cooking more towards those who need quick, easy, comforting and/or nutritious food on a regular basis (whether that’s because of a mental health issue or just a general need). For now it’s worth saying that I normally prep my recipes a month in advance anyway, and most of what’ll be coming out over the next month will be stuff I made ages ago, so if it looks like it’s taking me a while to get into the swing of ‘The Mindfulness Kitchen’ that’s why.

So enough with the slightly angst explaining of what the hell I’m doing, onto the food! During my amazing time at Greenbelt we worked 4 hours shifts, often that went over a lunchtime or the time in the evening when you start to get peckish (some people call it dinner?). Luckily we were positioned right next to an little food truck that sold insanely good Middle Eastern dishes, so it was super easy to go and get some really good food in the calmer moments of a shift! My favourite of these was their maneesh, a soft flatbread topped with za’atar spice blend, which they stuffed with lamb and hummus. It was so good that as soon as I got home I just had to make my own, and this was the result!

This particular maneesh bread isn’t really a flatbread, more of a  flat soft bread, but it still works well as dipping device. If you want more a pita type thing you could just roll your dough thinner but personally I wouldn’t for two reasons – 1. The big chunks of bread mean that this can double as a hearty lunch-type bread that’ll actually fill you up, and 2. the dough is really stubborn when it comes to rolling and springs back a lot, so you’ll be there ages if you try to get the dough thin enough to be a proper flatbread. Whatever you go for though, this is an amazing sharing bread that’s especially good served with oil, hummus, balsamic and minced lamb, so its perfect for parties or meze/tapas style dinners.

Recipe

Serves 4

Time: 40 minutes, plus proving and baking time

Ingredients

  • 360g Strong white bread flour
  • 8g Salt
  • 15g Caster sugar
  • 7g Fast action dried yeast
  • 1 tbsp Olive oil, plus extra for greasing
  • 250ml Water
  • 2 tbsp Zaatar spice blend

To Serve (optional)

  •  4 tbsp Olive oil
  • 400g Minced lamb
  • A little Balsamic vinegar
  • 4 tbsp Hummus

Method

  1. Begin by making the bread. Put the flour, salt, yeast, and sugar into a bowl and mix together. Add the oil and ½ the water and then mix together until combined. Slowly add the remaining water, mixing constantly, until a soft dough forms.
  2. Tip the dough out onto a lightly oiled worktop and knead until smooth and elastic, about 10 minutes should do it. Kneading is the process by which you stretch the dough, so as long as you’re stretching the dough as much as possible you’re doing it right, but if you want some more technique this is how I do it. With your left hand hold the end of the dough closest to you, then with the heel of your right hand push the dough away from you as far as you can. Roll the dough back towards you with your right hand, turn the dough 90˚and repeat.
  3. When the dough is sufficiently kneaded (ie is smooth and lovely) form the dough into a ball, tip it into a lightly oiled bowl and cover with clingfilm. Leave for an hour or two until doubled in size.
  4. When risen knead the dough a little on a worktop to knock the air out. Split the dough into two, roll each portion out into a circle about 1 cm thick, then place on a lined baking tray.
  5. Mix the zaatar with a little olive oil to make a paste. Spread this paste over the bread circles and leave for another 15-30 minutes to rise slightly.
  6. Pre-heat the oven to 180˚C. Bake the breads in the oven for 15-20 minutes until golden brown and slightly risen.
  7. Meanwhile prep the lamb. Put 1 tbsp of the oil into a pan and heat gently. Add the minced lamb and then fry until browned all over but not dry. Season with a little salt and pepper and then serve with the rest of the oil, the bread, balsamic, and hummus!

Thanks for reading!

Emma x

Afternoon Tea Sandwiches

Afternoon Tea Sandwiches

Every afternoon tea starts with a delicious selection of finger sandwiches. For this spread I went for cheese and ham on brown bread and then cucumber and smoked salmon on white bread. These are personal faves  of mine, but feel free to get experimental! So yes I am going to write a recipe for sandwiches, here we go…

Recipe

Makes 6 of each type of sandwich

Time: 10 minutes

Ingredients

  • 6 tsp Unsalted butter
  • 6 slices Brown bread
  • 6 slices White bread
  • 2 tsp cream cheese
  • A few pieces of Smoked salmon
  • ¼ cucumber
  • 3 Slices of Honey smoked ham
  • 3 Slices of Cheddar cheese

Method

  1. Begin by buttering (the proper technical term) the brown bread slices and half the white bread. Then spread the cream cheese over the remaining White bread slices.
  2. To make the smoked salmon sandwiches lay the smoked salmon in  a layer over half the cream cheese covered bread. Then sandwich these sandwich halves with the rest of the cream cheese covered slices.
  3. Now make the cucumber sandwiches. Thinly slice the cucumber and then lay the slices over 1/2 of the white bread slices.  You might need to cut some of the cucumber discs in half so all the bread is covered. Top with the other slices of white bread and leave to one side.
  4. To make the remaining sandwiches lay the ham over 3 buttered brown bread slices and the cheese slices over the another. Then top with the remaining slices of brown bread, butter side down.
  5. Take a sharp knife and cut the crusts off all the sandwiches (keep these in an air tight box as they make great snacks!) and then cut each sandwich in half vertically to make two finger sandwiches. (Depending on the size of bread you’re using you might need to cut the sandwiches into three or something, but just use your judgement). Serve!

Thanks for reading! Next afternoon tea recipe coming out tomorrow!

Emma x

The Lion, The Witch and The Wardrobe: Turkish Delight

The Lion, The Witch and The Wardrobe: Turkish Delight

When I was younger one of my favourite book series was The Chronicles of Narnia, and my favourite of those was The Lion, The Witch and The Wardrobe (or LW+W as I’ll refer to it from now on – great book but hella long title!) As you may have noted by all the other books that have inspired me this month, anything based in a fantasy world or with mystical imagery will tick my box, and so the idea of a land cursed with eternal winter appealed to me from a young age.  Those of you who’ve read LW+W will know the reason why I chose Turkish Delight as my inspired creation for this week (and those of you who haven’t should read the book!) and although I wouldn’t say it’s worth-betraying-my-family-to-the-white-queen good, it’s still pretty tasty!

Turkish delight is one of those things that is really easy to make… if you know how to make it. Those of you following my Instagram may have seen my first attempt at this which ended up as a burnt, black sludge that was binned pretty quickly. After a few recipe tweaks though I’ve ended up with this which I think is pretty successful and pretty easy to get right.  I’ve used a 20cm square tin here to set the sweets in which has made them a little flatter than you’d normally find Turkish delight – but hey, as long as they taste good right? If you prefer yours as proper cubes though just use a smaller tin.

Recipe

Makes 24 squares

Time: 45 minutes

Ingredients

  • 1 tbsp Cornflour
  • 2 tbsp Icing sugar
  • 9 Gelatine leaves
  • 450g Granulated sugar
  • Few drops of rosewater
  • Few drops of Pink food colouring

Method

  1. Lightly oil a 20cm square tin. Then line the tin with cling film. Mix together the cornflour and icing sugar in a bowl and then sift it into the tin. Move the tin around so the sugar mixture dusts the whole inside, then tip the excess out for later and place the tin to one side.
  2. Pour 300ml water into a large pan. Add the gelatine and leave it to soak for about 5 minutes, until soft and pliable.
  3. Place the pan over a medium heat and stir gently until the gelatine dissolves. Then add the sugar and continue to stir until the sugar dissolves (you shouldn’t be able to feel anything gritty on the bottom of the pan).
  4. Bring the mixture up to the boil and then reduce the heat to low and leave the mixture to simmer for 20 minutes.
  5. Take the pan off the heat and stir in the rose water and food colouring until the colour is even through the mix.
  6. Pour the mixture into the lined tin and then leave to set overnight.
  7. The next day sift a little of the icing sugar/cornflour mixture from earlier onto a board or plate. Turn the Turkish delight out onto the dusted surface and, using a sharp knife, cut the Turkish delight into strips and then squares about 3x3cm.
  8. Use the rest of the dusting mixture to coat all surfaces of the Turkish delight to stop it from sticking to everything, and then it’s ready to eat! These should be stored in an airtight container, probably between layers of baking paper or cling film to stop the layers from sticking together, for up to a week.

Thanks for reading!

Emma x

Tabbouleh

Tabbouleh

 In every Greek meal there has to be tabbouleh. It’s refreshing, zingy and a great palette cleanser for the richer, spicier dishes on the table. Personally, I’m not a massive fan of tabbouleh because on its own it’s a bit too herby for my liking, but I will admit that it’s delicious when paired with anything else on the table!

Recipe

Makes 1 Mezze dish

Time: 10 minutes

Ingredients

  • 50g Bulgar wheat
  • 40g Flat leaf parsley
  • 40g Mint
  • 200g Vine tomatoes
  • 2 Beef tomatoes
  • 3 Spring onions
  • 2 tbsp Olive oil
  • 2 tbsp Lemon juice
  • A pinch of Sea salt

Method

  1. Put the bulgur wheat into a sieve and rinse under cold water. Then put this into a bowl and pour over 200ml boiling water. Cover with clingfilm and leave to soak for 30 minutes.
  2. Roll the parsley into a bunch and then roughly chop it. Do the same with the mint so that it’s chopped super fine. Next take your tomatoes and chop them roughly into bits. Put all the herbs and tomatoes into a big bowl.
  3. Slice the spring onions in half and then finely chop them. Add this to the big bowl.
  4. Drain the bulgur wheat and then mix this into the herbs. Add the lemon juice, olive oil and some salt and pepper to season. Mix it all together and then serve!

Thanks for reading!

Emma x