Category: Pastry

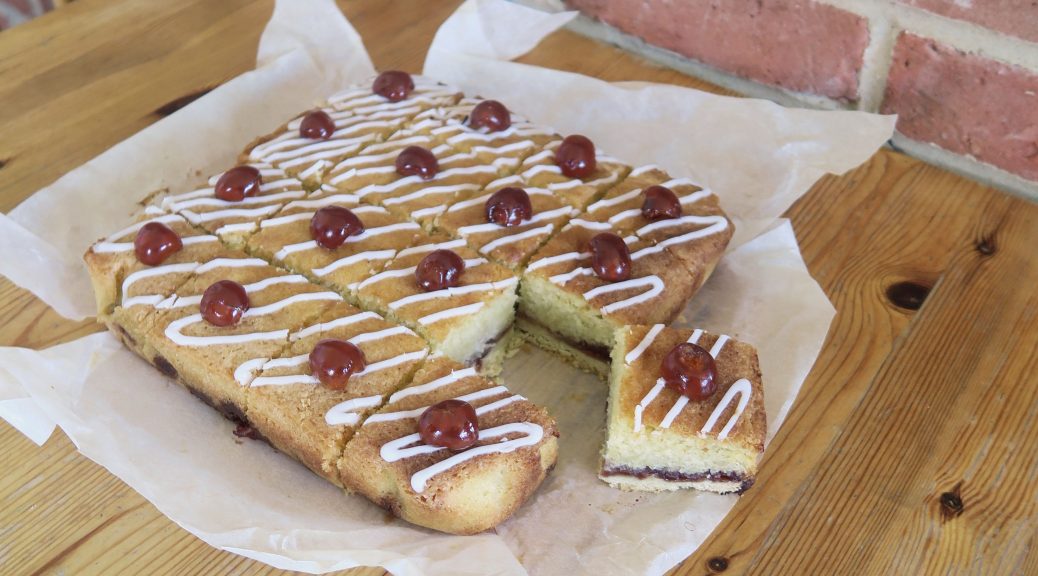
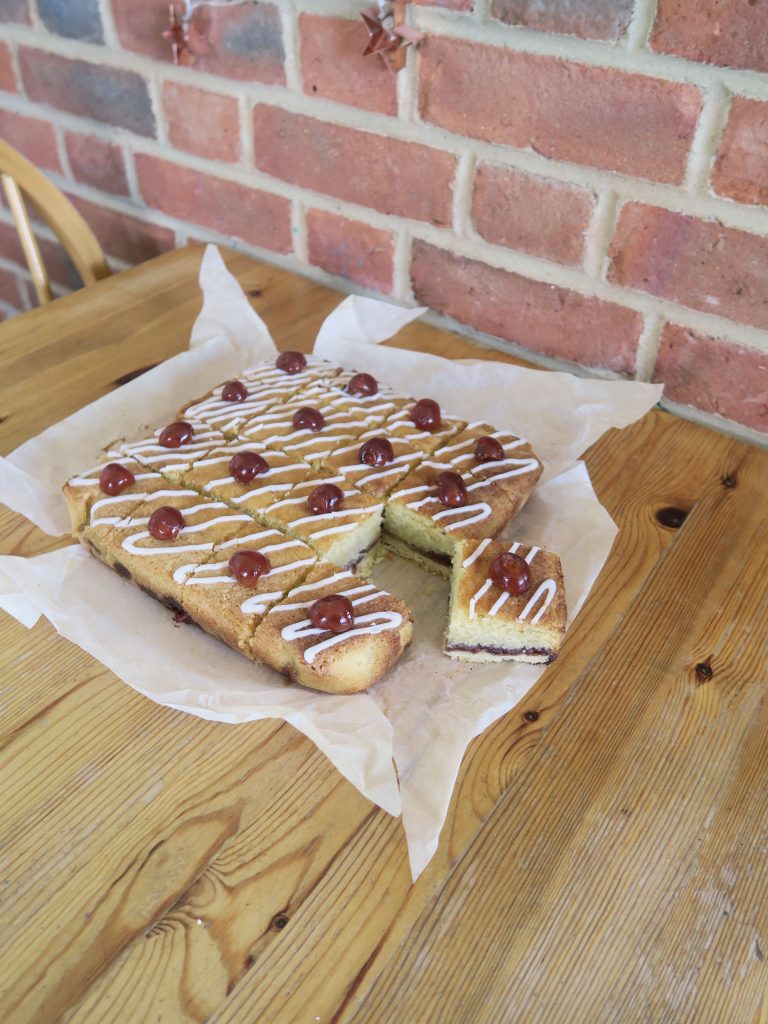
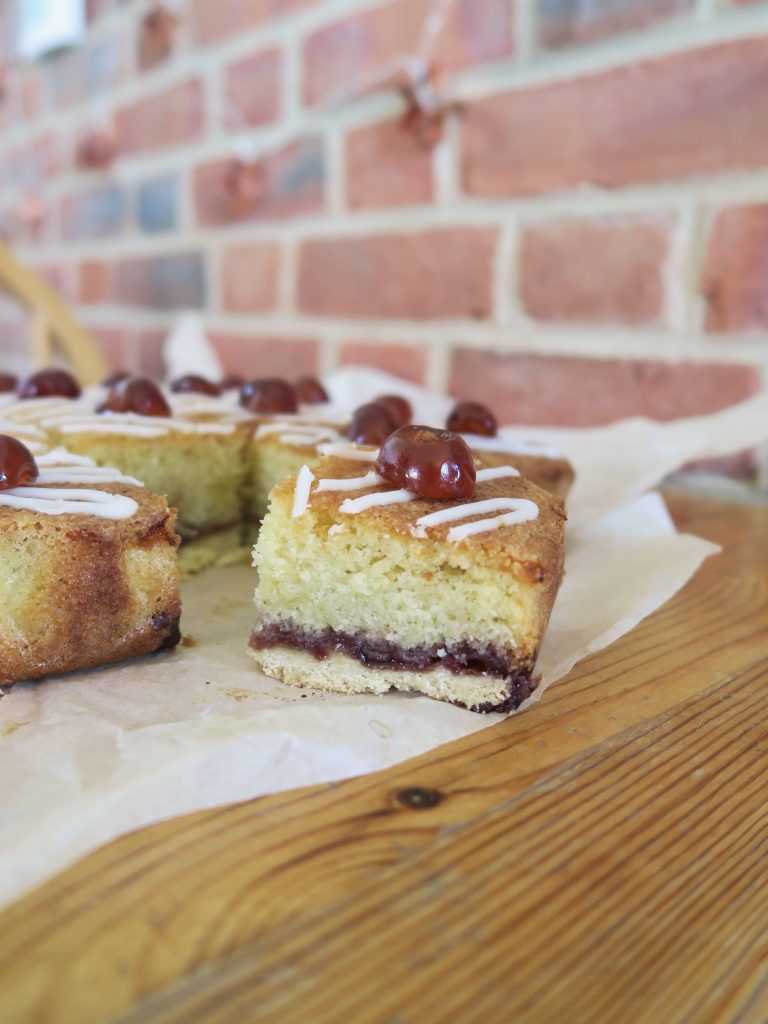
Bakewell Traybake

Bakewell Traybake

I’m a bit behind with my recipe writing so apologies for the tardiness on this one! I’m getting into the habit of brainstorming, baking, photographing and then posting on social media, but not so much with the follow up blog posts. When I’m baking I tend to jot down on post-it notes what I’m doing and what quantities I’m using etc, but recently these have ended up piling up in a corner waiting for me to re-visit them! But anyhow – we’re here, and this one is a particular fave of mine. I’ve been making bakewell tarts for as long as I’ve been baking, but I decided this time to make it as a tray bake so it can be easily chopped up and shared around! I’ve used raspberry jam here as I think it’s a nice tartness to pair with the sweet pastry and cake, but you could use any kind of jam you like!

Recipe

Makes 16 squares

Time: around 2 hours

Ingredients

For the pastry (or use ready-made)

  • 175g plain flour
  • A pinch of salt
  • 2 tbsp caster sugar
  • 115g unsalted butter
  • 1 medium egg yolks
  • 2 tbsp cold water

For the filling

  • 5tbsp raspberry jam
  • 200g soft butter
  • 200g caster sugar
  • 100g ground almonds
  • 100g self-raising flour
  • 1tsp baking powder
  • ½ tsp almond extract
  • 4 eggs, beaten

To decorate

  • 100g icing sugar
  • 25g flaked almonds

Method

  1. Pre-heat the oven to 180C. Line a 20x30cm tin with butter and baking paper.
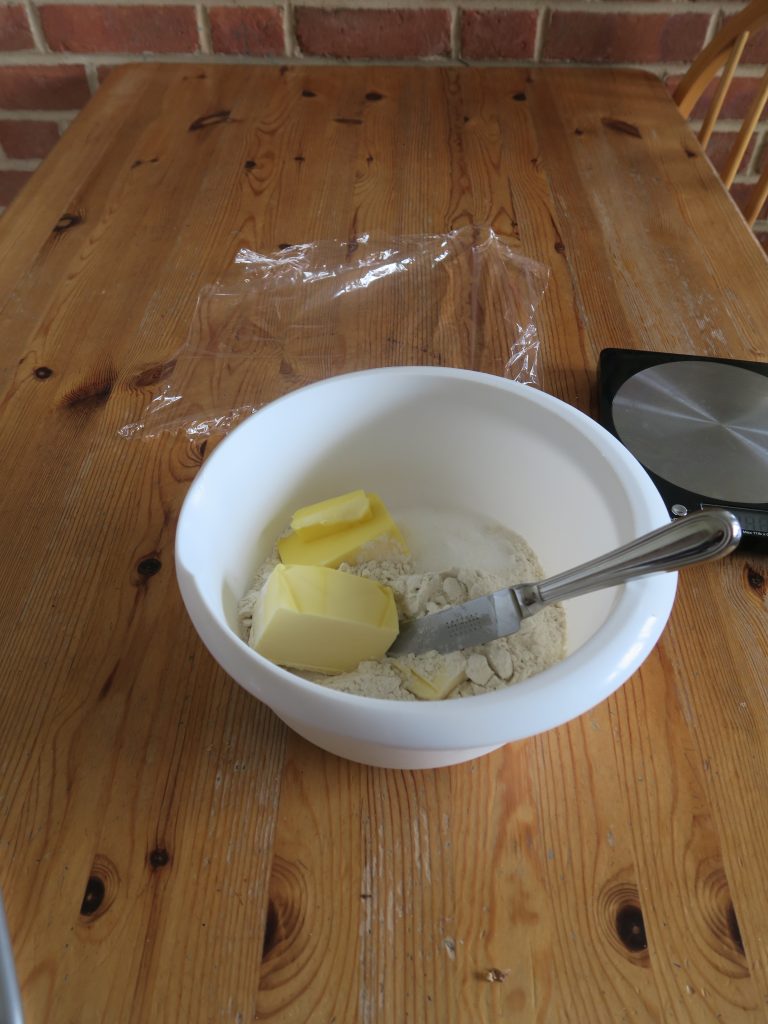
  2. To make the pastry put the flour, salt and sugar into a bowl and mix together. Add the cold butter in chunks and cut it into small lumps with a table knife. Then go in with your hands and rub the butter into the flour with your fingertips until the mixture resembles breadcrumbs. (Shaking the bowl side to side every now and then can help bring the lumps to the top).
  3. Press the pastry into the lined tin to form an even layer. Prick the base all over with a fork and then bake for 8-10 minutes until cooked through.
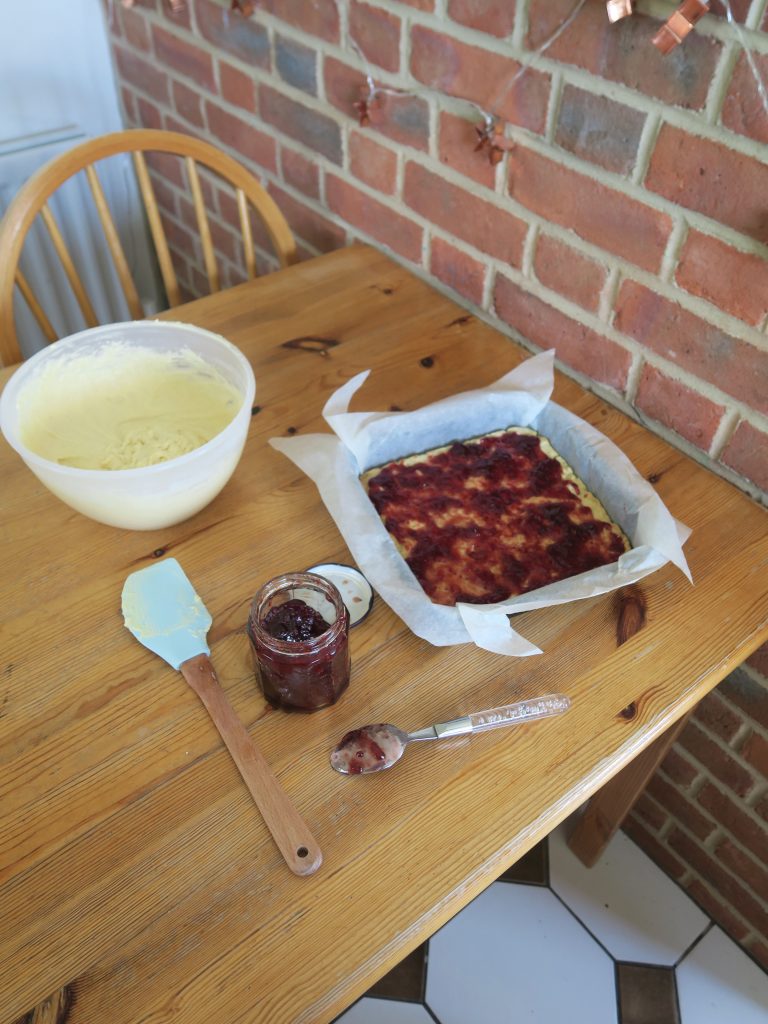
  4. Spread the raspberry jam over the base to make an even layer.
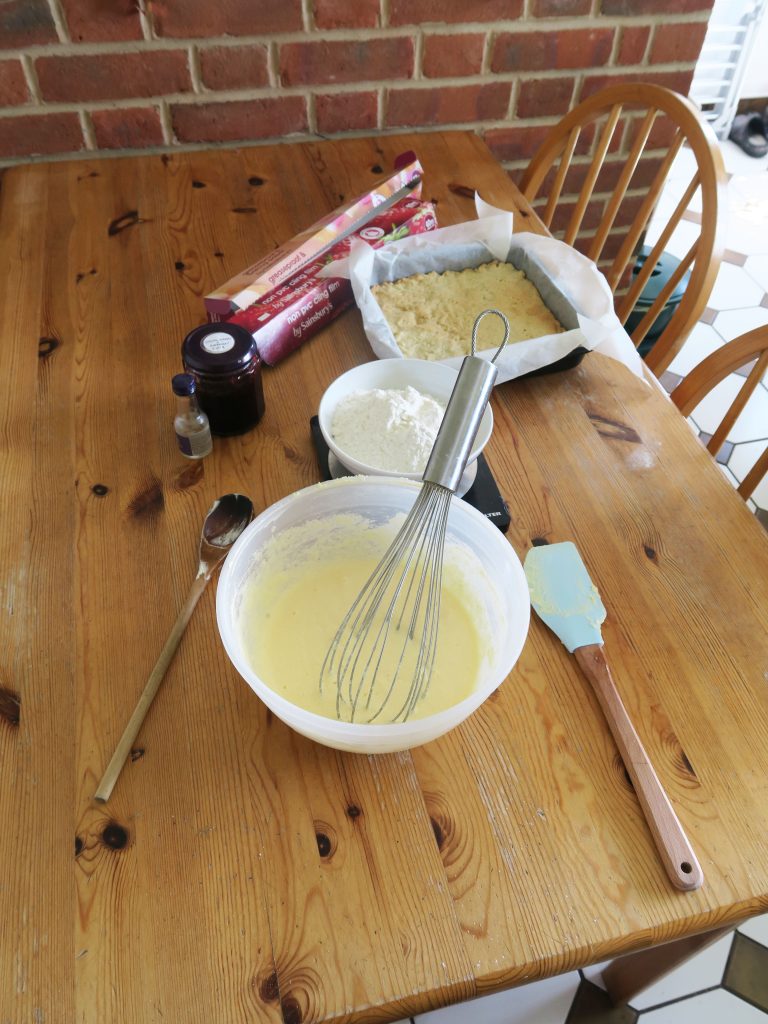
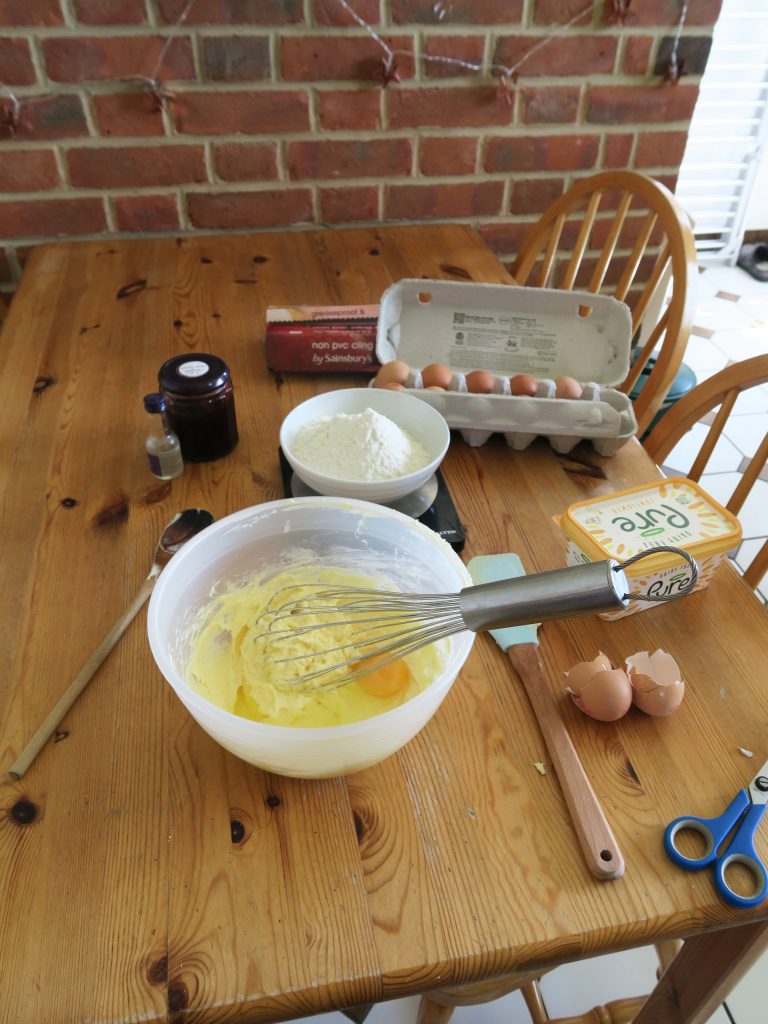
  5. Put the butter, sugar, ground almonds, flour, baking powder, almond extract and eggs into a bowl and beat together until smooth. Pour this over the jam layer, even out to a smooth layer and then bake for 30 minutes until risen and golden brown.
  6. Leave the traybake to cool and then take it out of the tin and place on a chopping board. Mix the icing sugar with 1 tbsp water and drizzle the icing over the traybake. Scatter over the flaked almonds and then cut the traybake into 12 fingers. Enjoy!

Thanks for reading!

Emma x

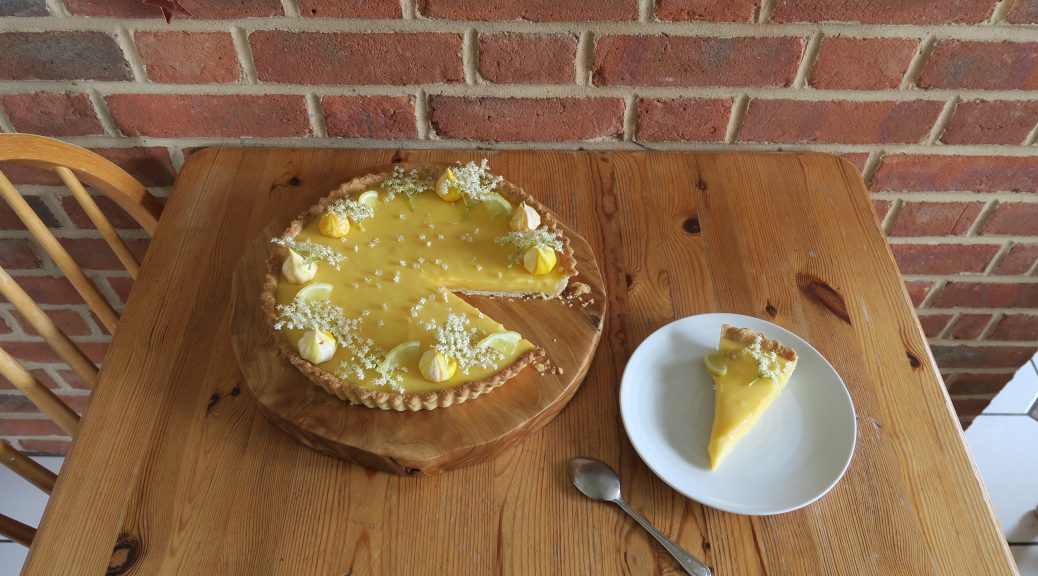
Lemon and Elderflower Tart

Lemon and Elderflower Tart

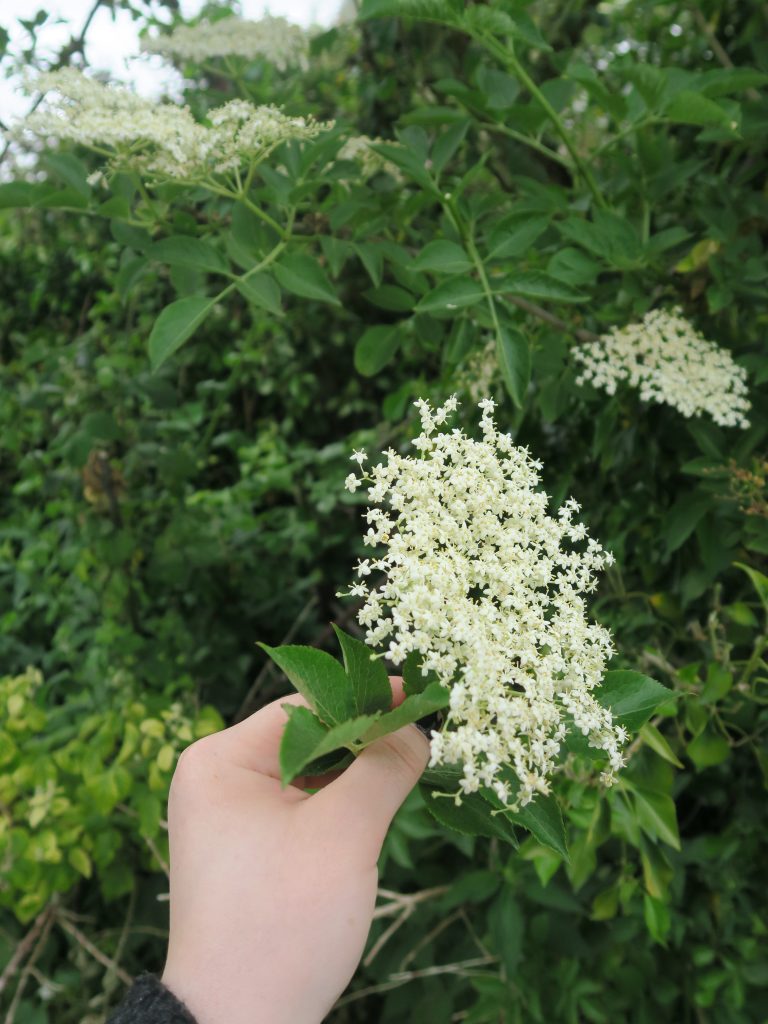
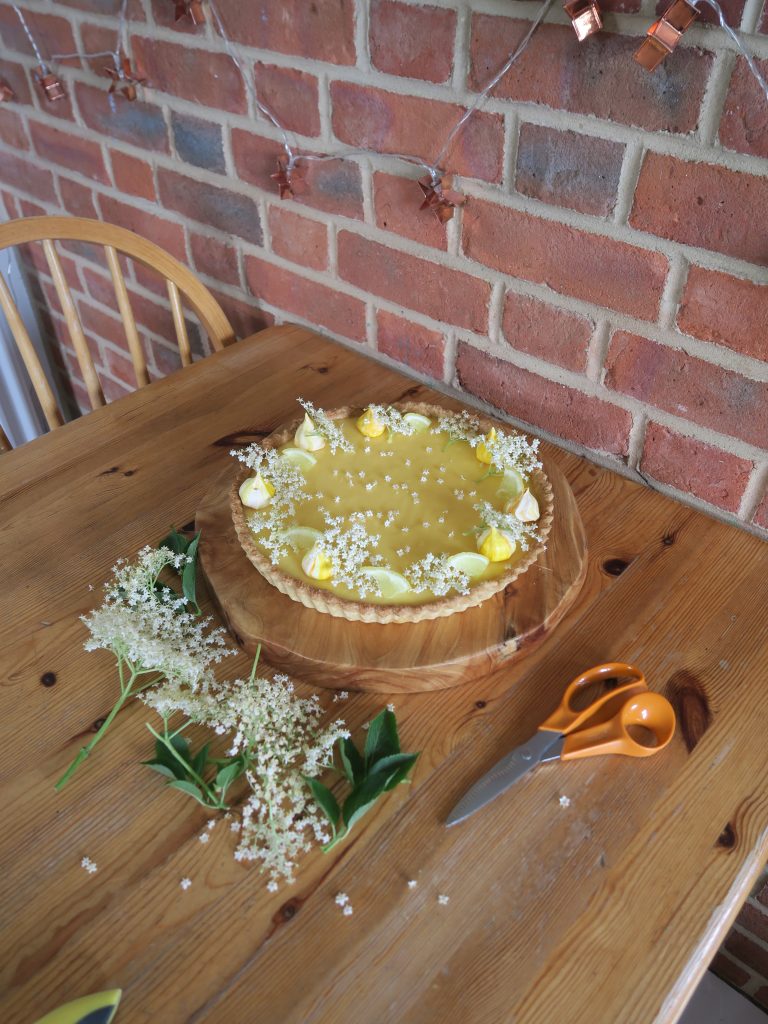
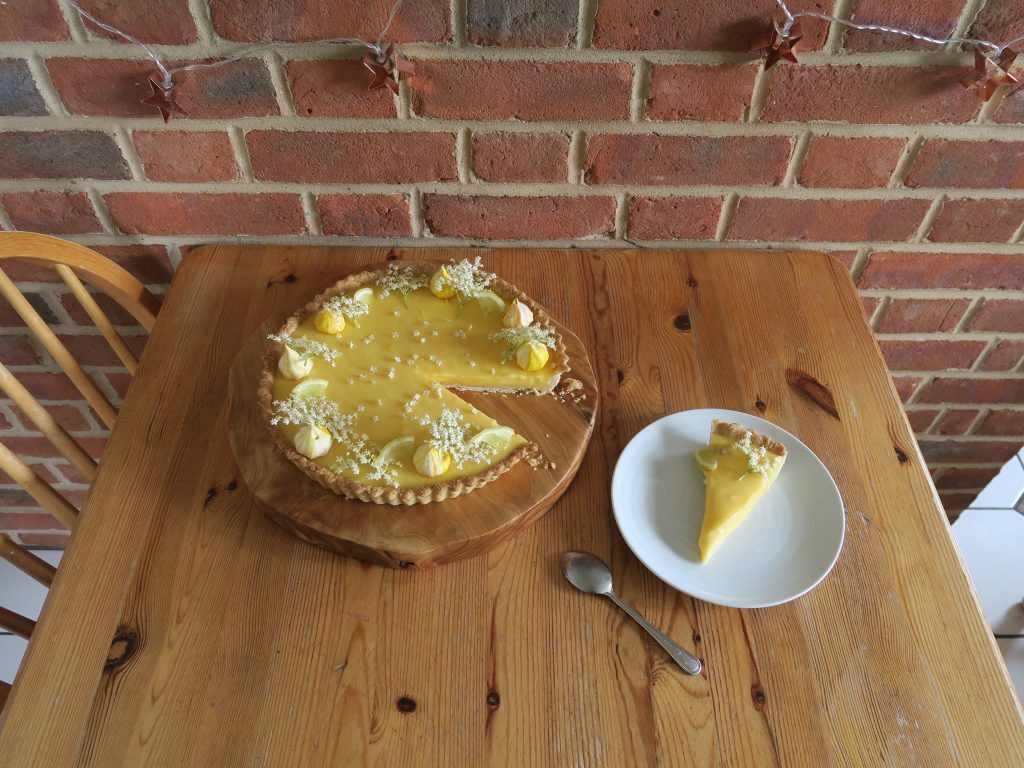
Summer has arrived and I don’t think much says summer more than a slice of this lemon and elderflower tart! Since lockdown began I’ve become really interested in foraging in my local area, and this year I noticed how much elderflower there is where I go for walks! I now can’t step outside my front door without getting a whiff of some gorgeous elderflower on the wind. I’ve used the flowers to decorate the top of this tart, but the flavour of elderflower in the filling comes from elderflower cordial so you could make this all year round!

Recipe

Serves 12

Time: 2 hours, plus lots of chilling and baking time

Ingredients

For the pastry

  • 265g plain flour
  • A pinch of salt
  • 3 tbsp caster sugar
  • 170g unsalted butter
  • 1 egg yolk
  • 3 tbsp cold water

For the filling

  • 4tbsp elderflower cordial
  • 160ml lemon juice
  • 2 large eggs
  • 2 large egg yolks
  • 225g caster sugar
  • 338g unsalted butter

To decorate (optional)

  • 2-3 elderflower heads
  • A few meringue kisses
  • 1 fresh lemon
  • Fresh cream to serve

Method

  1. Begin by making the pastry. Put the flour, salt and sugar into a bowl and mix together with a table knife. Add the butter and use the knife to cut it into small lumps. Then go in with your fingers and rub the butter into the flour until the mixture resembles fine breadcrumbs. (Shaking the bowl side to side every now and then can help bring the bigger lumps to the top).
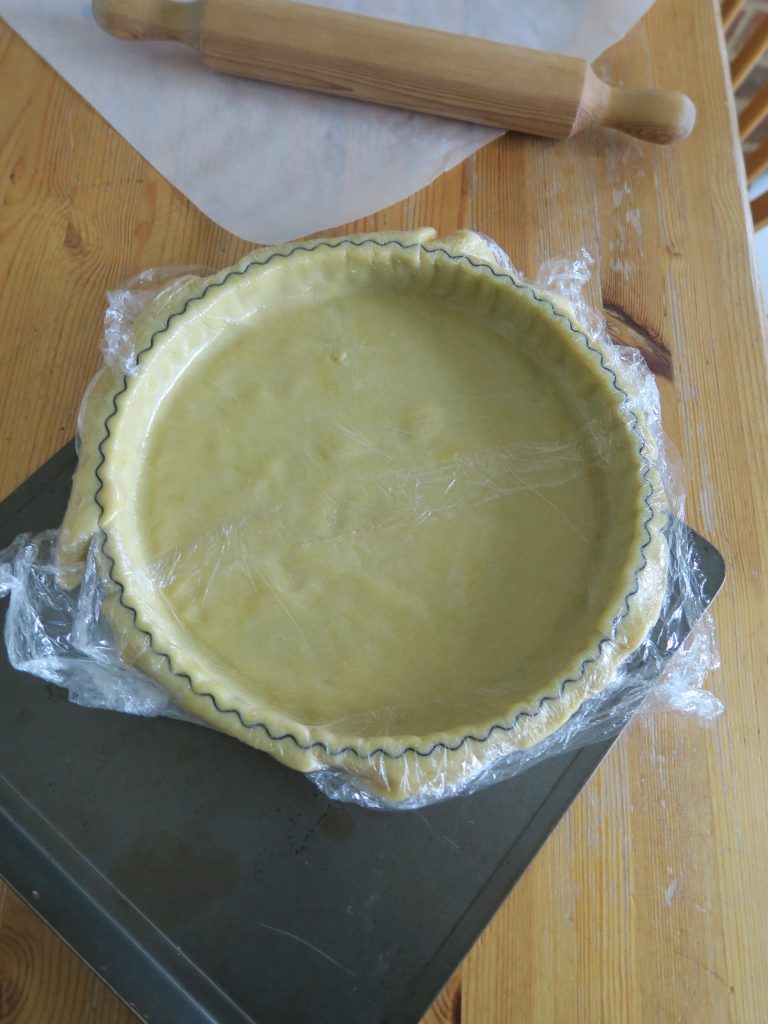
  2. In a small bowl mix together the egg yolk and the water. Pour this into the breadcrumb mixture and stir until the mixture forms a smooth dough ball. Wrap the dough in clingfilm and leave in the fridge for at least 1 hour to chill.
  3. Take the pastry out of the fridge and roll it out on a lightly floured work top so it’s about 2 cm wider than your tin all around.
  4. Carefully lift the pastry sheet up and fit it into the tin, making sure it fits snug into all the flutes. Leave the pastry in the fridge for at least 30 minutes to chill.
  5. Pre-heat the oven to 180C. Take the lined tart out of the fridge. Take a rolling pin and roll over the top edge of the tart to trim off the excess pastry.
  6. Take a sheet of baking paper around the same size as your tart case and scrunch it up into a ball. Carefully un-crumple it and then fit it into the tart case, making sure there’s enough excess sticking out the top. Fill the pastry case with baking beans (or rice) and then bake it in the oven for 10 minutes until starting to look baked.
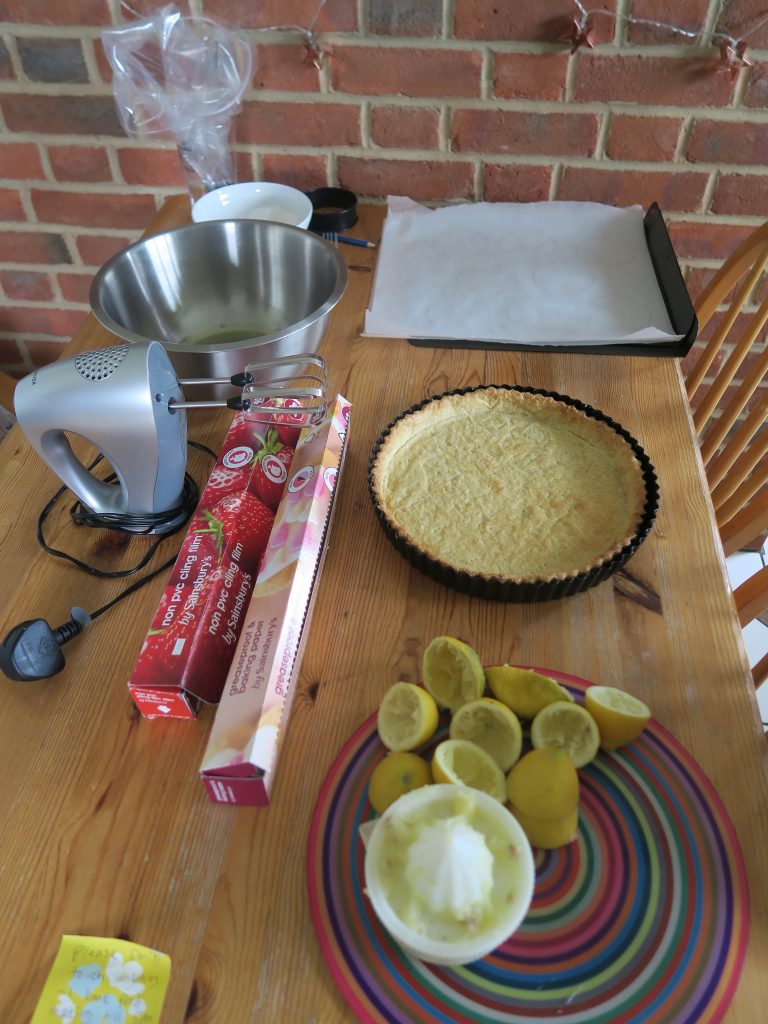
  7. Take the baking beans and the baking paper out of the tart case and put the tart back into the oven to bake until golden brown all over and crisp. Leave the tart case to cool completely in the tin.
  8. Now make the filling. Put the elderflower cordial, lemon juice, eggs, egg yolks, and sugar into a large pan and whisk over a medium heat until the mixture reaches 75C on a thermometer. (This will get the mixture up to the temperature to set, but any higher and the mixture will curdle).
  9. Sieve the mixture into a bowl and leave to cool for 5 minutes. Then, when the mixture is about lukewarm, add the butter into chunks and whisk until it’s melted and incorporated into the mixture.
  10. Cover the filling with clingfilm and leave in the fridge for at least 2 hours to chill.
  11. Whisk the filling mixture to break it up a little and then pour it into the cooled tart case. Smooth it out so it forms an even layer and then put it into the fridge to set completely overnight.
  12. The next day take the tart out of the fridge and take it out of the tart tin. Then, if you’d like, top the tart with elderflowers, meringue kisses and wedges of fresh lemon and serve with fresh cream!

Thanks for reading!

Emma x

Chocolate and Raspberry Tartlets

Chocolate and Raspberry Tartlets


Recipe

Makes 6

Time: 2 hours plus chilling and baking time

Ingredients

For the chocolate pastry

  • 125g plain flour
  • 2tbsp icing sugar
  • 2tbsp cocoa powder
  • 135g butter
  • 1 small egg yolk
  • 1tsp lemon juice

For the raspberry chiffon

  • 325g frozen raspberries
  • 75g caster sugar
  • Juice of 1 lemon
  • 2 sheets of gelatine
  • 100ml double cream

For the chocolate drizzle

  • 50g dark chocolate
  • 50ml double cream

To decorate

  • A few fresh raspberries

Method

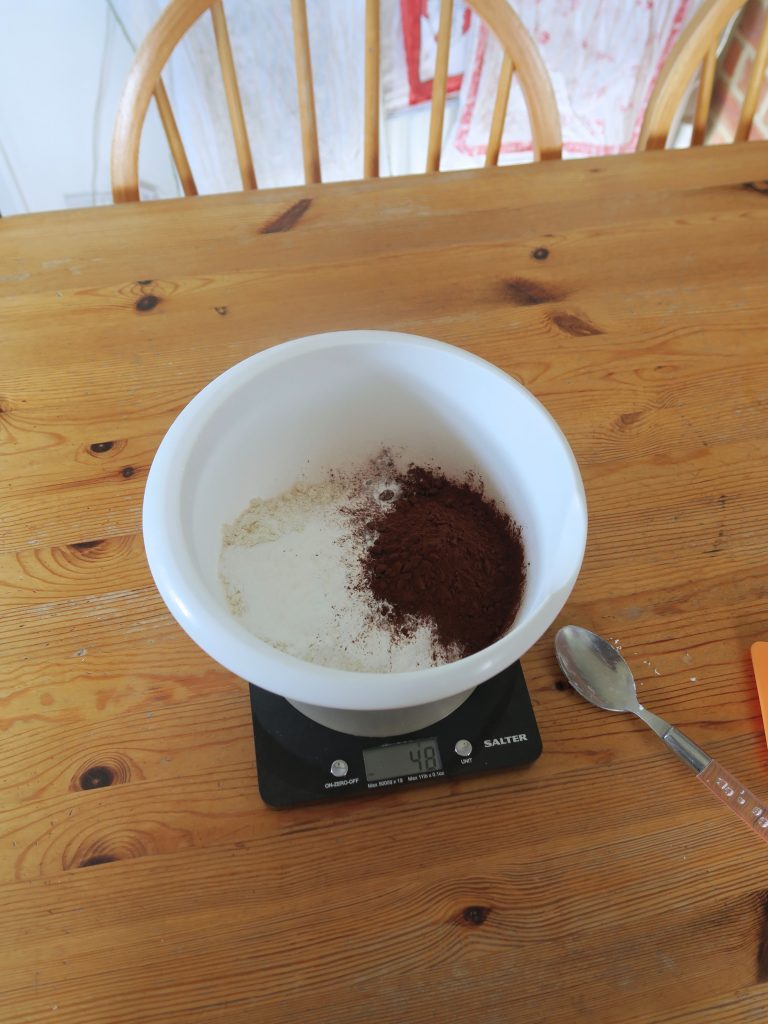
  1. Begin by making the pastry. Put the flour, icing sugar and cocoa powder into a bowl. Add the butter in cubes and rub it into the flour with your finger tips until the mixture resembles fine breadcrumbs.
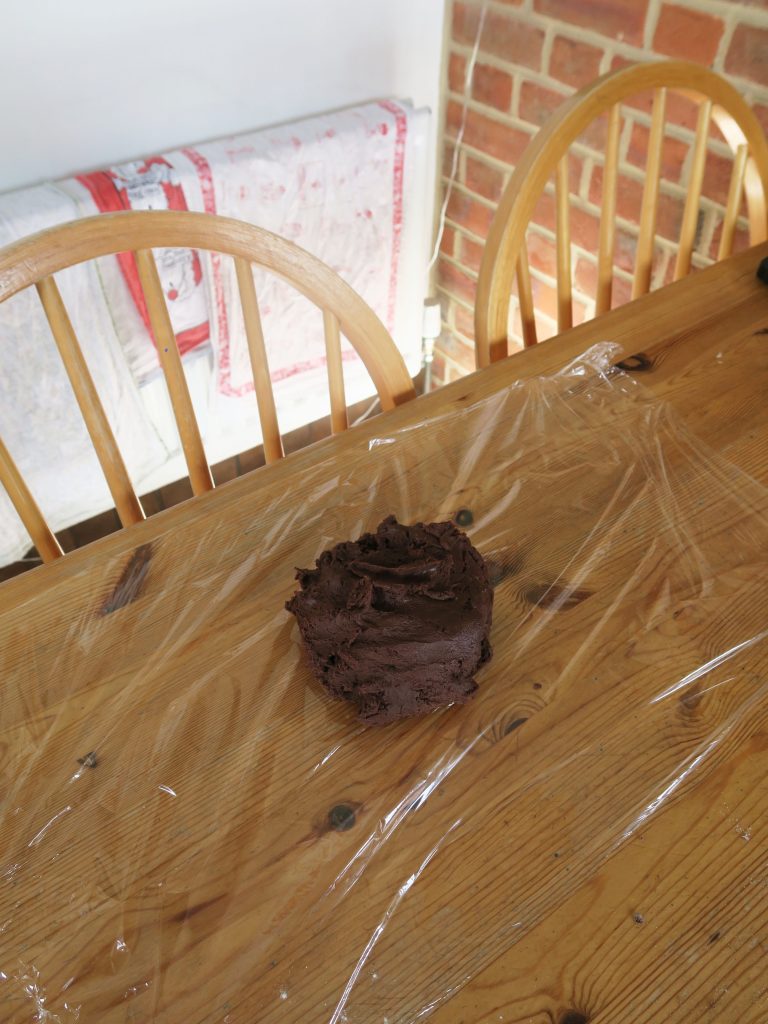
  2. Add the egg yolk and lemon juice and stir the mixture with a round bladed knife to bring together into a ball of dough. (You can go in with your hands at the end to bring it together if need be).
  3. Wrap the dough in cling film and leave to chill in the fridge for at least 1 hour.
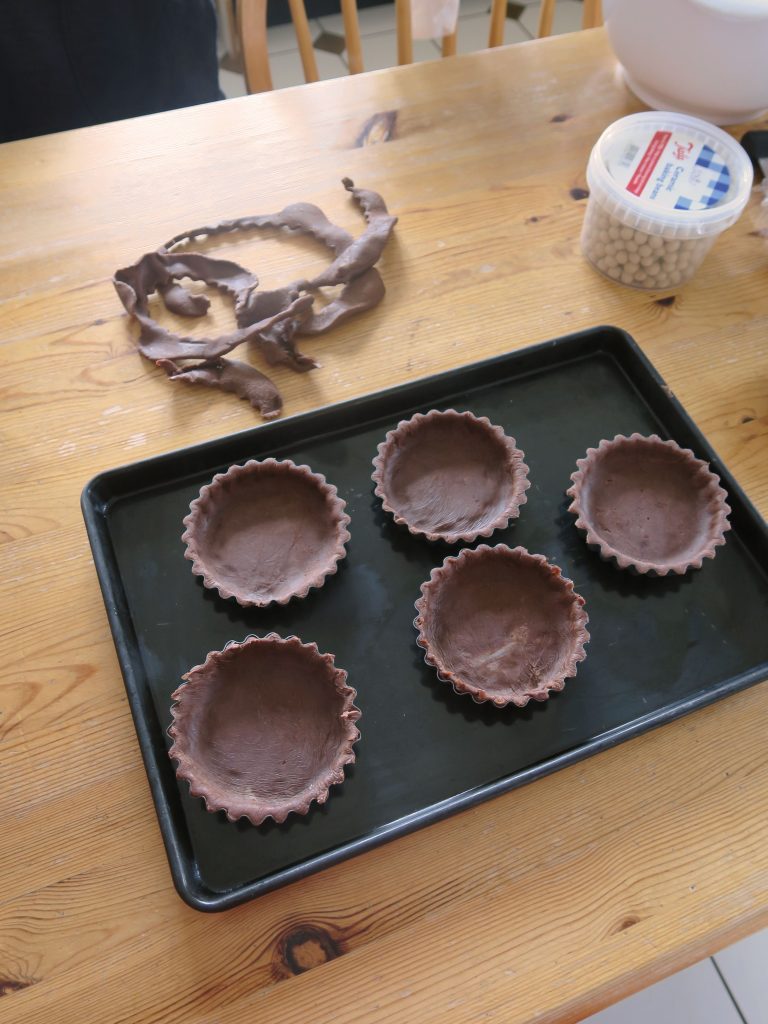
  4. Split the dough into 6, take one and put the others back into the fridge. Roll your first bit of pastry into a circle, about the thickness of a 1p coin, between two sheets of clingfilm. You can use your tartlet tins as a guide as to the shape of the circled you role out by placing them on top of the pastry every now and then. You want the pastry to be about 2cm wider all around than your tin.
  5. Take the top layer of clingfilm off the pastry and then turn the pastry sheet upside down (so the bottom layer of clingfilm is on the top) and gently ease the pastry into the tart case.
  6. Press your fingers gently into the tart (especially around the sides) to make sure the pastry has taken the shape of the tin. Then fold the excess pastry enough so the top edge of the tin is covered all the way around. Take a rolling pin and role it across the top of the tin to cut off the excess pastry. (Don’t worry about removing this excess pastry yet as it’ll be easier once frozen).
  7. Repeat the lining of the tins, taking one piece of dough out of the fridge at a time until you have 6 lines pastry cases, with the top layer of clingfilm still on. Place these in the freezer for 20 minutes.
  8. Pre-heat an oven to 180C. Peel the clingfilm off the tart cases and then break off the excess pastry around the top (this should be much easier now the pastry has frozen).
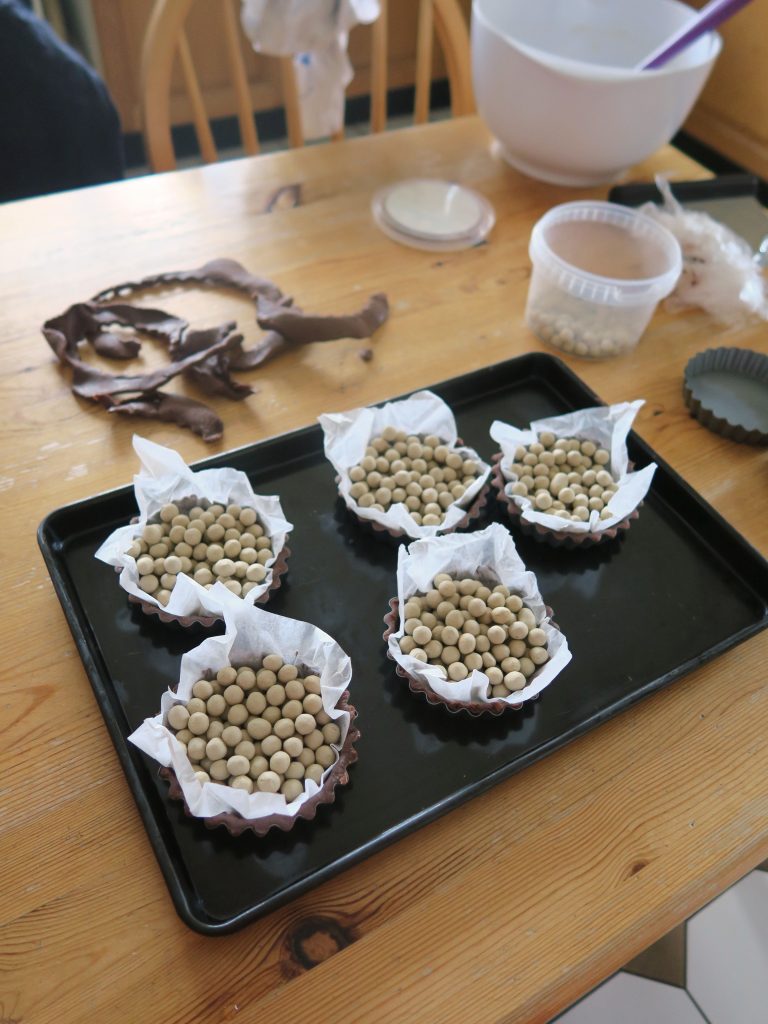
  9. Cut 6 squares of greaseproof paper, around the same size as the tartlets, and crumple them up in your hands. Carefully un-crumble each one and then fit it inside the tart case. Then fill the tartlets with baking beans (or rice).
  10. Bake the pastry cases in the oven for about 15 minutes. Then take out the baking paper and beans and bake for another 5-10 minutes to crisp up completely. (The pastry wont be going in the oven again so make sure it’s perfectly cooked through before taking it out). Leave the pastry to cool completely.
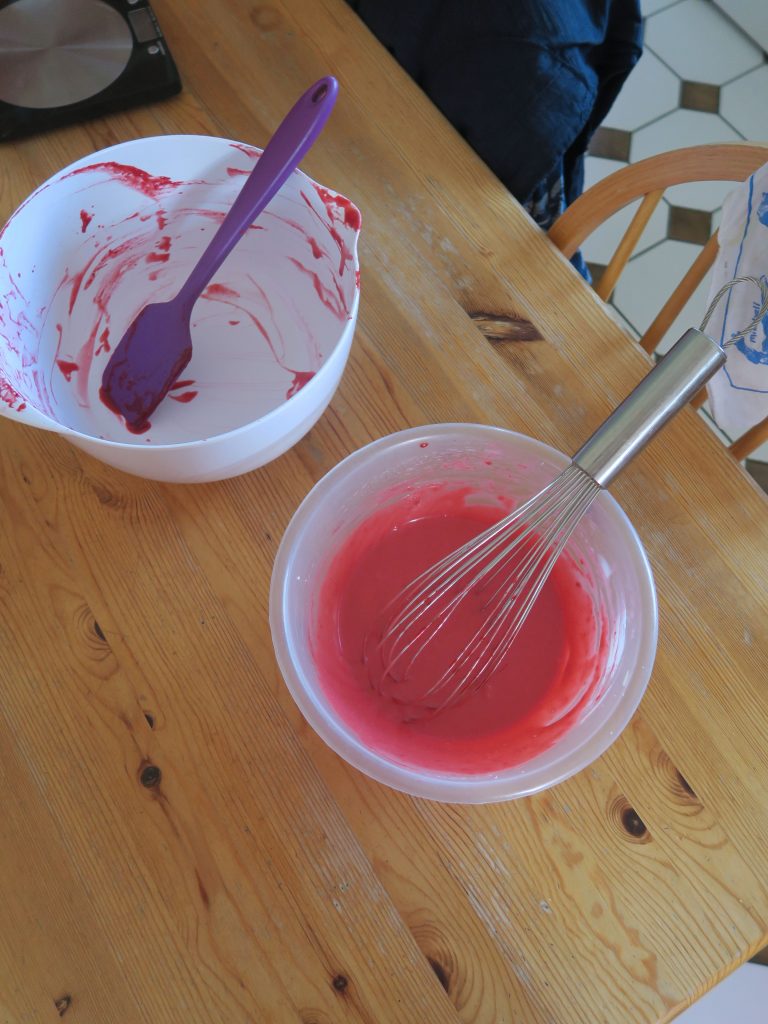
  11. Now move onto the raspberry chiffon filling. Put the raspberries, sugar and lemon juice into a pan and simmer for 3-4 minutes, until the raspberries have defrosted and the sugar has dissolved.
  12. Meanwhile fill a small bowl with cold water and place the gelatine sheets in it to soften.
  13. When the raspberries have done simmering, take the gelatine, squeeze it to release the excess water and then stir it into the raspberries to dissolve.
  14. Sieve the raspberries into a large bowl. Make sure to work the raspberries through the sieve with a spatula, and to scrape off the pulp on the bottom of the sieve as that’s where all the good stuff is. Leave to cool completely.
  15. Whisk the cream up to soft peaks. Then whisk the cooled raspberry puree into the cream, a little bit at a time.
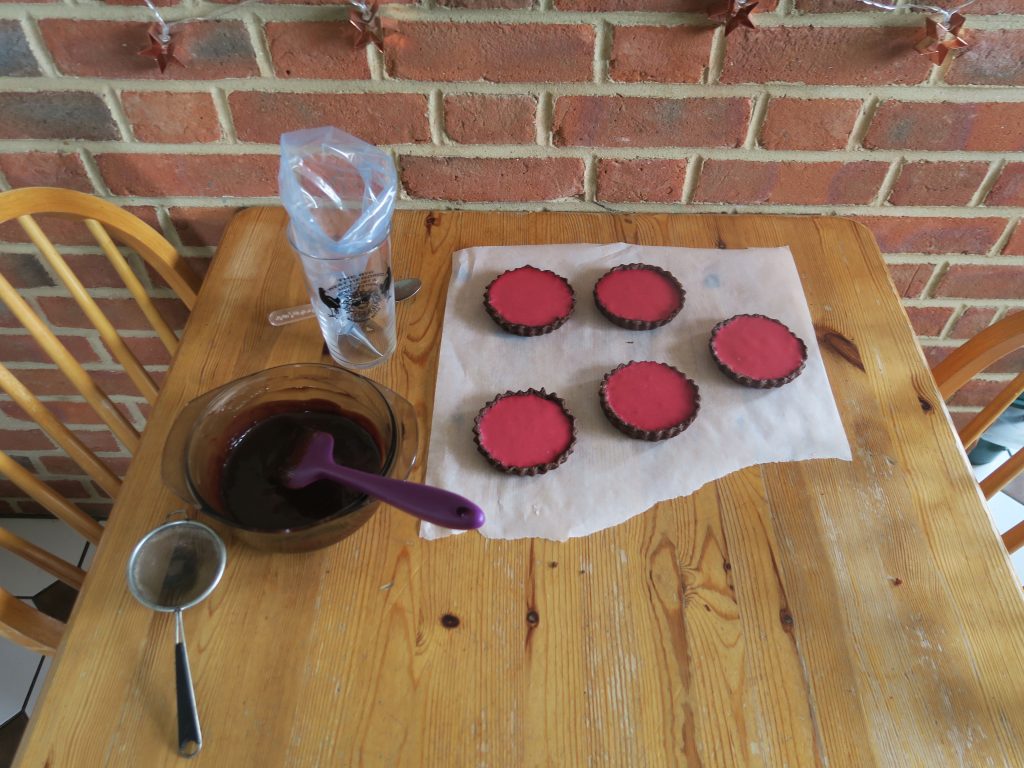
  16. Leave the raspberry mixture to thicken up a little bit, stirring every 15 minutes to check the consistency. You want it to be at the point where it’s just about to form a trail when a spoon is lifted out of the mixture and left to drip. At this point pour it into the cooled pastry cases until full and then leave them in the fridge to set completely.
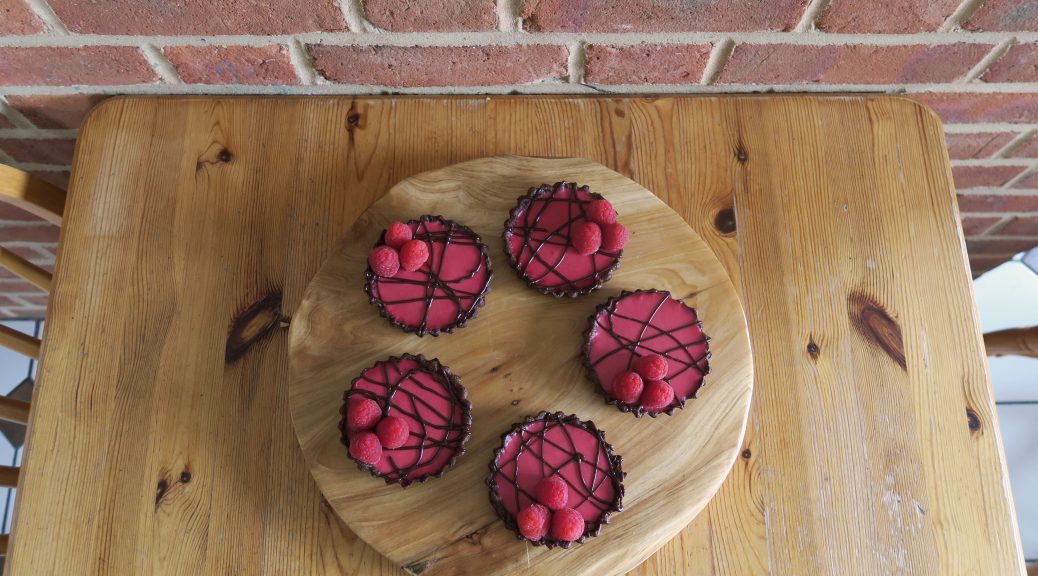
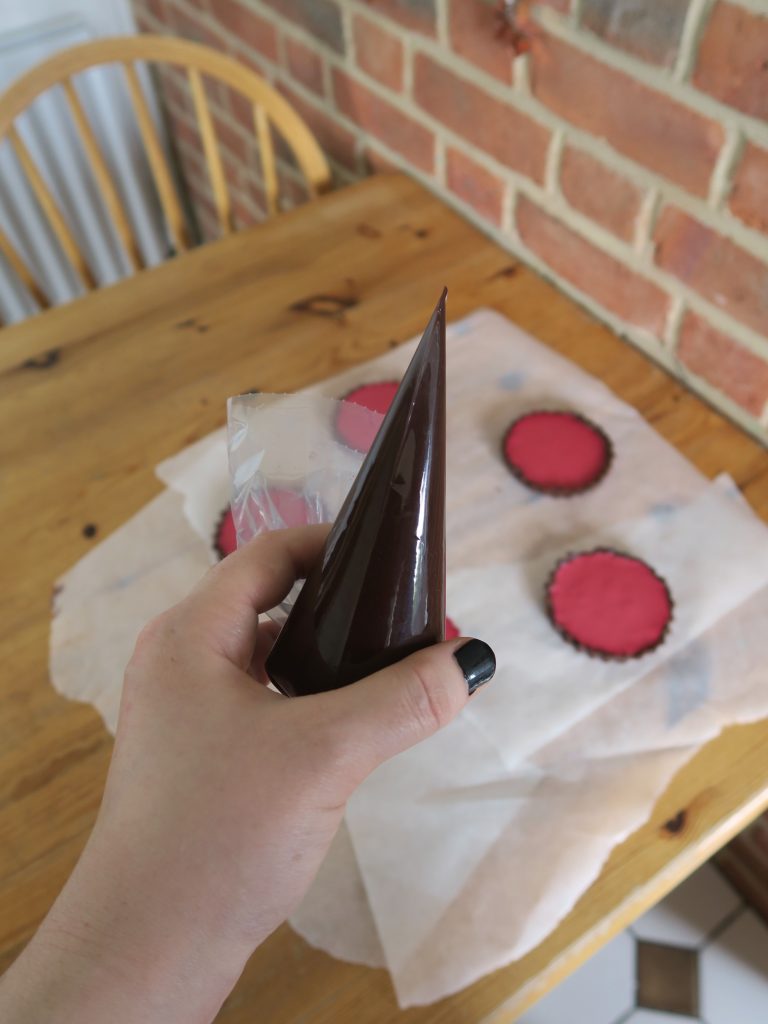
  17. Once set move onto the chocolate drizzle. Chop the chocolate finely and put it into a metal or glass bowl. Heat the cream in a small pan until just below boiling and then pour it over the chocolate, whisking constantly, until melted.
  18. Pour the ganache into a pipping bag (either with a very small, round nozzle or a disposable one you can cut a small hole in the end of). You then need to wait for the ganache to reach the consistency where it pipes in a smooth line but hasn’t set too much (the only way to find this out is to try pipping every 15 minutes or so and see what it looks like).
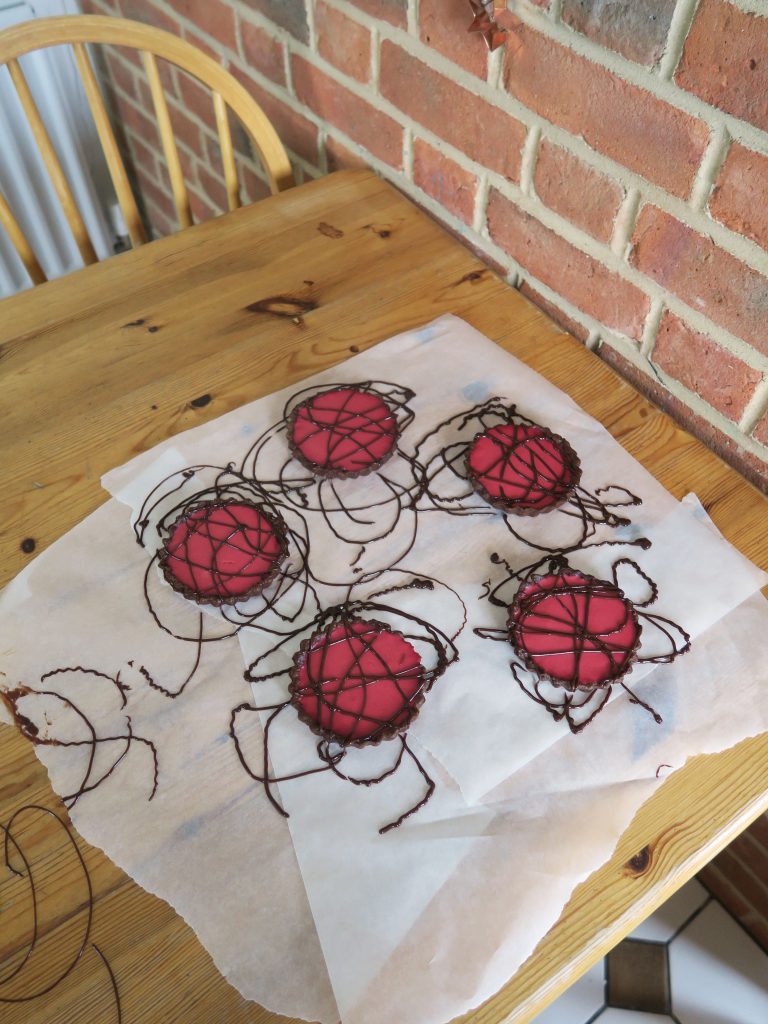
  19. When ready to pipe take your tartlets and spread them out on a worktop. Then pipe loose swirls, loops and circles over the tops. Leave for 20 minutes to set.
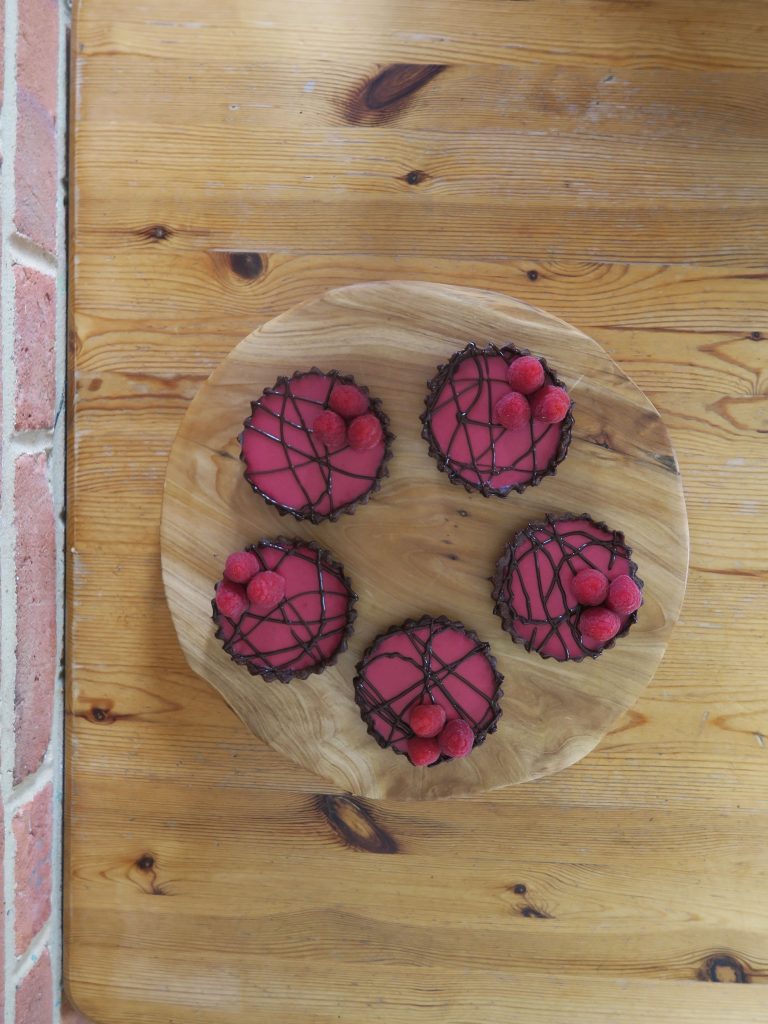
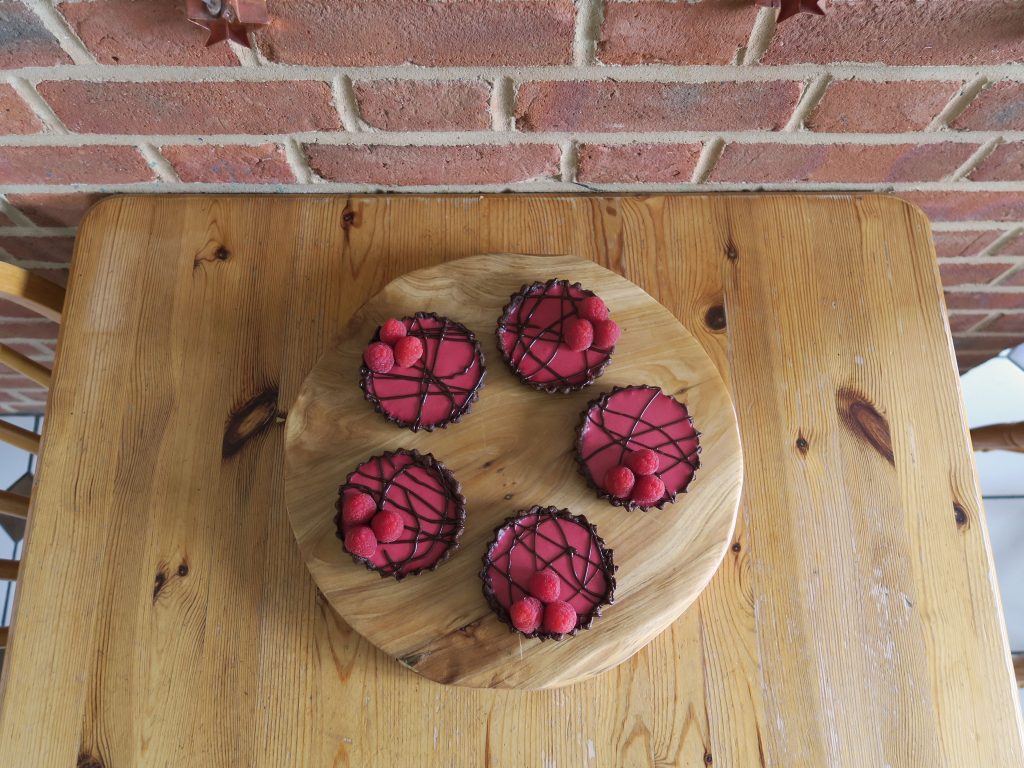
  20. To finish off take the tarts out of their tins and then top with some fresh raspberries.

Thanks for reading!

Emma x

Apple and Cherry Midnight Pie

Apple and Cherry Midnight Pie


Recipe

Serves 12

Time: 1 hour, plus chilling and baking time

Ingredients

For the pastry

  • 470g plain flour
  • 225g unsalted butter
  • 1 ½ tbsp caster sugar
  • A pinch of salt
  • 4 ½ tbsp water

For the filling

  • 4 Large cooking apples (I used 1kg of Bramley)
  • 3 tbsp brown sugar (around 90g)
  • ½ tsp ground cinnamon
  • ½ tsp ground ginger
  • 1 tbsp plain flour
  • 300g frozen cherries
  • 200g frozen blueberries

Method

  1. Begin by making the pastry. Put the flour and butter into a large bowl. Rub the butter into the flour with your finger tips until the mixture resembles breadcrumbs.
  2. Stir the sugar and the salt into the flour with a round bladed knife and then keep mixing as you add the water until a smooth dough forms. Bring the dough together with your hands to make a ball and then wrap the dough in cling film and leave in the fridge to chill for at least 1 hour.
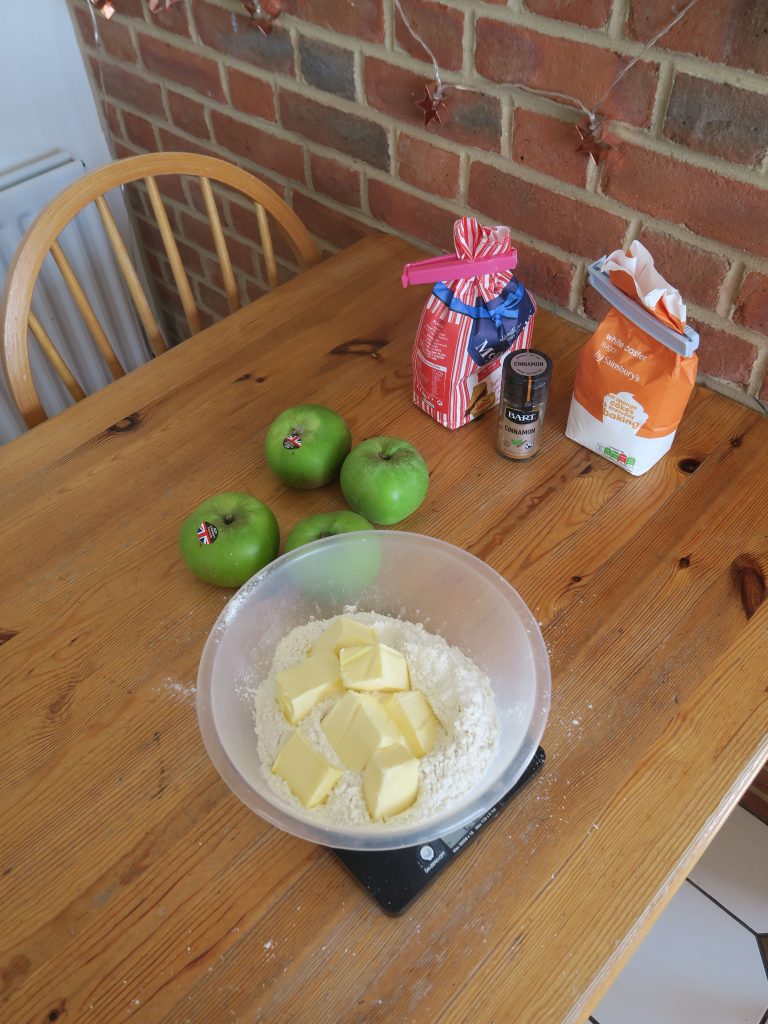
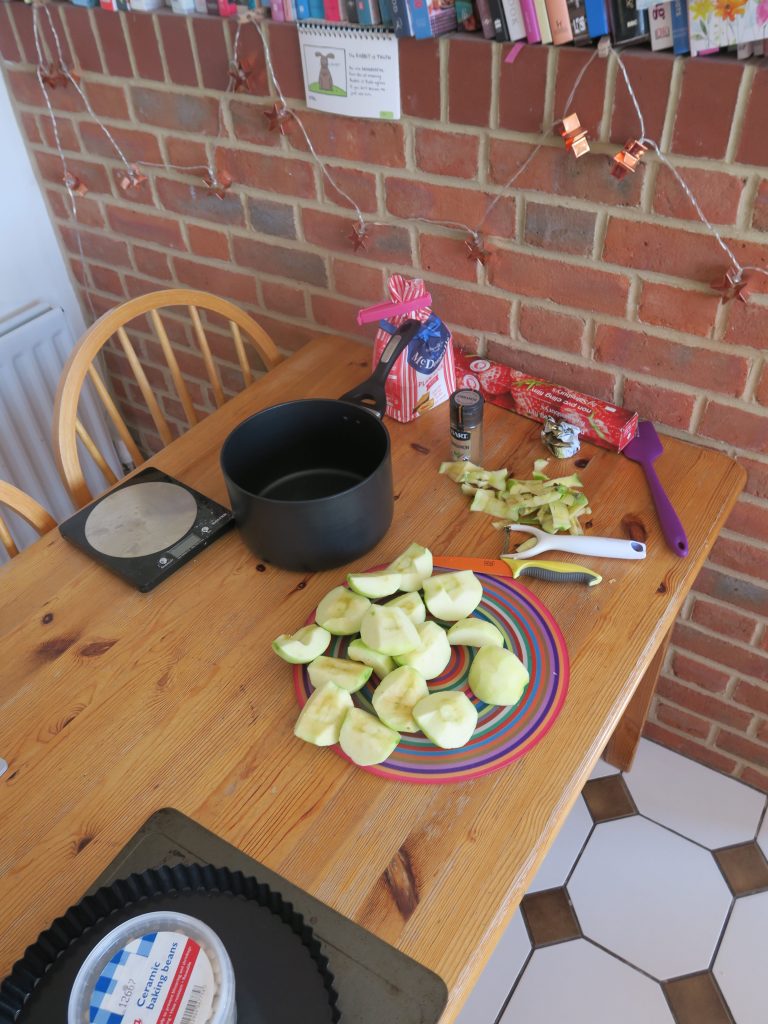
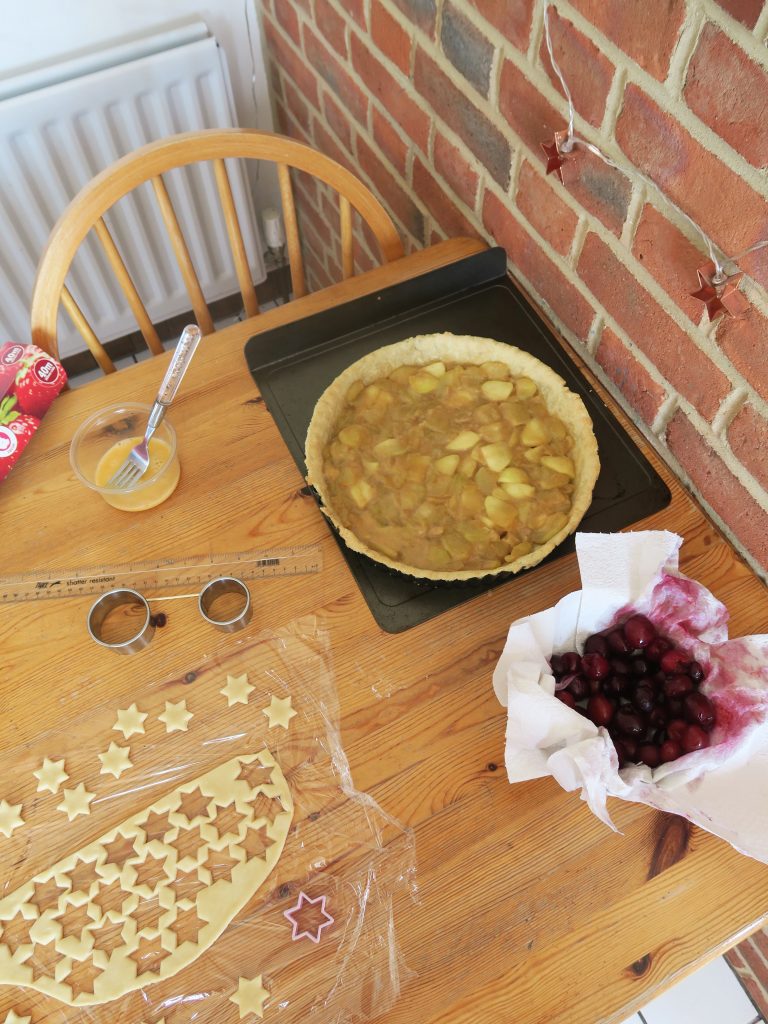
  3. Meanwhile prepare the filling. Peel, core and dice the apple. Put the apple chunks into a large pan with the sugar, cinnamon, and ginger. Place over a medium heat and bring to a gentle simmer, stirring occasionally until the fruit is starting to soften and let out its juices. Add the flour to the pan, stir to combine and then set aside to cool.
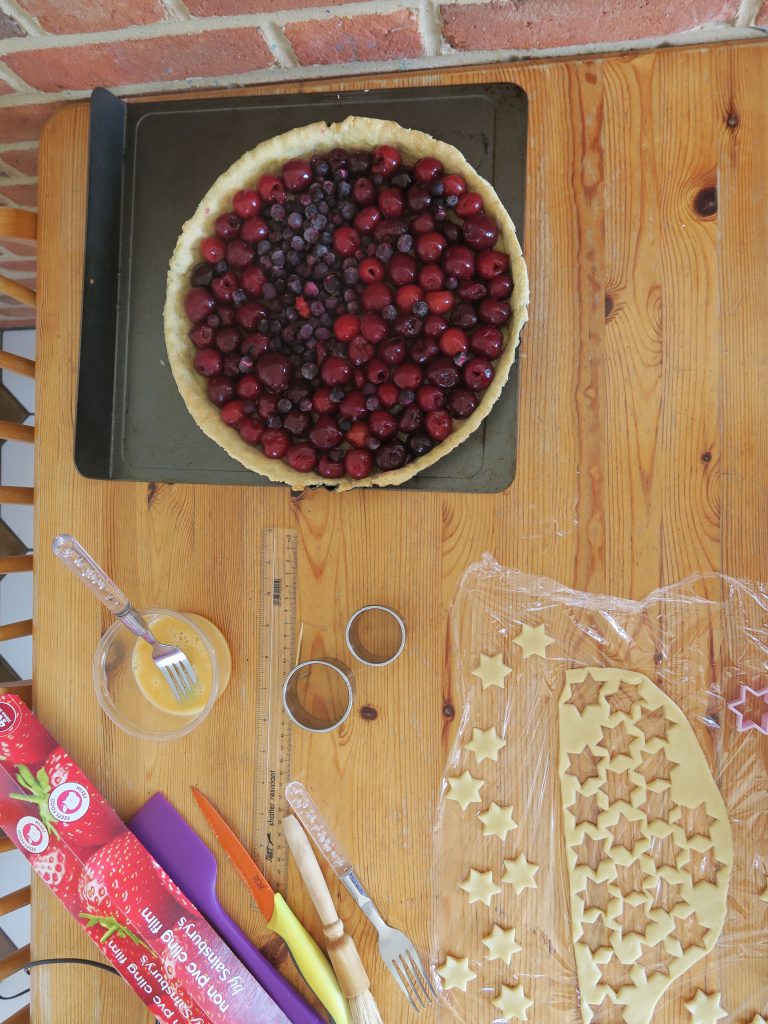
  4. Take the frozen blueberries and cherries and tip them onto a baking tray lined with kitchen roll. Leave to defrost, changing the kitchen roll if it becomes too wet.
  5. Pre-heat the oven to 180˚C. When the pastry is ready take it out of the fridge, cut it in two and put one of the halves back into the fridge.
  6. Shape the pastry half you’re working with into a circle and then roll it out on a lightly floured worktop into a circle about 33cm wide (or about 3cm wider all around than your tin. You can use your tin as a guide for rolling by placing it over your pastry every now and then to check the size!)
  7. Transfer the pastry disc into the pie tin, making sure it fits into any flutes or creases. Allow any excess pastry to hang over the edge for now.
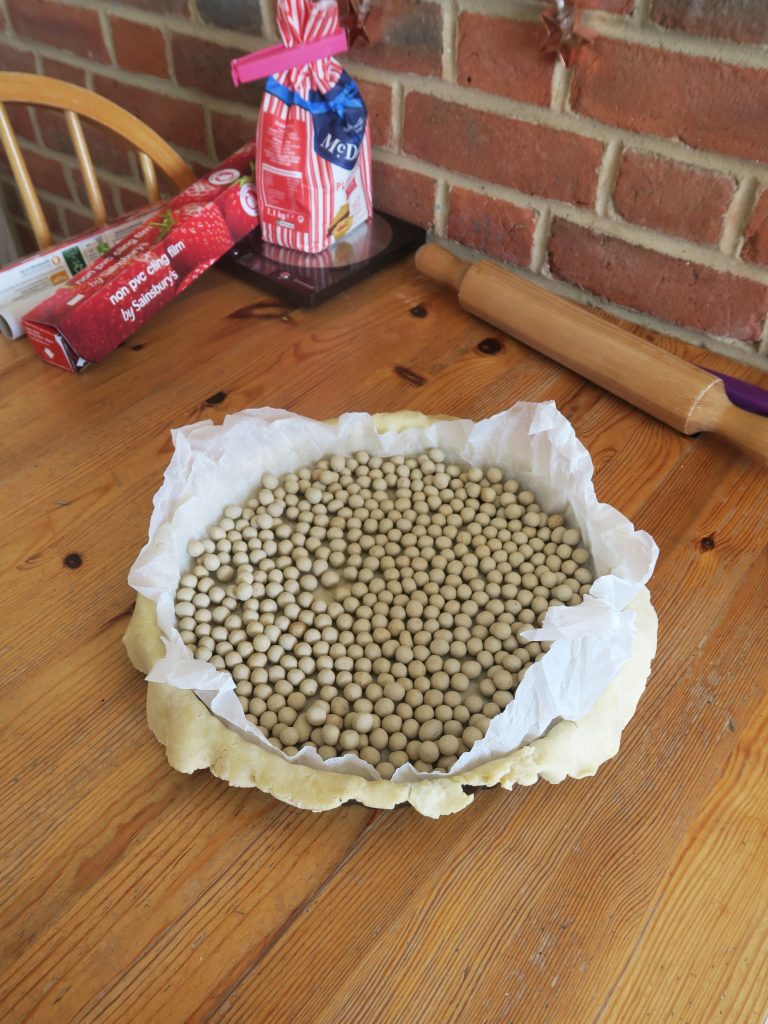
  8. Take a square of baking paper around the same dimensions as the pastry disc you just rolled out. Scrunch it up into a ball in your hands and then unfold it back out into a crumpled square. Use this to line the inside of the tart, then weigh down the pastry with baking beans or rice.
  9. Bake the pastry like this for 10 minutes, until the pastry looks like it’s starting to cook through. Take out the weight (beans or rice) and the baking paper and return the base to the oven for about 10 minutes until just starting to brown. Leave to one side to cool completely.
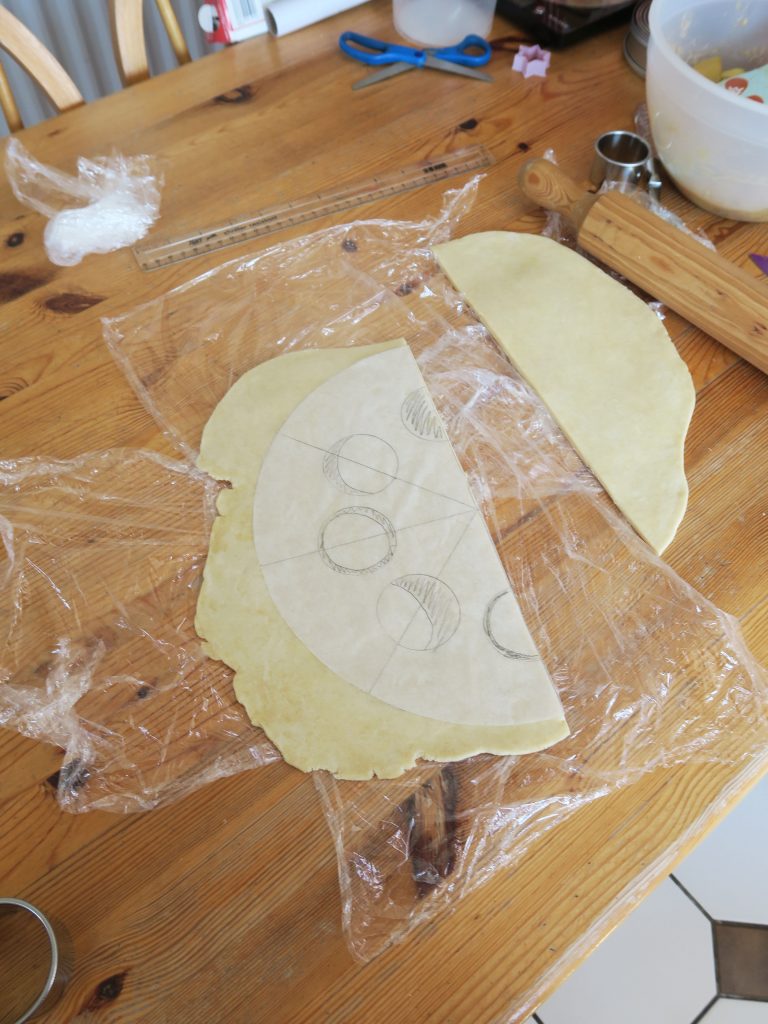
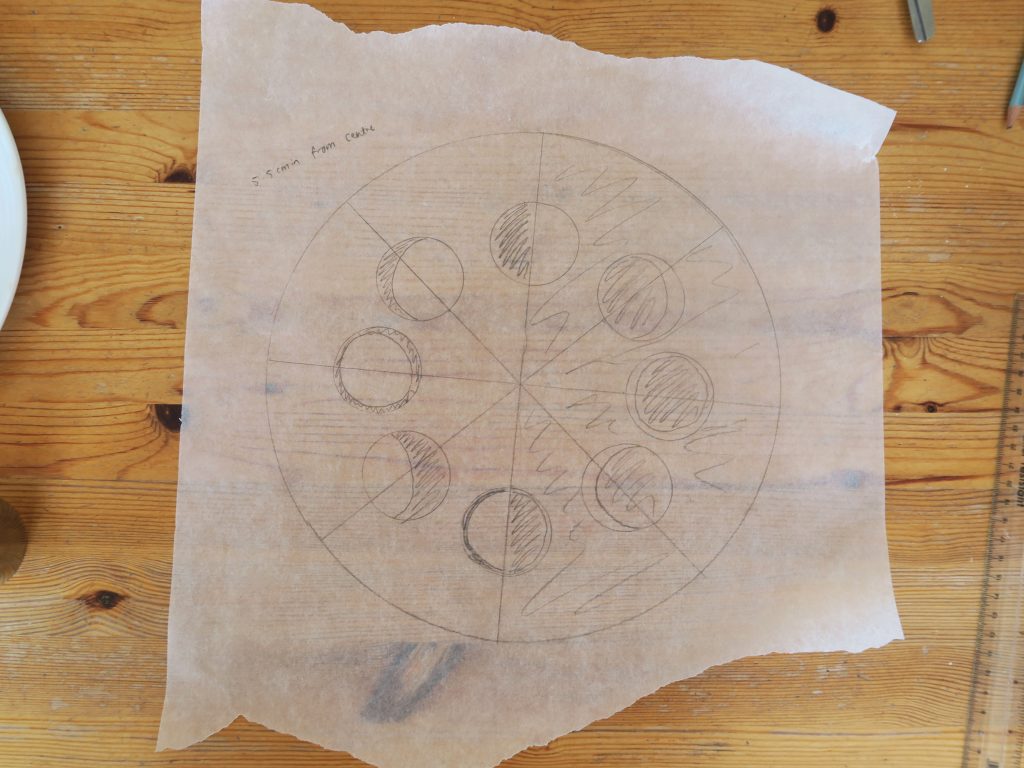
  10. Meanwhile prepare/shape the pastry for the topping. Take the second half of pastry, shape it into a circle and then roll it out into a disc, roughly the same size as before, between two sheets of clingfilm. (I find at this point it’s useful to have a guide on baking paper to transfer your design onto, but you could also work freehand. If you want to do a pattern you can follow my instructions on how to make your own below this recipe.)
  11. Cut the pastry in half, down the centre of the circle you’ve rolled out. Place one semi circle to one side for later.
  12. Take a 5cm round cookie cutter and cut two semi-circles out of the pastry , equal distance from the centre point and place the hemispheres you’ve cut out to one side.
  13. Next cut 3 full circles out of the centre of the pastry in an arc, moving around from the top semi-circle to the bottom semi-circle. Keep all the circles you cut out.
  14. Take the first circle and, using the same 5cm cutter, cut out a moon shape by slightly off-setting where you cut into the circle. Do this again with another one of the circles, this time cutting a moon from the other half of the circle.
  15. Take the final full circle and a 4cm cookie cutter and cut a smaller circle out of the main circle. Finally, take one of the hemispheres and, using the 4cm cutter, cut a smaller hemisphere out of the large one.
  16. Place all of the pieces you’ve cut out onto clingfilm and leave in the fridge until the pastry base and apples have cooled completely.
  17. Pre-heat the oven to 180C.
  18. When ready to start assembling the pie begin by spreading an even layer of the apple filling over the pastry base. Then scatter over the de-frosted cherries and blueberries, starting with the cherries and then filling in the gaps with the blueberries.
  19. Take the egg for the topping and whisk it in a small bowl with a fork until runny. Brush this on half of the exposed pastry crust.
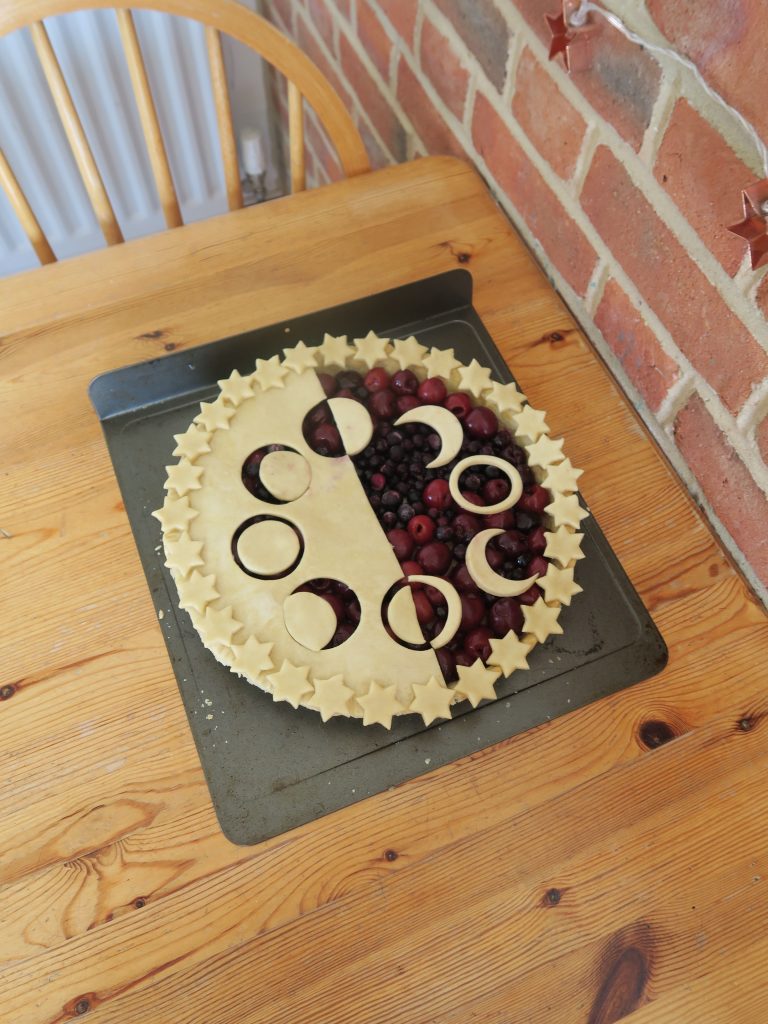
  20. Take the semi-circle of pastry out of the fridge and place it on top of the filling, where you brushed the egg, so the centre line cuts across the middle half of the pie. Take a fork and press gently around the top edge of the crust to help it bind with the baked pastry. Then cut off the excess pastry round the edge by cutting it away with a sharp knife, held vertically and then stroked along the edge of the pie dish.
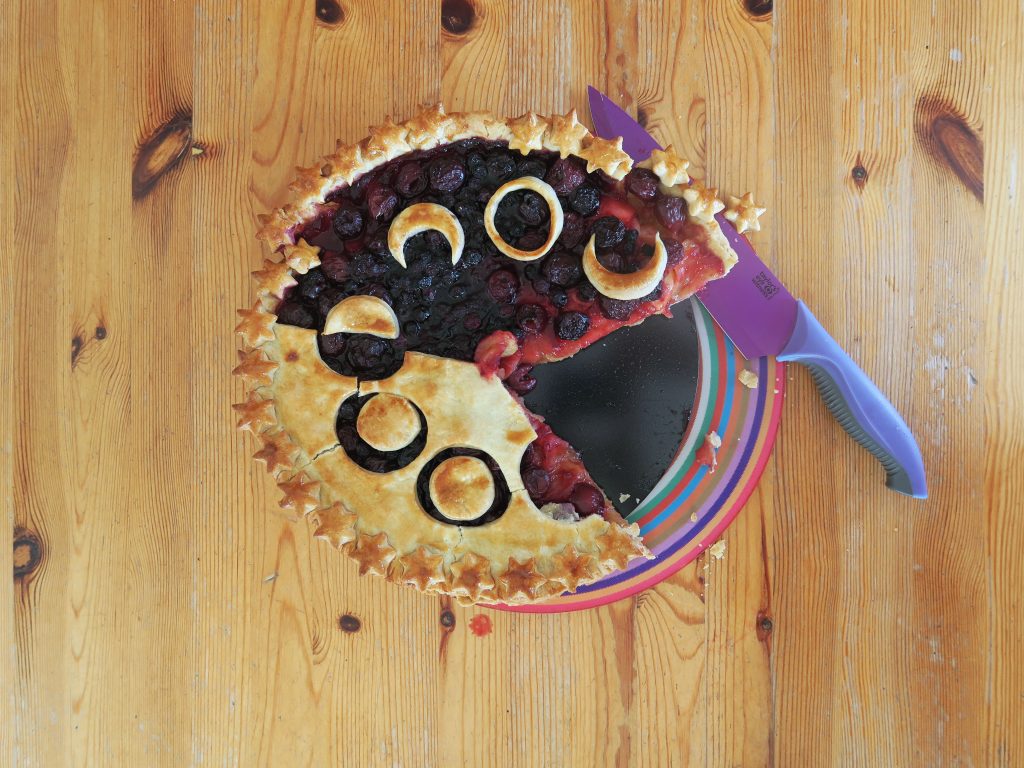
  21. Take the shapes of pastry that you cut out earlier and arrange them on the top of the pie to look like the above photo.
  22. Take the leftover rolled-out pastry and cut out stars. Brush the pastry on the top of the pie with the rest of the beaten egg and then place the pastry stars around the edge of the pie. Brush the stars with more beaten egg.
  23. Bake the pie in the oven for about 15 minutes, until the pastry is golden brown. Leave to cool a little and then serve with ice cream or custard!

How to make a pattern/guide for the top!

  1. Cut a sheet of baking paper about 33cm long (by however wide the roll is).
  2. Take something circular measuring 27.5cm in diameter (or equivalent to whatever diameter your pie tin is) and trace a circle onto your sheet of baking paper.
  3. Take a rule and draw a line down the centre of the circle to dissect it into two. Draw another line perpendicular to the first to transect the circle into quarters. Do this twice more so you have 8 segments.
  4. Take your ruler again and mark 5.5cm along each line from the centre point.
  5. Take a 5cm round cookie cutter and place the bottom edge on one of the 5cm marks you just made. Trace the circle onto this position and then repeat this on the other 5.5cm marks you made. You should now have 8 circles in a perfect ring.
  6. From this point you can choose how much more you do. I like to draw on the shapes you’ll be cutting out of the pastry, then to shade in where the filling will be visible.
  7. Keep the circle whole for now, however later when using it as a guide it might be useful to cut out the half of the circle that will be made up mainly of pastry so you can use it as a template on the pastry itself.
  8. If you choose to do step 7, a good tip is to take a pin or cocktail stick and make a little hole at the top and bottom of each circle (where the circle intersects with the line). This means that when you place the template on the pastry you can prick again with a cocktail stick through these holes and then you can use these marks to line up your cookie cutter so you cut out perfectly in-line circles.

Thanks for reading!

Emma x

Plum and Apple Crumble Flat Crust

Plum and Apple Crumble Flat Crust

This summer’s been pretty crazy for me. Not because I’ve been all around the world or have gone on a fascinating internship or the like, but because it’s been the first summer in well over 4 years that I’ve just stopped and let myself think. I tend to plow on through life head first, doing as much as I can and I often wear myself out in the process, so this summer I’ve let myself rest, re-coup and try to sort out my head a bit.
I’ve been thinking a lot about mental health guilt recently and the downward spiralling effect this can have on an already fragile mind. By mental health guilt I mean feeling as though you have no right to be depressed or feeling low because you think others have it worse than you. I think this something that a lot of people with depression experience at some point and I’ve been feeling it a lot myself recently. After all, I’m a white, middle class woman from a stable family in a relatively stable part of the world. I’ve had all the education I could wish for, all the opportunities I could imagine and yet I still find myself coming back to this really dark place.
Something I think that’s important to remember when you feel this way is that all pain is relative and personal. Everyone has different life experiences and struggles, and you can never know the full story behind what someone else is experiencing. Therefore, when it comes to mental health, it’s ultimately impossible to say that one person deserves help more than someone else, or that someone’s pain is worse than another’s. Surely if you feel in pain and it’s affecting you, you deserve the help and support you need, regardless of whether someone else has it worse or not. Unfortunately, this is not reflected in the UK’s mental health system from my experience. At the moment there is massive under funding in the NHS and so as a result the only ones getting real treatment (and even then after a long waiting time) are those who are suffering at the most extreme level. This of course makes sense and it is important that we treat the most serious cases first, but it does make those with more minor, yet still serious conditions, feel as though their problems aren’t serious enough to warrant treatment – which when you’re feeling like you have no right to feel depressed in the first place isn’t helpful.
We can’t change this overnight, but we can start to make those who can make the changes more aware of the mental health crisis in the UK by talking about it more openly. There are great charities and campaign groups such as Young Minds and Heads Together who are doing amazing work to get better mental health provision in the UK, and supporting them in their work is probably the best shot we have to influence major change at ground level. For now though I’ll just say it’s worth remembering that it doesn’t matter if someone has it worse than you or if you don’t feel like you have the right to feel depressed.  Depression isn’t a choice, and although it can be formed out of circumstance it is inherently biological and beyond a person’s control. Therefore if you do feel down or low, in need of treatment or even just in need of a talk, reach out for it. Don’t feel like it needs to get worse before you’re allowed to get better, or that you’re being over-dramatic and should just calm down. It’s thoughts like that which lead people to end up in really bad places that are even harder to get out of.
For me it’s by no means been an easy summer, and I doubt it’ll be an easy autumn but I am looking forward to a new academic year and a change of scene. By taking it slow over the past couple of months I’ve found a rhythm for living which I hope I can translate into my working term at Uni and fingers crossed I can keep myself relatively stable. Most importantly for me I have re-kindled my love of cooking. Now, of course this never really went away but I’ve had a tricky relationship with food in that I cook to de-stress, but recently the mere idea of cooking has stressed me out.  Sometimes I don’t have the energy to cook, sometimes I don’t want to eat anything, and sometimes I just don’t have the patience. However I’ve started to find that these times are all totally fine and normal, and the important thing is that I always come back to the kitchen sooner or later and have fun when I’m there!
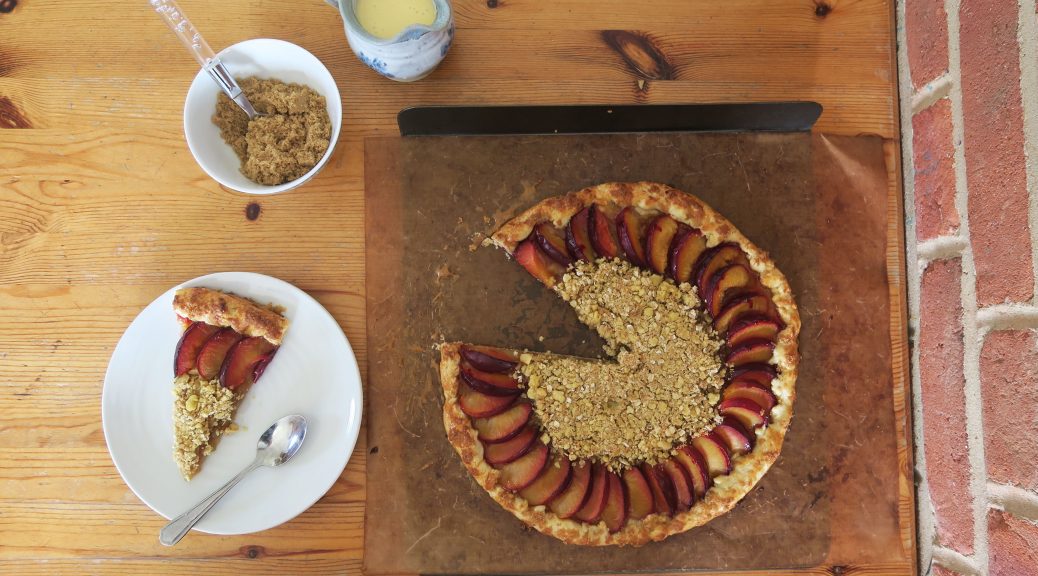
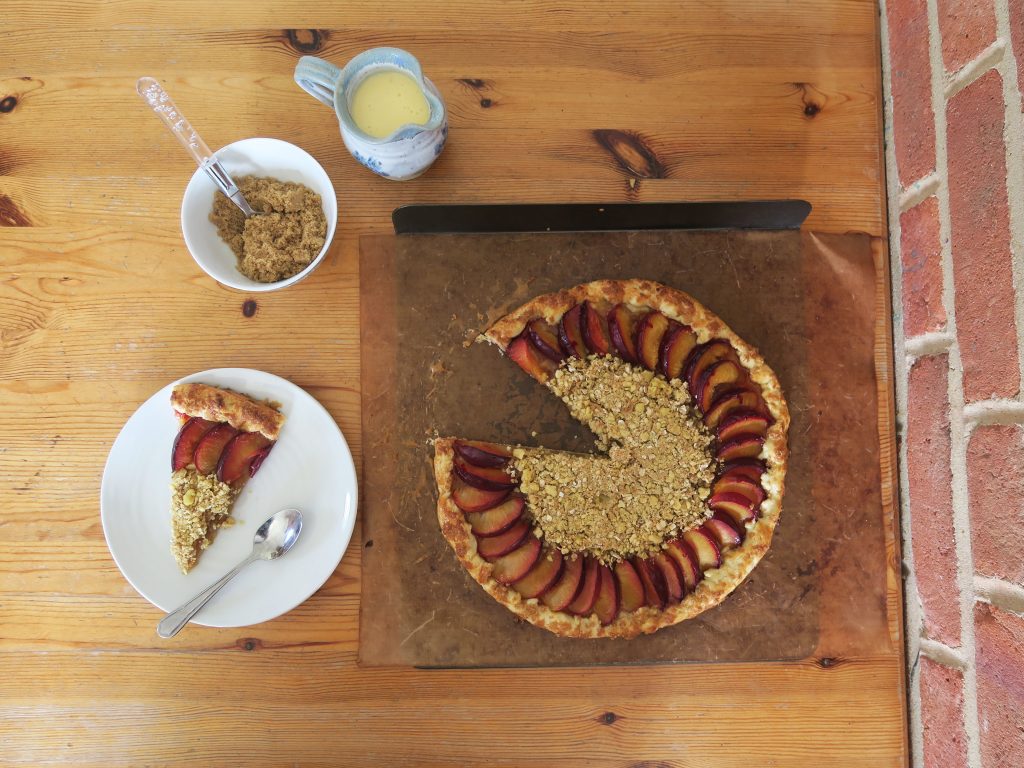
This new, relaxed approach to my cooking is how I eventually came up with this plum and apple crumble ‘flat-crust’. I wanted to make a tart but really couldn’t face the paph of lining a tart tin or blind baking etc, so I found that this was a great compromise. As it’s not made in a tin you don’t have to worry too hard about what awful shape your pastry is being rolled into which is a really nice thing. As long as it’s vaguely round and flat, you’re good. Quick, delicious, full of warming autumn flavours and all that good home comfort stuff we like to see around this time of year!
Recipe

Serves 12

Time: 90 minutes

Ingredients

For the pastry

  • 175g Plain flour
  • 2 tbsp Caster sugar
  • 115g Butter
  • 1 Egg yolk
  • 1 tbsp Water

For the filling

  • 2 Bramley apples (or medium sized cooking apples)
  • 1 tbsp Brown sugar, plus extra for sprinkling
  • ¼ tsp Ground ginger
  • ¼ tsp Ground cinnamon
  • 3 Plums
  • 1 Egg

For the Crumble topping

  • 75g Butter
  • 2 tbsp Plain flour
  • 2 tbsp Porridge oats
  • 1 tbsp Brown sugar
  • ¼ tsp Ground cinnamon

Method

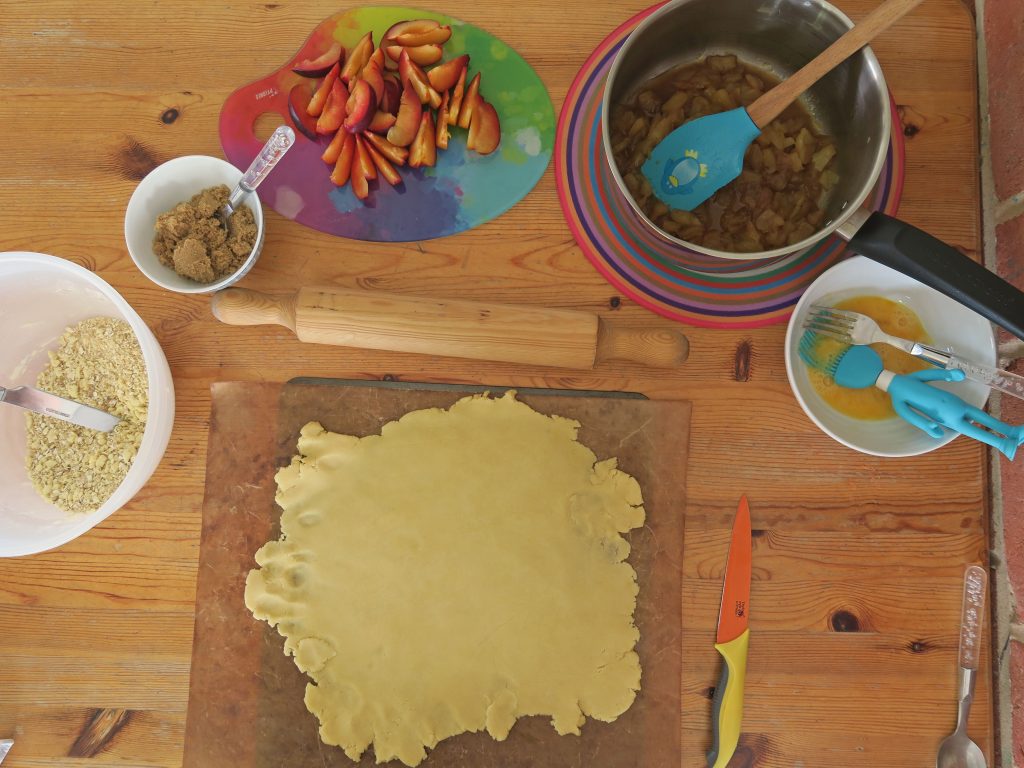
  1. Begin by making the pastry. Put the flour and sugar into a bowl and mix together with a round bladed knife (a regular table knife). Add the butter and use the knife to cut it into chunks in the flour.
  2. When you can’t cut the butter up any more, go in with your fingers and rub the butter into the flour until the mixture looks like breadcrumbs. (Shaking the bowl from side to side every now and then will help bring the lumps to the top).
  3. In a small bowl mix together the egg yolk and water and then mix this into the breadcrumb mixture. Mix with a table knife until a smooth dough forms. Wrap the dough in cling film and then leave it to chill in the fridge for at least an hour, or until needed.
  4. Now move onto the filling. Peel, core and then roughly dice the apples and put them into a large pan. Add the sugar, ginger and cinnamon and bring to a gentle simmer over a low heat. Leave to simmer for 25-30 minutes until broken down and golden, stirring the mixture every now and then to make sure nothing burns on the bottom of the pan. Take the pan off the heat and leave to cool until needed.
  5. Meanwhile halve and de-stone the plums. Then slice the plums into smallish pieces (I find I get around 5 slices from each half).
  6. Now make the crumble topping. Put the butter and flour into a large bowl and rub the butter into the flour until you have a breadcrumb texture again, like you did with the pastry. Add the sugar and oats and then mix together with a spoon to make a crumbly mixture.
  7. When ready to start assembling pre-heat the oven to 180˚C and line a baking tray with baking paper.
  8. Take your pastry out of the fridge and place it on a sheet on clingfilm on a work top. Place another sheet of clingfilm over the top and gently roll the pastry into a rough circle (don’t worry if you end up with more of a square, it won’t matter in the end!). Take a plate, cake tin or generally round object around 11” in diameter and use it as a guide as to how far to roll the pastry. You’ll want it around 0.5 – 1 inch wider all around, than this template.
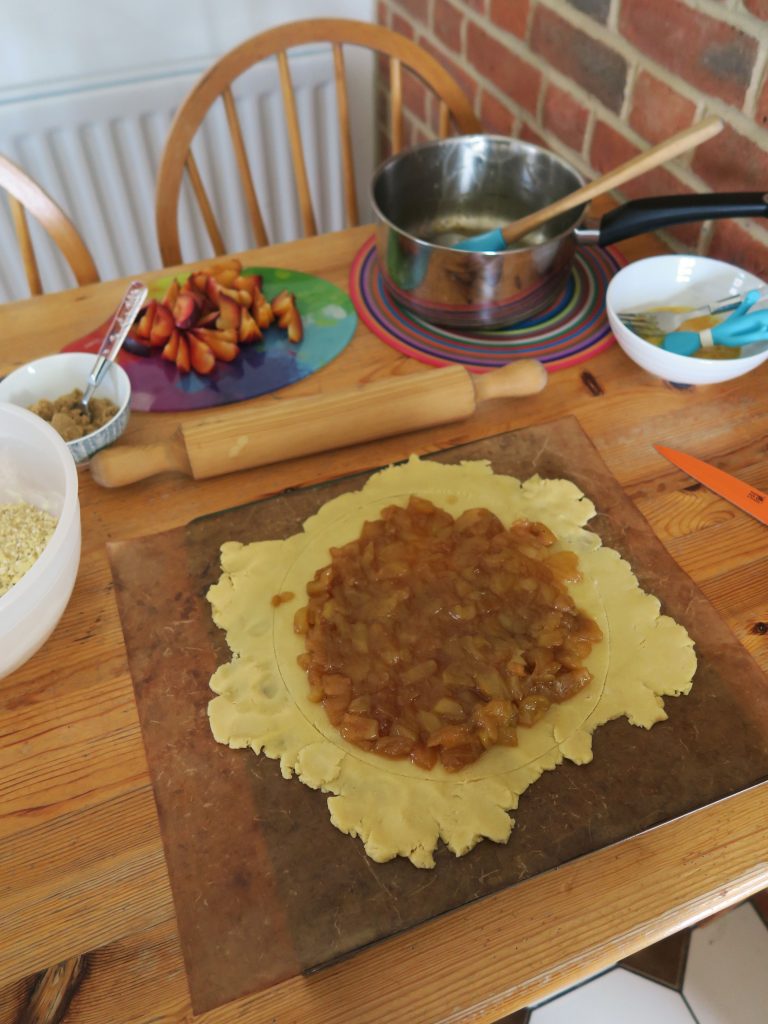
  9. Peel the top sheet of clingfilm off the pastry and flip it over onto your lined baking tray. Then peel off the other sheet of clingfilm. Lay your template on top of the pastry and gently score the circular shape into the dough with a knife, being careful not to cut all the way through!
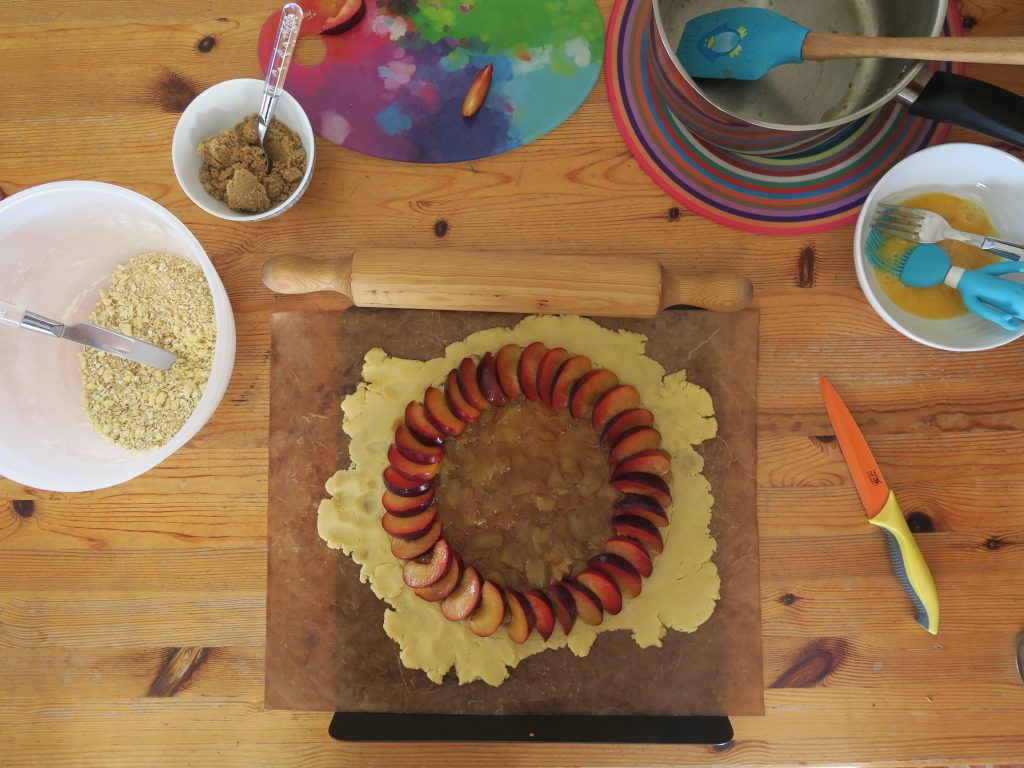
  10. Spoon the stewed apple inside the circle you’ve just marked, leaving a ½ inch gap around the edge. Next take your plum slices and lay them around the edge, making their top edges line up with the circle you’ve made. You should now have a ring of plum slices bordering a pile of apples.
  11. If you were worried about the edge of your pastry now’s the time we’re going to sort that out. If you have any bits that are really sticking out from the plum edge, and some other bits that are really close to it you can carefully peel off a chunky bit and squish it onto somewhere lacking in pastry. Then gently roll up the pastry all around the edge until you reach the plum boarder, to make a crust.
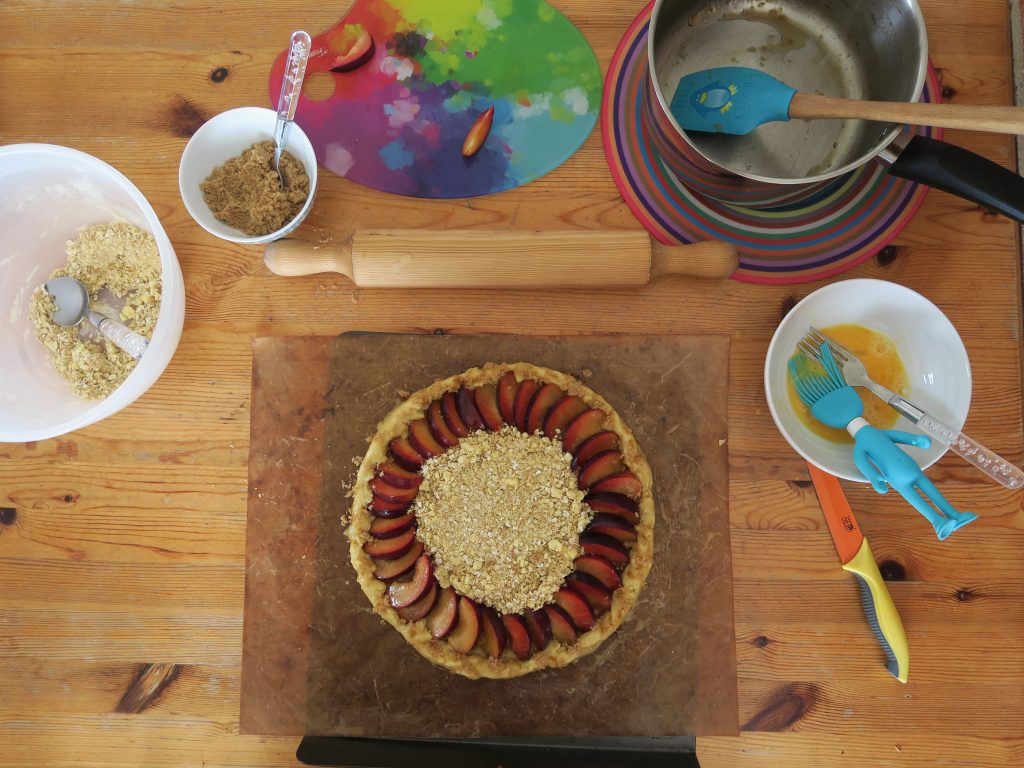
  12. Take the crumble topping and sprinkle it over the exposed apple filling. Then crack the egg for the topping into a bowl and whisk it up with a fork until the yolk and white are mixed. Brush a little egg around the edge of the pastry and then sprinkle over a little more brown sugar to give a crunchy crust.
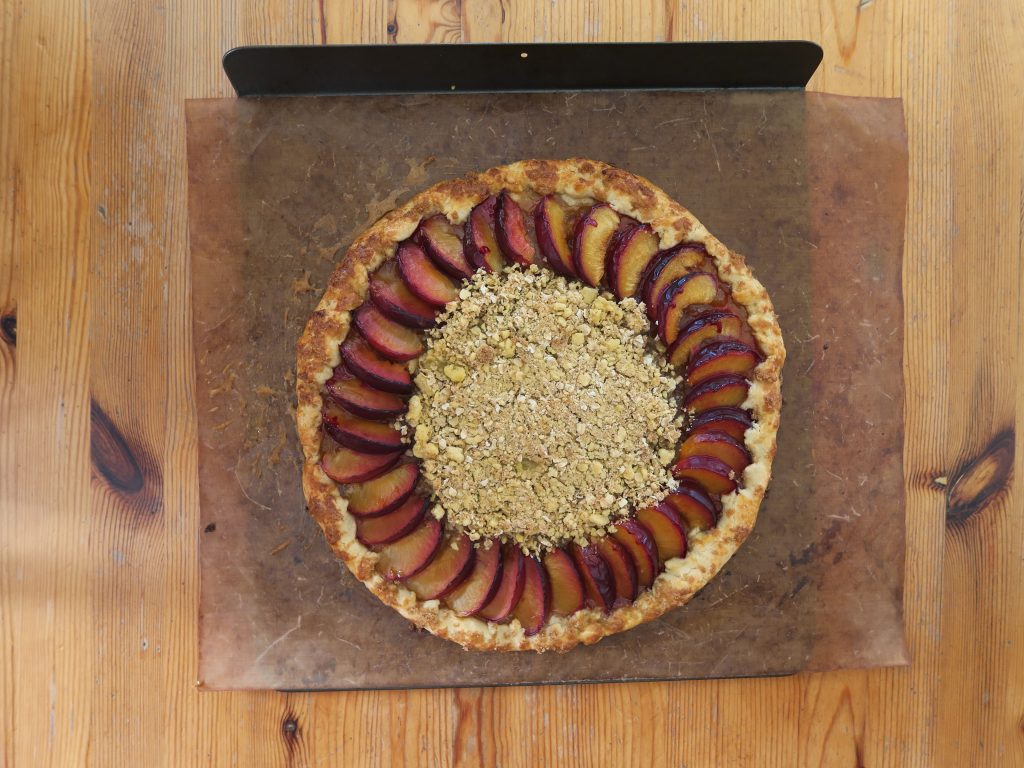
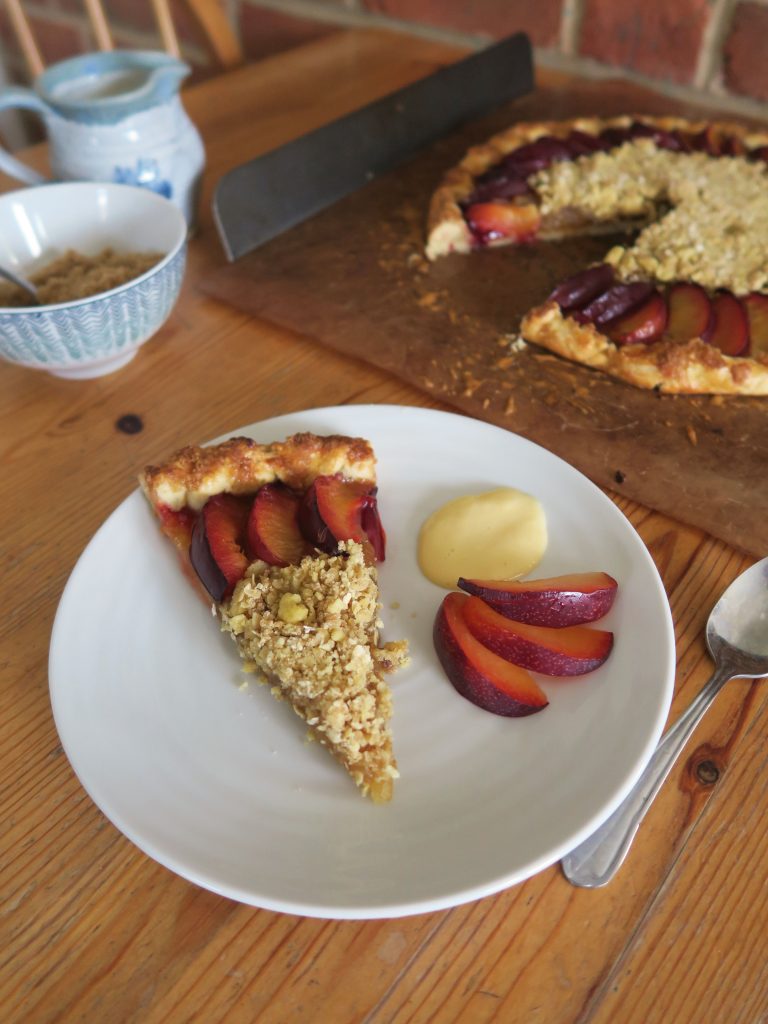
  13. Bake the tart in the oven for around 15-20 minutes until the plums are shrivelled, and the crumble top and pastry are golden brown. Serve warm with fresh plums and custard!
Thanks for reading! Feel free to leave any comments, thoughts or feelings on anything in this post below!

Emma x