Category: Main Course

Aubergine Shakshuka

Aubergine Shakshuka

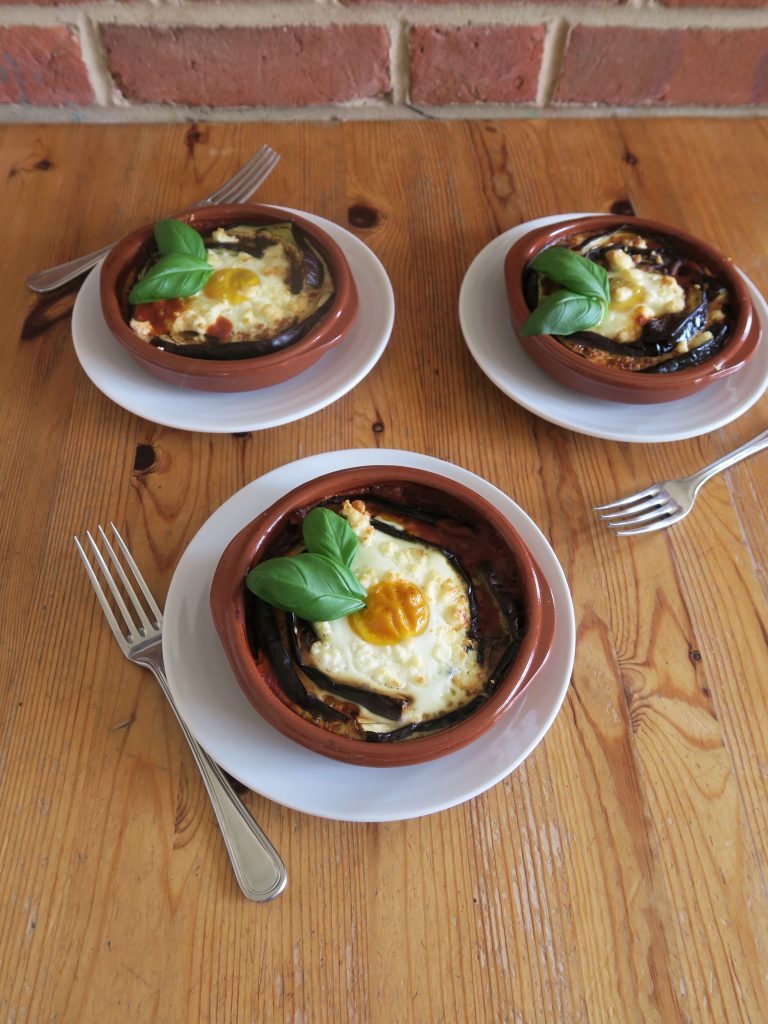
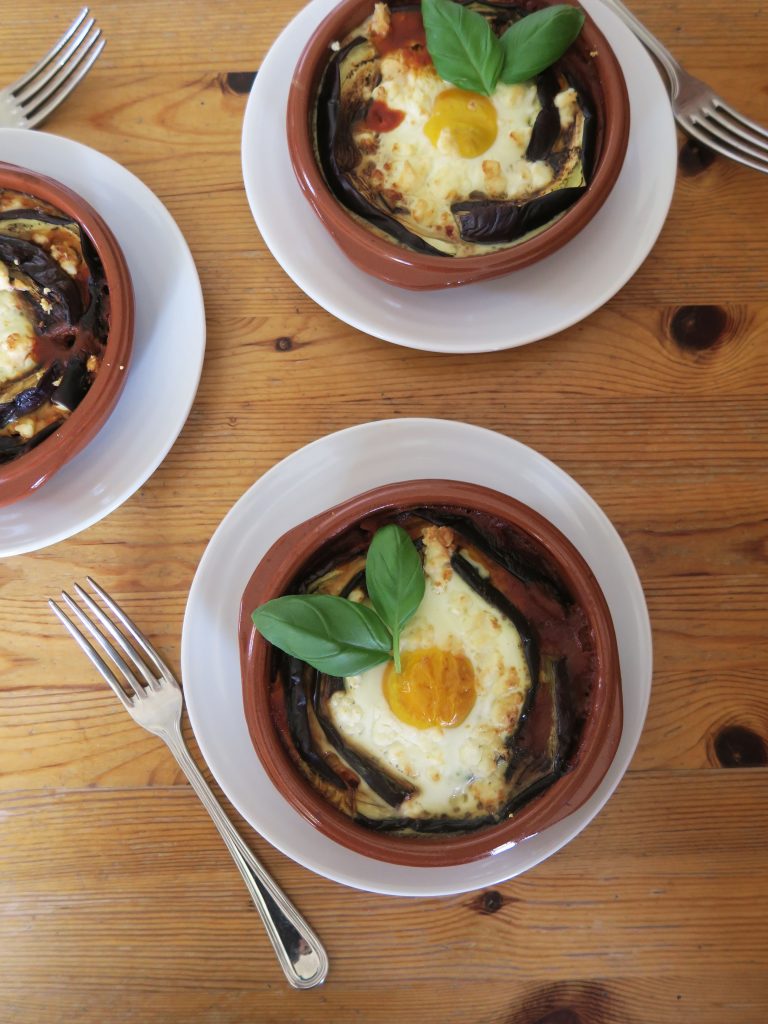
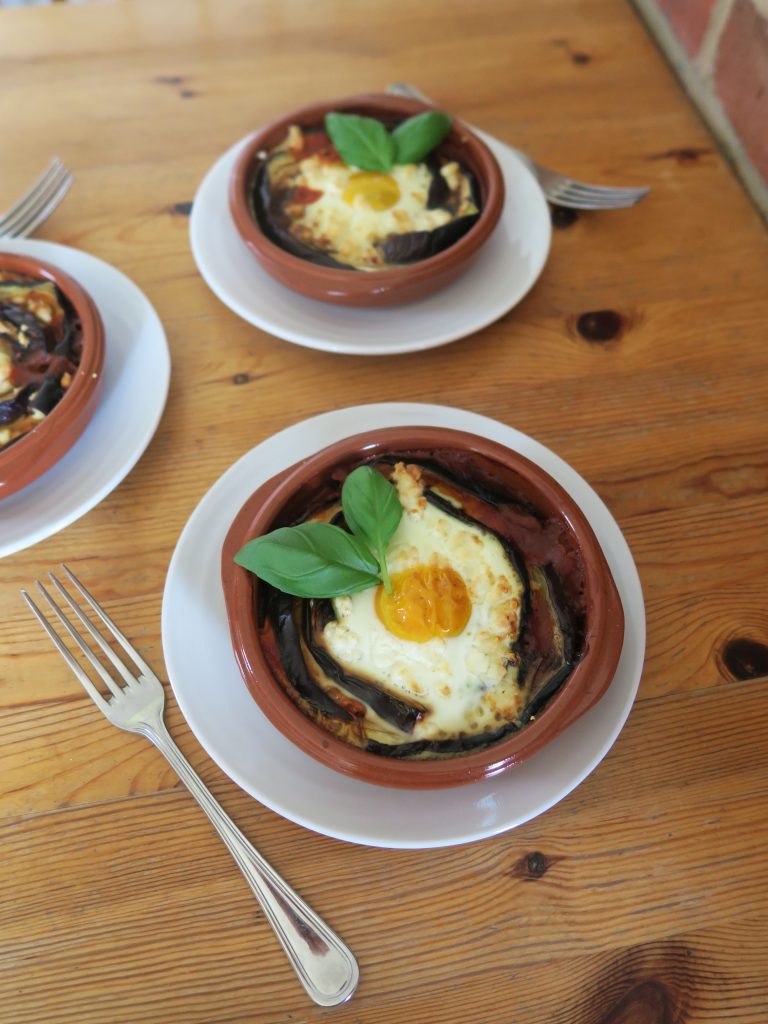
This is one of my family’s go-to comfort foods at the moment – ras el hanout aubergines, tomatoes, feta and a baked egg on top! You can make it in minutes and there’s always enough to share around!

Recipe

Serves 3-4

Time: 1 hour

Ingredients

  • 2 aubergines
  • A little oil for frying
  • 1 white onion
  • 1 garlic clove
  • 1 tbsp ras el hanout
  • ½ tsp smoked paprika
  • 1 tbsp tomato puree
  • 1 tsp sugar
  • 500ml tomato passata
  • 3 eggs
  • 50g feta

Method

  1. Preheat the oven to 180C.
  2. Cut both aubergines in half, and then cut each half into four to make 16 long wedges.
  3. Fry the aubergine with a little oil, over a medium heat until browned. Take the aubergine out of the pan and place to one side until needed.
  4. Top and tail, peel and then finely dice the onion. Add it to the pan and fry for about 5 minutes until soft. Meanwhile peel and finely chop the garlic.
  5. Add the garlic to the pan and fry for another minute. Then add the ras el hanout, paprika, tomato puree and sugar and stir to combine. Next add the passata and mix. Finish with a seasoning of salt and pepper.
  6. Pour the sauce into an oven-proof dish. Arrange the aubergines over the top. Crack the eggs over the top of the dish and then sprinkle over the feta.
  7. Cook the dish for about 7 minutes in the oven until the eggs are softly cooked.
  8. Serve warm with some bread to mop up the juices!

Thanks for reading!

Emma x

Veggie Stack Burgers with Sweet Potato Fries

Veggie Stack Burgers with Sweet Potato Fries

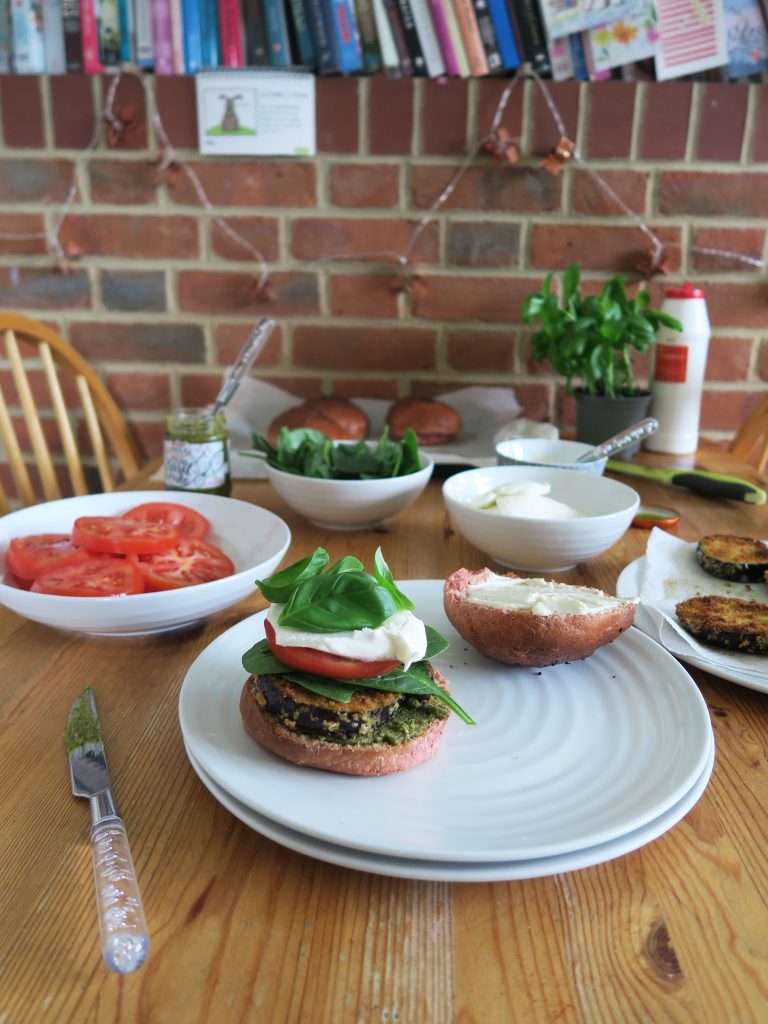
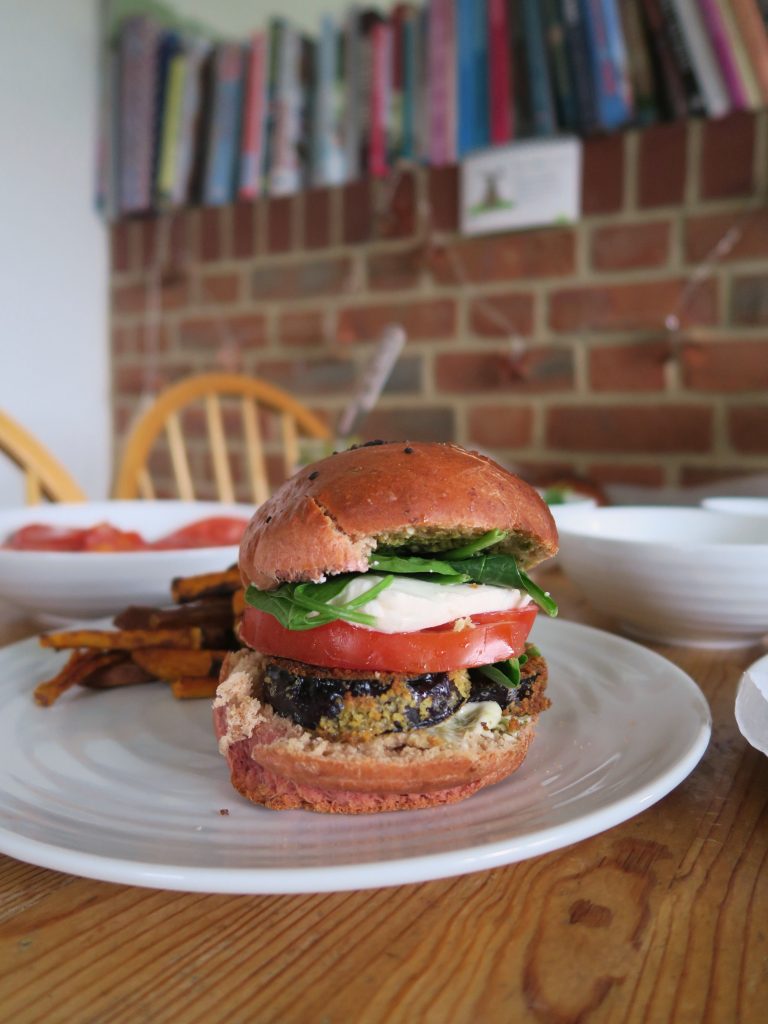
Summer has hit and what screams summer more than a good BBQ? Normally I’d reach straight for the beef burgers when at a BBQ, but after these I don’t think I’d look for the meat again!

Recipe

Makes 4 burgers

Time:

Ingredients

  • 4 beetroot burger buns (see recipe below) or regular burger buns

For the Crispy Aubergine Steak

  • 1 aubergine
  • 100g breadcrumbs
  • 50g sesame seeds
  • 2 eggs
  • ¼ tsp salt
  • ¼ tsp pepper
  • ¼ tsp smoked paprika

For the Sweet Potato Fries

  • 1 large sweet potato (or 2 medium)
  • 2 tbsp sunflower or vegetable oil
  • ¼ tsp salt
  • ¼ tsp black pepper
  • ½ tsp smoked paprika

For the Filling

  • 1 garlic clove
  • 50ml mayonnaise
  • 2 balls of mozzarella
  • 2 beef tomatoes
  • A few handfuls of fresh basil
  • 4 tsp pesto

Method

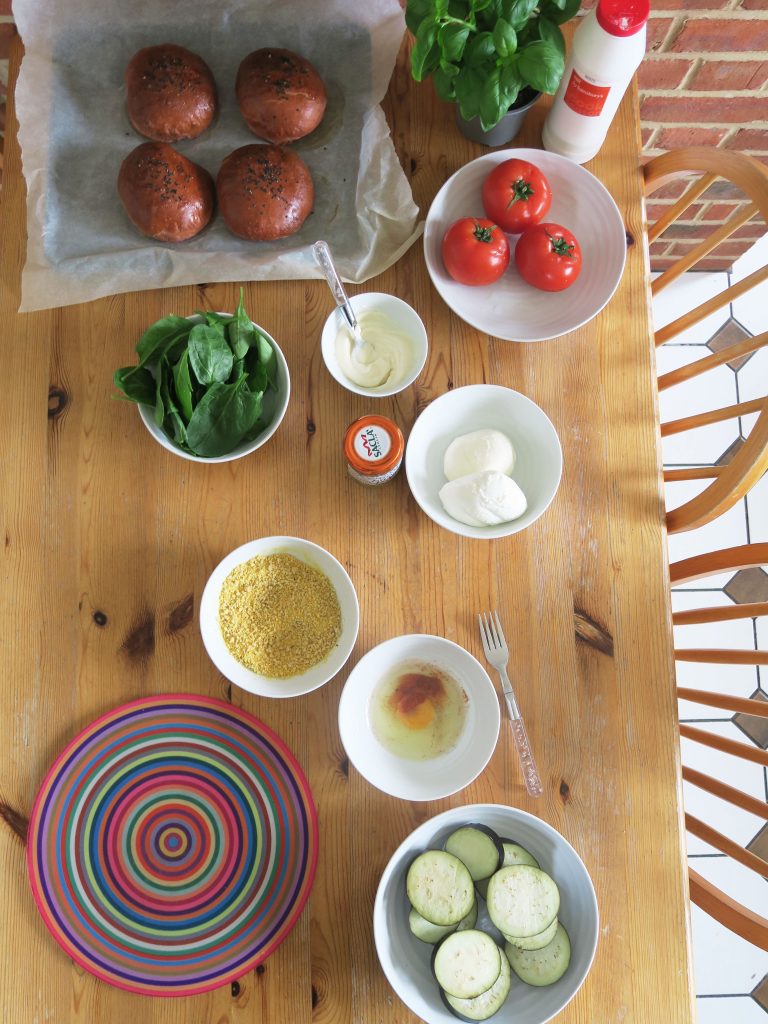
  1. Begin by making the crispy aubergine steaks. Cut the aubergine into 1cm wide discs.
  2. Place the discs into a bowl, sprinkle with a little salt and leave for 30 minutes to rest.
  3. Wash and then dry the aubergine.
  4. In a wide bowl mix together the breadcrumbs and salt.
  5. In another bowl beat together the eggs, salt, pepper, and paprika with a fork.
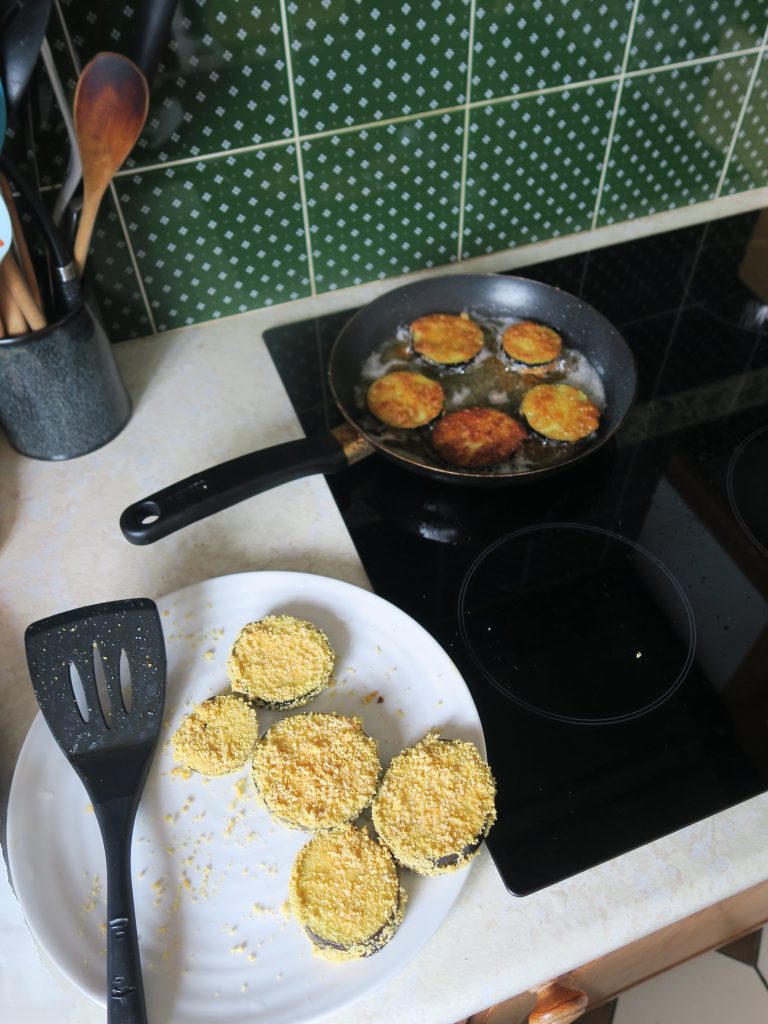
  6. Take one of the aubergine discs, dip it into the egg mixture so it’s coated all over and then dip it into the crumb mixture so it’s covered all over with crumbs. Repeat with the rest of the aubergine.
  7. Fill a deep, wide frying pan with about ½ cm deep of oil and place over a medium high heat. (A good way to check the temperature it to take a leaf of a fresh herb or something equivalent and throw it into the oil, it should bubble and simmer like crazy. Remove the herb and then you’re ready to go!).
  8. Carefully place the aubergine steaks into the oil and deep-fry for about 2-3 minutes on each side, until golden brown.
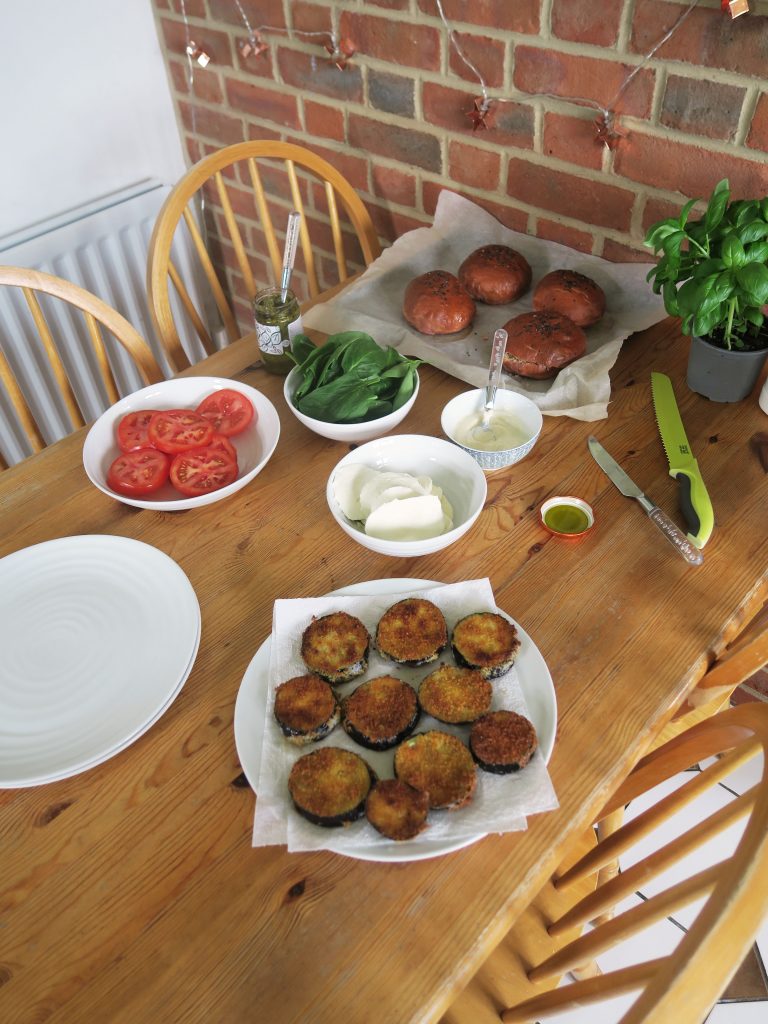
  9. Take the aubergine out of the oil and place on a plate lined with kitchen roll to soak up the excess oil.
  10. Now make the sweet potato fries. Pre-heat the oven to 200C.
  11. Wash and then slice the sweet potato into batons. Place them into a bowl and add the oil, salt, pepper and paprika. Stir until evenly coated and then tip out into a large roasting tin.
  12. Spread the fries out so they are as spread out as possible and then roast in the oven for about 40 minutes, stirring them halfway through cooking so they crisp up evenly.
  13. Whilst waiting for the fries to cook move on to the rest of the fillings. Take the garlic and crush it into a bowl. Add the mayo and mix to combine. Set to one side until needed.
  14. Take the mozzarella and slice it into discs about ½ cm wide. Do the same for the beef tomato.
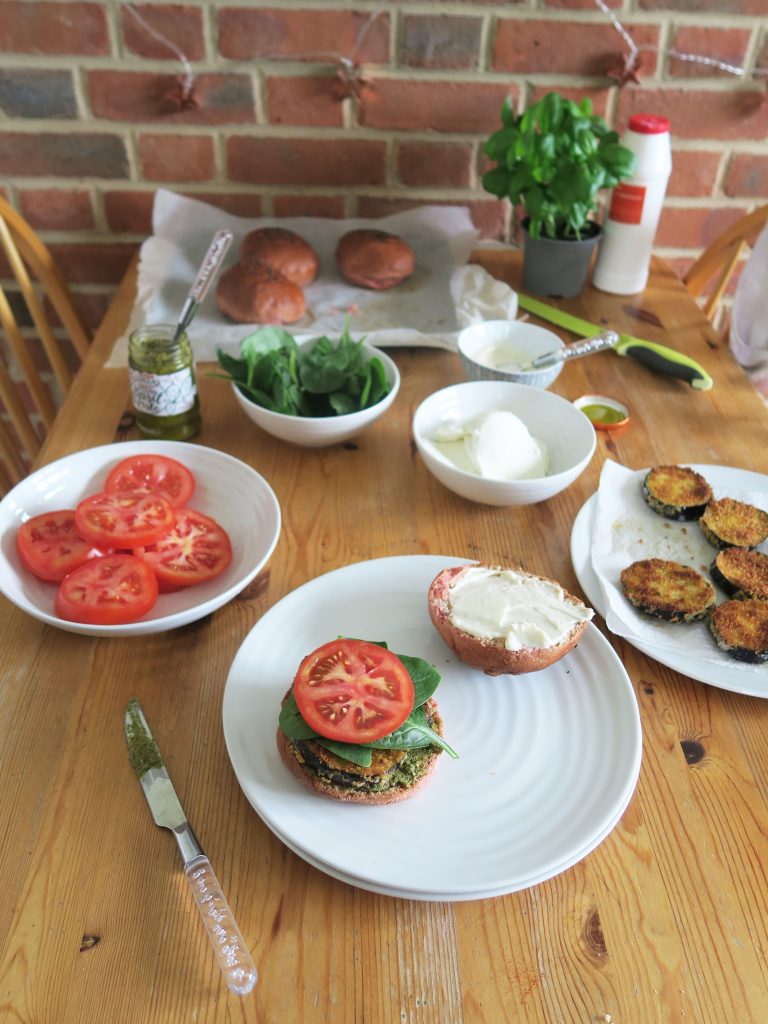
  15. Now assemble the burgers! Slice your burger buns in half. Spread 1 tsp of the pesto over the base bun and 1tsp of the garlic mayo over the top bun.
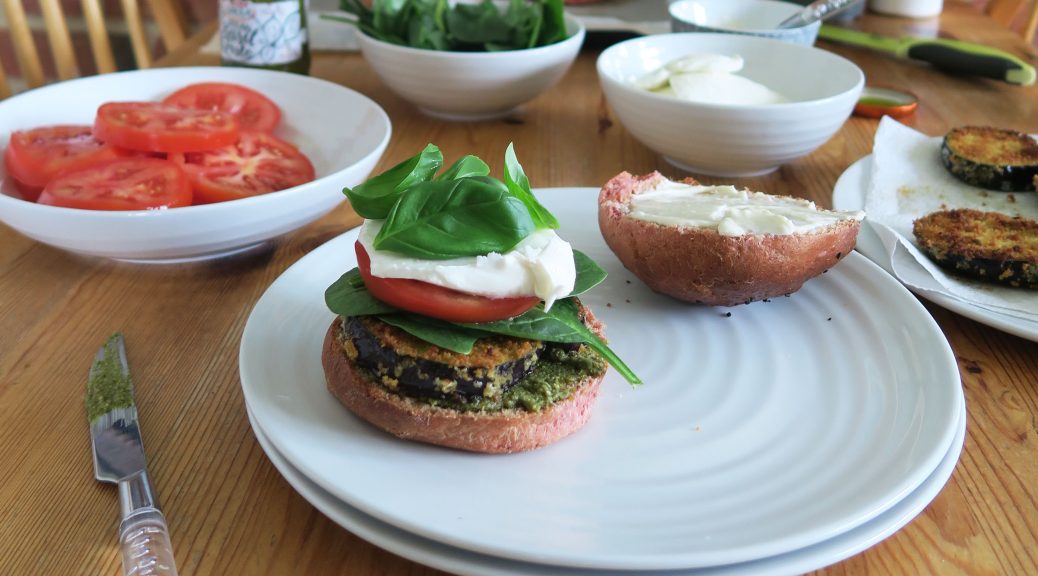
  16.  Place one of the aubergine steaks on top of the pesto. The layer up some of the spinach leaves, tomato, mozzarella and basil. Place the top bun on top and enjoy!

Thanks for reading!

Emma x


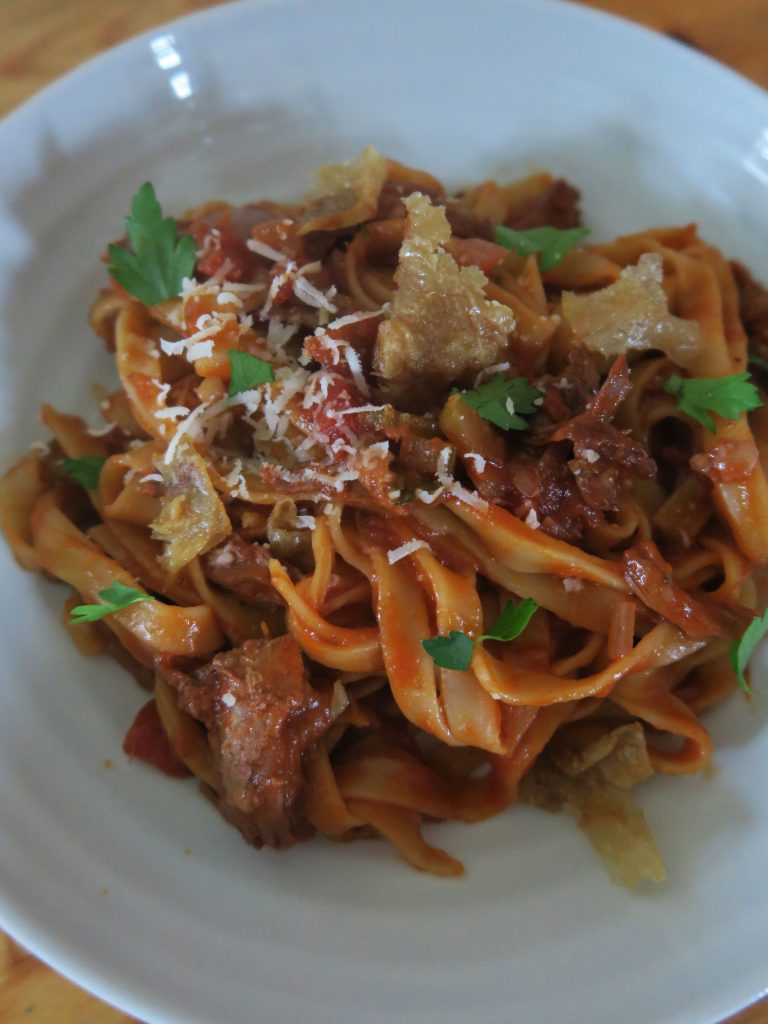
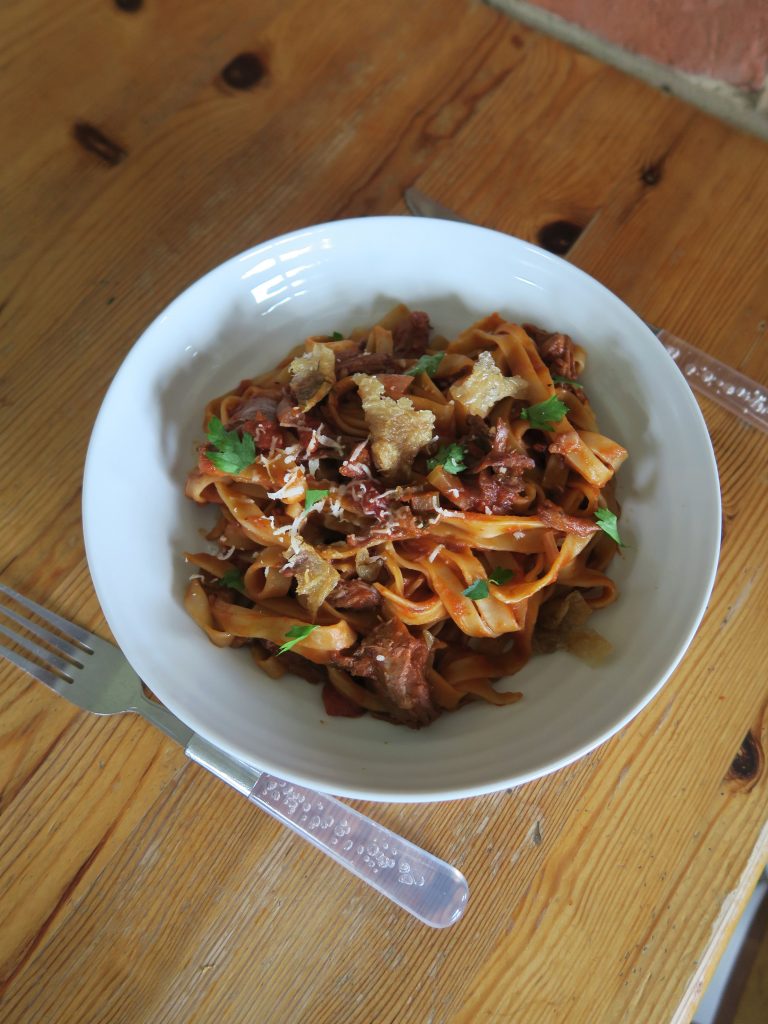
Duck leg ragu tagliatelle

Duck leg ragu tagliatelle

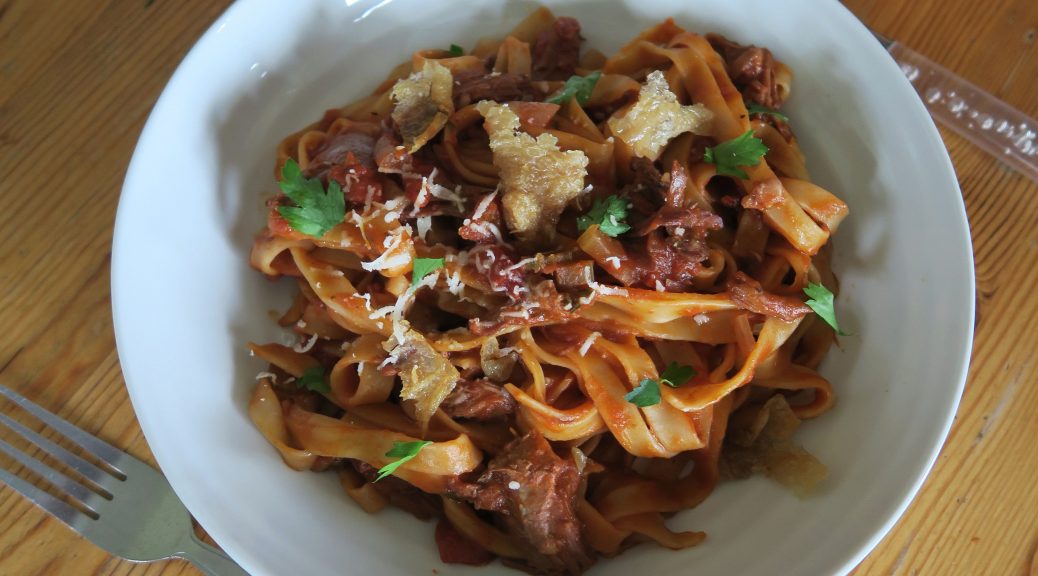
Welcome to autumn folks! Some people might be sad that the warm summer days are now behind us, but I can’t wait for the next couple months of warm blankets, cosy nights and comfort food favourites! Which brings me onto this delightful lil’ dish I have for you today. Now, personally I think duck has a bit of a bad rep. It’s often seen as expensive, fatty and a pain in the butt to cook – but hang on a sec and I’ll prove you wrong. When it’s done right you end up with a rich, moist deep-flavoured meat, topped with some salty, crispy skin and then whatever you put with it you’re gonna end up with something that screams decadence and class. As I’m not cooking as much as I used to I’m trying to make the most of my time in the kitchen by pushing myself both with my skills and my flavour experimentations. For example, I tend not to use alcohol in my cooking (apart from the odd liqueur in desserts) so I’ve never tried using red wine in sauces and the like. Yet I tried it in this dish to bring a little French classicism and it brings a depth to the sauce I’ve never been able to replicate before! (I guess there’s something to be said for the classics!)

Duck can also have a bad reputation because it’s traditionally very expensive. I heard of the idea of making duck bolognese years ago, but I couldn’t understand why you’d want to shred such a beautiful, expensive meat and cloak it in a bolognese sauce!? But then I realised that duck legs are what you need. They’re so much cheaper than duck breast and are perfect for shredding and pairing with a rich sauce. So in short, abandon your preconceptions, this is definitely worth a try – and because of the flavour you get from duck I think this would be particularly good for a special occasion like an anniversary, birthday or dinner party!

Recipe

Serves 2-3

Time: 2 hours

Ingredients

  • 2 Duck legs
  • 1 Small white onion
  • 3 Garlic cloves
  • 1/2 stick of Celery
  • 2 tbsp Tomato puree
  • 1 tsp Dried oregano
  • 1 Handful of fresh thyme
  • 250ml Red wine
  • 400g Chopped tomatoes
  • 1 large pinch of Paprika (optional)
  • 120g Tagliatelle pasta
  • 50g Parmesan
  • A handful of fresh parsley

Method

  1. Pre-heat the oven to 180˚C. Season the duck legs with salt and pepper, then rub them with a little oil and place them in a roasting tin. Roast them in the oven for around 40 minutes until the skin is crispy and the flesh is cooked through.
  2. Take the legs out of the oven and leave to cool for a couple of minutes. Then use two forks to pick the meat off the bone. Set this to one side, separating the flesh and skin.
  3. Place a large pan over a medium heat and add a little of the duck fat that will have collected in the tin you cooked the duck in. Peel, halve and finely chop the onion and garlic and add these to the pan. Fry for 2-3 minutes until starting to caramelise. Then dice the celery and add it to the pan with the tomato puree. Fry whilst stirring for another 2 minutes.
  4. Add the oregano, thyme and wine to the pan and bring to a boil. Once the sauce has reduced by half add the tomatoes, paprika and duck meat. Then turn down the heat to a gentle simmer and leave to bubble for 15 minutes.
  5. Meanwhile put a large pan of water on to boil for the pasta. Add the pasta and cook to packet instructions (around 10 minutes is standard) until al dente.
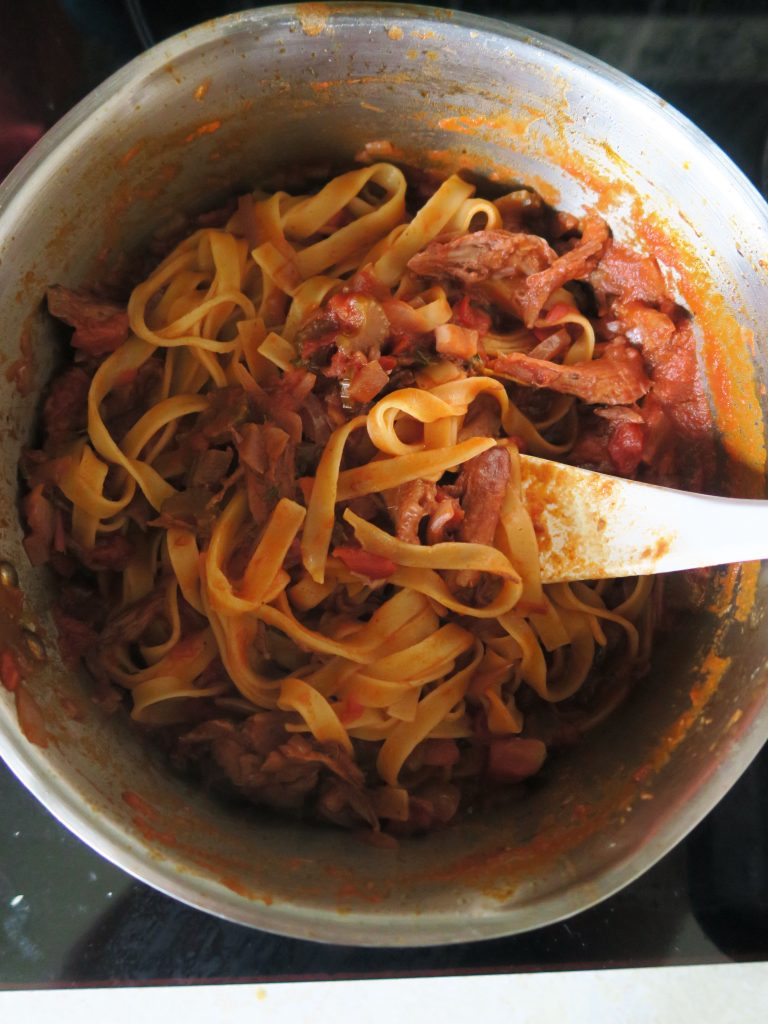
  6. Drain the pasta and add it to the ragu. Mix everything together and then get ready to serve.
  7. Divide the pasta between 2 serving bowls and top with a little grated parmesan, chopped parsley and the remaining crispy duck skin. Enjoy!

Thanks for reading!

Emma x

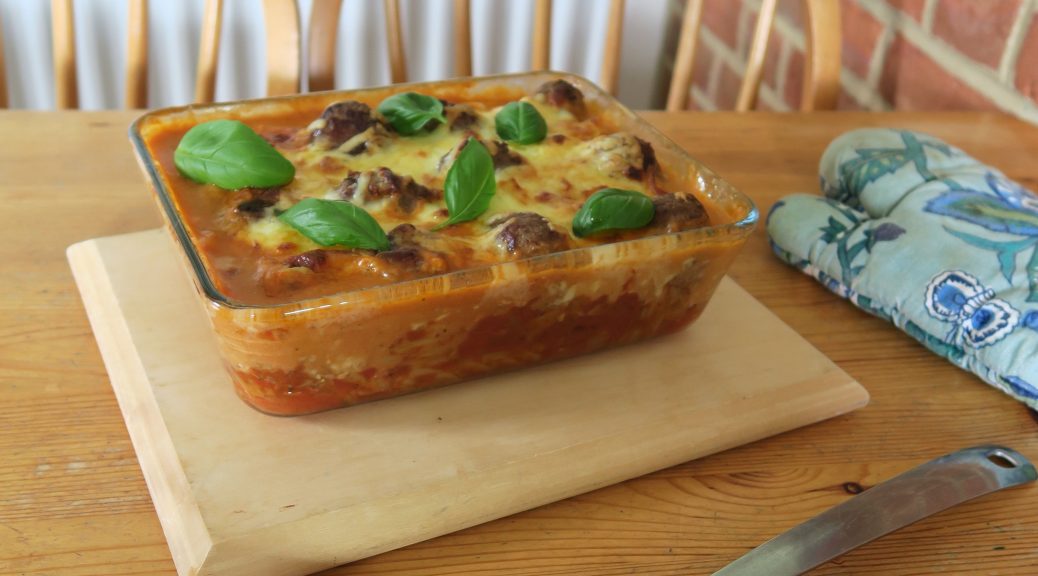
Meatball Pasta Bake

Meatball Pasta Bake

The start of Uni is coming up and so it’s time to dig out those quick, comforting student-friendly recipes for term time! This one’s a really useful dish to have under your belt as it’s hearty, tasty and will also give you some really useful skills that you can use to make loads of other things. My mum always says that if you know how to cook a bit of meat, make a tomato sauce and make a white sauce you’re pretty much set. From the skills you learn from this you can also make a chilli con carne, bolognese, cauliflower cheese, fish pie and a number of other dishes!
This is also a really easy dish to play around with to suit whatever you need.  Want to make it vegetarian – use a meat substitute or vegetables (I like aubergine and sweet potato!). Want to feed a crowd? Just double your quantities! Don’t have the cash for/can’t find meatballs? Use some chopped up sausages instead! Don’t have the time to make this in one go? Make the tomato and white sauce in bulk and then all you need to do is re-heat them and add the meat and pasta! I’ve included some herbs and spices in this tomato sauce as it really does make it so much better than boring ones you get out of jars, however, if you’re a student and/or on a budget I wouldn’t expect you to have these so they’re not essential. That said I would really recommend taking some paprika to uni with you if you can – it might seem pretentious but it’ll add instant flavour and kick to any dish without making it blow-your-head-off spicy!
This year I’m living out of college so I’ll have my first taste of true student cooking which is gonna be interesting… That said, I did use our little kitchen in halls quite a bit last year and found out some things that are kinda useful to know:

3  Nuggets of knowledge to take with you to Uni…

  1.  Pasta is life! It’s so versatile, goes with everything, and is really quick/easy to cook. Make sure you take some pasta and maybe some pasta sauces with you when you go to uni. (If you don’t like pasta a staple carb like rice or noodles will also work!)
  2. In the hectic life of uni the fruit you buy can often end up being neglected and before you know it the beautiful morsels you bought are 4 weeks old, squishy and gross. You may be tempted to throw these in the bin (and if they’re mouldy then, yeah, do that!) but if they’re looking generally ok, they’re just too far gone to eat raw, use them in your cooking! I found topping some chopped up eating apples with a simple crumble topping and baking them for 20-30 minutes gave a really quick apple crumble. You can use pretty much any fruit you want to make a good crumble, but stone fruits (like plums, peaches and nectarines) work super well! You can also put old bananas in banana bread and citrus fruits in smoothies!
  3. ALWAYS TIDY UP AFTER YOURSELF! Ok, so maybe I’ve not had the best experience this year with dealing with other people’s mess in the kitchen – but trust me, people know who are the ones who leave their stuff in the kitchen and though they’ll never tell you it, they won’t like you for it. Just make sure you leave the kitchen as you found it (or better) – wash up your dishes, put them away, put food back in the fridge and wipe down the work tops. It’s common niceties for using a shared space and it’ll stop people forming judgements about you before they know you!
I also had no idea what kind of equipment I’d be needing in the kitchen last year, and no matter what you do take you always end up forgetting something. So if you’re wondering what to pack for your student kitchen I’d say make sure to pack the following…

  • A good non-stick sauce pan.
  • A large mixing bowl  – This’ll be useful for everything, from making a 3 tiered birthday cake to eating cereal when you can’t find your crockery!
  • A mug – If you don’t drink coffee or tea before you go to uni you will by the time you come home! (Also really good for mug cakes and for measuring!)
  • A spare fork – great as a whisk, pastry crimper, tub opener, cake prodder, pasta tester and pretty much anything you can think of. You will also always get to a point where the only piece of cutlery you can find is a broken table knife and a ladle, so spare forks are very valuable!
  • A spatula – As a student you don’t want to be wasting any food you’ve spent money and time on making just because you can’t scrape it out of the pan.
  • Tupperware boxes – If you’re as bad as portioning as I am you’ll often end up with a whole other portion of food you want to put in the fridge and keep for another day!
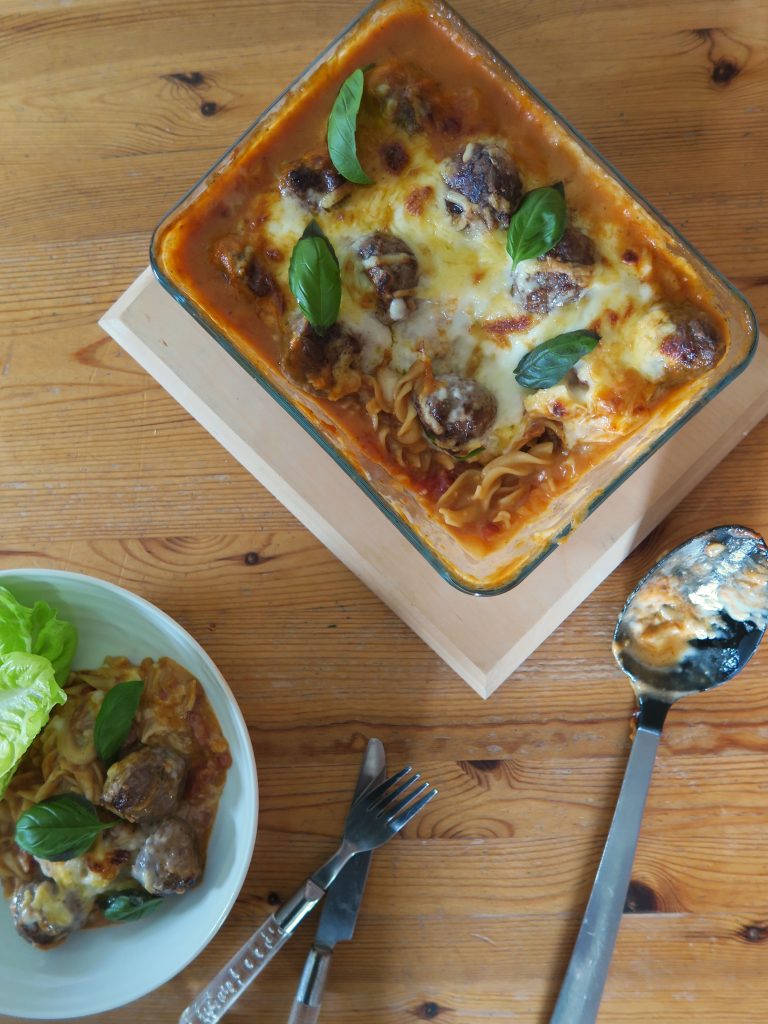
  • Glass dish with lid – Great for baking and cooking things in (like this pasta bake!) and for then storing leftovers in the fridge.
  • A bottle opener – everyone always needs one, no one ever has one!
  • A chef’s knife and a smaller prep knife.
  • A chopping board – self explanatory, but also great for carrying hot dishes back to your room to eat.
  • A tea towel – can double up as an oven glove and ensures you have no excuses to leave your pans out!

Of course there are lots of other useful bits of kit like a wooden spoon, extra pans, oven gloves, a tin opener, a sieve, and of course crockery, but these are the the main things I found I reached for when I was in the kitchen!
Recipe

Serves 2 – 4 (really depends on how hungry you are!)

Time: 45 minutes

Ingredients

  • 1 ½ mugs of Pasta
  • 1 tsp Sunflower oil
  • 12 Meatballs (or 4 sausages)
  • Fresh basil to serve (optional)

For the tomato sauce

  • 1 Small white onion
  • 2 Garlic cloves
  • 1 tbsp Sunflower oil
  • ½ tsp Smoked papirika
  • ¼ tsp Cayenne pepper (optional)
  • 400g Chopped tomatoes
  • 1 Beef (or vegetable) stock cube
  • 1 Bay leaf (optional)

For the white sauce

  • 50g Butter
  • 1 tbsp Plain flour
  • 450ml Milk
  • 75g Cheddar cheese, plus extra for the topping

Method

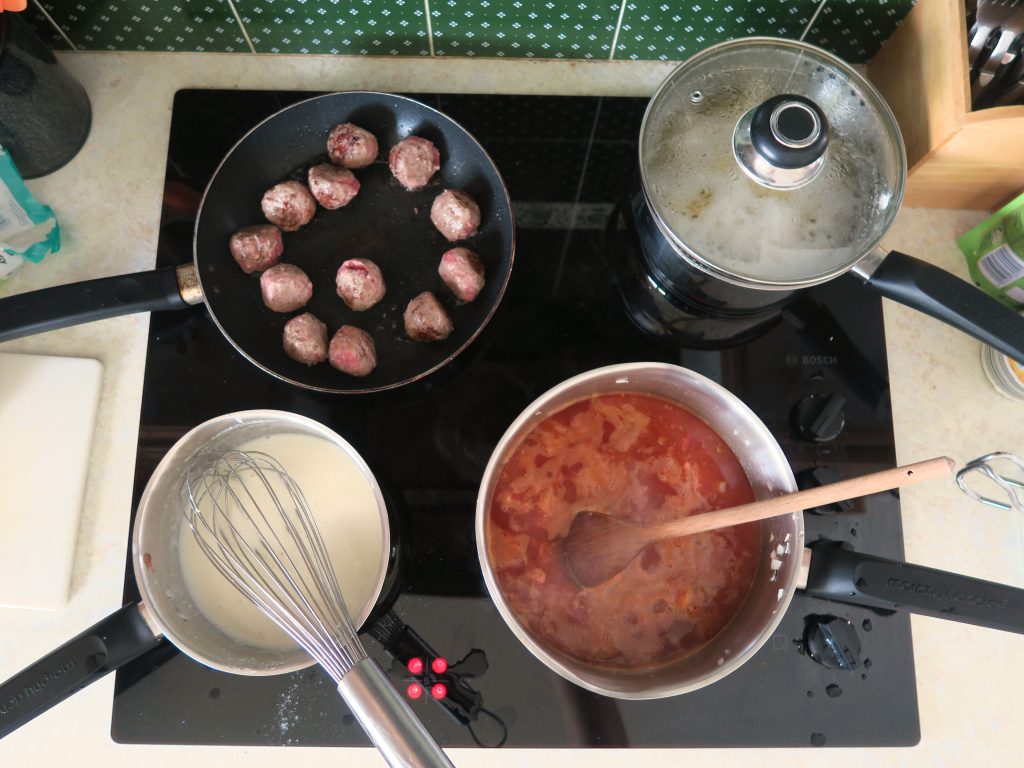
  1. Begin by making the tomato sauce. Peel and finely dice the onion and garlic. Put the oil into a large saucepan and fry the chopped onion until starting to caramelise and turn golden. Add the garlic, paprika and cayenne (if using). Stir and fry for another 1-2 minutes.
  2. Add the chopped tomatoes and beef stock cube to the pan, stir and bring it up to a boil. Fill the empty tomato tin/carton with water and pour this into the pan (it’ll rinse the remaining tomatoes out into the pan and will give you the liquid you need!). Add the bay leaf, stir the mixture again and then reduce the heat to a gentle simmer. Leave for 30-40 minutes until reduced and not too watery. Season to taste with salt and pepper and leave to cool until needed
  3. Meanwhile put a pan of water on to boil. Then cook the pasta to the packet’s instructions. When aldente take the pan off the heat and leave in the water until needed.
  4. Next prepare the meatballs. Put the oil into a frying pan and place over a medium heat. Add the meatballs and fry them for 1-2 minutes until browned on one side. Then turn them over and repeat the frying and turning until they’re brown all over. (If using sausages instead, pierce the skins 2-3 times with a sharp knife and pan-fry them in a similar way, before chopping them into chunks). Don’t worry if the meat isn’t cooked all the way through as it’ll continue to cook in the oven, you just want them browned all over on the surface. Leave to one side until needed.
  5. Meanwhile make the white sauce. Melt the butter in a pan and then add the flour. Mix the flour into the butter with a wooden spoon to make a paste. Beat it in the pan for around 1 minute to cook out the flour.
  6. Slowly add the milk to the pan, (around 3-4 tbsp at a time at first and then after 4-5 of these start to slowly pour it in), whisking constantly to slowly make a sauce. This is the most important step as if you add the milk all at once the mixture will become lumpy and won’t thicken. Once all the milk is added keep on whisking for 5-10 minutes until the mixture thickens and leaves a trail when the whisk is lifted out.
  7. Grate the cheddar into the sauce and whisk again until it’s melted and combined. Then taste the mixture and season with pepper and salt, if needed.
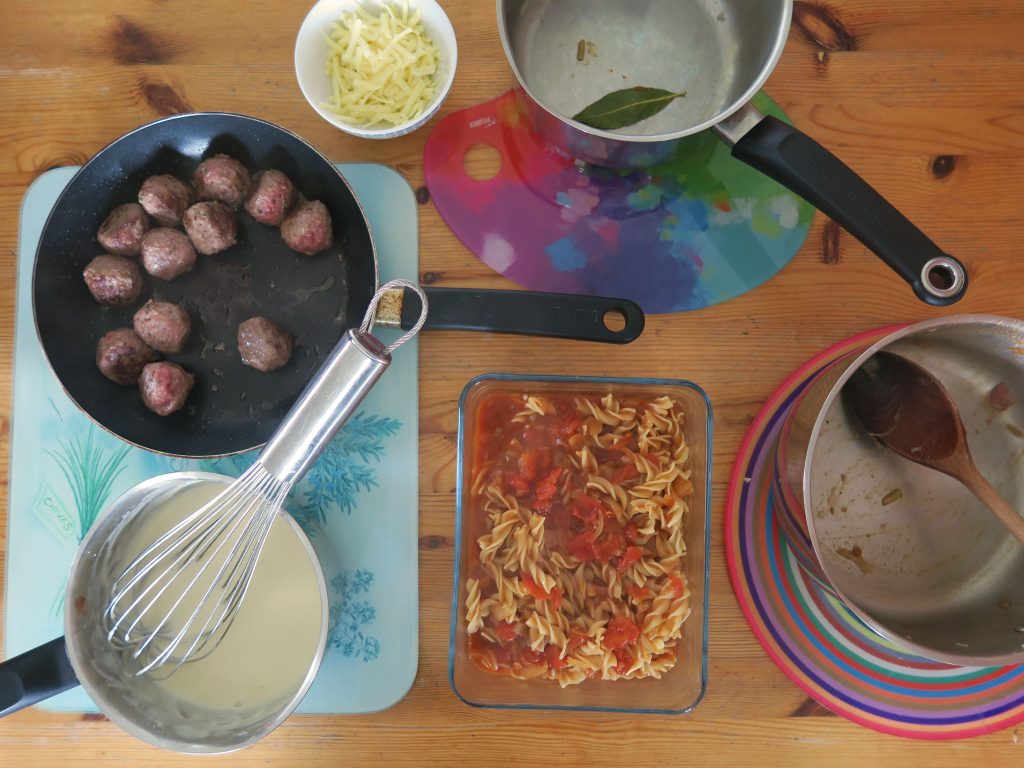
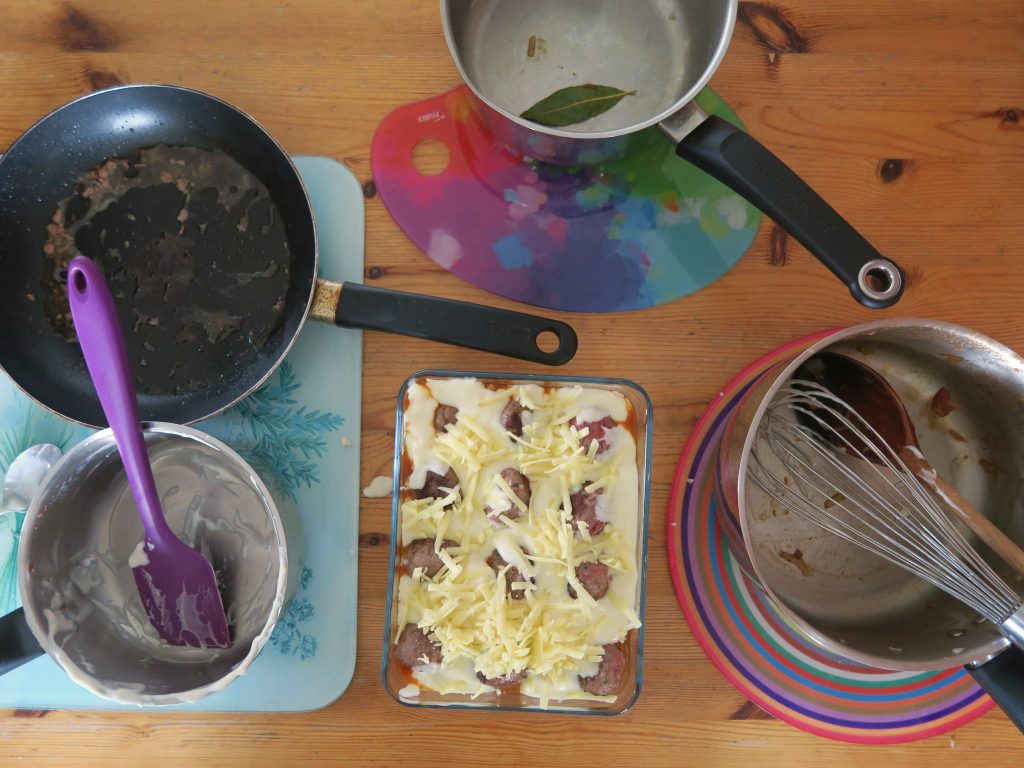
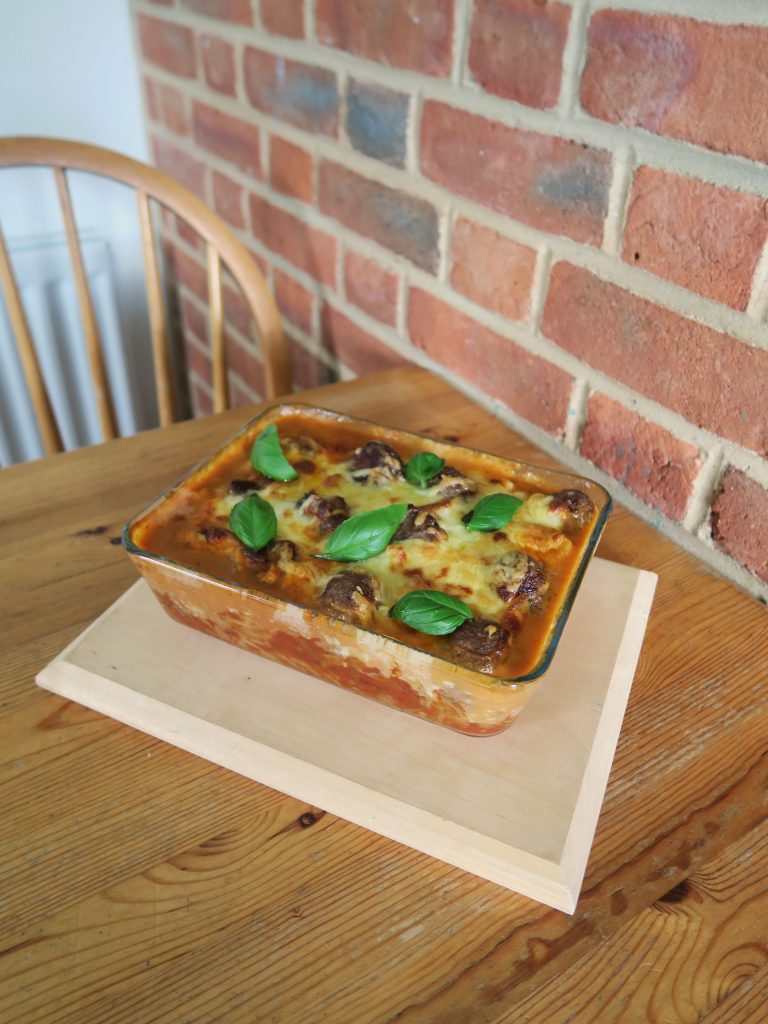
  8. When all the elements are ready start assembling. Drain the pasta and mix it into the tomato sauce. Then pour it out into a glass/oven-proof dish. Top with the meatballs and then spoon the white sauce in between the meatballs. Top with some extra grated cheese and then bake the dish in the oven for around 10-15 minutes, until the top is golden brown and the sauce is bubbling.
  9. Serve with a side salad and basil (if you want!). This will keep in a covered contained in the fridge for up to 3 days.
Thanks for reading!

Emma x
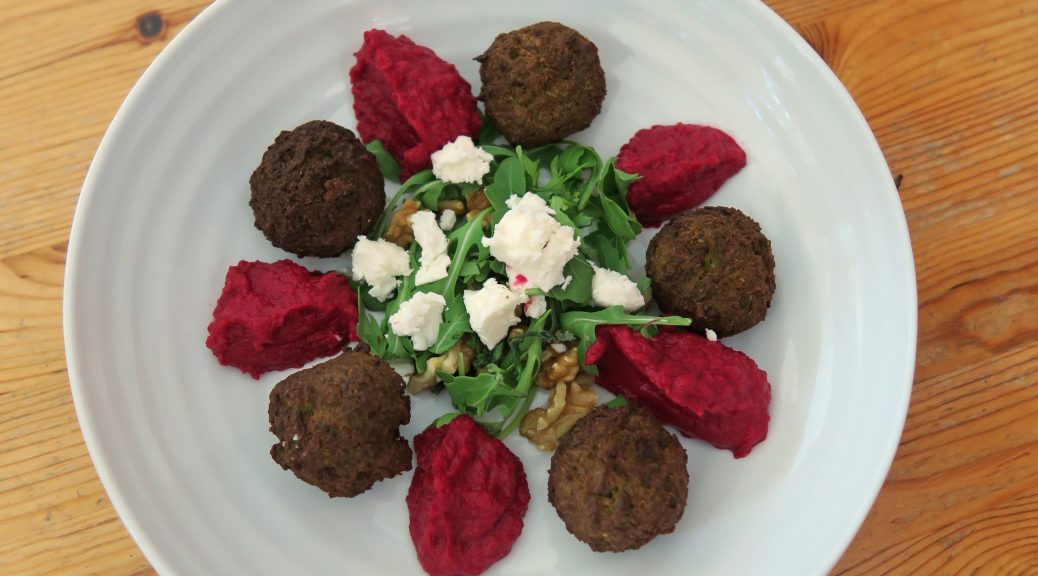
Walnut Falafels with Beetroot Hummus

Walnut Falafels with Beetroot Hummus

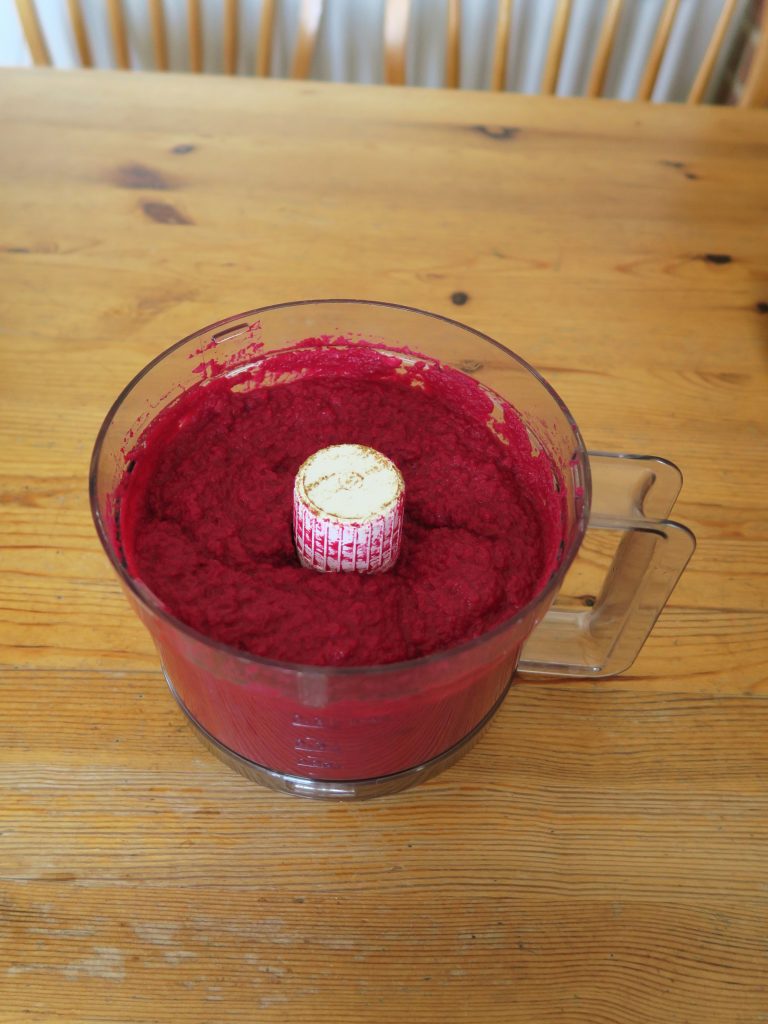
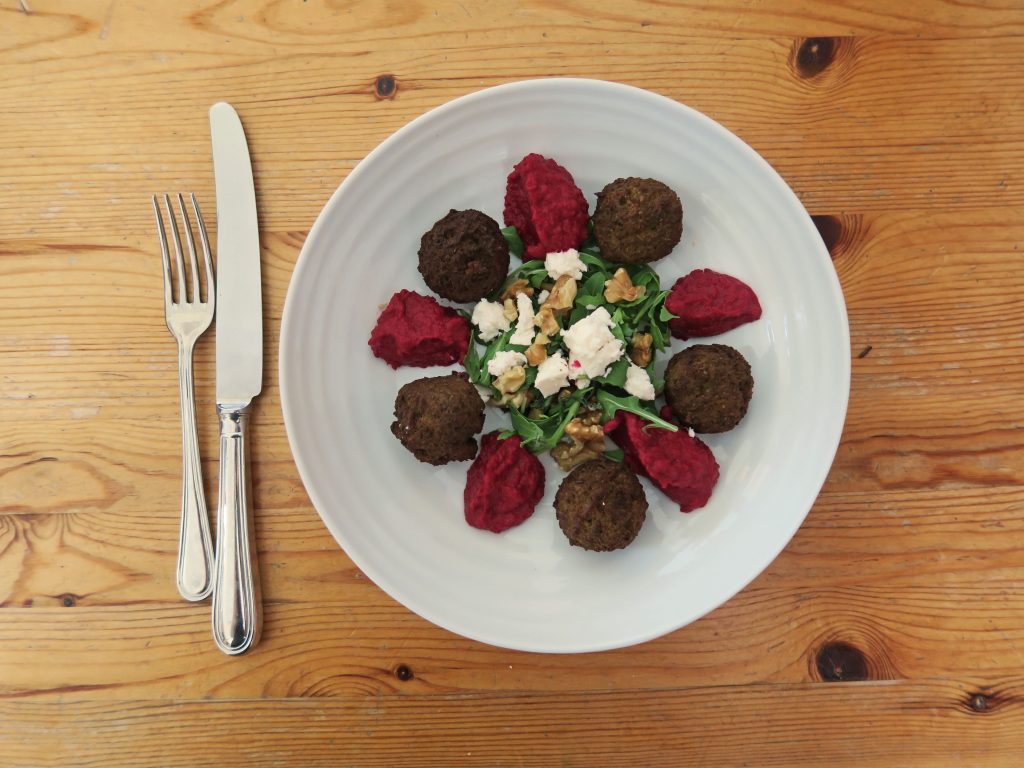
This summer I’ve been on a healthy food pilgrimage – slowly crawling towards finding enough tasty meals that will benefit my waistline, whilst also keeping my culinary fancies happy. So you could say I was pleased as punch when I first discovered beetroot hummus. I never thought I’d be one for messing around with the wonder that is traditional hummus – why mess with perfection right? But this stuff is really cool. It’s kind of earthy, rich hummus with the most incredible colour. I mean can you be sad when you have something this bright on your plate? The artist in me is very, very happy with this.

There is also this massive trend at the moment for making falafels out of everything left right and centre. Name an ingredient, someone somewhere has probably tried making a falafel out of it. Millennials and vegans eh? Anyway, the other day I had some beetroot hummus on this amazing spicy aubergine dish and they served it all with a walnut sauce – something I’ve never tried before but it was really good! So I thought hey, why not make some walnut falafel to go with my pinker than pink hummus? And boy jove, it works!

Recipe

Serves 2 (with lots of hummus left over!)

Time: 1 hour

Ingredients

For the Falafel

  • 1 Small onion or shallot
  • 1 Garlic clove
  • 2 tbsp Olive oil
  • 75g Walnuts
  • 150g Chickpeas
  • Zest of 1 Lemon
  • ½ tsp Paprika
  • 1 Small egg (or a 50/50 mixture of water and oil if you want to make these vegan)
  • Salt and pepper to season

For the Hummus

  • 250g Raw Beetroot (about 2 small beetroot)
  • 400g Chickpeas, drained
  • Juice of 1 Lemon
  • 1/2 tbsp Ground cumin
  • A large pinch of Salt

To serve

  • A handful of Rocket leaves
  • A sprinkling of Feta cheese

Method

  1. Begin by making the falafel. Pre-heat the oven to 200˚C and line two baking trays with baking paper.
  2. Chop the ends off the shallot and garlic, peel and then the finely chop them.
  3. Put half the oil into a small pan and put over a medium heat. Add the chopped onion and fry for 2-3 minutes until starting to caramelise. Then add the garlic and fry for another couple of minutes before taking off the heat.
  4. Tip the onion, garlic and walnuts into a food processor and blitz until coarse. Add the chickpeas, cumin, lemon zest and paprika and blitz again until the chickpeas are just broken down and the mixture is coming together – you want it to be more breadcrumb-like in texture than like a puree.
  5. Season the mixture with salt and pepper and pulse again to mix. Then add the egg and pulse to bring the mixture together as a dough.
  6. Divide the mixture into 10 small balls. Place these onto a lined baking tray and then leave in the fridge to chill for at least half an hour.
  7. When ready to bake take the falafels out of the fridge, drizzle with the rest of the olive oil and then put into the oven to bake for 20 minutes, until golden brown and crisp.
  8. Meanwhile make the hummus. Bring a large pan of water to the boil. Add the beetroot and then leave to simmer for 30-40 minutes until tender. Drain the water from the beetroot and leave to cool.
  9. When cool enough to handle take off the roots, stalks and peel the beetroot. Then roughly chop the flesh and put it into a food processor.
  10. Add the chickpeas, lemon juice, cumin, salt and pepper into the processor and then blend until smooth and creamy. Taste the mixture and if needed season with some extra salt, pepper, paprika or cumin.
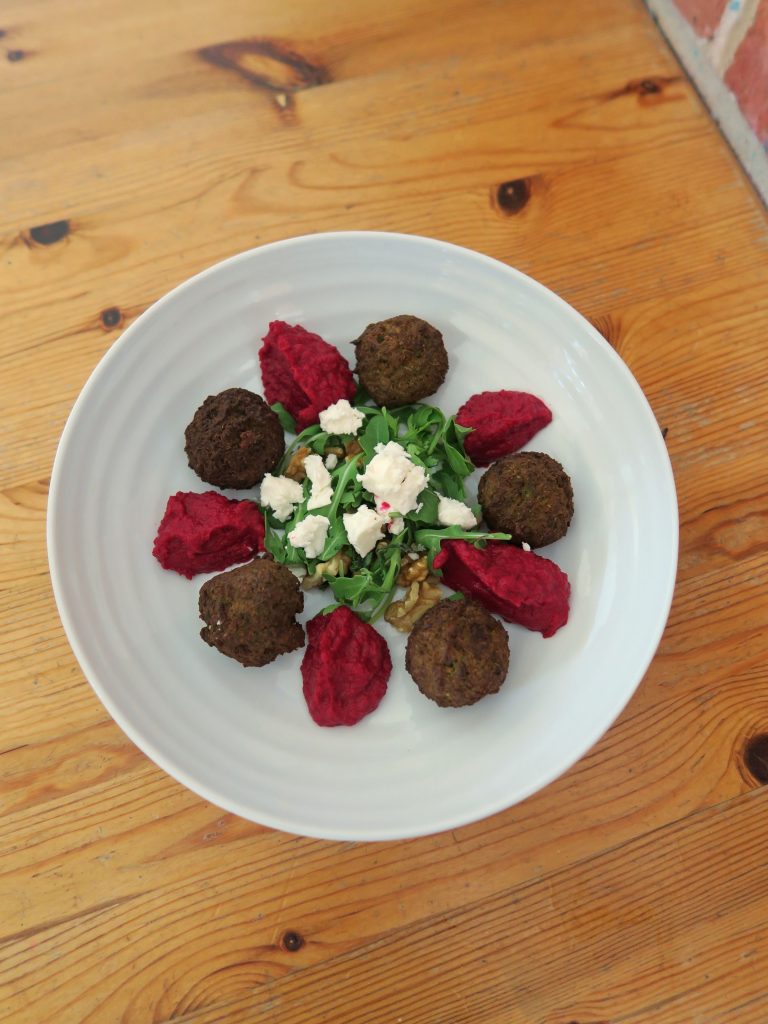
  11. Serve the warm falafels with a dollop of the hummus, a sprinkling of feta and some fresh rocket!

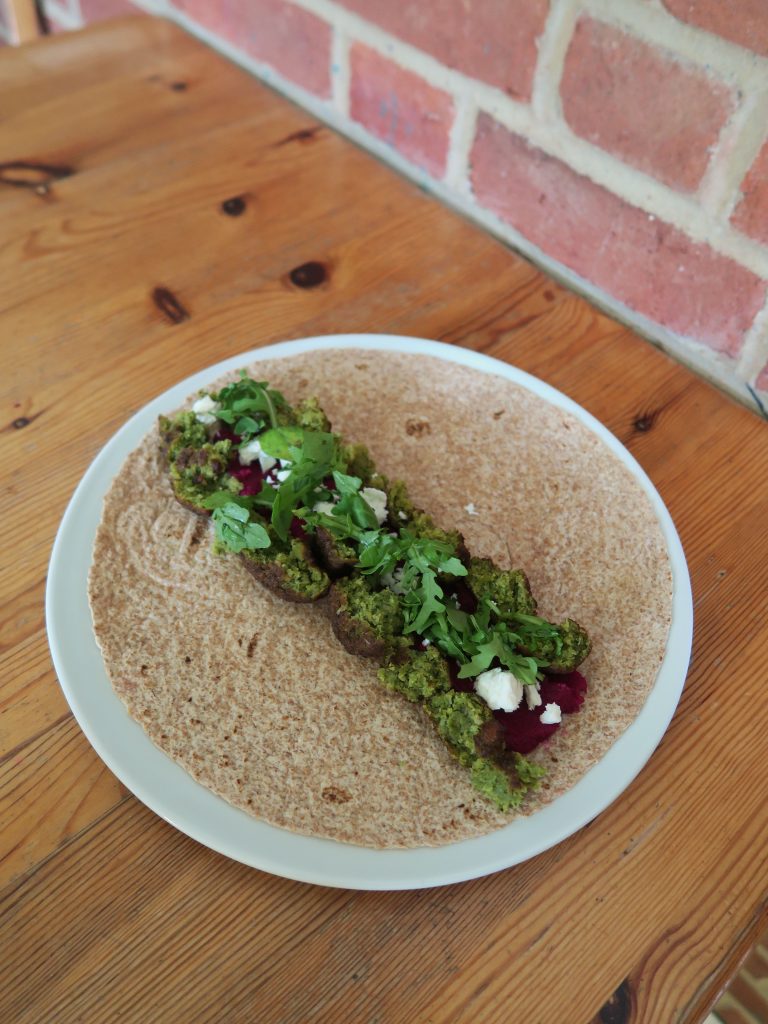
Note: this also works really well as a wrap for eating on the go! Just layer up the hummus, rocket, nuts, feta in a line on a wholemeal wrap. Then crush and sprinkle over pieces of the warm falafel and roll up!

Thanks for reading!

Emma x